| Build Thread, Page :
<< 5 6 7 8 9 [ 10 ] 11 12 (220 posts, 20 posts per page, 12 pages in total)
|
[ < Prev ] [ Next > ] |
| moostang51, Comment for image # 3561 | 10 Jul 07 17:11 |
| Very, very nice. Will the pilot figure be installed? |
| poppy, Comment for image # 3561 | 10 Jul 07 16:36 |
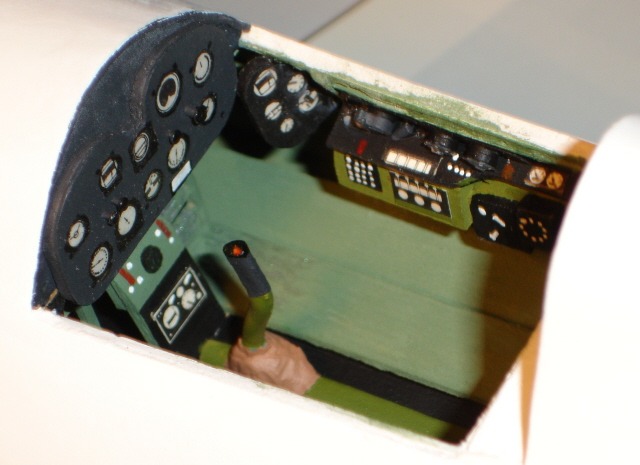
| DD, the color pics were very useful. I did some minor paint alterations but I used a different brand of interior green. Will have to re-do using old brand to match flooring and sides. Oh well, what else do I have to do. |
| poppy, Comment for image # 3551 | 10 Jul 07 16:19 |
| John, I've done it twice but for me it was time consuming and I was not happy with the results. Sorry. |
| poppy, Image # 3561 | 10 Jul 07 16:16 |
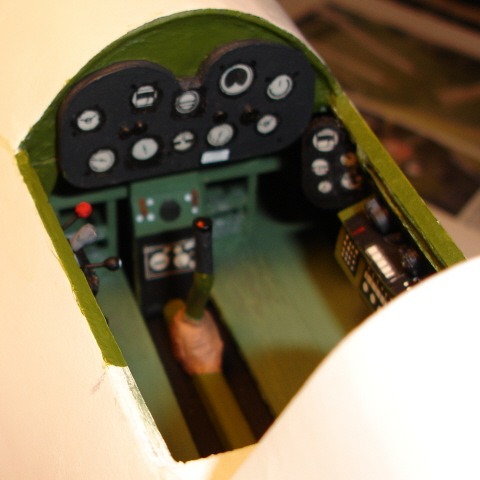
And another. I think I left something out. Oh yeah, the seat and gunsight!! Coming soon. |
| poppy, Image # 3560 | 10 Jul 07 16:15 |
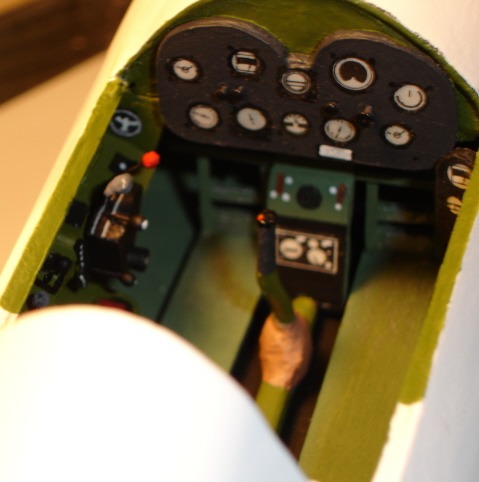
Another view. |
| poppy, Image # 3559 | 10 Jul 07 16:13 |
Left side finished. |
| John M Oshust, Comment for image # 3551 | 10 Jul 07 12:27 |
| Have you ever fabricated a canopy? I am in need of direction. I have some ideas but maybe you can save me some time. |
| John M Oshust, Comment for image # 3558 | 10 Jul 07 10:36 |
| Quite an "Air Force!", you need a security team to gruad it against terrorists! |
| David Duckett, Comment for image # 3558 | 10 Jul 07 10:17 |
| Museum material! |
| poppy, Image # 3558 | 10 Jul 07 09:10 |
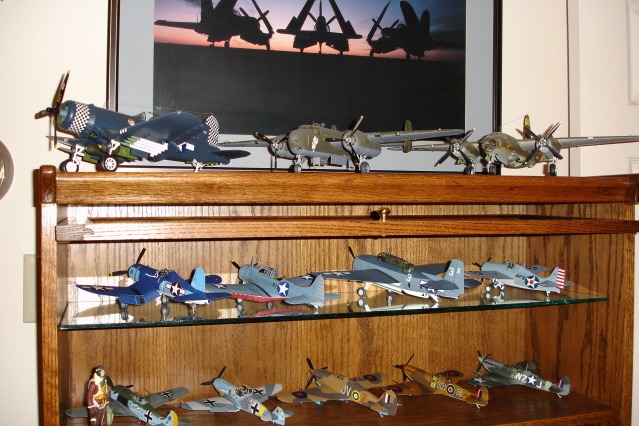
A pic of some smaller scales. |
| poppy, Comment for image # 3551 | 09 Jul 07 21:35 |
| Thanks guys. I do like the detail work but there comes a point when I say "enough already!!". |
| jgood, Comment for image # 3551 | 09 Jul 07 20:49 |
| Poppy, great work, it looks amazing. It's good to see one of your builds coming along. |
| David Duckett, Comment for image # 3551 | 09 Jul 07 18:03 |
| Color photos of a real Hellcat interior should have arrived today and I would be thinking this is pretty close. Since this kind of work involves improvisational skills I don't possess I can only sit back and marvel at seeing it done by you two and I'm sure I'm not the only one who feels this way. Well, at least, now we know it CAN be done. About a hundred years ago a friend said attention to detail was important. About twenty years ago the media picked it up and I've hated it since. However, it is true, and this is visible proof. |
| John M Oshust, Comment for image # 3551 | 09 Jul 07 14:57 |
| Nice work but I think you forgot the muffler bearing toggle switch! |
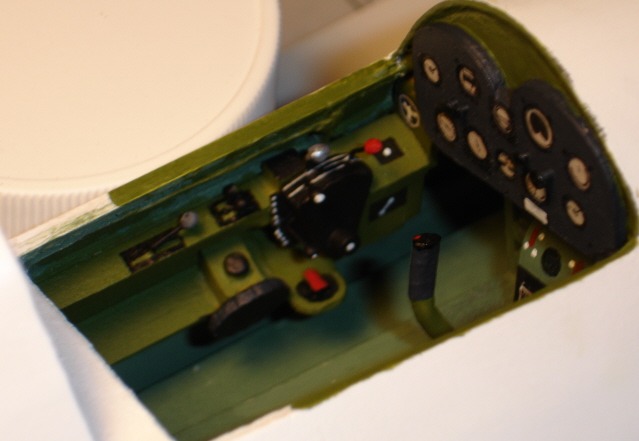
| poppy, Image # 3551 | 09 Jul 07 14:08 |
Right console finished. |
| David Duckett, Comment for image # 3533 | 08 Jul 07 18:23 |
| Aha! Many thanks. I'm a stock holder in the Hobbylite filler co. although I use white. I will most definitely get some Micro Fill, as well. Thanks for sharing. |
| poppy, Comment for image # 3533 | 08 Jul 07 18:10 |
| I use balsa fill first, then primer, then Micro Fill(micro balloons) to fill any flaws. I also use the Micro fill for wing fillets. You can shape it while moist and when dry, sands easily. |
| poppy, Image # 3533 | 08 Jul 07 18:05 |
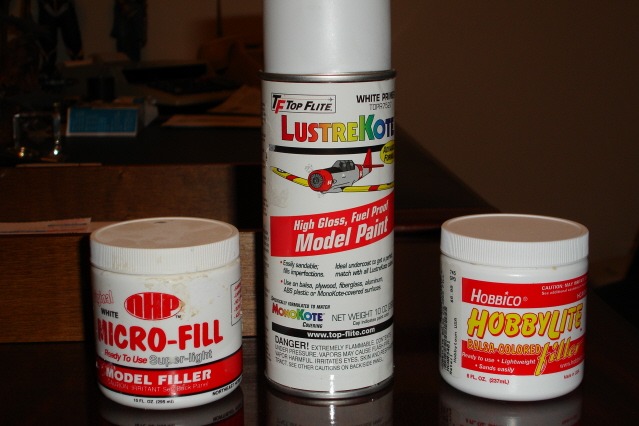
Products used for finish: NHP Micro-Fill, Hobbylite Balsa filler, TopFlite white primer(sandable). |
| poppy, Image # 3531 | 08 Jul 07 13:44 |
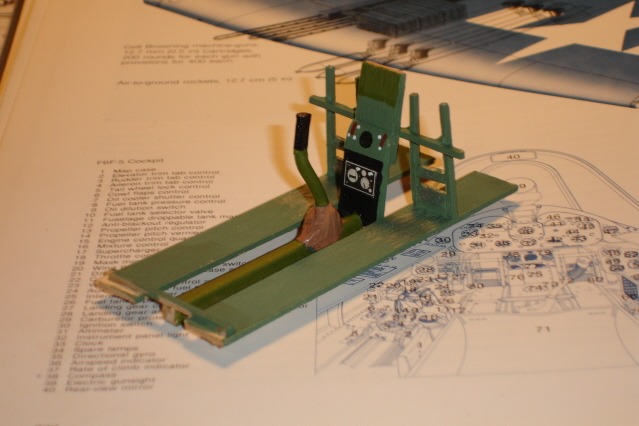
Floor tunnels, rudder pedals, center console and control column. "Boot" is modeling clay. |
| poppy, Comment for image # 3525 | 08 Jul 07 10:22 |
| Only balsa filler, micro ballon fill, and primer. Used to cover with silkspan but grain would still show. after light sand of filler and 2 coats of primer the shell is hardened and can take a bit tougher sand w/220 grit. Some additional fill is needed then recoat w/primer. After wings, Rudder and stabs are fit another couple of coats of primer are added, sanding between. My wife says gives a surface "as smooth as a baby's behind". Nuff said. |
| Build Thread, Page :
<< 5 6 7 8 9 [ 10 ] 11 12 (220 posts, 20 posts per page, 12 pages in total)
|
[ < Prev ] [ Next > ] |
