| Build Thread, Page :
1 [ 2 ] 3 4 (70 posts, 20 posts per page, 4 pages in total)
|
[ < Prev ] [ Next > ] |
| meku, Comment for image # 34309 | 02 Jul 15 00:03 |
| Brilliantly executed....looks like the real thing. |
| Don C, Comment for image # 34309 | 01 Jul 15 23:57 |
| This is truly a fine build. Nice work! |
| FLYBOYZ, Comment for image # 34308 | 01 Jul 15 15:59 |
| Real beauty Skyediamonds!When I first seen you holding the motor I was like I got to get me one for my micros new engine!:}I was watching a show they said the Wright brothers was the first to build a true prop for flight.This was a part of there sucssees.:] |
| Skyediamonds, Comment for image # 34309 | 01 Jul 15 11:21 |
| Thank you DD., & all you guys. Really means a lot to hear from my peers who are knowledgeable in their respective fields. |
| Skyediamonds, Comment for image # 34308 | 01 Jul 15 10:49 |
| Rgood, JohnO, & Ray, I'm grateful for your appraisal. You guys know what it takes to make a model into a work of art & what to look for in other's. The covering was straight from Guillow's kit. The original Wright Flyer did not use any dope on the covering. I cheated just a bit & allowed just one thin coat of 50/50 dope, for just a bit more taughtening & protection. Even then, I still have to make sure my hands are dry before handling it, lest the moisture from my palms affect the covering. Just one word to describe this model.... Fragile. Just look at it cross-eyed & something will snap. Thanks guys, you mean a lot. -Sky
|
| Skyediamonds, Comment for image # 34309 | 01 Jul 15 10:36 |
| Thank you very much, it's greatly appreciated. |
| David Duckett, Comment for image # 34309 | 01 Jul 15 07:35 |
| Impressive! |
| rayl, Comment for image # 34308 | 30 Jun 15 23:28 |
| Sweet,sweet. |
| John M Oshust, Comment for image # 34308 | 30 Jun 15 21:11 |
| Well Wilber, I think you have this modeled wonderfully.......Orville! |
| Skyediamonds1985, Image # 34309 | 30 Jun 15 20:48 |

There you have it. I might add I installed the engine cooling tubes just prior to installing the front elevator assembly. |
| rgood, Comment for image # 34308 | 30 Jun 15 20:45 |
| To beautiful for words! Covering looks very well done and of a "fine" grade - not that supplied withe kit?
I may well start my Gillows Wright Flyer too - but you have set a very very high standard to aim for - nervous! |
| Skyediamonds1985, Image # 34308 | 30 Jun 15 20:39 |
With most of the rigging complete, the rear struts were finally installed and the rear portion of the rigging complete. I might add that the wing-warping rigging is confined to the two outer most rear struts only. |
| Skyediamonds1985, Image # 34307 | 30 Jun 15 20:32 |
Its only after the wing-warping and internal rigging is complete, when the "outside" rigging is started. Note the fuel line being routed around the struts to the tank. Some pictures show the fuel line hanging off the leading edge, some pictures show it to be more tight. It was just an arbitrary decision on my part. Just seemed to "look right." |
| Skyediamonds1985, Image # 34306 | 30 Jun 15 20:24 |
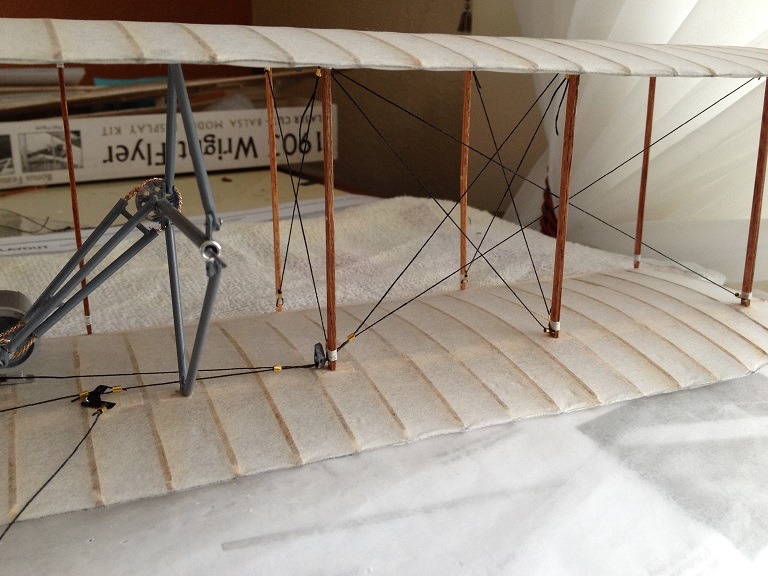
With the wing-warping complete, now starting on the internal rigging (called longitudinal, according to the blue prints) |
| Skyediamonds1985, Image # 34305 | 30 Jun 15 20:08 |
This is the underside of the top wing. The wing warping rigging is complete. No other rigging is (yet) installed and lack of the remaining rear struts helps me to get my hands inside. |
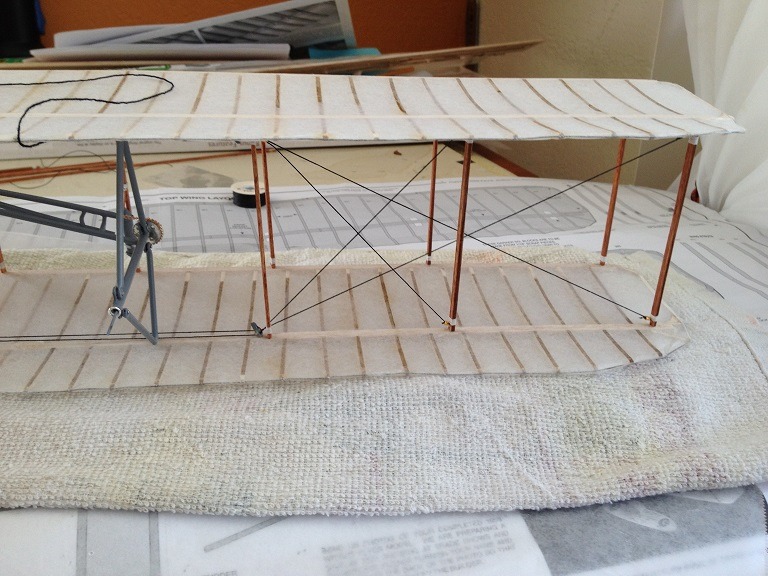
| Skyediamonds1985, Image # 34304 | 30 Jun 15 20:00 |
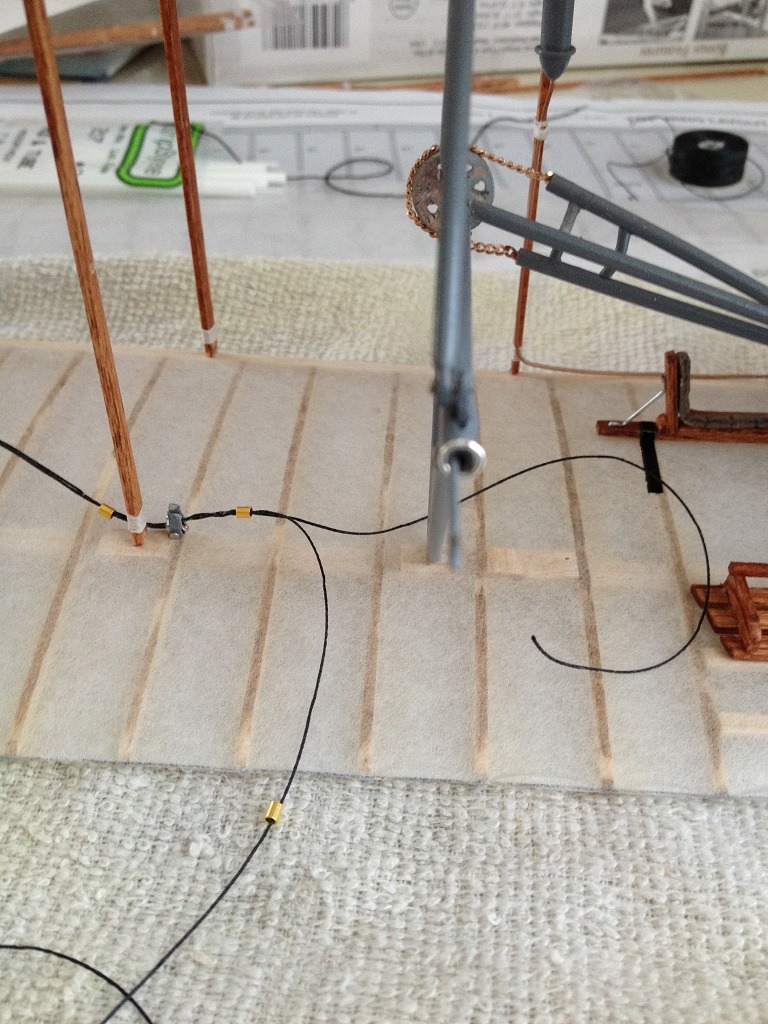
Rigging wing-warping first. Home made pulley is near the strut small tubular beads were purchased at local arts & crafts store |
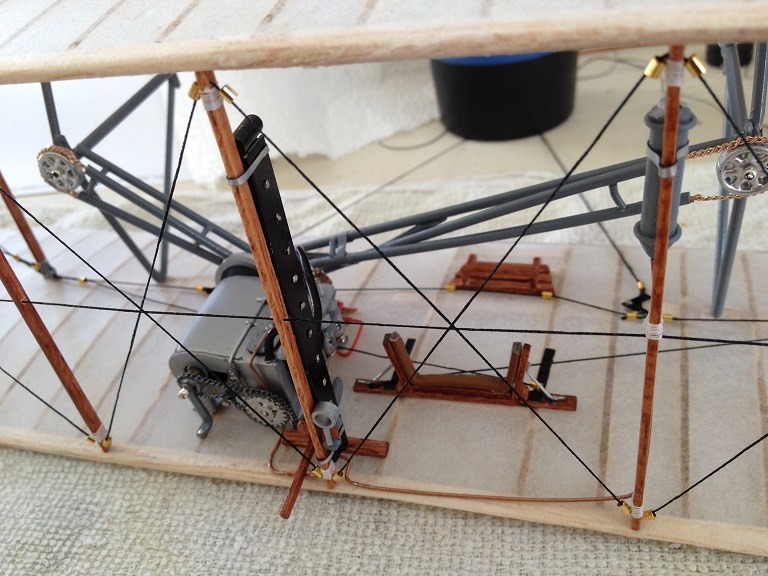
| Skyediamonds1985, Image # 34303 | 30 Jun 15 19:56 |
All the main accessories are in place. Held off installing the rear struts to allow room for my hands and tools. |
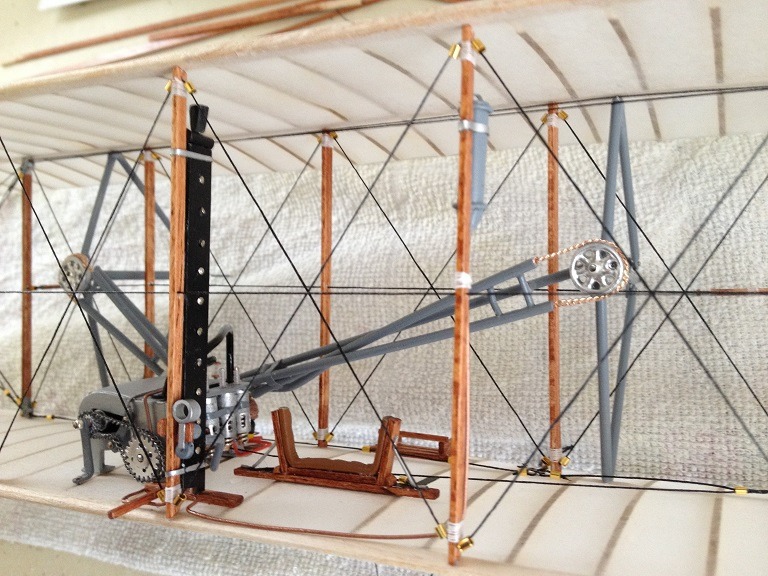
| Skyediamonds1985, Image # 34302 | 30 Jun 15 19:50 |
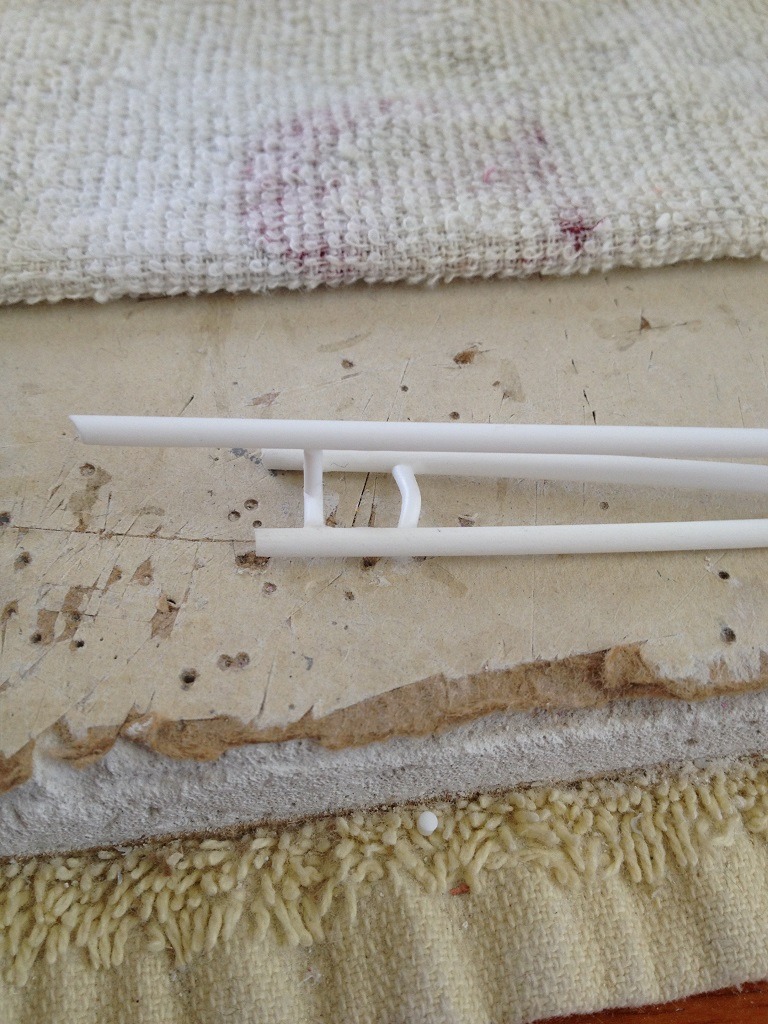
The left prop drive assembly is complete. This whole assembly is held in place by the main tube just glued to the engine axle and the other end to the prop mount. Pretty fragile set up. |
| Skyediamonds1985, Image # 34301 | 30 Jun 15 19:42 |
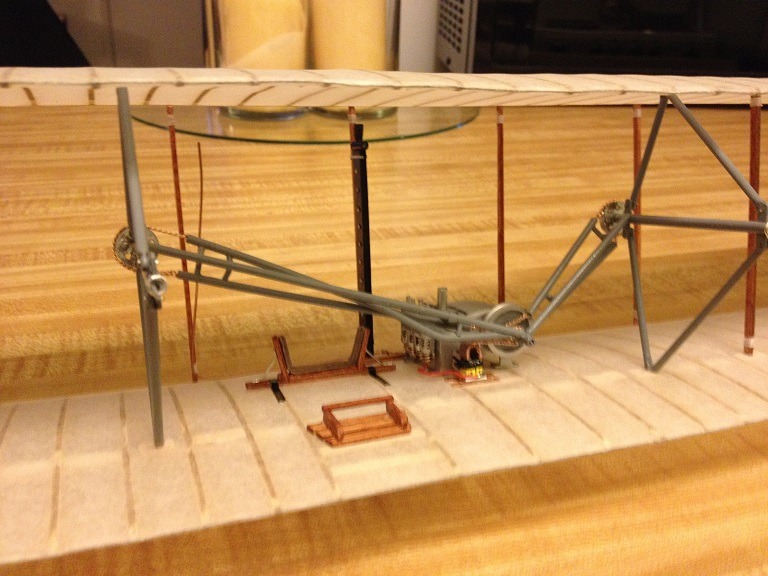
The assembly is complete. The main support is on top, the two tubes containing the drives chains are on the bottom supported by a small brace. |
| Skyediamonds1985, Image # 34300 | 30 Jun 15 19:37 |
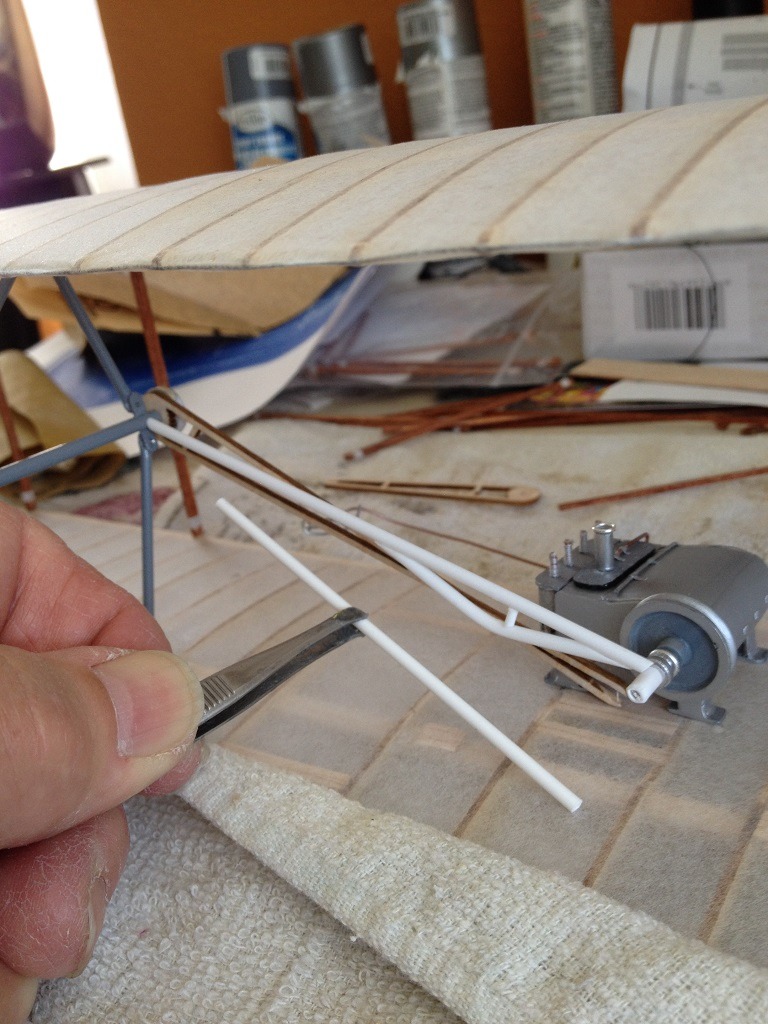
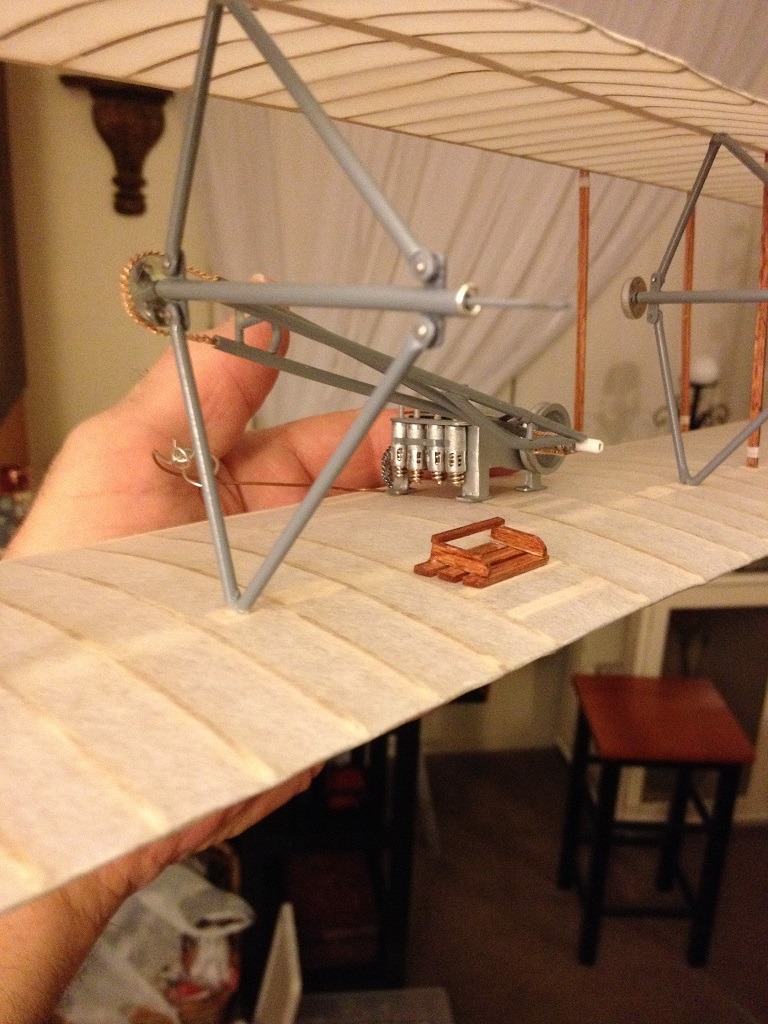
Sorry guys. Goofed on the captioning. Assembling the main prop drives. On the original Flyer the main tube connects directly from the axle of the engine to the prop mounts. Here, I'm holding one of the additional tubes that will contain the drive chains. |
| Build Thread, Page :
1 [ 2 ] 3 4 (70 posts, 20 posts per page, 4 pages in total)
|
[ < Prev ] [ Next > ] |
