| Build Thread, Page :
<< 6 7 8 9 10 [ 11 ] 12 13 14 15 (289 posts, 20 posts per page, 15 pages in total)
|
[ < Prev ] [ Next > ] |
| David Duckett, Comment for image # 8127 | 01 May 08 11:19 |
| That's purty!! |
| poppy, Image # 8127 | 01 May 08 09:50 |
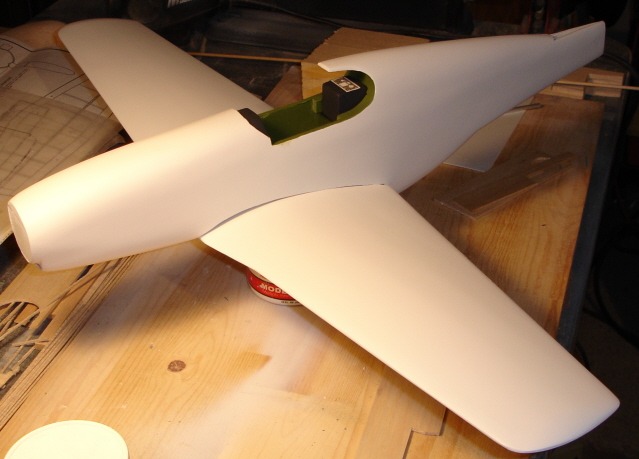
These surfaces are finished and ready for install and paint. |
| poppy, Image # 8126 | 01 May 08 09:48 |
|
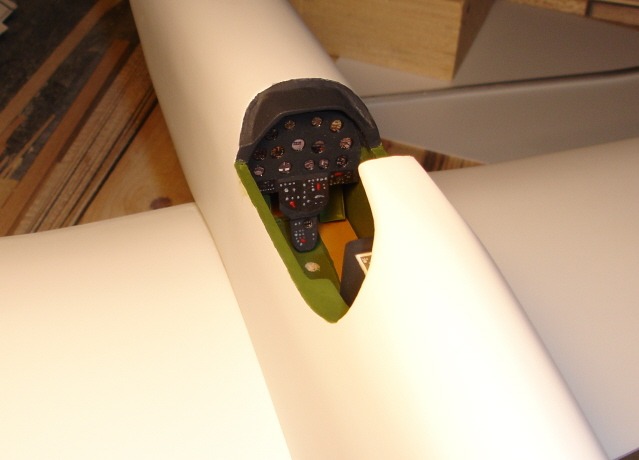
| poppy, Image # 8125 | 01 May 08 09:47 |
Beginning cockpit. |
| sly812, Comment for image # 8042 | 28 Apr 08 10:53 |
| outstanding... I love this site.....nothing like learning from top builders like yourself. |
| John M Oshust, Comment for image # 8042 | 27 Apr 08 14:04 |
| Digits of the master! Great photos! Do not lick your fingers or scratch your nose!!! |
| poppy, Image # 8042 | 27 Apr 08 11:28 |
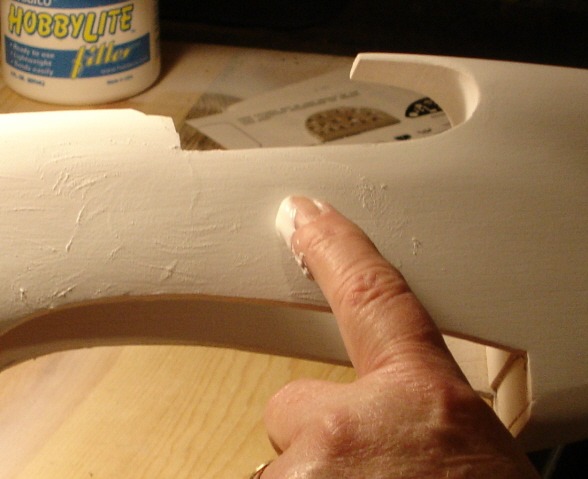
Apply in a circular motion. |
| poppy, Image # 8041 | 27 Apr 08 11:27 |
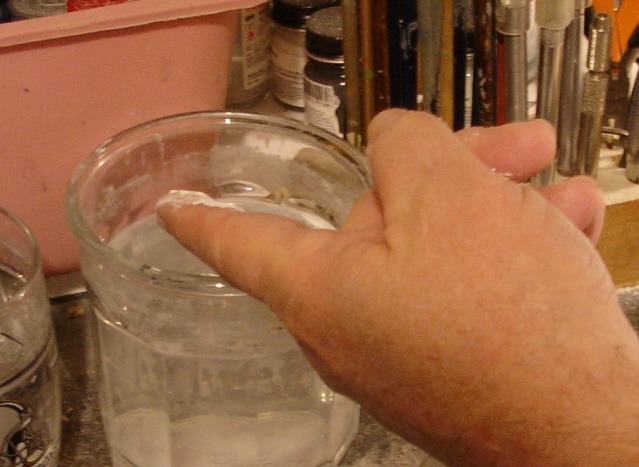
Quickly dip in water. |
| poppy, Image # 8040 | 27 Apr 08 11:26 |
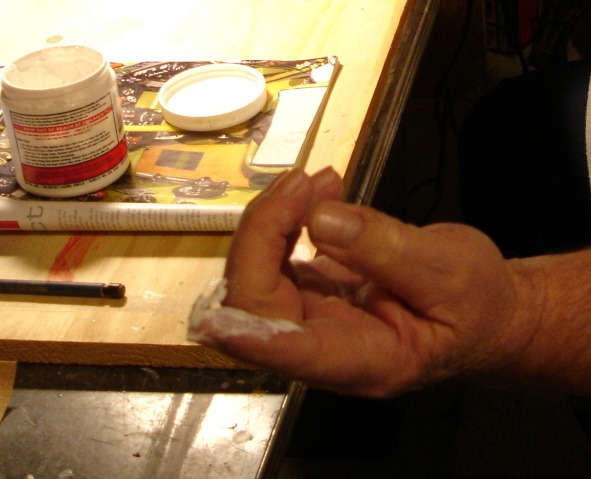
My method of getting a smooth finish. First a dollop of Micro-fill on finger. |
| sweetwillie, Comment for image # 7891 | 23 Apr 08 19:42 |
| Poppy, with your formula, maybe I can get this filler thing down pat. I, like the others, can't seem to get it right. That's going to win the contest. |
| RodN, Comment for image # 7891 | 23 Apr 08 18:07 |
| Beautiful job indeed Poppy, I am very much looking forward to seeing this kit complete!! |
| sly812, Comment for image # 7891 | 23 Apr 08 16:39 |
| Great... thanks poppy, i'm learning from the best i see... |
| poppy, Comment for image # 7891 | 23 Apr 08 06:33 |
| I obtain the desired finish before installing the parts, fuselage, wing, tail surfaces, etc. Easier to sand that way. |
| poppy, Comment for image # 7891 | 23 Apr 08 06:26 |
| Well, my method is not hard. I dip my index finger in water,get a dollop of fill on it, and apply to surface in a circular motion, much like waxing a car. If it gets too thick while doing this I dip my finger in water again. I like a consistency similar to mayonnaise. I keep this up until entire surface has a thin covering. Sand when dry, and do it again. So the consistency is maybe 75/25 or 60/40 or 50/50. I really don't know. Steve, moisture is why I seal the wood surfaces before filling. And when I start to sand, I only want to see primer color. If wood shows, I stop sanding. |
| sly812, Comment for image # 7891 | 22 Apr 08 18:40 |
| I'm with DD, what consistency do you use with the mirco fill? |
| SteveM, Comment for image # 7891 | 22 Apr 08 13:40 |
| Thanks for the details poppy, I've been wanting to skin a plane and knew some of the steps but not all. I would imagine sealing the wood with dope also helps when it comes to applying micro-fill as it won't suck all the moisture out of it like unsealed wood does. |
| David Duckett, Comment for image # 7891 | 22 Apr 08 09:00 |
| I'm guessing you thin the Micro-Fill with water before applying it so the question is: to what consistency? |
| Abby Marie, Comment for image # 7891 | 22 Apr 08 08:15 |
| I have found that painting across grain, fills in grain faster. |
| poppy, Comment for image # 7891 | 22 Apr 08 08:09 |
| B-4 painting, I dope all wood surfaces, lightly sand, and spray a coat of sandable primer. I then start with 2 light coats of micro fill, sanding between coats. Another coat of sandable primer, and more micro fill. I continue this process until I have a smooth fininsh with no grain showing. Then paint. It is important to dope 1st, then sandable primer to protect against moisture when using the micro fill, and also to give the 1/32" wood a hard surface so you will not sand thru it. Hope this helps. |
| sly812, Comment for image # 7891 | 22 Apr 08 06:41 |
| hi poppy, question?? like you I covered my last build with wood but I still have wood grain lines coming through the paint, how did you manage to get rid of them??
p.s. another great build on the way I see... grats.. |
| Build Thread, Page :
<< 6 7 8 9 10 [ 11 ] 12 13 14 15 (289 posts, 20 posts per page, 15 pages in total)
|
[ < Prev ] [ Next > ] |
