| Build Thread, Page :
1 2 [ 3 ] 4 (72 posts, 20 posts per page, 4 pages in total)
|
[ < Prev ] [ Next > ] |
| Skyediamonds1985, Image # 34360 | 06 Jul 15 17:04 |
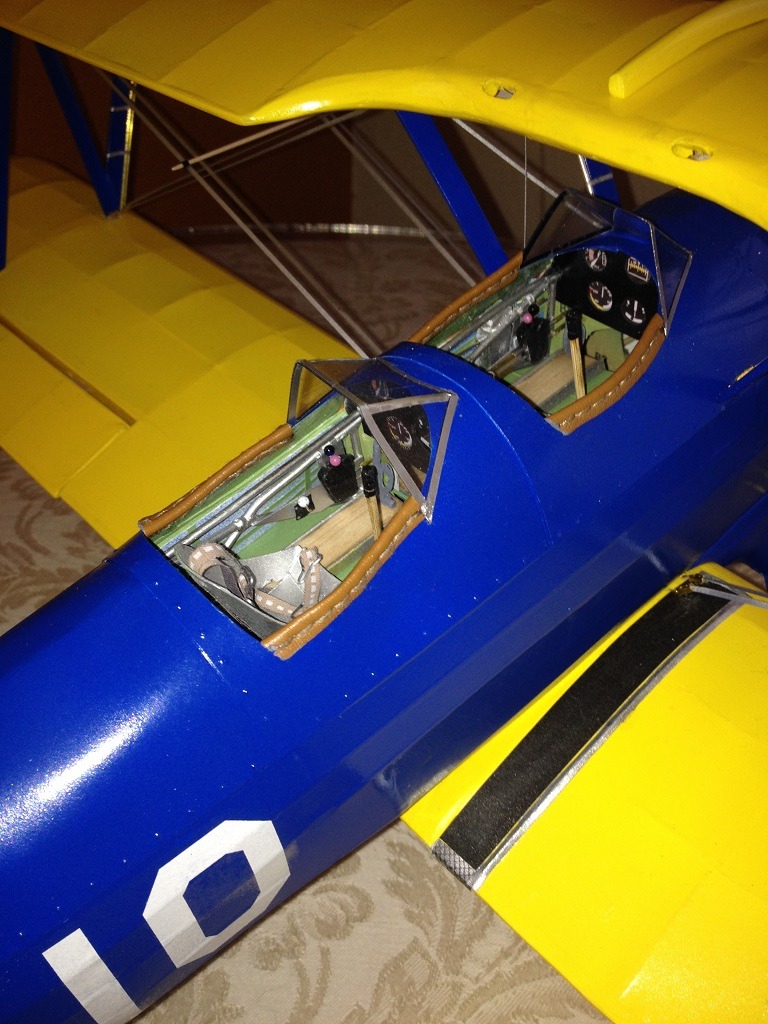
Cockpit coaming and other goodies |
| Skyediamonds1985, Image # 34359 | 06 Jul 15 17:03 |
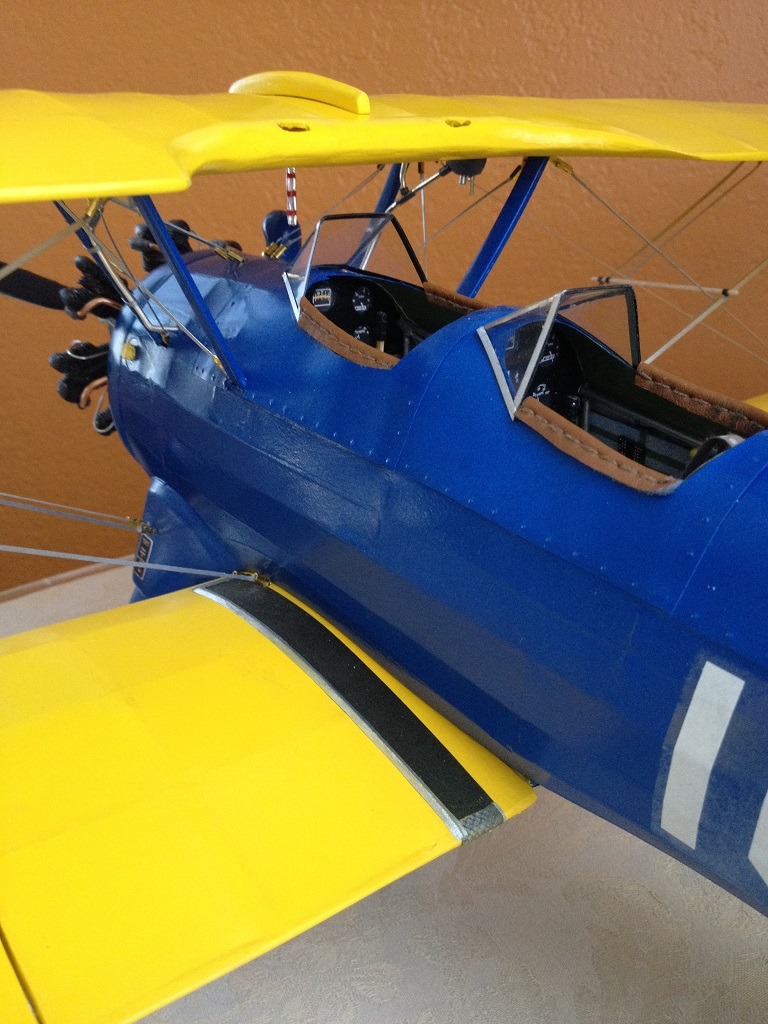
Cockpit coaming and other goodies |
| Skyediamonds, Comment for image # 34339 | 06 Jul 15 15:57 |
| Creo-I too, admire & followed (albeit a bit late) your wonderful build on the Piper L-4. That detail on the 4-banger Continental is amazing! I sincerely thank you for your appraisal of my PT-17. By the way, saw your "fashionably challenged" shirt in one of your posts, & with all those airplane prints, you looked good & fashionable to me! -Sky |
| Creosotewind, Comment for image # 34339 | 06 Jul 15 12:24 |
| Nicely detailed work Skye. |
| Skyediamonds, Comment for image # 34339 | 04 Jul 15 14:06 |
| Meku: Now that I have been awed by your incredible museum S.E.5 model, I shall treasure that compliment!! |
| meku, Comment for image # 34339 | 04 Jul 15 11:22 |
| Yes, yes, I'm impressed, great micro work, interesting excellent ideas, high craftsmanship, thoughtful watch !!! -Sky :) |
| Don C, Comment for image # 34324 | 04 Jul 15 09:42 |
|
| Skyediamonds1985, Comment for image # 34338 | 03 Jul 15 23:30 |
| Might like to add that the gray colored cooling fins on the exhaust side of the cylinders help to direct attention to the copper exhaust on the back while the spark plugs attract attention on the front. |
| Skyediamonds1985, Comment for image # 34330 | 03 Jul 15 22:38 |
| I should mention that the space between the rings near the top of the upper half of the cylinder is for the spark plug. |
| Skyediamonds1985, Image # 34339 | 03 Jul 15 21:38 |
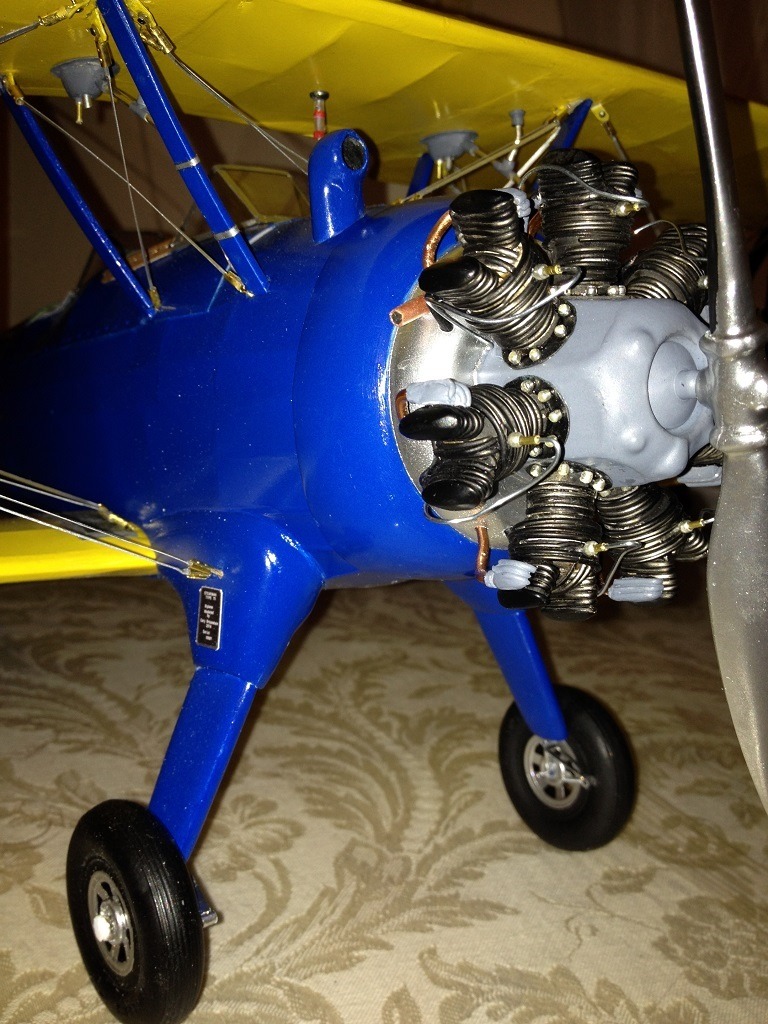
There you have it. The engine has lots of character and highlights one of the main focal points of a radial engined biplane. |
| Skyediamonds1985, Image # 34338 | 03 Jul 15 21:35 |
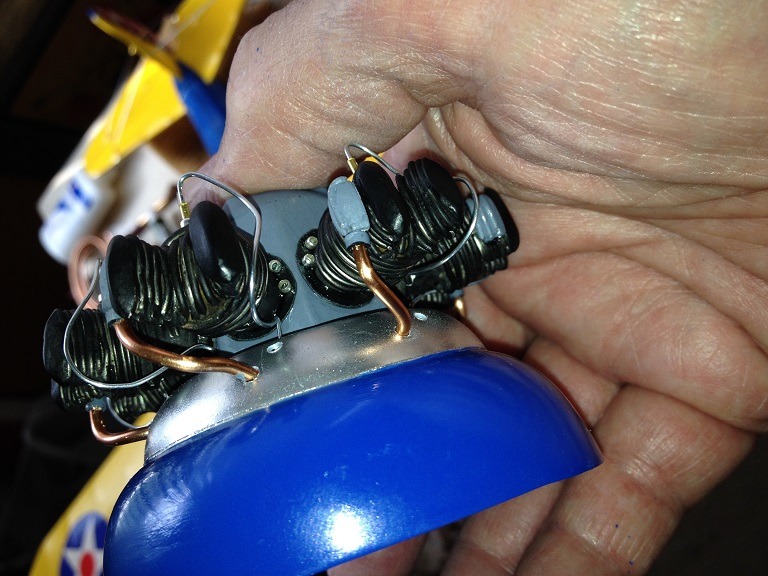
As you can see, the copper exhaust really stands out, despite it supposedly being "hidden" behind the cylinders. The "bling" factor really plays out here. The intake manifold will also be added. The intake manifolds were painted black for added contrast. |
| Skyediamonds1985, Image # 34337 | 03 Jul 15 21:32 |
Each cylinder was first set in its "mounting base" made from paper and beads and then the whole assembly epoxied onto the plastic crankcase |
| Skyediamonds1985, Image # 34336 | 03 Jul 15 21:29 |
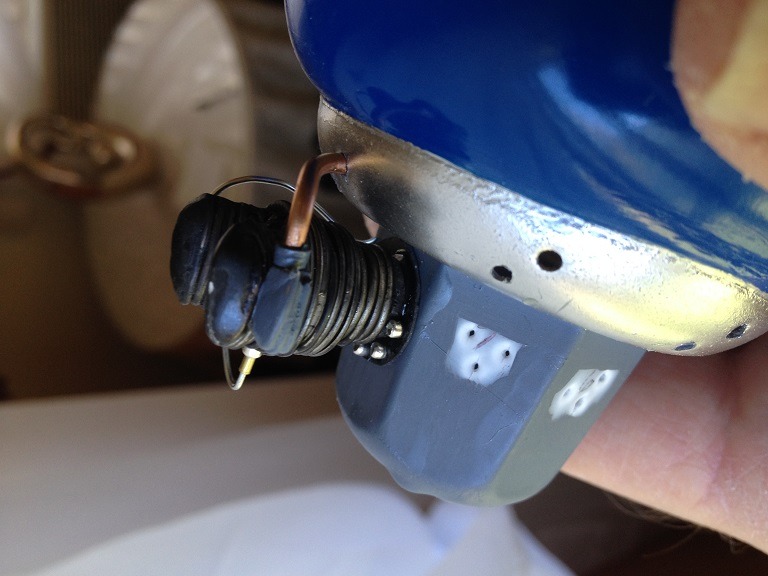
After each cylinder was epoxied in place, I cut a small section of slightly thick copper wiring and bent it to shape to simulate the exhaust. It was epoxied into place. The spark plug wiring was simply superglued. I purposely left the copper wiring in its natural state as sometimes exhaust pipes can take on various burnt hues of colors that closely resembles well, copper. |
| Skyediamonds1985, Image # 34335 | 03 Jul 15 21:24 |
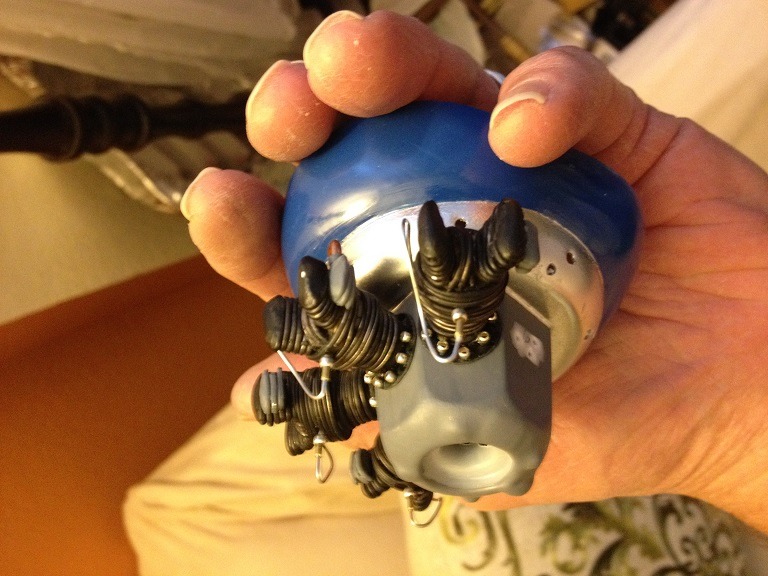
The plastic housing making up the nose of the fuselage and crankcase was painted in blue, silver for the exhaust collector ring, and gray for the crankcase. The cylinder was epoxied using the 5-minute brand. Again, why wait for 30 minutes while holding it in your hand for it to set? |
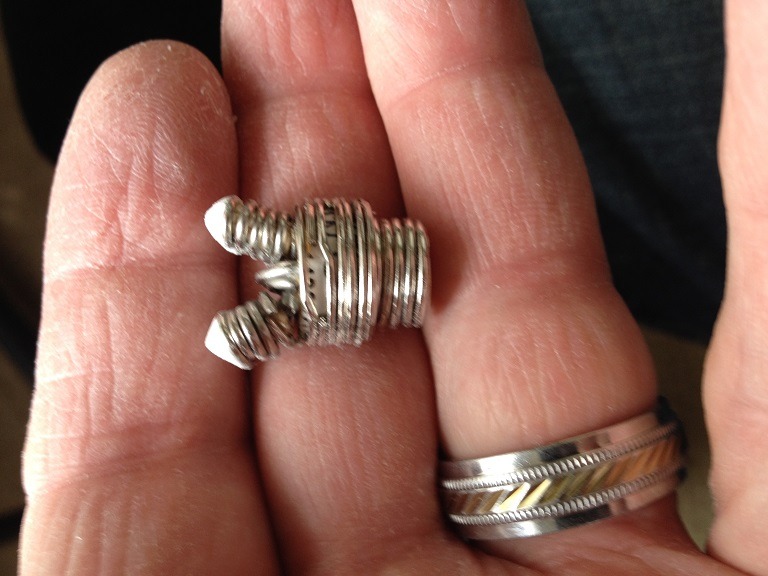
| Skyediamonds1985, Image # 34334 | 03 Jul 15 21:21 |
I used a T pin to make a hole in between the "cooling fins" for the spark plug and wiring. Then carefully pre-bent it back around the cylinder to its approximate location prior to gluing onto the crankcase. |
| Skyediamonds1985, Image # 34333 | 03 Jul 15 21:17 |
What can I say? |
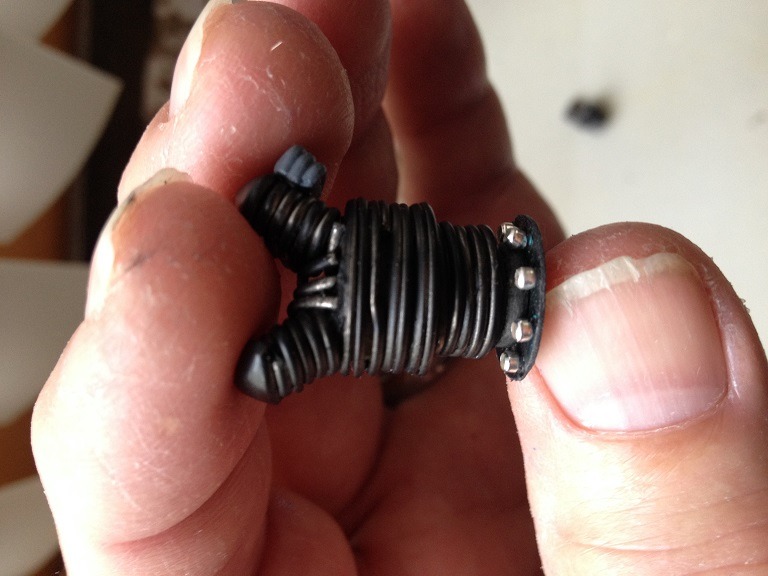
| Skyediamonds1985, Image # 34332 | 03 Jul 15 21:16 |
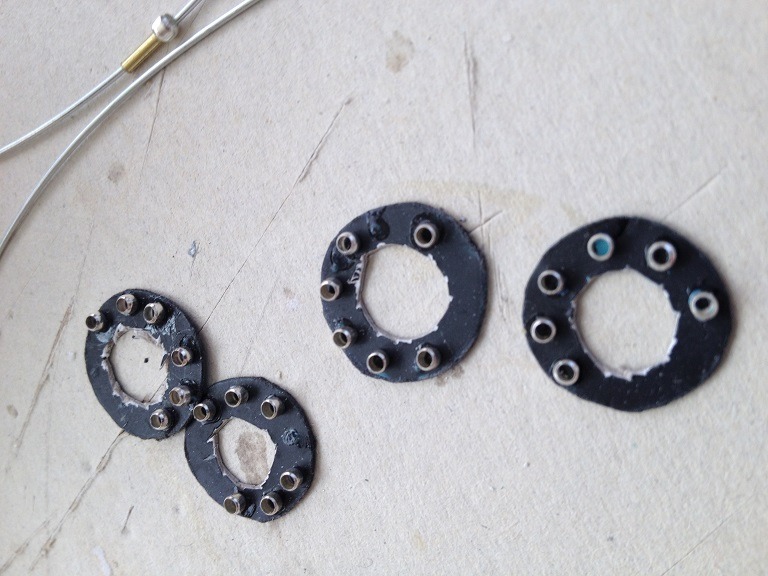
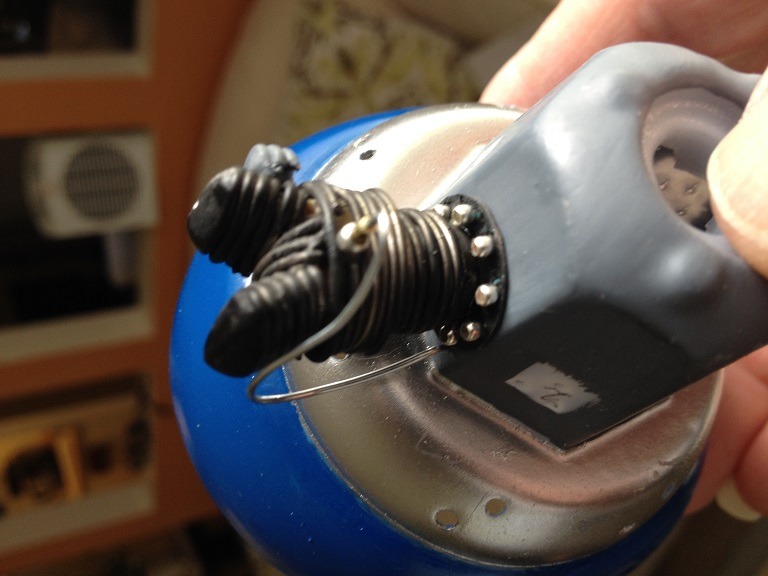
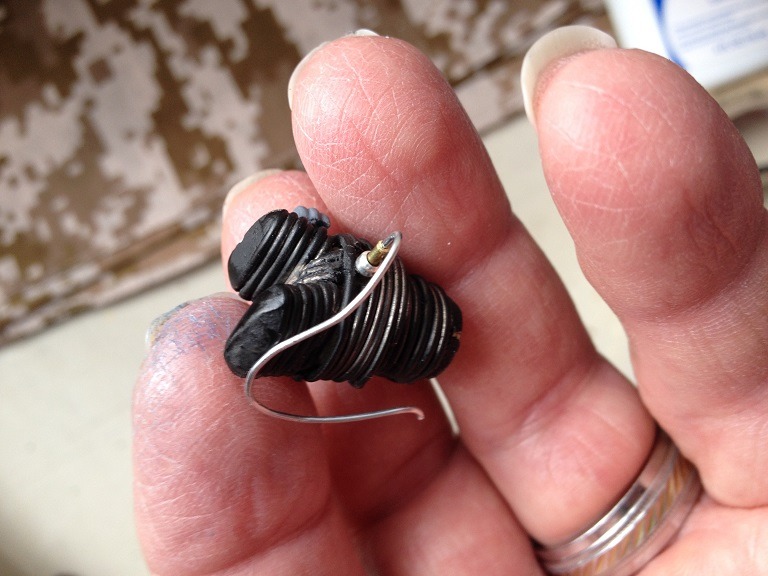
For the mounting base of each cylinder, i simply cut circular rings from paper (I figured it was far easier than cutting plastic with an X-Acto knife) and used small beads to simulate the mounting lugs. If you look carefully, you can easily see that I used a small diameter copper tubing with the same sized beads for simulating spark plugs. I left the beads in their natural bright metallic finish for that added "bling" factor. |
| Skyediamonds1985, Image # 34331 | 03 Jul 15 21:09 |
Just a dash of flat black spray but not too much. Want to allow that silver from the rings to show through for that metallic look. It was at this point I fabricated extra cooling fins for the exhaust side by cutting small sections of extra rings over a small piece of balsa. Then painted a flat gray as seen on the real engine. Besides, it kind of highlights the added detailing anyway. |
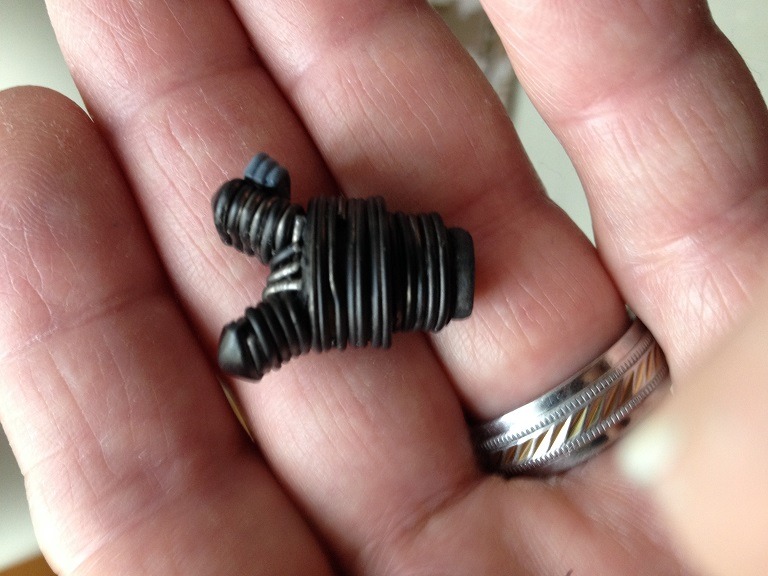
| Skyediamonds1985, Image # 34330 | 03 Jul 15 21:04 |
Ahem...again. Note the cylinder is starting to take shape. It only took a dash of Spackling compound on top of each end to simulate the valve covers. Again, a quick build without the added hassles of vacuum forming (of which I don't have anyway). I simply cut some extra rings in half and glued them in between the "V." |
| Skyediamonds1985, Image # 34329 | 03 Jul 15 20:56 |

Cylinder is starting to take shape |
| Build Thread, Page :
1 2 [ 3 ] 4 (72 posts, 20 posts per page, 4 pages in total)
|
[ < Prev ] [ Next > ] |
