| Build Thread, Page :
1 2 3 [ 4 ] (72 posts, 20 posts per page, 4 pages in total)
|
[ < Prev ] |
| Skyediamonds1985, Image # 34328 | 03 Jul 15 20:52 |
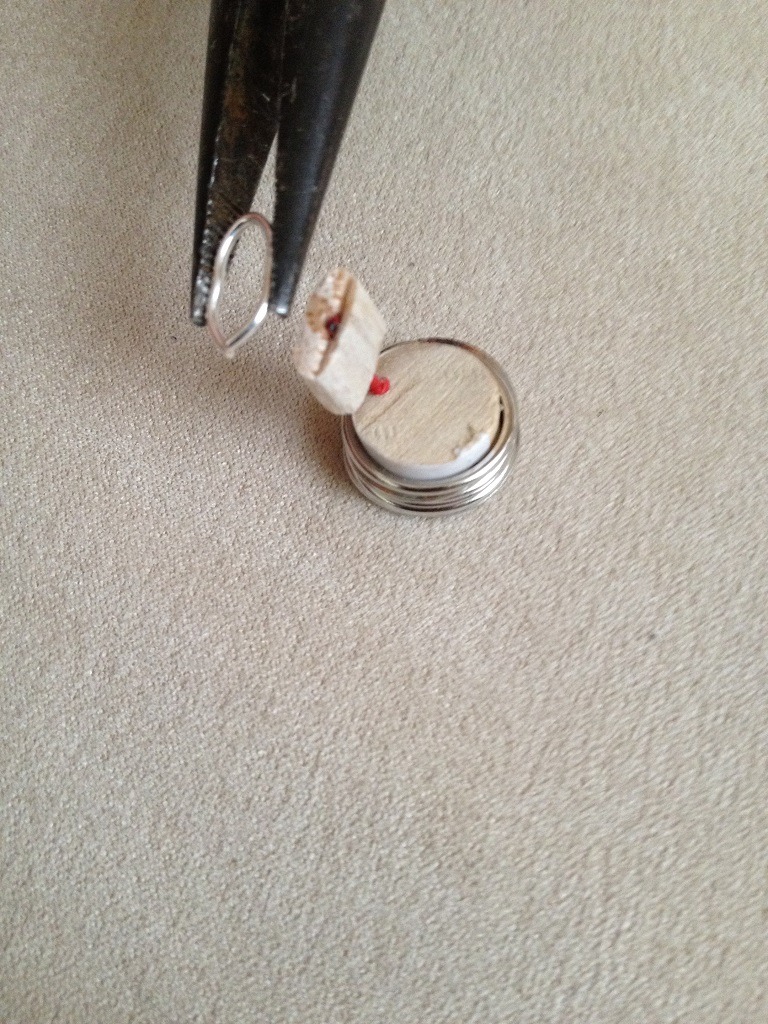
This photo is only for illustrated purposes as the elongated ring would have been slipped over the balsa support before gluing onto the top of the upper cylinder half. |
| Skyediamonds1985, Image # 34327 | 03 Jul 15 20:49 |
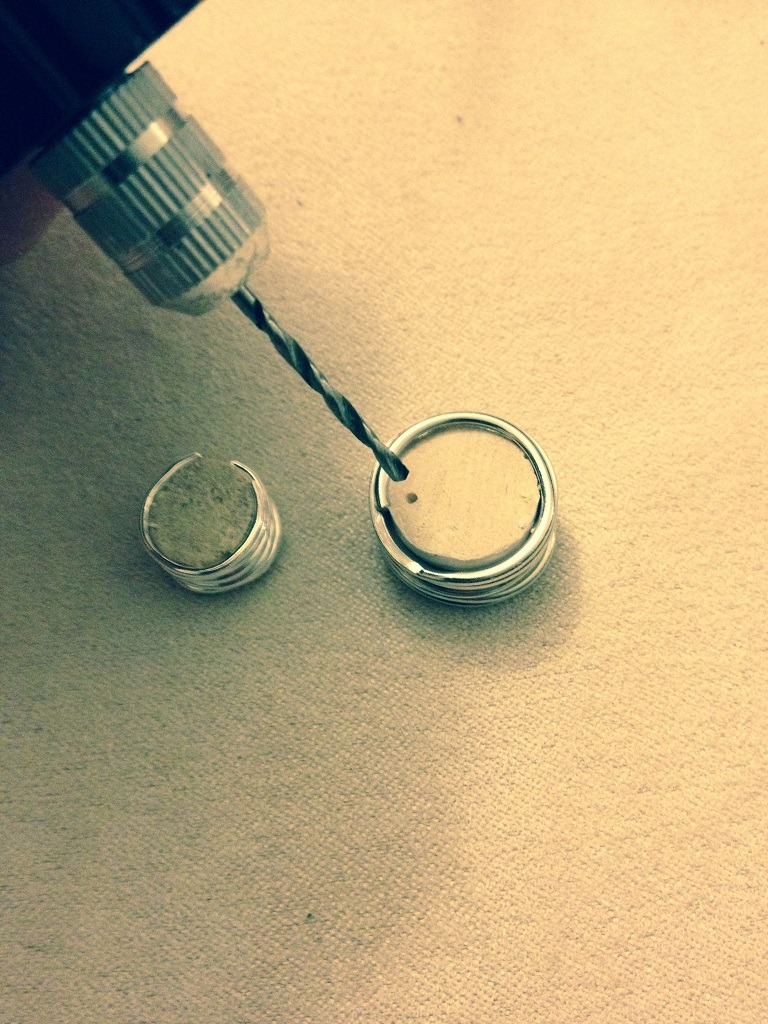
This may seem a bit out of sequence, but just using a pin vise over a previously set hole from the use of a T pin, at an apprx. angle to the "V" for the extra cooling fins and support. |
| Skyediamonds1985, Image # 34326 | 03 Jul 15 20:46 |
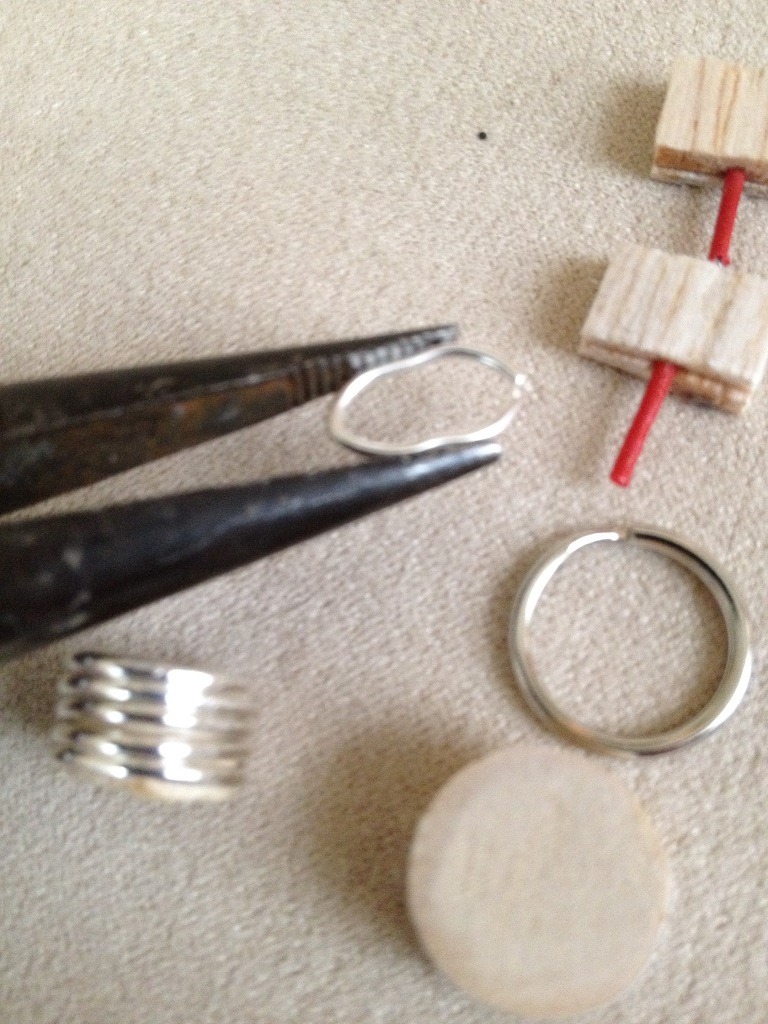
Let's try this again. I'm still learning to post, so sorry about that guys. I should point out that I purposely kept the upper and lower halves of the cylinders apart as I found out (the hard way, of course) that when slipping down the tightly squeezed rings, I kept breaking them apart. So each half had its respective sized rings slipped on. To make the "V: portion, I simply squeezed the rings to form an elongated "O" to suit the size of the two balsa strips used as formers. Again, a bit of fussing around, but still better than the alternate methods. |
| Skyediamonds1985, Image # 34325 | 03 Jul 15 20:41 |

urse) that when slipping those tightly squeezed rings, I kept breaking them apart. |
| Skyediamonds1985, Image # 34324 | 03 Jul 15 20:34 |
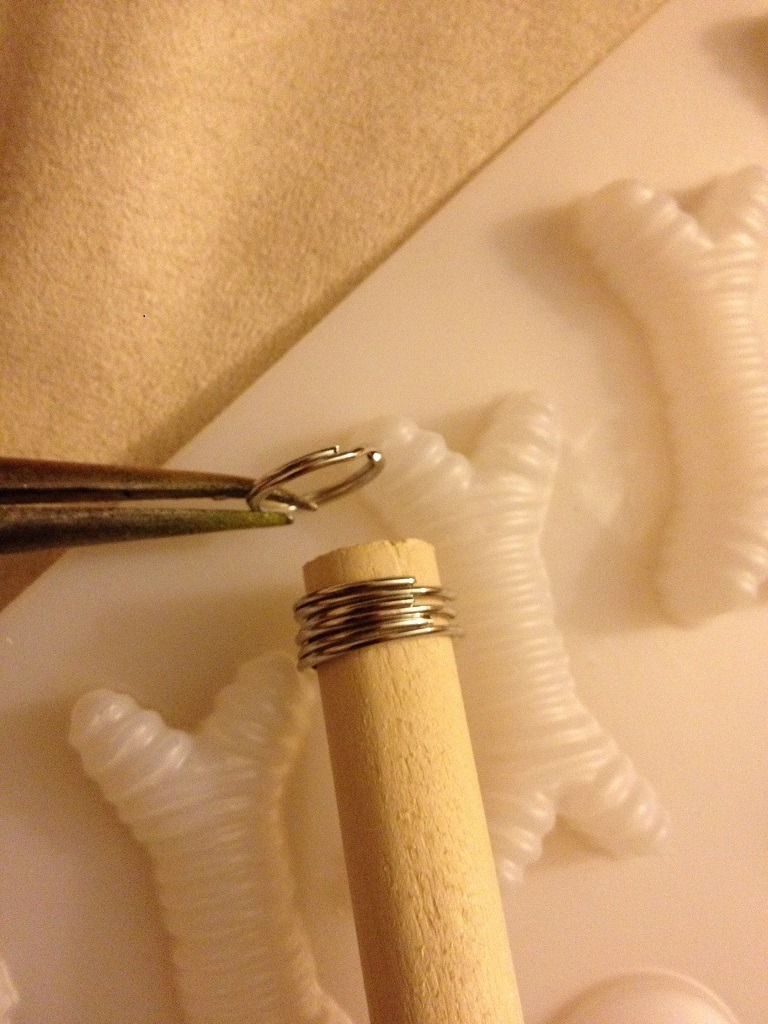
As you can easily see from my practice sessions against the Guillow's plastic cylinders in the background, all I had to do was slip each "cooling fin" over the appropriately sized dowel. Although the rings were close enough in diameter to the dowels, I still had to open them up a bit to squeeze them over. Still, the rings helped to give a sharp definition to the cooling fins as opposed to thread or string or Heaven forbid, cutting up thin plastic rings. |
| Skyediamonds1985, Image # 34323 | 03 Jul 15 20:29 |
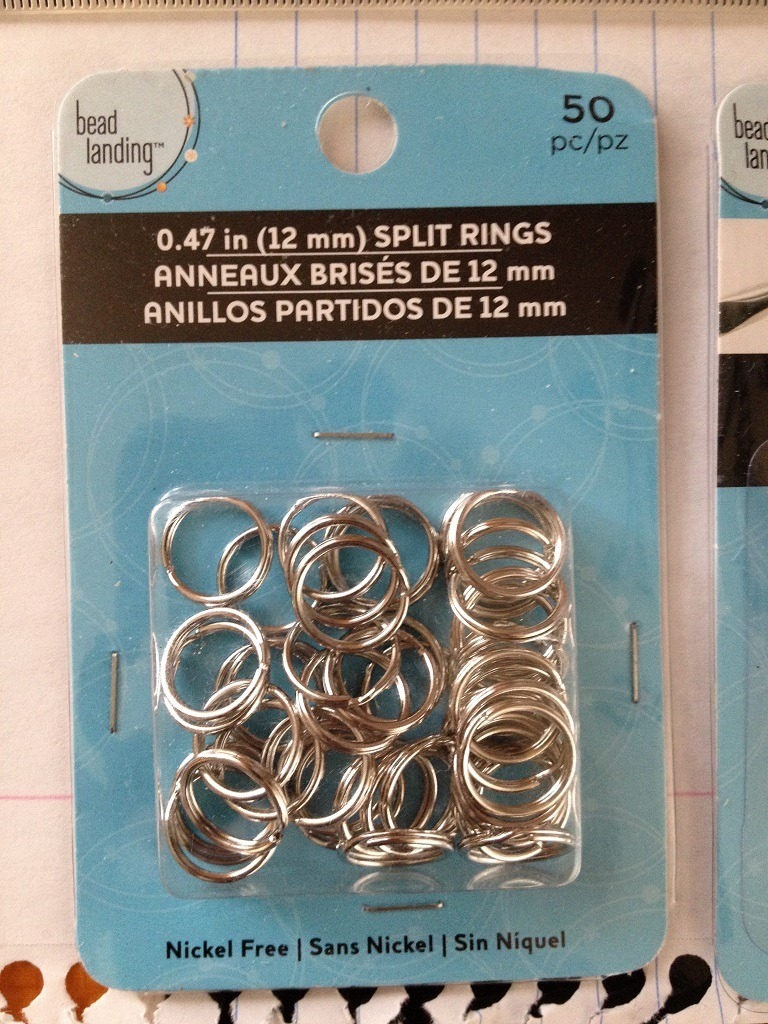
Okay so far. Now comes a bit of imagination (at least on my part). What to use to simulate cooling fins? Wrapping threads or strings? Cutting out thin slices of plastic rings? Still thinking of "quick build" I visited the local arts & crafts store and....my cooling fins were neatly packaged and waiting for me. |
| Skyediamonds1985, Image # 34322 | 03 Jul 15 20:26 |
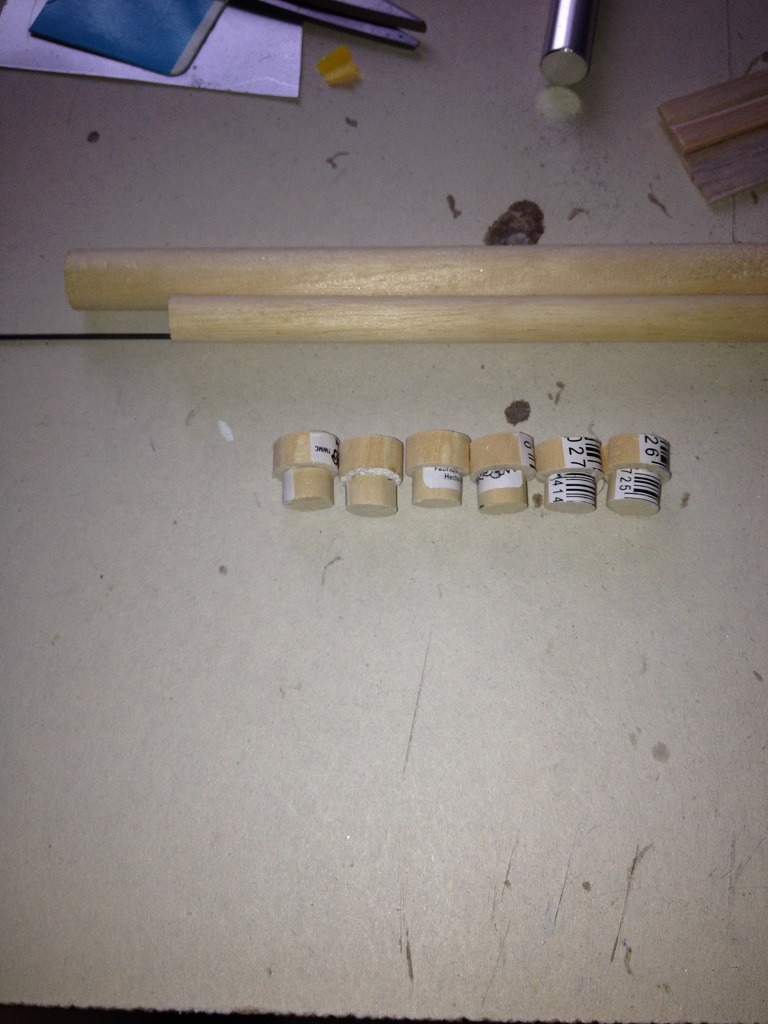
Since weight was not a consideration, and plastic tubing isn't readily available in the sizes I needed, I chose hardwood dowels of two approximate sizes for each cylinder. Thinking of it as a quick build, the dowels were already round and sized to suit my needs. I only had to cut them to the approximate size of each cylinder |
| Skyediamonds1985, Image # 34321 | 03 Jul 15 20:06 |
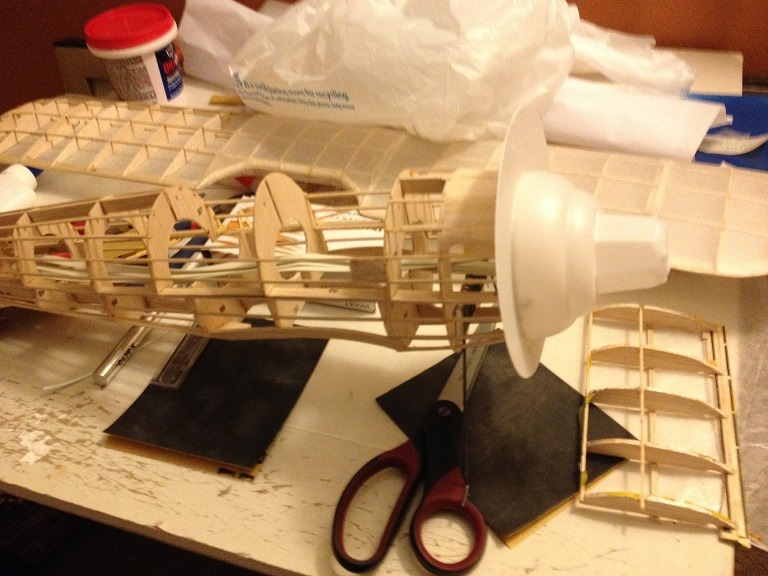
I decided early on to use the plastic nose/crank case provided by Guillow's as a quick-build version of the radial. This allows me to focus more on the cylinders and some of the accessories such as intake and exhaust manifolds, spark plugs and their wiring. |
| Skyediamonds1985, Image # 34320 | 03 Jul 15 19:45 |

Unique characteristics of the Continental R-670 are: intake and exhaust pipes are behind the cylinders with the main exhaust manifold hidden behind in the nose, the main electrical harness is wrapped around the main crank case behind the cylinders with the front spark plug wiring routed around the cylinders to go behind, the push rods are also behind the cylinders and each cylinder has additional cooling fins for the exhaust. Those were the details I wanted to highlight on the scratch radial. Finally, the engine had to be in 1/20th scale to the aircraft model itself. |
| Skyediamonds1985, Image # 34319 | 03 Jul 15 19:30 |
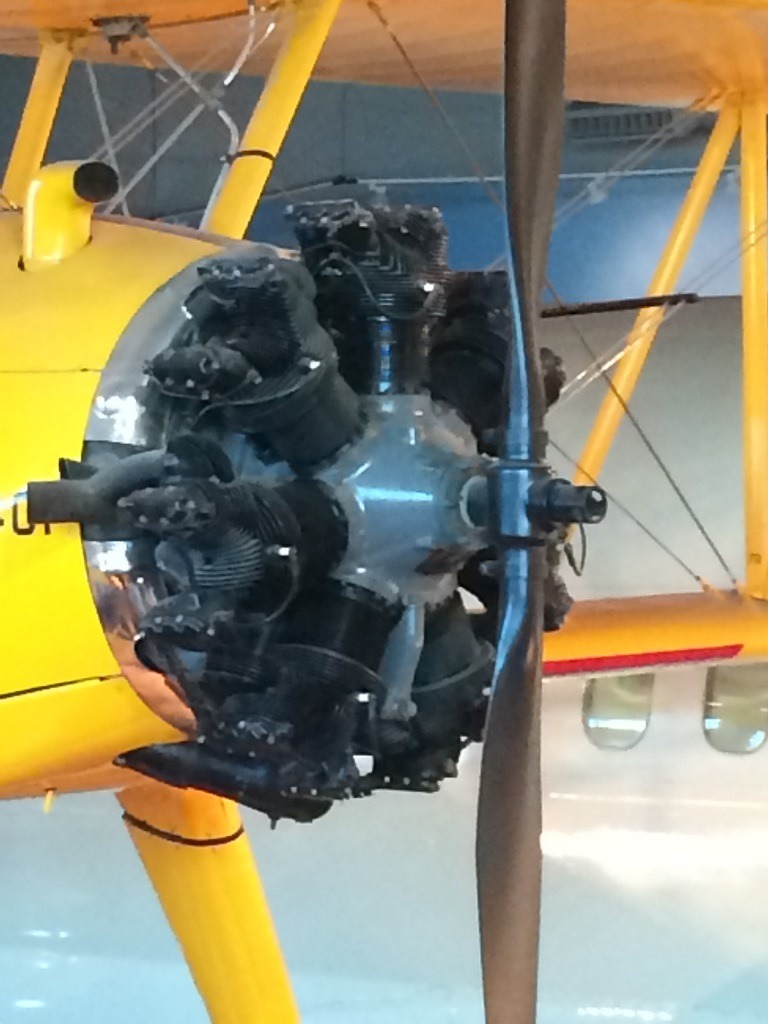
One of the more unique characteristics of this particular radial, is the main elect. harness is located behind the cylinders, with the front spark plug wiring being diverted around the cylinders to the back, the exhaust manifold is inside the nose, and each cylinder has extra cooling fins for their own respective exhaust outlets, and the push rods are behind the cylinders as well. |
| Skyediamonds1985, Image # 34318 | 03 Jul 15 19:19 |
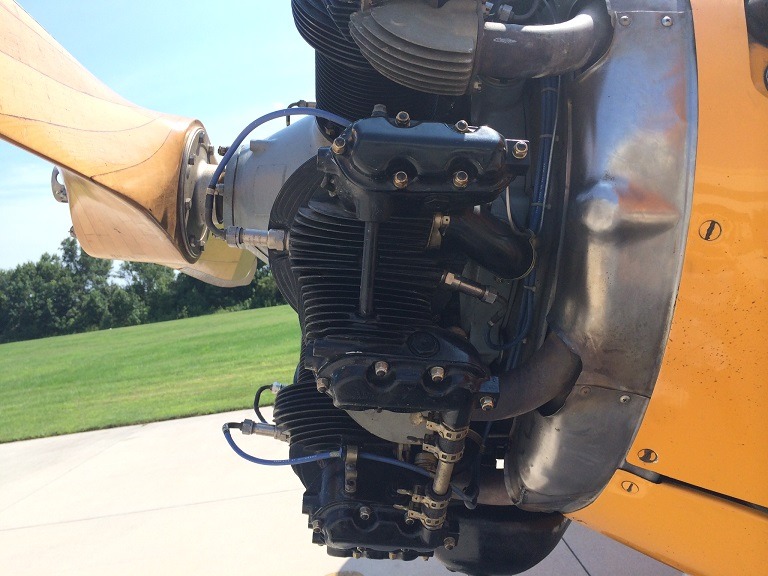
First, need to carefully observe the Continental R-670s. If they used the Lycoming R-680s, then they're designated PT-13s. Go figure. |
| Skyediamonds1985, Image # 34317 | 03 Jul 15 19:01 |
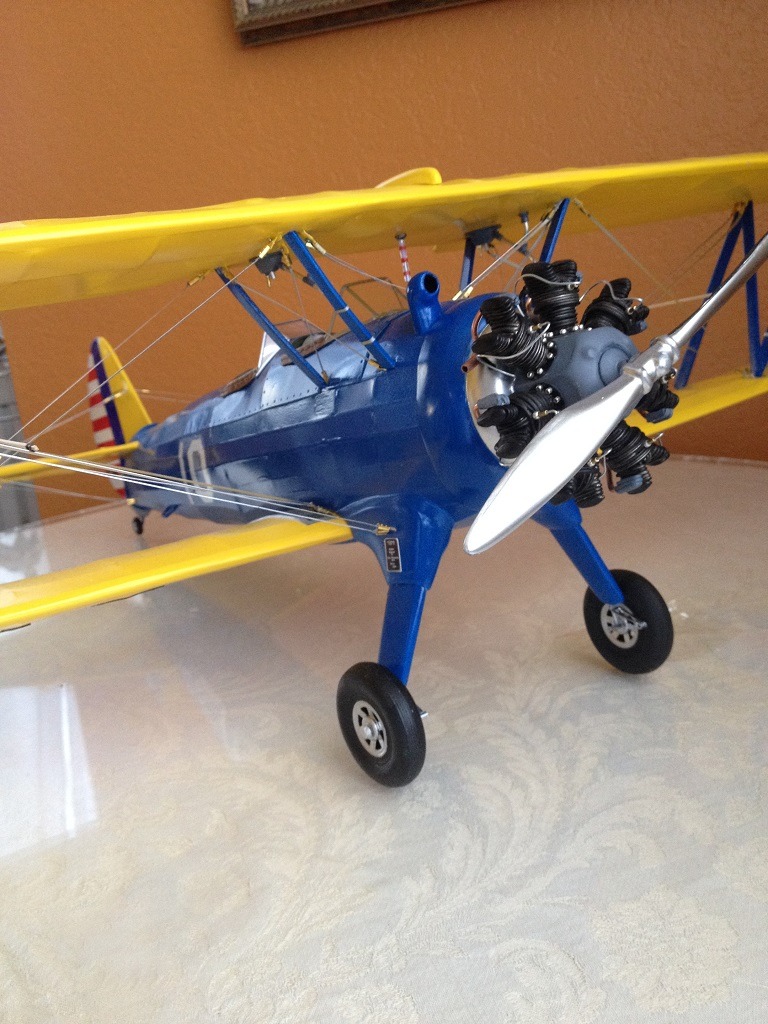
Okay guys. This is my first model after almost 30 years of abstinence. With it, comes trials & tribulations with dashes of lessons learned (and errors to avoid). Keep in mind, all I have are: a pair of tweezers, needle nose pliers, scissors, an X-Acto knife and lots of imagination. Going to start off on how I (somehow) managed to scratch build the radial engine for the Guillow's PT-17. |
| Build Thread, Page :
1 2 3 [ 4 ] (72 posts, 20 posts per page, 4 pages in total)
|
[ < Prev ] |
