| Build Thread, Page :
1 2 [ 3 ] 4 5 6 (106 posts, 20 posts per page, 6 pages in total)
|
[ < Prev ] [ Next > ] |
| plasticbuddha, Image # 4048 | 15 Aug 07 16:21 |
|
| plasticbuddha, Comment for image # 4043 | 15 Aug 07 16:20 |
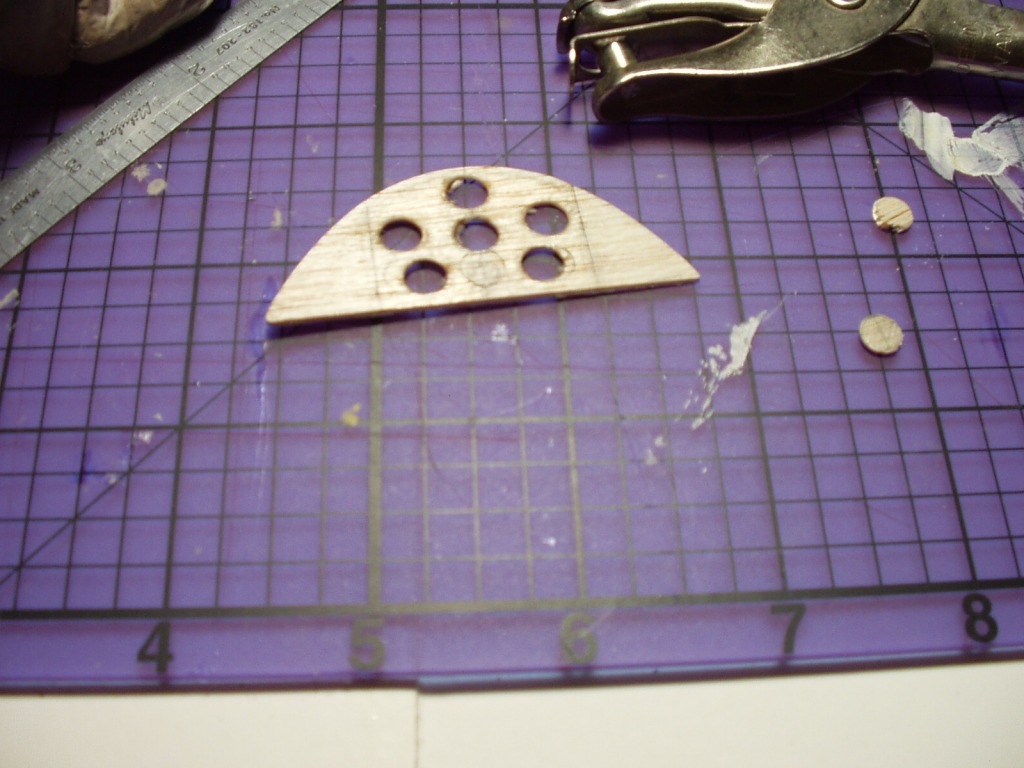
| Hi John! I found out (the hard way) that some balsa sheets are prone to chipping very easily. So I rough cut the outline, run a bead of CA along where the finished edge will be and then I can sand/file/ream out with less chances of breaking out or chipping. It also stiffens and hardens the balsa so that it almost feels like styrene or plywood.
poppy - Thank you! It is very flattering to recieve a complement from one of the Masters!!!
Jedi - Since I don't have a MotoTool, I resorted to wrapping some sandpaper around the sharpened end of a pencil. I then reamed out the roughly punched holes. Takes a lot of time!!! (ugh!) |
| plasticbuddha, Comment for image # 4044 | 15 Aug 07 16:14 |
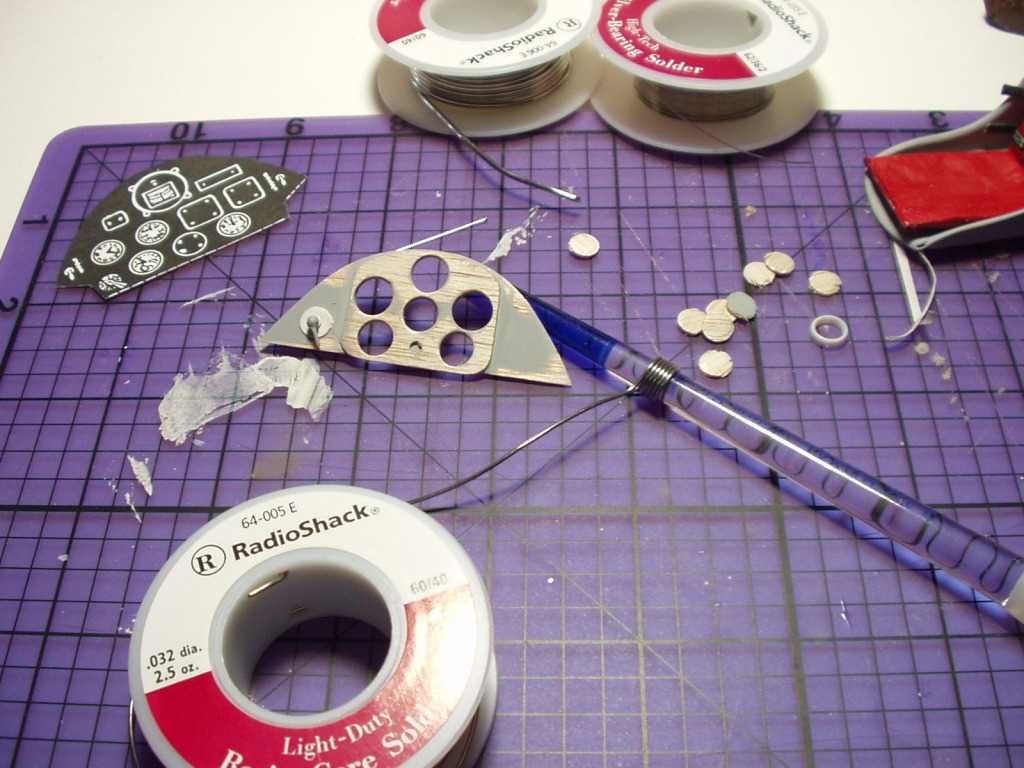
| Ah, thank you Creosotewind!:) I believe I also read that technique in an article on SFA. One could also use rolled up paper too. I did go with your suggestion although I used soft solder wire. I would love to see your reference photos! Hey, James..just a suggestion but how about a general photo reference section so that we can all upload reference pictures to share with our members? Might save time for those who like to add details or accurate colour schemes? |
| Jedi, Comment for image # 4043 | 15 Aug 07 15:01 |
| How are you getting the perfect cut circles? |
| Creosotewind, Comment for image # 4044 | 15 Aug 07 10:59 |
| A good and easy way to make the bezel is to take copper wire or solder and wrap it around a tube of the correct diameter. Make several tight wraps and then cut one side with a blade. Slip them off the tube and voila, bezels. I have a lot of photos of both interior and exterior shots of Stearmans, if you are interested.
Jim |
| poppy, Comment for image # 4043 | 15 Aug 07 10:01 |
| Superb craftsmanship. |
| JohnG., Comment for image # 4043 | 15 Aug 07 09:39 |
| Why did you feel the need to seal the cut edges with C/A before sanding?? |
| plasticbuddha, Comment for image # 4044 | 14 Aug 07 22:12 |
| Trying to replicate the bezel around each instrumnet face. I might go with Evergreen tubing. After which, I will apply a sheet of clear lexan onto the back. Then the instrument faces printed on glossy paper. |
| plasticbuddha, Comment for image # 4043 | 14 Aug 07 22:09 |
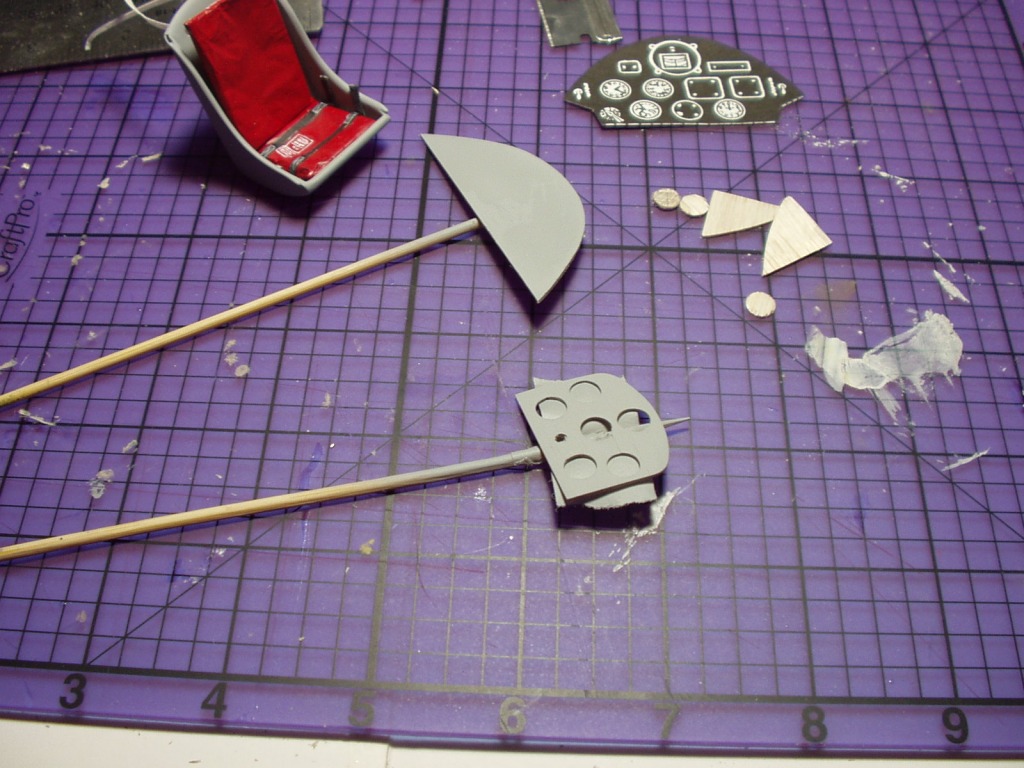
| You can see the scale difference between the kit's cardboard version and the scratchbuilt one (closer to scale). |
| plasticbuddha, Comment for image # 4043 | 14 Aug 07 22:07 |
| Sealed all of the cut edges with CA before sanding. Several coats of primer filler were needed. |
| plasticbuddha, Comment for image # 4042 | 14 Aug 07 22:06 |
| Started work on the instrument panel. After a bit of experimenting, I ended up using a paper puch directly on the 1/32 balsa (I miss having a Dremel MotoTool). Takes a certain touch so as to avoid chipping. |
| plasticbuddha, Image # 4044 | 14 Aug 07 22:03 |

|
| plasticbuddha, Image # 4043 | 14 Aug 07 22:03 |
|
| plasticbuddha, Image # 4042 | 14 Aug 07 22:02 |
|
| poppy, Comment for image # 4020 | 14 Aug 07 06:29 |
| And I thought I added a lot of detail. I'm with CD, can't wait to see the rest. |
| cdwheatley, Comment for image # 4020 | 14 Aug 07 05:26 |
| Wow, if this is the amount of detail you've included on just the pilot and his seat I can't wait to see the finished plane! |
| plasticbuddha, Comment for image # 4020 | 14 Aug 07 00:57 |
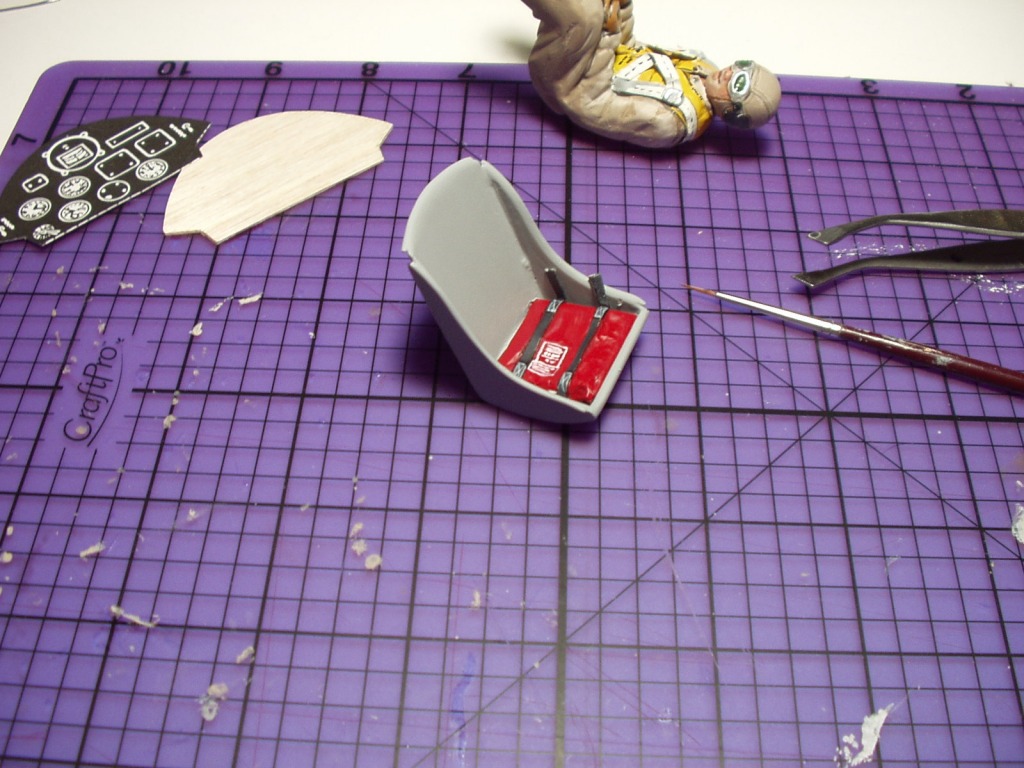
| Don't have much time at the bench today but some progress. Stripped off the balsa edges and replaced them with solder after all. Blended the solder with the balsa with some dabbed on filler/primer. Several spray coats of filler/primer still to go as the wood grain is still visible (argh!!). I'm sorely tempted to break out the Evergreen styrene just to save the added work!!! The seat cushion was painted with flat red enamel and then lightly buffed to simulate vinyl. Hold down straps are strips of masking tape. Painted the label with a 000 brush and white paint thinned with mineral spirits. |
| plasticbuddha, Comment for image # 4015 | 14 Aug 07 00:49 |
| Thank you both!! :) This is very much a learning and experimenting experience for me (technique-wise) and I hope it might save someone some headaches with their project. As always, I am more than happy to share what little I know. A big "Thank You" to James for this wonderful site!!! |
| plasticbuddha, Image # 4020 | 14 Aug 07 00:46 |
|
| jerry campbell, Comment for image # 4015 | 14 Aug 07 00:22 |
| I especially owe thanks for these photos. I've only bult two seats and neither came out as good as yours. Seeing yours wll help me on my next project. |
| Build Thread, Page :
1 2 [ 3 ] 4 5 6 (106 posts, 20 posts per page, 6 pages in total)
|
[ < Prev ] [ Next > ] |
