| Build Thread, Page :
1 2 3 [ 4 ] 5 6 (106 posts, 20 posts per page, 6 pages in total)
|
[ < Prev ] [ Next > ] |
| cdwheatley, Comment for image # 4016 | 13 Aug 07 17:27 |
| Ingenious! |
| cdwheatley, Comment for image # 4015 | 13 Aug 07 17:26 |
| No need to apologize! It's always fascinating to see other modellers builds. Keep up the good work. |
| plasticbuddha, Comment for image # 4016 | 13 Aug 07 16:05 |
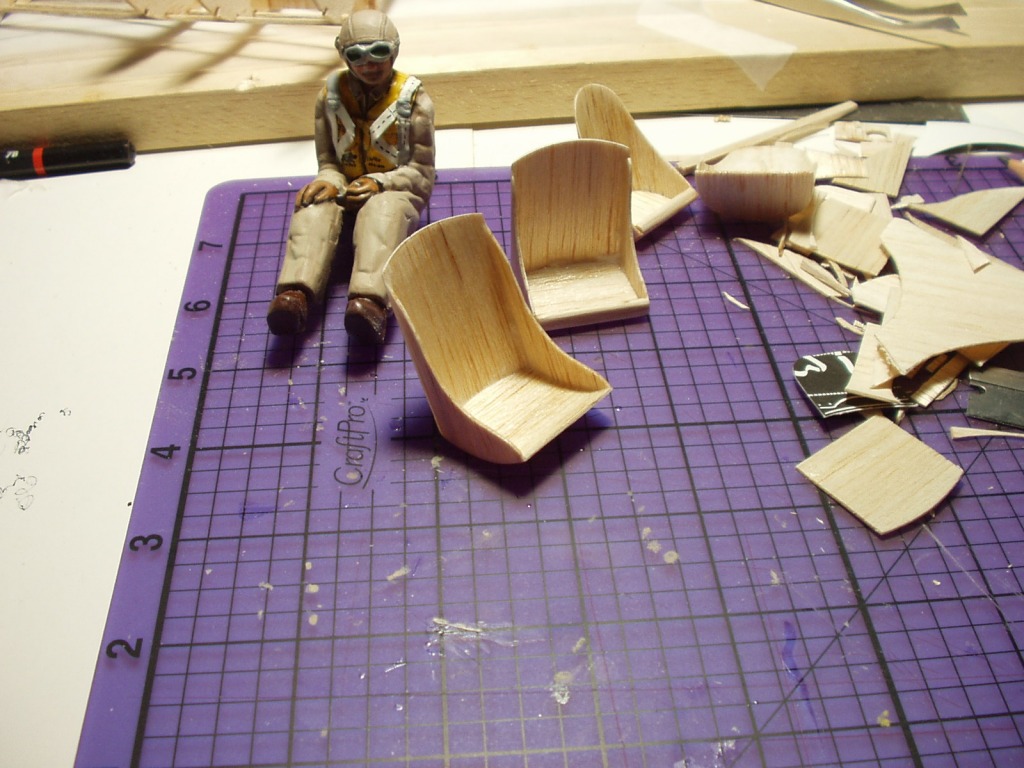
| I got the edge to look reasonable (hard to tell from this photo) with sanding and scratch filler/primer. My references also show seat cushions. I tried several things before using some bathroom tissue wrapped in aluminum foil. What makes it work is that after I wrapped the tissue with foil, I burnished the aluminum foil from the center outwards. This causes the foil to expand to creat slack. With real cushions, the padding gets compressed over time so the covering gets loose and creats ripples. This technique might also work to replicate leather (tiny creases in the foil). |
| plasticbuddha, Comment for image # 4015 | 13 Aug 07 16:00 |
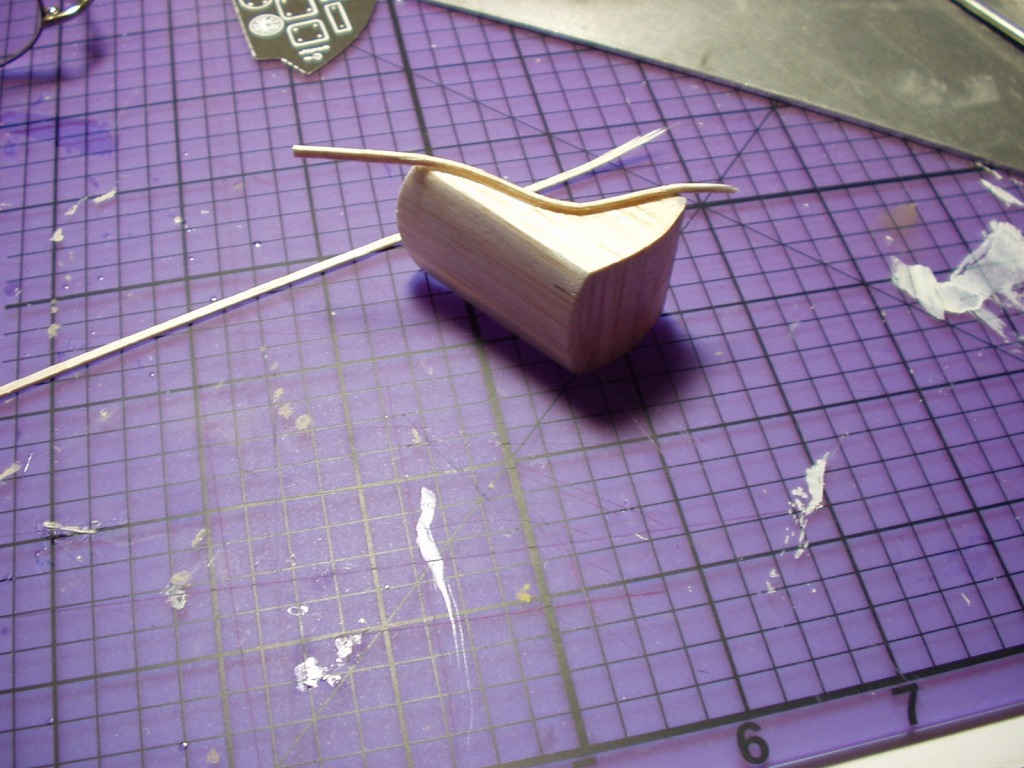
| I apologize for the volume of photos in the build. It's tedious but I thought I'd share whatever ideas I come up with during the build process. My reference photos show that the seat is light gauge steel; four sheets that were formed and then riveted together. The edges are rolled around a rod. I should have used solder wire to replicate that but I decided to try with balsa wood. Glued a strip of 1/32 x 1/16 along the edge. I had to soak the wood with water to get it to soften. I might try Windex with ammonia next. |
| plasticbuddha, Image # 4016 | 13 Aug 07 15:55 |

|
| plasticbuddha, Image # 4015 | 13 Aug 07 15:55 |
|
| poppy, Comment for image # 4010 | 13 Aug 07 11:58 |
| Looks even better. Save the first one for a fighter plane. Will work on most. |
| jgood, Comment for image # 4010 | 13 Aug 07 11:08 |
| Nice furniture PB. |
| plasticbuddha, Comment for image # 4011 | 13 Aug 07 00:35 |
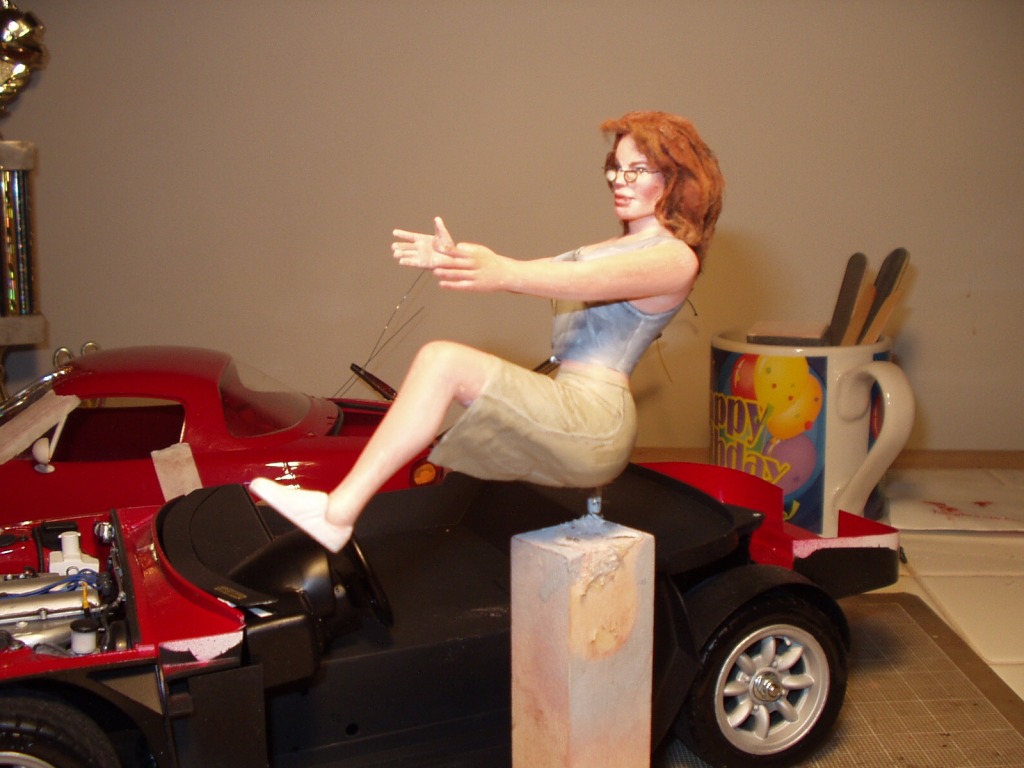
| Here's Bob's girlfriend.. Betty. (James, sorry about the non-aircraft nature of the pic!) |
| plasticbuddha, Image # 4011 | 13 Aug 07 00:34 |
|
| plasticbuddha, Comment for image # 4010 | 13 Aug 07 00:23 |
| Hi Dave!!! The Phantom is really looking great. From head on, it is really menacing. I could imagine a MIG pilot wetting his pants as he looks behind him! BTW, I love the paintings. On that note, YOU are the creative/artistic one! |
| plasticbuddha, Comment for image # 4010 | 13 Aug 07 00:21 |
| After a good deal of surfing, I finally found some photos pf the PT-17's cockpit. Turns out the kit's seats are nowhere near accurate. Just as well because Beautiful Bob's rear was a touch too big to fit the tiny seat. So I eyeballed things when I built another seat shell. More details need to be added to the shell but I think it's a little closer. |
| David Duckett, Comment for image # 4010 | 13 Aug 07 00:21 |
| The creative/artistic mind at work is a beautiful thing. |
| plasticbuddha, Image # 4010 | 13 Aug 07 00:17 |
|
| John M Oshust, Comment for image # 3985 | 12 Aug 07 18:30 |
| Then this is wonderful modification to poor plastic Guillows parts. |
| poppy, Comment for image # 3985 | 12 Aug 07 17:18 |
| John, I think this is the same figure, highly modified. |
| John M Oshust, Comment for image # 3985 | 12 Aug 07 16:52 |
| Being a novice at this, does Guillows provide figurines. My Camel came with a grostesque head and shoulders that could not have been of the proper scale. |
| poppy, Comment for image # 3985 | 12 Aug 07 16:16 |
| Jeez, this is the best rendition of a Guillows pilot I've ever seen. Fantastic!!!! |
| poppy, Comment for image # 3990 | 12 Aug 07 16:01 |
| Beautiful work!! I used the cardboard seat on mine. Wish now I had done it your way. Outstanding. Can't wait to see the finished plane. |
| plasticbuddha, Comment for image # 3990 | 12 Aug 07 15:05 |
| I never thought I'd be building wood furniture!! lol |
| Build Thread, Page :
1 2 3 [ 4 ] 5 6 (106 posts, 20 posts per page, 6 pages in total)
|
[ < Prev ] [ Next > ] |
