| Build Thread, Page :
1 2 [ 3 ] 4 (70 posts, 20 posts per page, 4 pages in total)
|
[ < Prev ] [ Next > ] |
| heywooood, Comment for image # 42239 | 05 Jun 20 23:23 |
| well Ed - the pictures don't tell the whole story. There was some effort and more than a few choice words tossed on the pile before I could take this photo. |
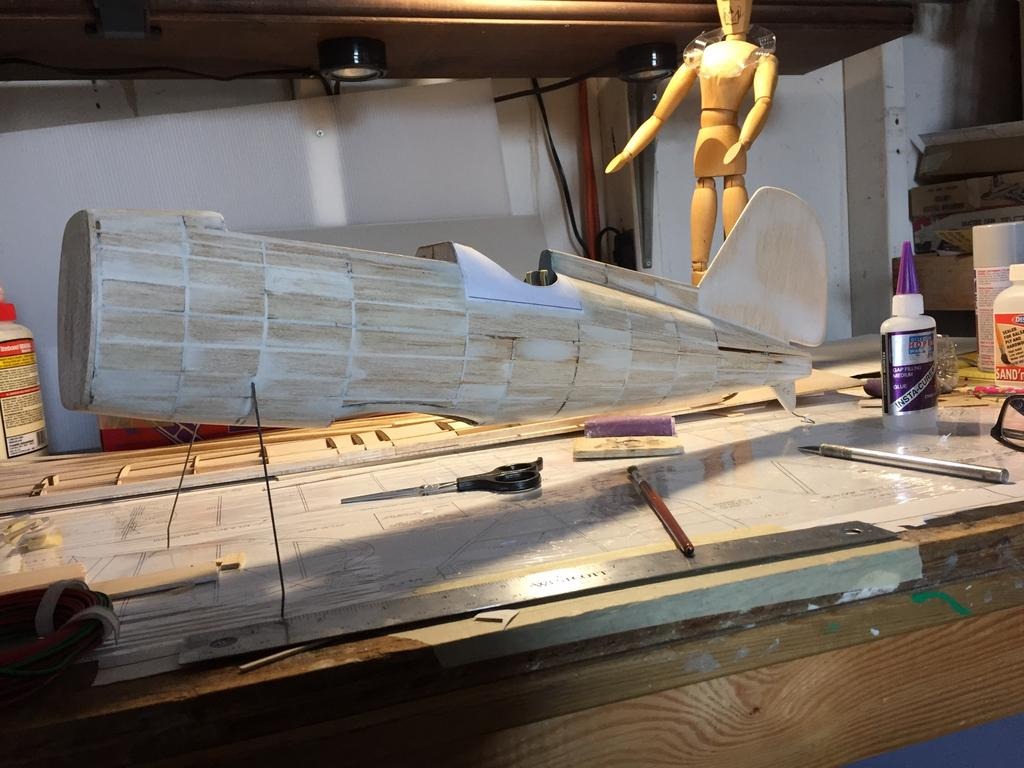
| heywooood, Comment for image # 42236 | 05 Jun 20 23:21 |
| it worked out ok in the end but it took some time to figure out that top rail. laying the balsa strips onto the top of the tubing with filler was the answer but I almost scrapped it before that solution came to me. |
| edbecky, Comment for image # 42239 | 05 Jun 20 07:38 |
| Really nice detail. You guys have so much patience. |
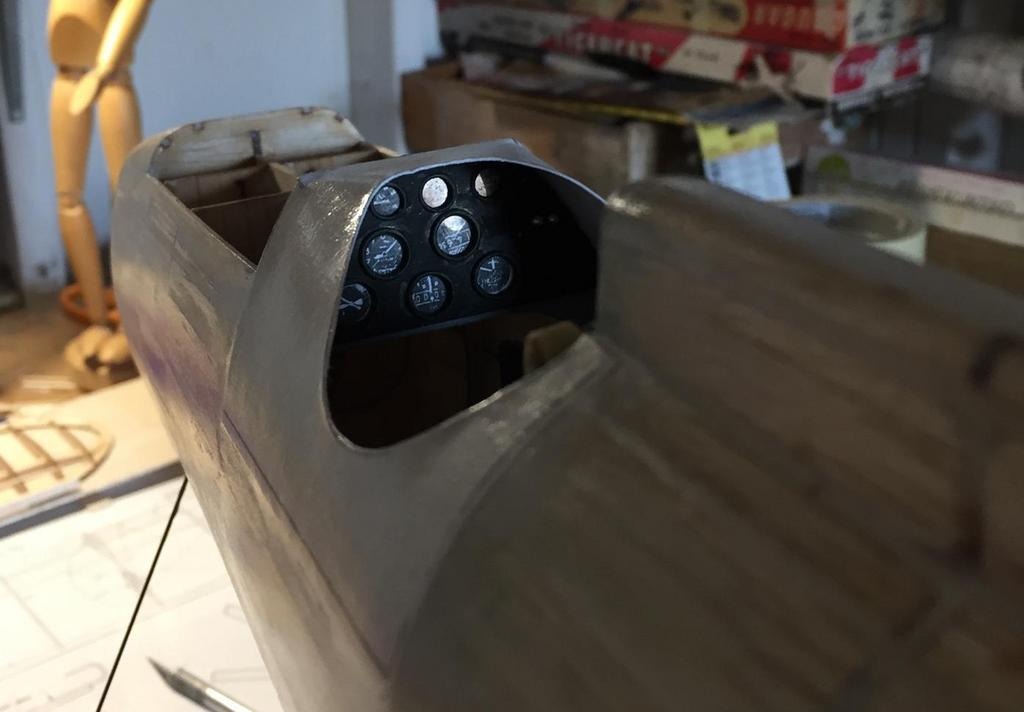
| heywooood, Comment for image # 42239 | 04 Jun 20 23:16 |
| I tried to get the grouping right - the three standard gauges along the bottom are not in a straight line but in an arc - with the two above them like the eyes of a ‘smilie face’ ..then four smaller dials in a straight line across the top of the panel. It took a few tries and a handful of unlawful words to get all the holes punched without cracking the birch ply. |
| heywooood, Comment for image # 42239 | 04 Jun 20 23:12 |
| I tried to get the grouping right - the three standard gauges along the bottom are not in a straight line but in an arc - with the two above them like the eyes of a ‘smilie face’ ..then four smaller dials in a straight line across the top of the panel. It took a few tries and a handful of unlawful words to get all the holes punched without cracking the birch ply. |
| Don C, Comment for image # 42239 | 04 Jun 20 16:25 |
| Great instrument panel!
|
| edtherenderman, Comment for image # 42236 | 04 Jun 20 16:13 |
| That really cool. Nice build out. |
| heywooood, Comment for image # 42236 | 04 Jun 20 15:12 |
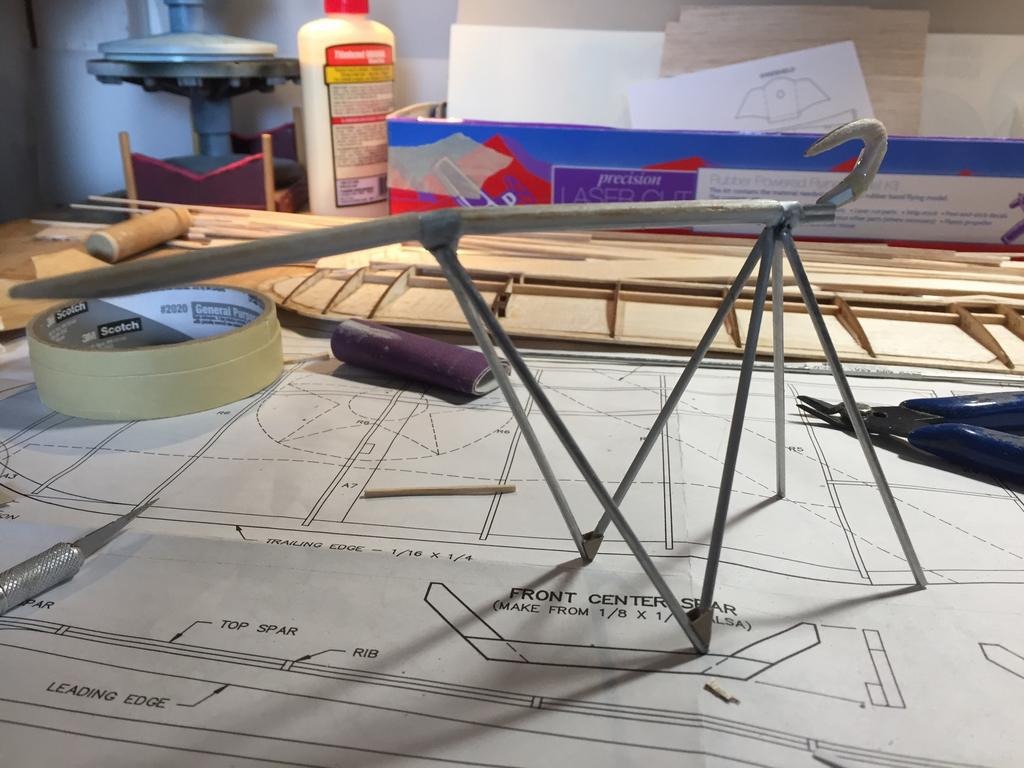
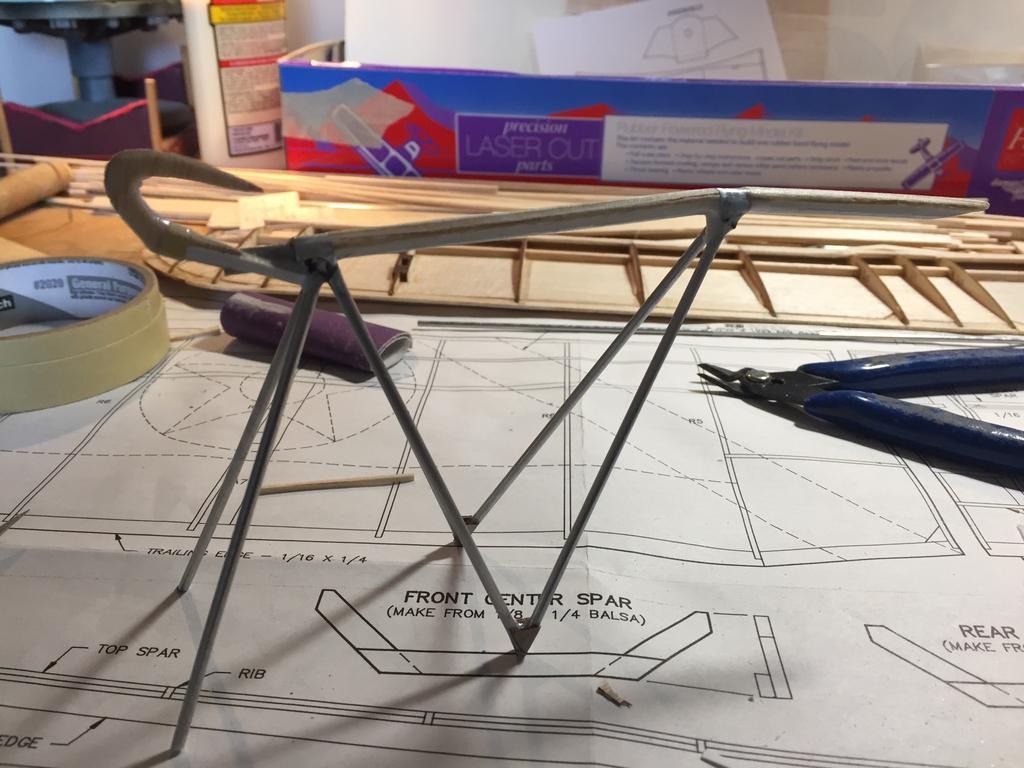
| 3/32" tubing was used for the framing and 1/8" tubing was used along with some 1/16" sq balsa strips and filler to make the top rail. The hook was fabricated using 1/64"thick birch ply sandwiched between two pieces of 1/16" thick balsa sheet stock. The gussets at the lower frame joints are from the birch ply. |
| heywooood, Image # 42239 | 04 Jun 20 15:09 |
|
| heywooood, Image # 42238 | 04 Jun 20 15:08 |
|
| heywooood, Image # 42237 | 04 Jun 20 15:08 |
|
| heywooood, Image # 42236 | 04 Jun 20 15:07 |
|
| heywooood, Image # 42217 | 29 May 20 09:34 |
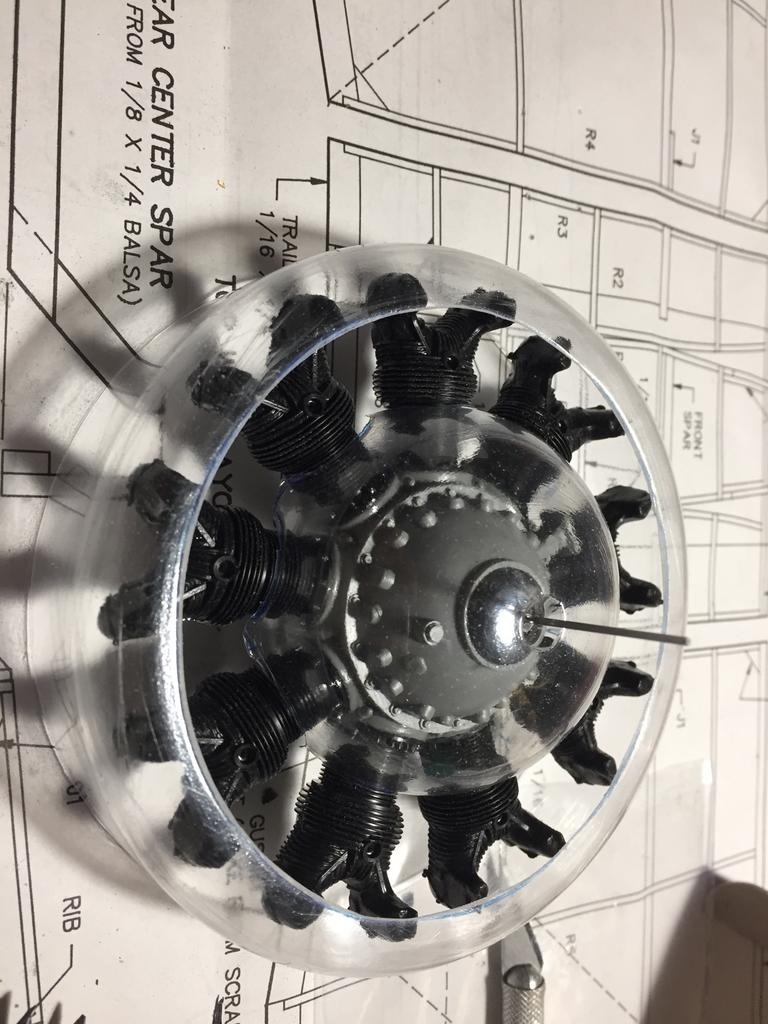
the sparrowhawk kit is 1/10 scale - the WB engine is 1/12 and it fits well behind the cowling and crankcase bell when built according to the WB plan so.. |
| heywooood, Image # 42216 | 29 May 20 09:32 |
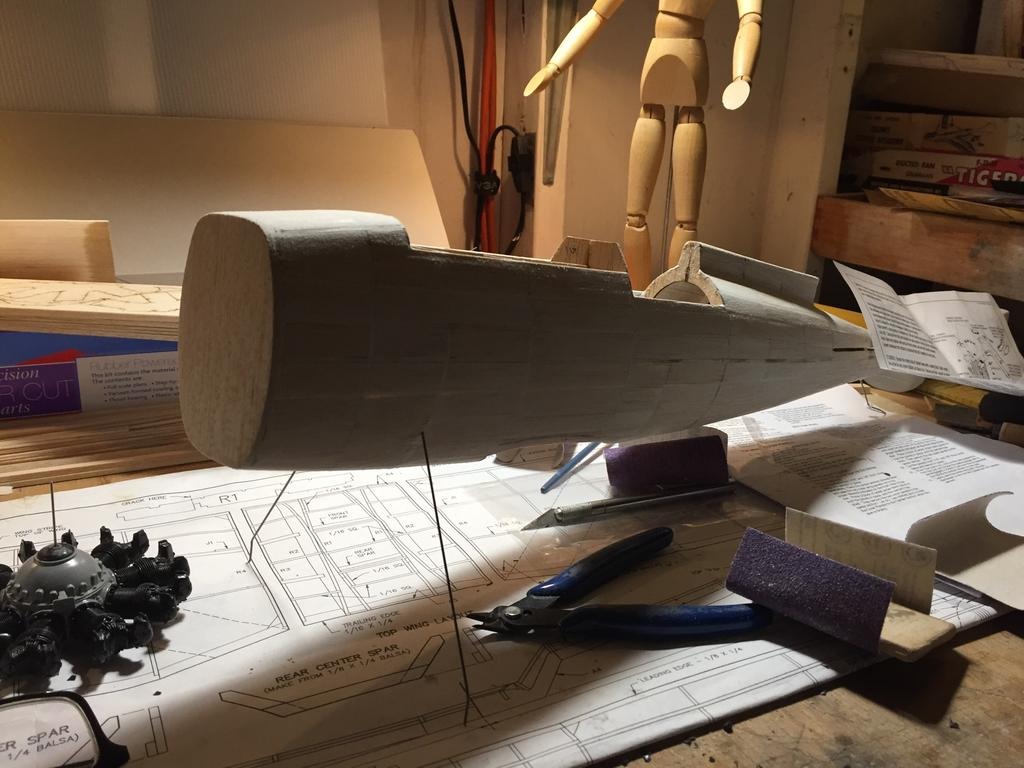
fuselage infill completed |
| heywooood, Comment for image # 41468 | 14 May 20 01:16 |
| Watching some old b/w footage of both the drop - and the snag.. plus some mess hall jawboning and dirigible wheelhouse pilotage. A different time but I think the depression led a lot of young fellers to try their hands at whatever came with a paycheck. I would love to see and hear the maneuver with modern HD cameras and sound. Even a CG representation of it would be something. |
| bobgood, Comment for image # 41468 | 13 May 20 20:02 |
| ... when the "lock-down" allows us to move that is! |
| bobgood, Comment for image # 41468 | 13 May 20 20:01 |
| I would love to see a DD or HW Tiger Moth build - or a DH 60 Gypsy Moth perhaps. Hope to,get back to some model building when we are settled in our new home in the Mojave. |
| bobgood, Comment for image # 41468 | 13 May 20 19:58 |
| Love the Sparrowhawk - not sure that I would be up for that hook-up job though! Making a good three-pointer in a Tiger Moth was just about my limit. |
| heywooood, Comment for image # 41468 | 12 May 20 23:49 |
| well - it ain't winter in San Diego no more (if ever) so this is next..and probably in this exact livery..maybe |
| heywooood, Comment for image # 41468 | 25 Oct 19 11:04 |
| I have three chapters in my encyclopedia of dirty words dedicated to the subject.. |
| Build Thread, Page :
1 2 [ 3 ] 4 (70 posts, 20 posts per page, 4 pages in total)
|
[ < Prev ] [ Next > ] |
