| Build Thread, Page :
1 [ 2 ] 3 4 5 (93 posts, 20 posts per page, 5 pages in total)
|
[ < Prev ] [ Next > ] |
| LASTWOODSMAN, Image # 37911 | 04 Feb 17 13:17 |
View of deeper "Dish" side |
| LASTWOODSMAN, Image # 37910 | 04 Feb 17 13:15 |

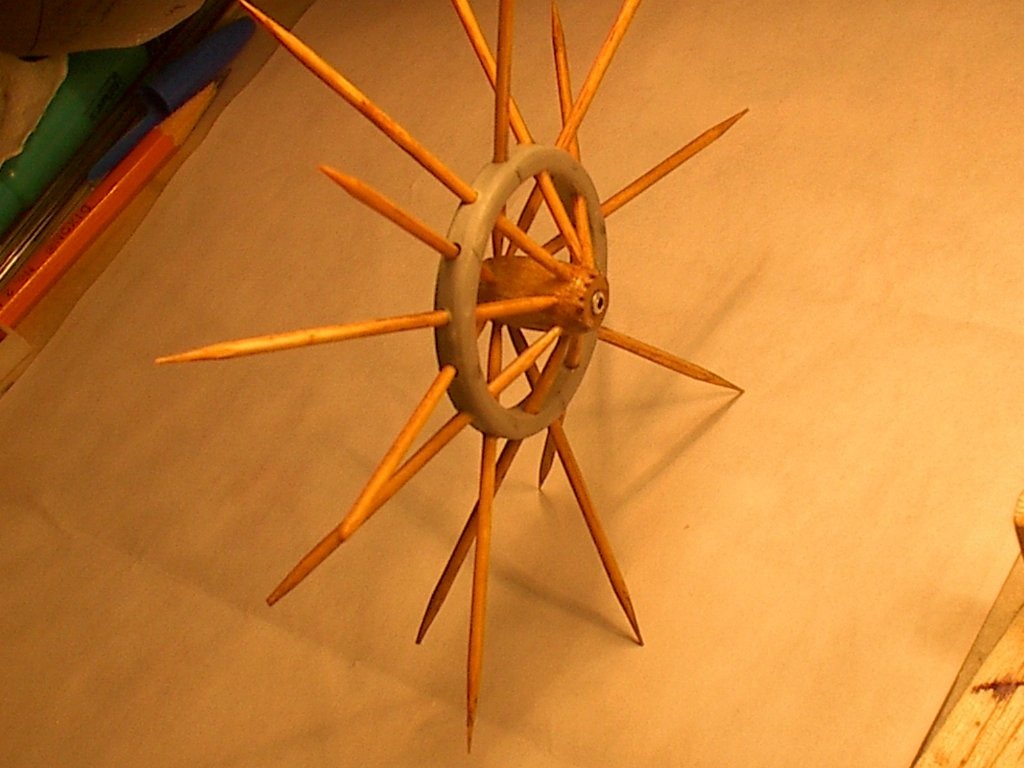
16 wooden spoke assymetrical "Dish" wheel. |
| LASTWOODSMAN, Image # 37909 | 04 Feb 17 13:11 |

Notice the "longer" shinny spacer sleeve, on the bottom of the axle of the wheel jig (right side of pic), used in order to make the "Shallower" dish of the wheel. |
| LASTWOODSMAN, Image # 37908 | 04 Feb 17 13:06 |

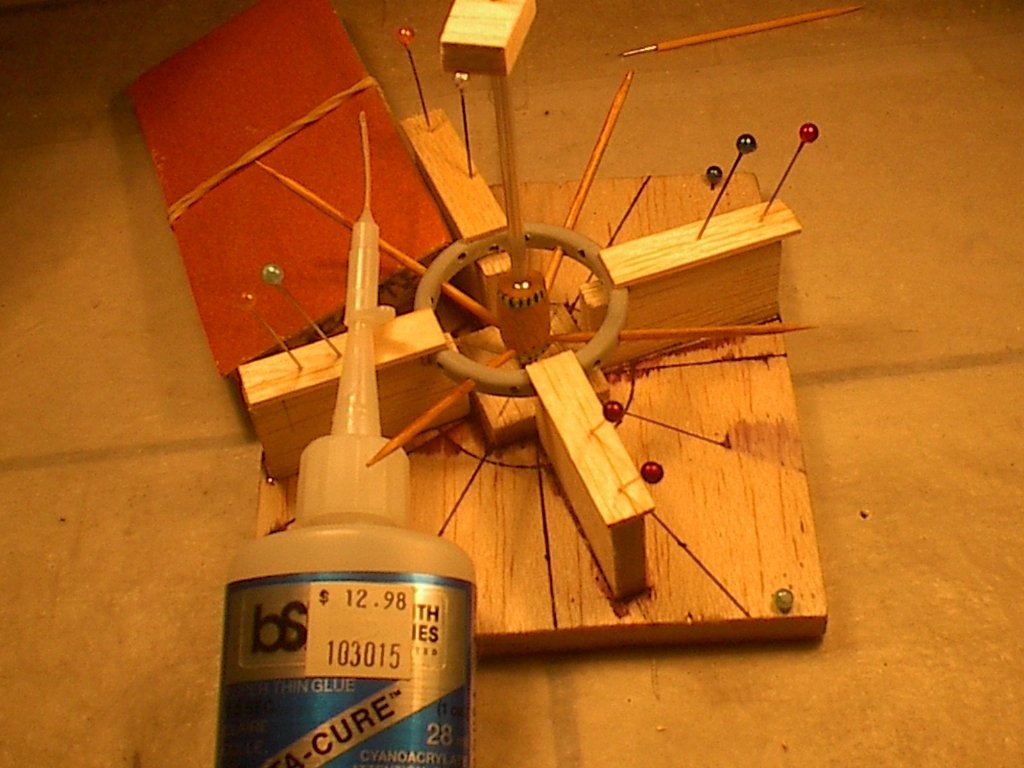
All spokes are now in and glued with tiny drops of super thin CA glue. |
| LASTWOODSMAN, Image # 37907 | 04 Feb 17 13:04 |

This is the other "Shallower Dish" side of the wheel - spokes being added - so many spokes close together is causing interference with the four wheel rim mounts of the jig. |
| LASTWOODSMAN, Image # 37906 | 04 Feb 17 12:59 |

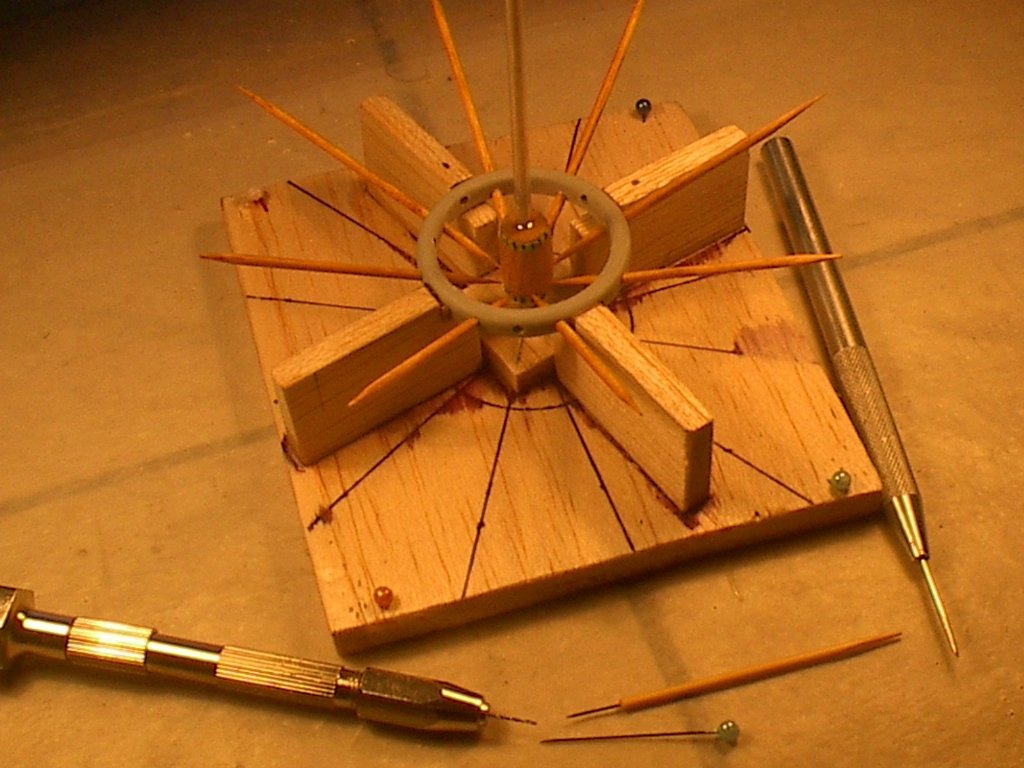
This is the "Deeper Dish" side of the wheel - 8 spokes glued in place - notice the "shorter" shinny spacer sleeve on the bottom of the axle of the wheel jig (left side of pic), which lowers the hub from the wheel rim that is positioned on the jig, in order to get a deeper dish when installing the spokes at a downward angle from the wheel rim. |
| LASTWOODSMAN, Image # 37905 | 04 Feb 17 12:50 |
I used an "extender tip" on the CA glue bottle to place a tiny drop of glue where the tenon spoke tip went into the mortise hole of the hub. It worked at first, then plugged up - anyone know how to keep them from plugging up? |
| LASTWOODSMAN, Image # 37904 | 04 Feb 17 12:46 |

Here is that tool (upper right - shiny pin at the tip of a toothpic) making a pin hole into the balsa hub. Then I pushed the long sharp point, of a stained finished toothpic spoke, through the felloe hole of the wheel rim, and into the starter pin hole in the hub, twisting and spinning the spoke into the hub pin hole. I then removed the spoke and cut a little bit off of the pointy tip of the toothpic spoke, stuck it back in, pushed it into the enlarged hub hole, and spinned it nice and tight, and glued the rim felloe hole with the toothpic in it with super thin CA glue. |
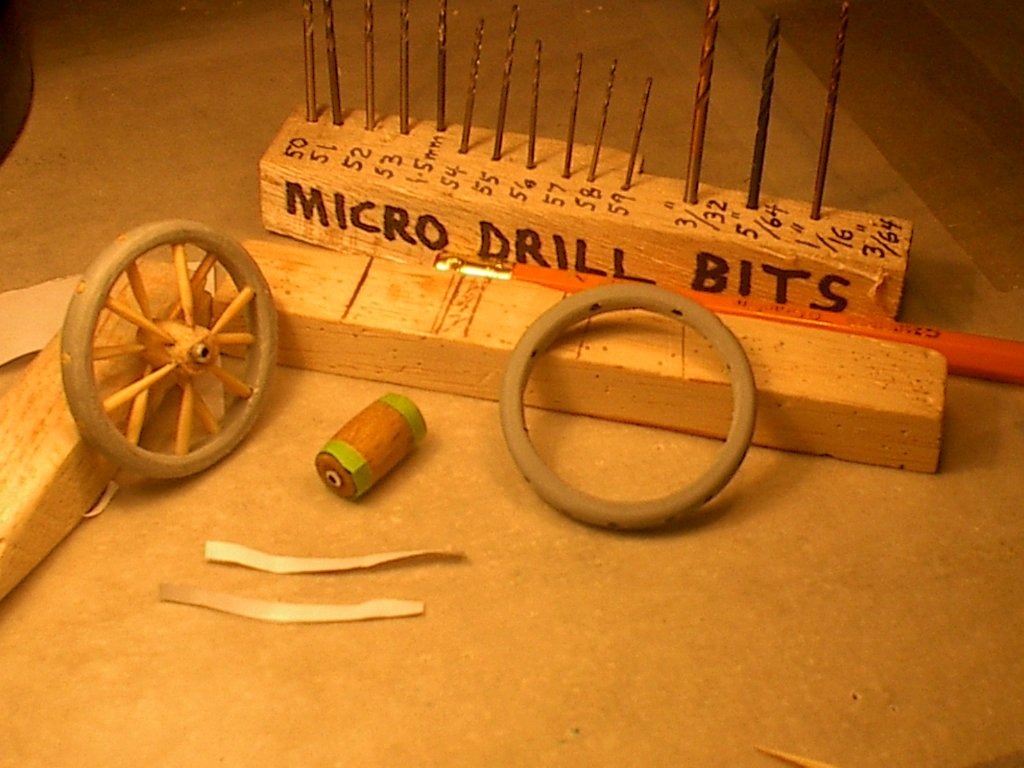
| LASTWOODSMAN, Image # 37903 | 04 Feb 17 12:30 |
Checking the allignment of the spokes to the hub attach points. Since the wheel hub was soft balsa, I did not have to actually drill the tiny holes in the hub. I started the mortise holes in the hub with the point of a round head 0.023" dia. pin. I made a little tool to push the pin point into the hub for a starter hole. I cut off the tip of a spare toothpic, drilled a 0.025" hole with a #72 drill bit and pin vise, into the toothpic and cut off a piece of the tip of the round head pin, and CA glued it into the end of the toothpic (tool at bottom of pic). |
| rayl, Comment for image # 37882 | 31 Jan 17 17:50 |
| If only we had known enough then to learn what we need to know now. I think that some famous person said that. |
| John M Oshust, Comment for image # 37882 | 31 Jan 17 15:10 |
| Godfrey Daniels.....it worked!!! |
| Don C, Comment for image # 37882 | 31 Jan 17 12:29 |
| Looks like it paid off. |
| LASTWOODSMAN, Comment for image # 37876 | 31 Jan 17 12:23 |
| Since they are larger cousins of bats - they taste like bats. |
| LASTWOODSMAN, Comment for image # 37875 | 31 Jan 17 12:21 |
| JohnO - how much is that bridge you want to sell me. -{:)]> |
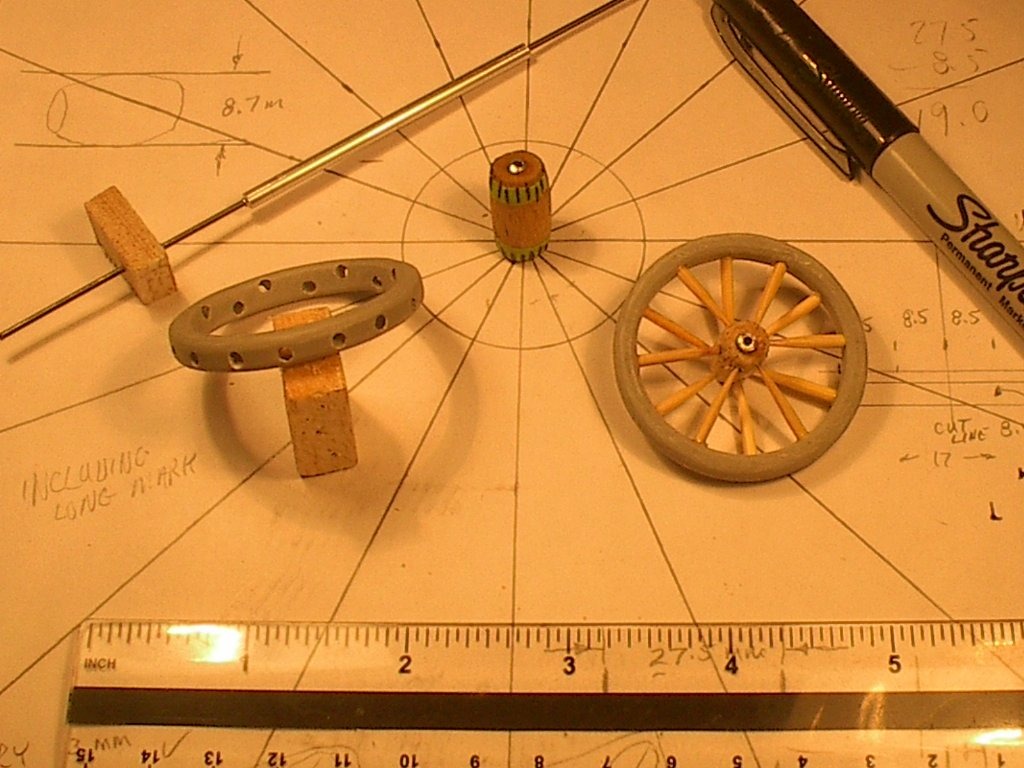
| LASTWOODSMAN, Image # 37885 | 31 Jan 17 12:16 |
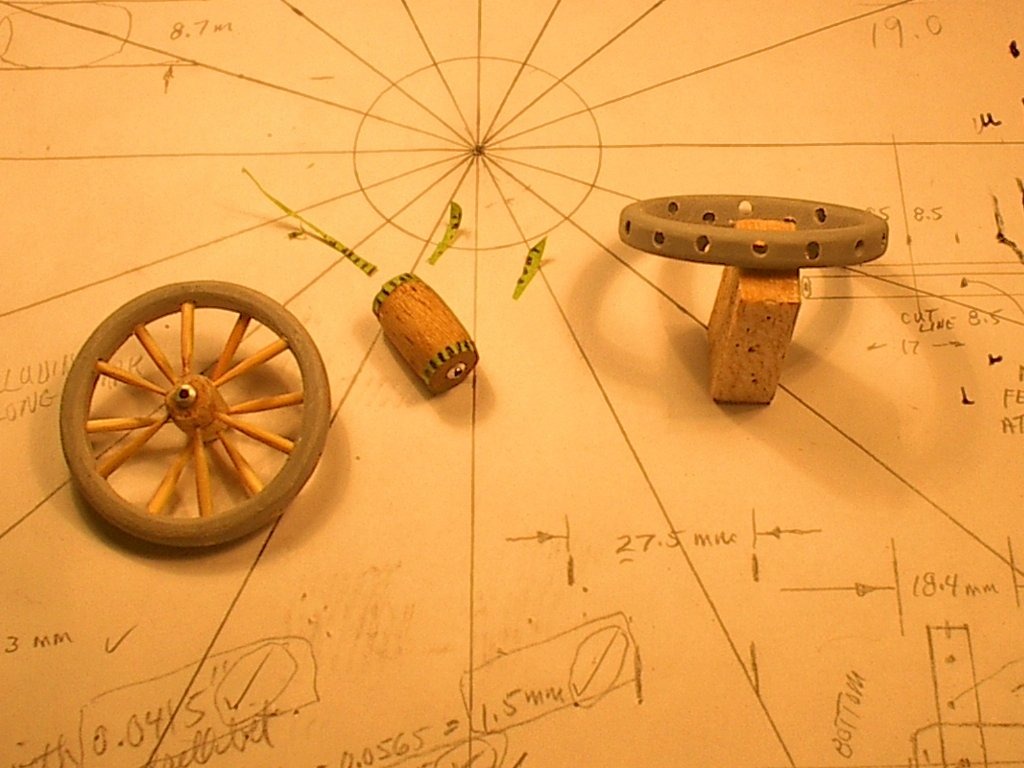
The slices of masking tape are cut off - the spokes will now enter into the balsa of the hub, right beside the masking tape. At left is the finished old 12 spoke wheel, and at the right is the new 16 spoke hole rim for comparison. |
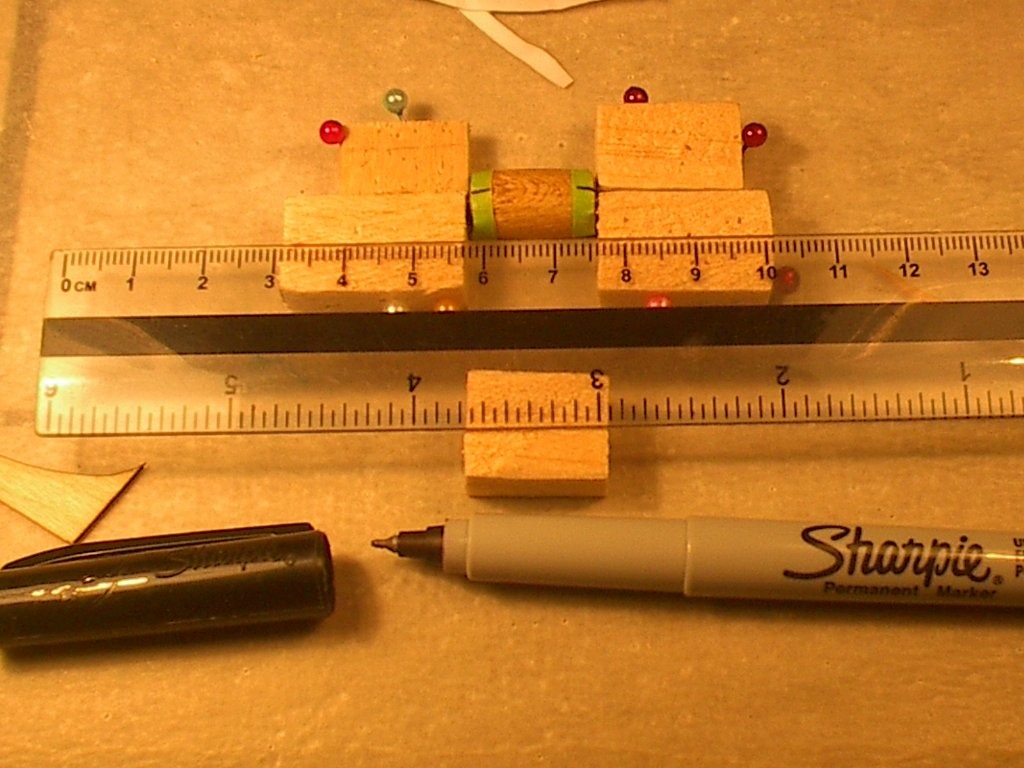
| LASTWOODSMAN, Image # 37884 | 31 Jan 17 12:12 |

I then put the hub and wheel rim and spokes back into the wheel jig to check the allignment and attachment locations. I had to cut off a thin strip of the masking tape, so that the spokes would enter the balsa, not the tape. |
| LASTWOODSMAN, Image # 37883 | 31 Jan 17 12:08 |
I finalized the dashes with a Sharpie again to make sure they were straight with each other. |
| LASTWOODSMAN, Image # 37882 | 31 Jan 17 12:06 |
I then stuck the hub onto the Master Circle layout to mark the rest of the dashes for the spoke attach points. I would like to thank my three great inspiring Math Teachers in High School - Mr. Swintak, Mr. Balkwill, and overbearing Mr. Gallie (my pet peeve in Gr. 13) who made darn sure you knew your stuff! - OH! the homework ... |
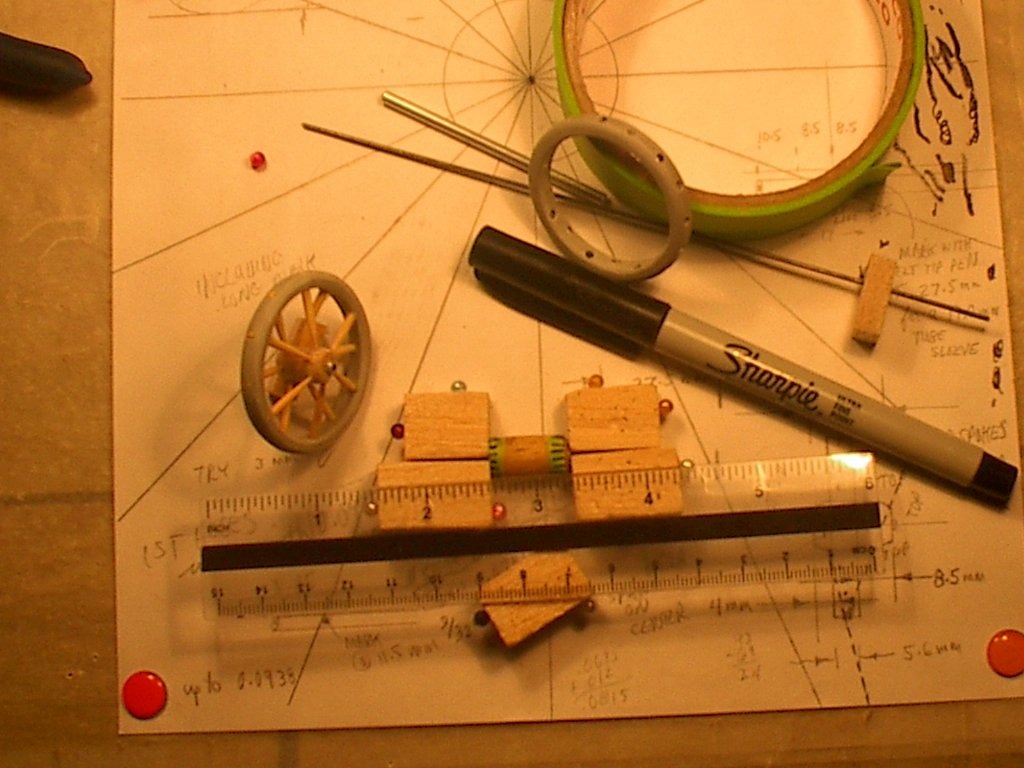
| LASTWOODSMAN, Image # 37881 | 31 Jan 17 12:01 |
I then placed the hub in the middle of a small 3/64" drill bit, and blocked up the drill bit ends, and the hub, with little blocks of balsa, and marked two even dash mark locations in black Sharpie Marker, onto the green masking tape templates. |
| LASTWOODSMAN, Image # 37880 | 31 Jan 17 11:57 |
The two green masking tape templates were then stuck on the wheel hub ends. |
| Build Thread, Page :
1 [ 2 ] 3 4 5 (93 posts, 20 posts per page, 5 pages in total)
|
[ < Prev ] [ Next > ] |
