| Build Thread, Page :
1 2 3 [ 4 ] 5 (93 posts, 20 posts per page, 5 pages in total)
|
[ < Prev ] [ Next > ] |
| LASTWOODSMAN, Image # 37831 | 26 Jan 17 11:13 |
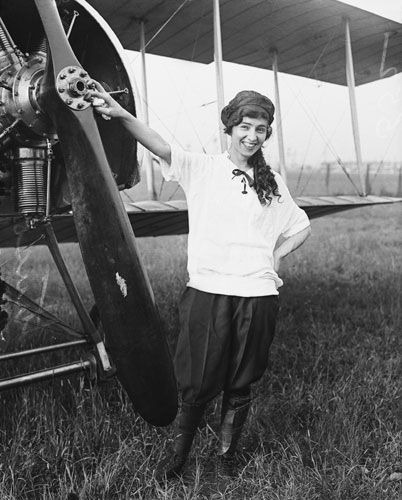
REMEMBERING KATHERINE STINSON During WW1, she flew a Curtiss JN-4D for the American Red Cross, having been twice refused as a fighter pilot. In June 1916, she also flew into Western Canda at Calgary, Edmonton, and Winnipeg. She took a boat with her plane to the big cities in Japan and China to flyl exhibitions and raise money for the Red Cross. In April 1917, the US entered the war, and she returned to the US with over $2,000,000 in charitable donations for the Red Cross. https://www.youtube.com/watch?v=s-RL4Gu07J4 |
| LASTWOODSMAN, Image # 37830 | 26 Jan 17 11:03 |
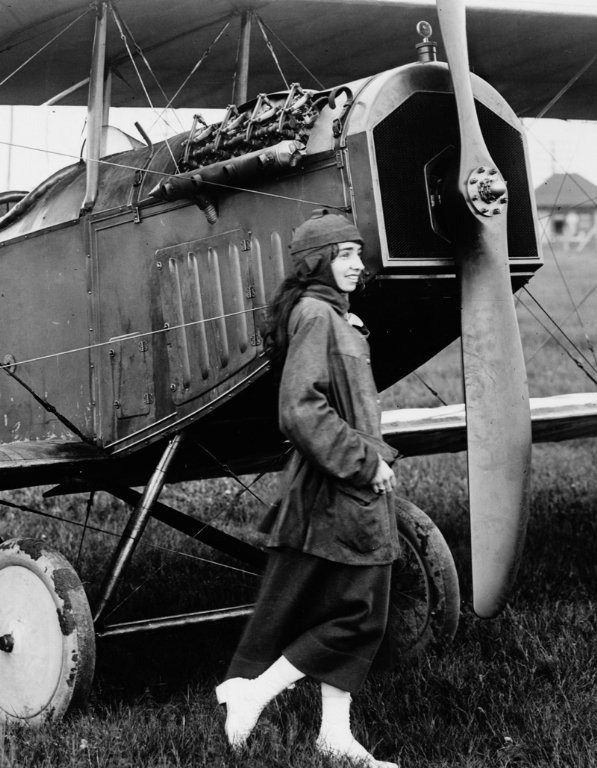
REMEMBERING KAHTERINE STINSON She was the 4th woman in the US to obtain a Pilot's Certificate on July 24, 1912 at age 21. By 1913, at age 22, she flew a Wright Model B Flyer on Exhibitions Circuits, billing herself as the "Flying Schoolgirl". All of her stunt flying was done in A/C using the Wright control system, which uses two side mounted levers for pitch and roll, and top mounted controls for throttle and yaw. By 1914 she was flying all over the US. On July 18, 1915 she was the first woman to perform a "LOOP" in an early "Laird" biplane. She was also the first woman to flly at night. https://www.youtube.com/watch?v=s-RL4Gu07J4 |
| LASTWOODSMAN, Image # 37829 | 26 Jan 17 10:50 |
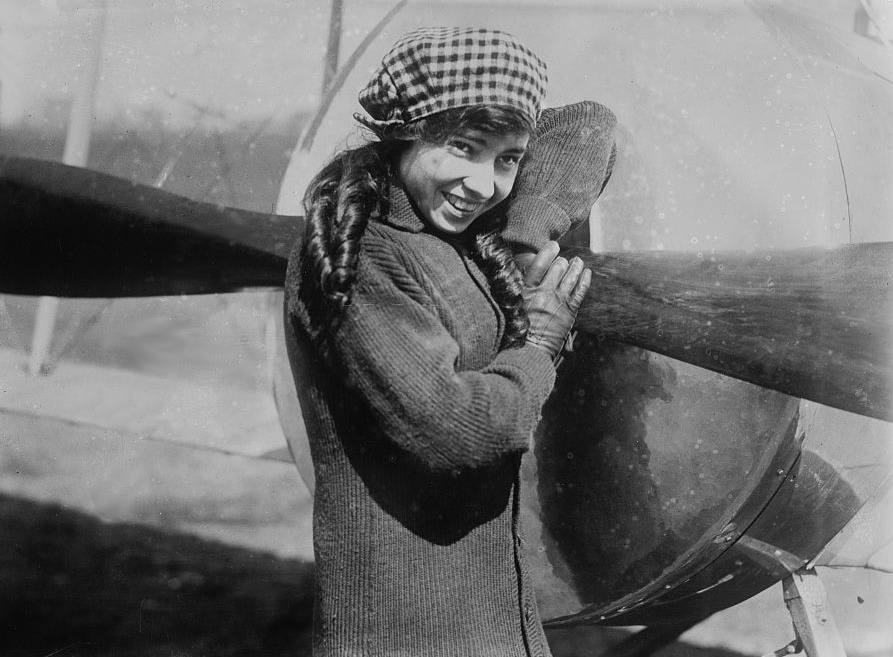
REMEMBERING KATHERINE STINSON Feb 14, 1891 - July 8, 1977 at age 86. She was a Pioneer Aviatrix and Stunt Flyer, who, by the end of 1915 at age 24, had become a national flying sensation. Her flying inspired her younger brothers to form the Stinson Aircraft Company. She first became interested in flying when she took her first ride in 1912 from Jimmy Ward. She took fllying lessons at the Wright Flying School and soloed after 4 hrs of instruction. https://www.youtube.com/watch?v=s-RL4Gu07J4 12 min video of the Stinson family |
| rayl, Comment for image # 37827 | 25 Jan 17 20:09 |
| This is going to get interesting. |
| LASTWOODSMAN, Image # 37827 | 25 Jan 17 19:36 |
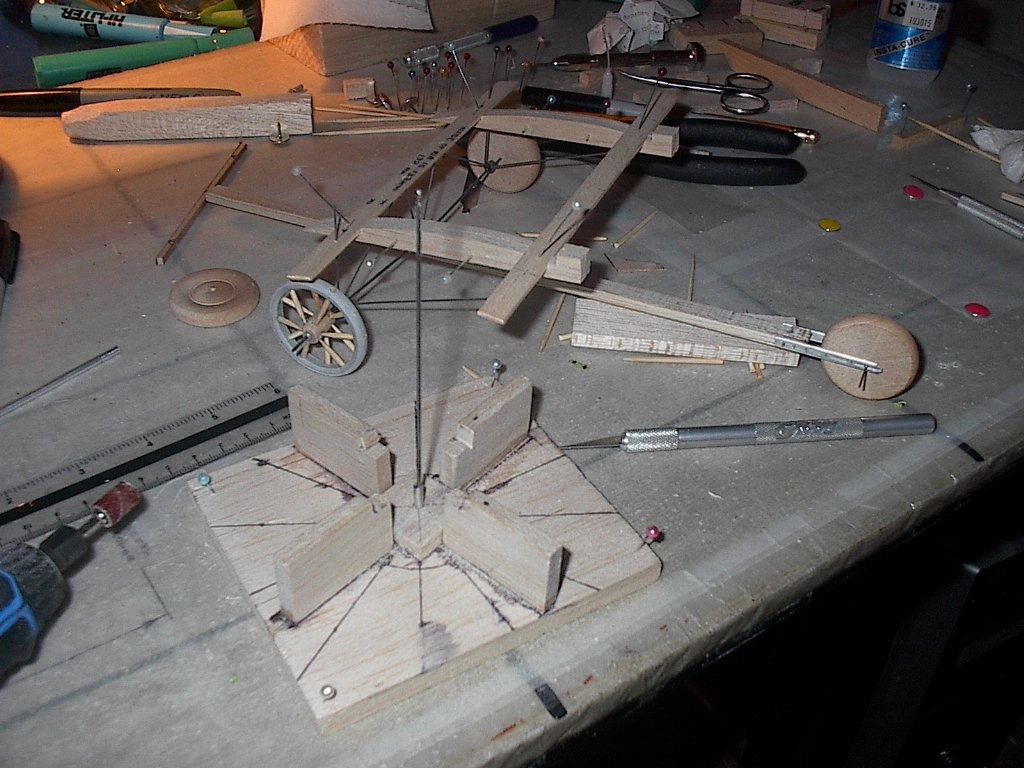
This is what the 12 spoker looks like on the undercarriage. I will try to make a 16 spoke wheel tomorrow. |
| LASTWOODSMAN, Image # 37826 | 25 Jan 17 19:33 |
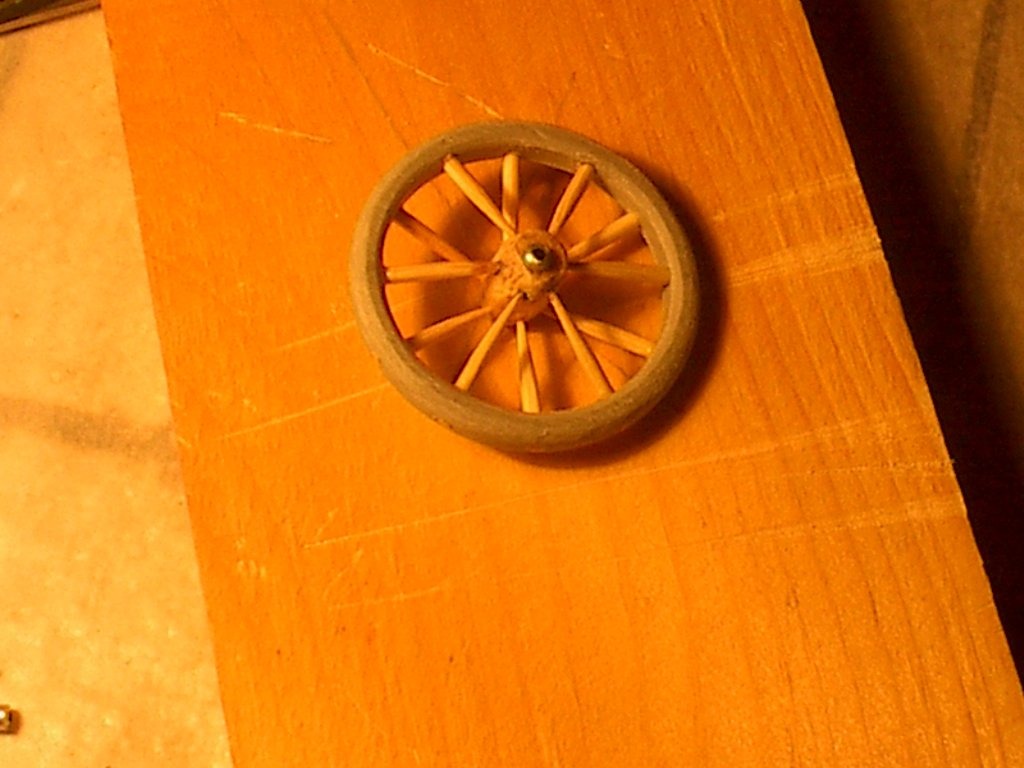
The wheel has 12 spokes - six on each side and equal "dishing". The kit supplied hardwood wheels are flat on one side and weigh 5.0 grams. I cut up (by hand!) a whole bunch more rims of 6, 7, and 8 mm widths. This wheel is 5.7 mm width. |
| LASTWOODSMAN, Image # 37825 | 25 Jan 17 19:26 |
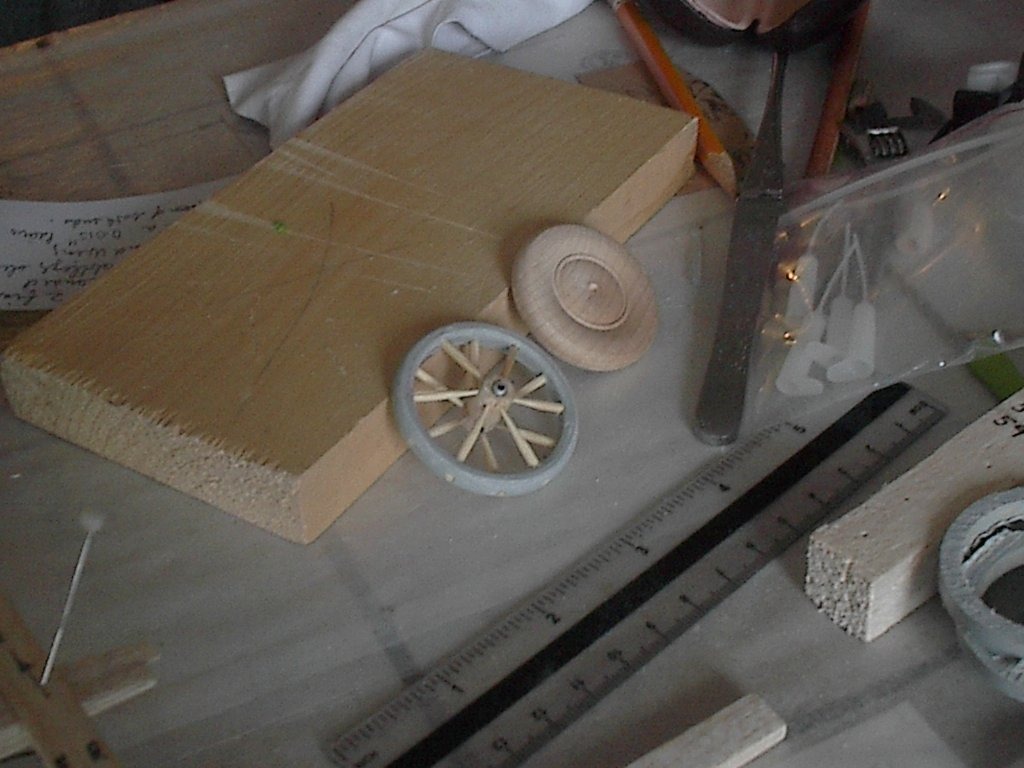
This wheel has 0.080" diameter hardwood toothpics for spokes, wheel hub is soft balsa, the sleeve bushing to hold the axle is 1/8" OD Aluminum tube (1/16" hole), the rim is 1 5/8" OD PVC gray plastic plumbing pipe having a wall thickness of 0.152". |
| John M Oshust, Comment for image # 37824 | 25 Jan 17 19:25 |
| This is looking great! |
| LASTWOODSMAN, Image # 37824 | 25 Jan 17 19:18 |
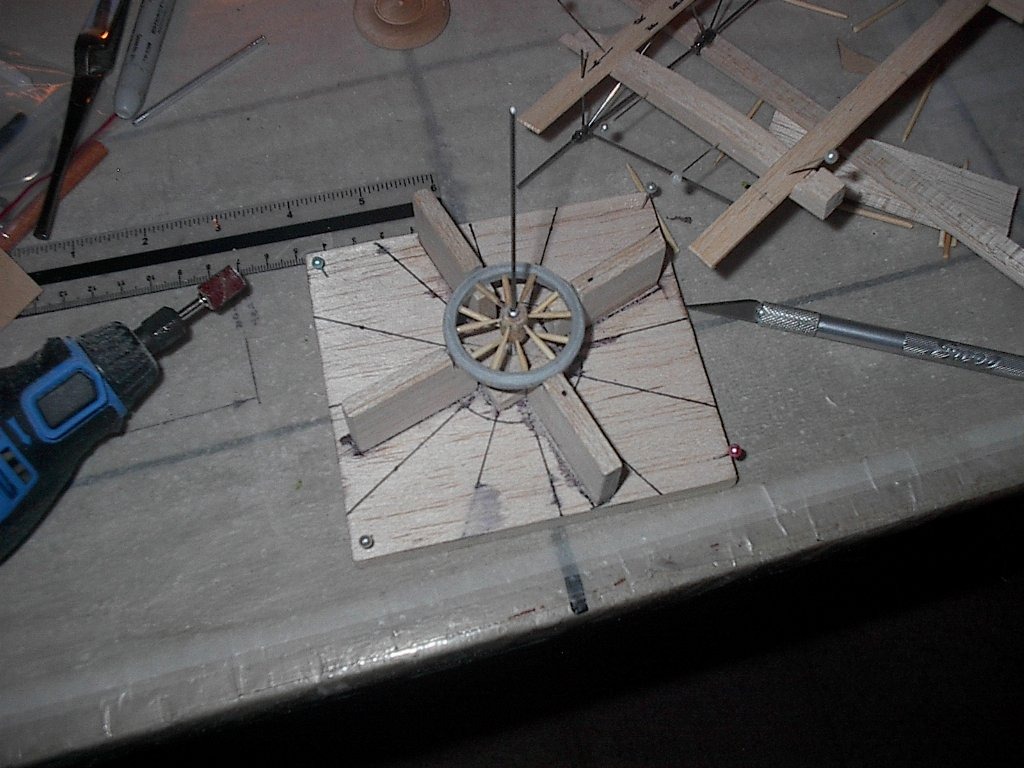
My first try at a wooden spoke wheel resulted in dismal failure. Then I tightened up the jig securely and it worked better. |
| rayl, Comment for image # 37805 | 23 Jan 17 16:07 |
| Another good example of re-purposing. Thanks Richard. |
| LASTWOODSMAN, Comment for image # 37805 | 23 Jan 17 15:56 |
| RayL - The glass square rectangle shaped "Compliments" Instant Coffee jars have a round opening at the top. It is always sealed with a thin, aluminum on one side, and a coated shiny brass color on the other, a very thin - 0.001" and bends the same as tin foil - "freshness seal" that I keep cutting out with a sharp knife and saving - take a piece of printer paper, wrap it around the strut end, mark the lines to cut with a pencil, cut it out, test it again, mark up s better one, over and over until you have a nice blank, trace the blank out onto the back of the "freshness seal", cut it out and CA glue it onto the end of the strut - it wraps around nicely holding its shape. |
| rayl, Comment for image # 37805 | 23 Jan 17 12:56 |
| Richard: What did you use to simulate the brass sleeves on the struts?? |
| rayl, Comment for image # 37803 | 23 Jan 17 12:55 |
| Cool Plan!!!!!!!! |
| LASTWOODSMAN, Image # 37806 | 23 Jan 17 11:02 |
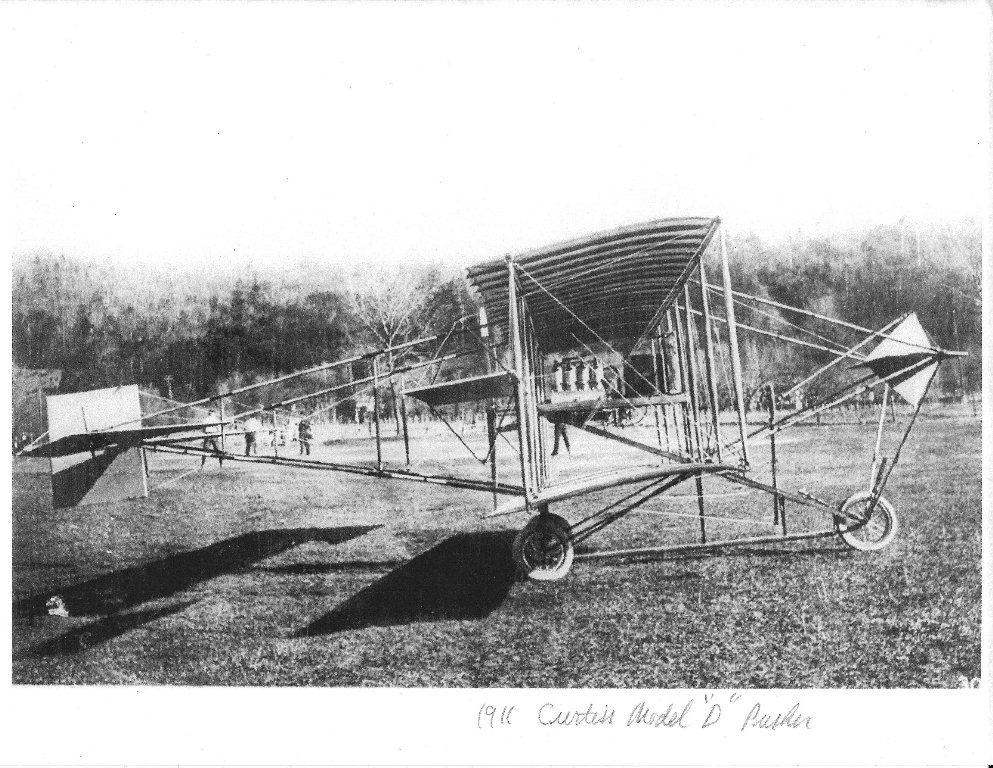
Another pic of the Curtiss Model "D" Pusher. |
| LASTWOODSMAN, Image # 37805 | 23 Jan 17 10:58 |
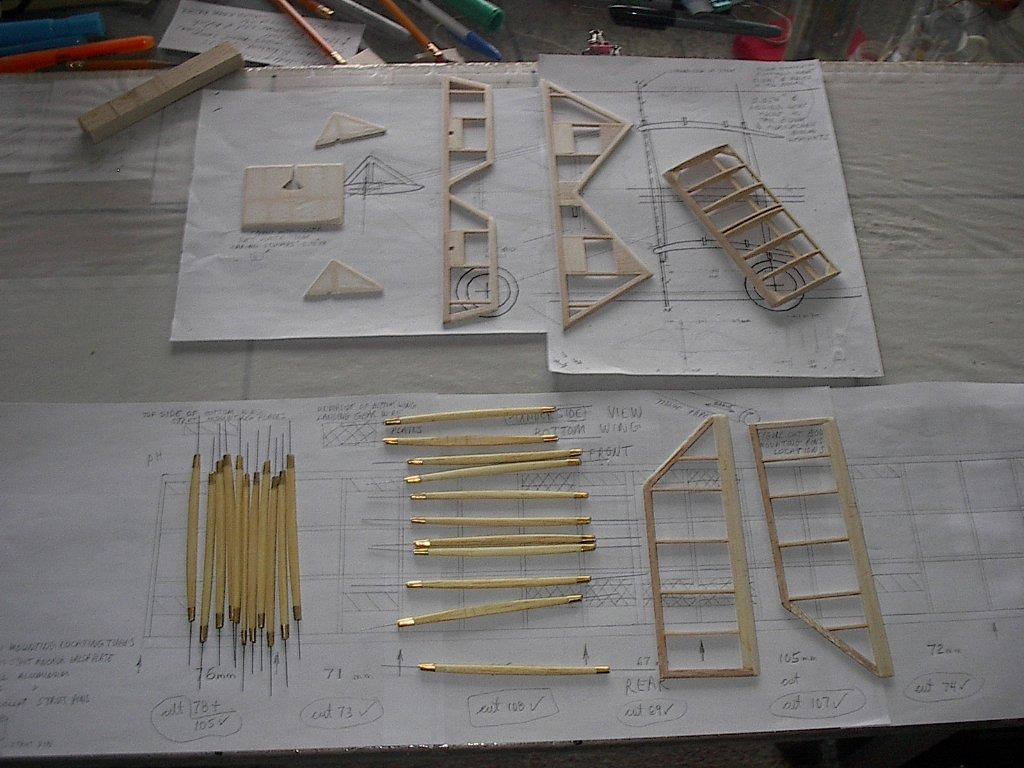
Other components completed - Canard Foreplane wing, two triangular fins for the canard, Rudder, Stabilizer, Elevator, and two Ailerons. The Wing Struts all have a 0.015" piano wire sticking out from both ends. |
| LASTWOODSMAN, Image # 37804 | 23 Jan 17 10:46 |
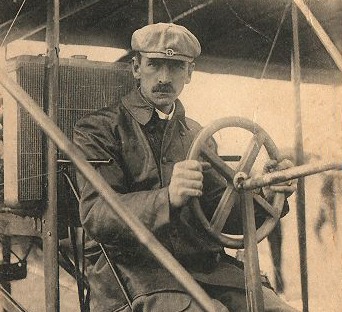
Here is a pic of Curtiss showing his shoulder cradle frame which was hinged at the bottom, allowing him to "push/lean" left or right with his shoulders, to push or pull the aileron control wires attached near the top of the cradle. |
| LASTWOODSMAN, Image # 37803 | 23 Jan 17 10:41 |
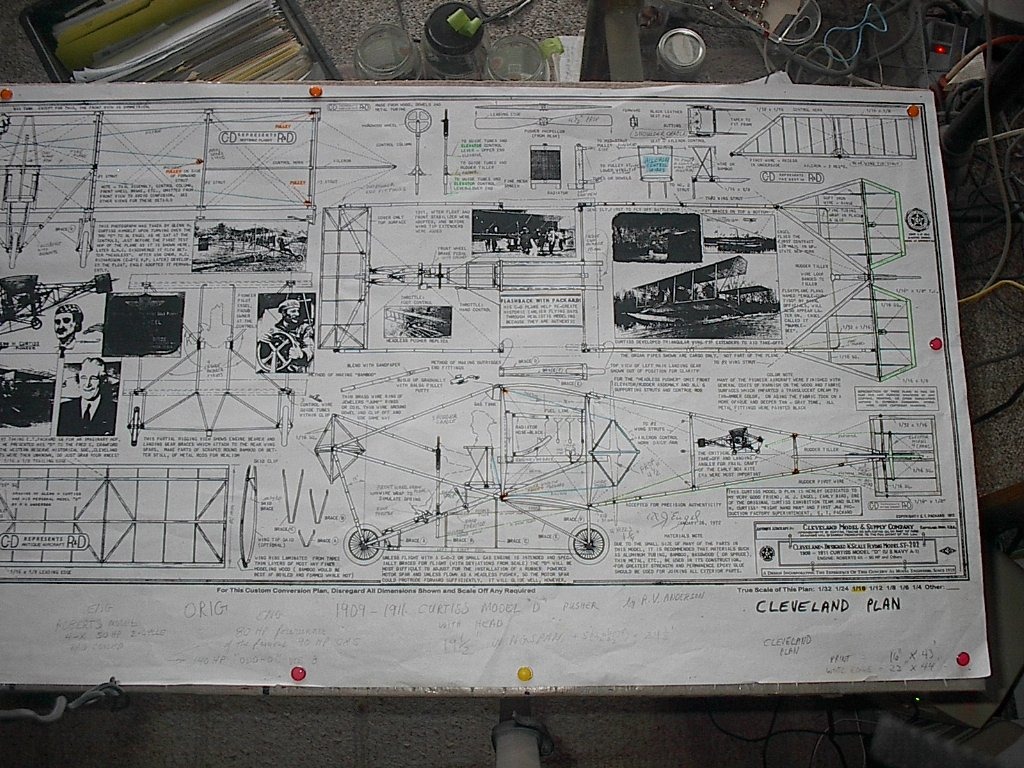
This is the right hand side of the big "Cleveland" plan. There are no Rudder pedals in this version, only a Rudder Tiller that works off of control wires attached to the control column stick. It also shows details of the "Shoulder Cradle" yoke harness that controled the interplane Ailerons positioned between the wings, and Curtiss' ingenious method of contol wires and pulleys connecting to the Aileron control horn drive arms. |
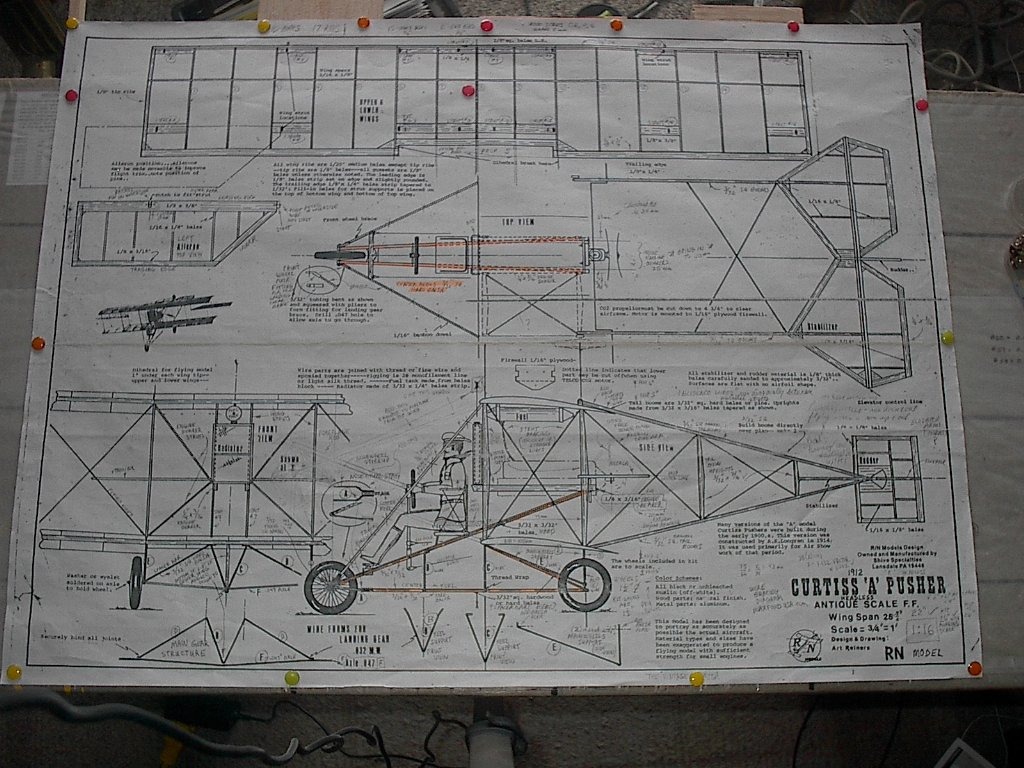
| LASTWOODSMAN, Image # 37802 | 23 Jan 17 10:31 |

This is the left side of the "Cleveland" Plan that I bought from John Jacox, which shows a foreplane Canard wing, hence the term "Headed" pusher - a very detailed plan, which also shows the Raoberts 4-X, 50 hp, two cycle engine which I will try to replicate. This plan is also printed out in 1/16 scale. Wings are 19 1/2", and 24 5/8" with the ailerons sticking out past the wing tips. |
| LASTWOODSMAN, Image # 37801 | 23 Jan 17 10:20 |
Scratch Built Curtiss Pusher 25" is built using an RN printwood kit and plan - scale 1:1/16 or (3/4" = 1 foot) Wings are 22" with the Ailerons sticking out past the wing ends -25 3/4". This plan has no "Canard" foreplane wing - hence the term "Headless". I intend on making a canard version, so I bought a Cleveland Plan also. |
| LASTWOODSMAN, Comment for image # 37790 | 21 Jan 17 21:17 |
| Thanks Biplane guy - There is a lot of rigging and control cables and pulleys and guide tubes and where they attach and how they work - it took me ages to figure it all out. With an open fuse framework on this box-kite, I plan on putting them all in. |
| Build Thread, Page :
1 2 3 [ 4 ] 5 (93 posts, 20 posts per page, 5 pages in total)
|
[ < Prev ] [ Next > ] |
