| Build Thread, Page :
[ 1 ] 2 3 4 5 (95 posts, 20 posts per page, 5 pages in total)
|
[ Next > ] |
| Skyediamonds1985, Comment for image # 36118 | 27 May 16 14:58 |
| Goldenboot: thank you for your comment. We all learn from each other. I too, have learned much since joining this site two years ago; both from the experienced modelers and those making mistakes. I try to understand their mistakes and learn from them. We're all here to help each other. You did a great job on your S.E. 5. |
| goldenboot, Comment for image # 36118 | 27 May 16 09:19 |
| Thanks both of you for your expert advice. I think I'll just use the usual method and try the plywood method on a different model later. Without this website and the wounderful commentary from The experienced modlers, i would never have completed even my first balsa model kit. |
| Skyediamonds1985, Comment for image # 36118 | 26 May 16 14:50 |
| I have to agree with DD on the feathering using 1/16" balsa. He's also correct in pointing out that Pfinn used plywood in his previous postings of this build. Like Pfinn, I decided early on to use 1/64" plywood wrapped around the fuselage cowling and top decking surrounding the cockpit area on my S.E. 5. This ply was thin enough to literally be wrapped around like paper, yet strong enough to compensate for it being so thin. Still had to wet it to help with the bending and wrapping. I also had to compensate for the added thickness of the ply, but at 1/64th, this was almost a none-issue. I covered the ply with a heat-shrink film so I can't comment on the surface finish for ply. For your Spitfire, as DD pointed out, you're looking at several areas of compound curves, especially near the nose area. If you elect to use the 1/64" ply, it will help take care of most of the fuselage, but you'll still have to do some creative wrapping or infilling at the nose as well as compensating for the thickness of the ply however thin it may be. Great job on the B-2 Miss Los Angeles by the way.!! |
| David Duckett, Comment for image # 36118 | 26 May 16 06:11 |
| You could but......feathering into the cowl is asking for trouble. To use 1/16" will require that each former has 1/16" removed from the perimeter and the stringers repositioned. It will also require several panels, just like a real one, and I would think that each one would need to be formed wet so that when used they will be completely dry. Another thing to consider is that panels of wood like that can only be glued to the frame at the edges/keels. If you glue it to the stringers as well, you take the chance that the wood will adhere just like tissue does and will have distinct sides instead of being round. The reason you need to do it in sections is that balsa does not bend in all directions at once and the Spitfire's fuselage isn't exactly a tube.
I know nothing about plywood but my guess would be even more trouble.
I believe Poppy has far more experience in this kind of construction and can provide some insight. |
| goldenboot, Comment for image # 36118 | 25 May 16 11:45 |
| Is it possible to use the same procedure to cover the fuselage of a spitfire. Can I use 1/16 balsa and feather it at the cowl? Or is 1/64 plywood the only option for using this technic? I think DD previously said 1/32 balsa doesn't sand well., and I agree after trying it on the topside of the wing. Don't like the thought of filling in all those little squares. |
| David Duckett, Comment for image # 36114 | 24 May 16 04:11 |
| Notice he's using plywood.... |
| Huey V77, Comment for image # 36114 | 23 May 16 21:12 |
| Pull it down that is. Hate key boards. |
| Huey V77, Comment for image # 36114 | 23 May 16 21:11 |
| Finn, don't know if this will help, I've found out that glass cleaner with ammonia turns balsa into putty. Pull it sounds and tape it, let it dry. Maybe? Looking good! |
| Huey V77, Comment for image # 36114 | 23 May 16 21:08 |
|
| pfinn, Image # 36119 | 23 May 16 13:45 |
Flush |
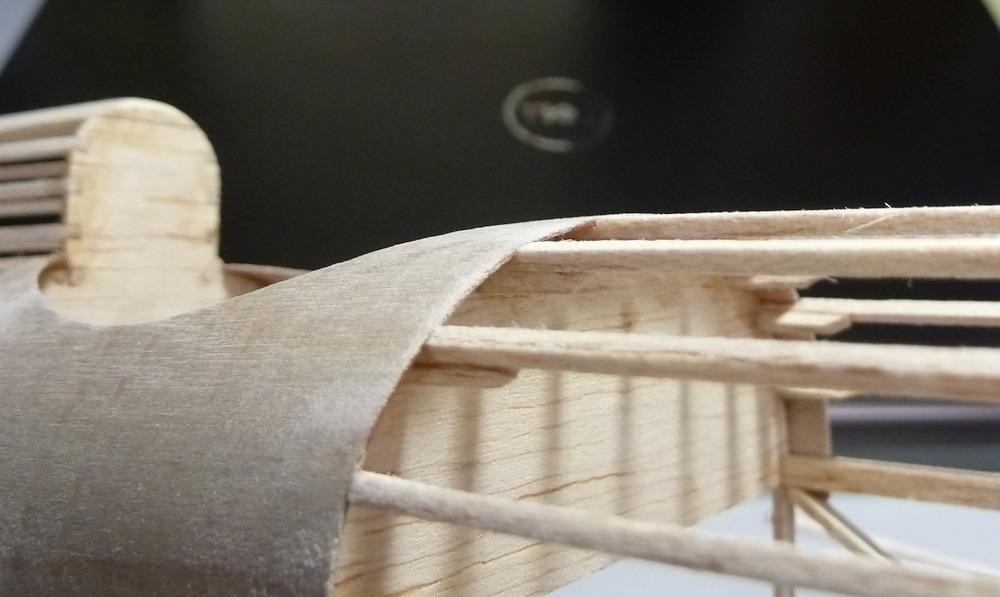
| pfinn, Image # 36118 | 23 May 16 13:44 |
Installed.Needed to add reinforcement to the stringers because the Fairing overlapped the bulkhead. |
| pfinn, Image # 36116 | 23 May 16 13:33 |
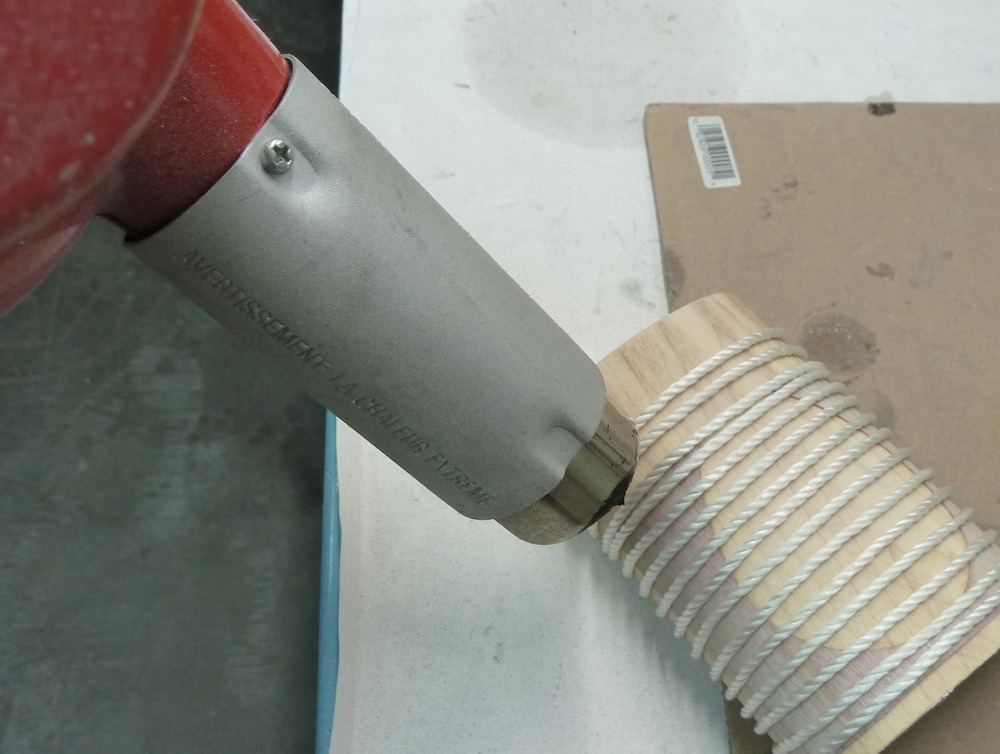
Since the Softener does work on the adhesive in the ply, A heatgun was used to soften up the glue during the forming. During this stage I repeatedly wet the ply with water to help the bend. When the water steams off the part, you know it's hot enough! |
| pfinn, Image # 36115 | 23 May 16 13:28 |
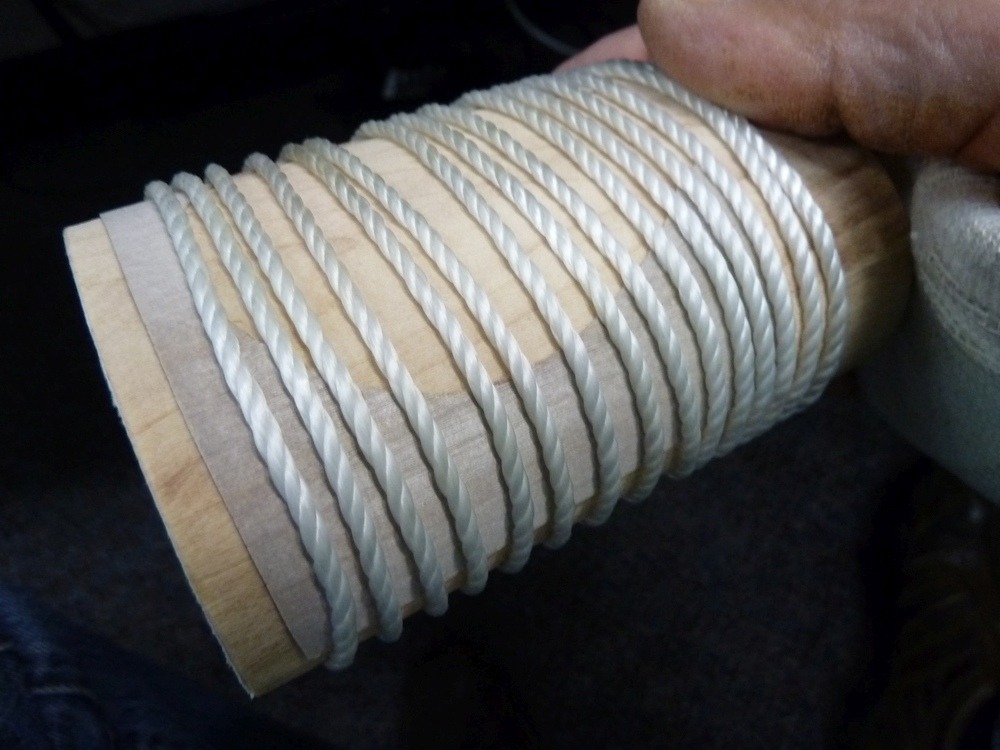
Left some space between the lashing. Notice my brand new cast! Broke my wrist a week and a half ago. DOH! |
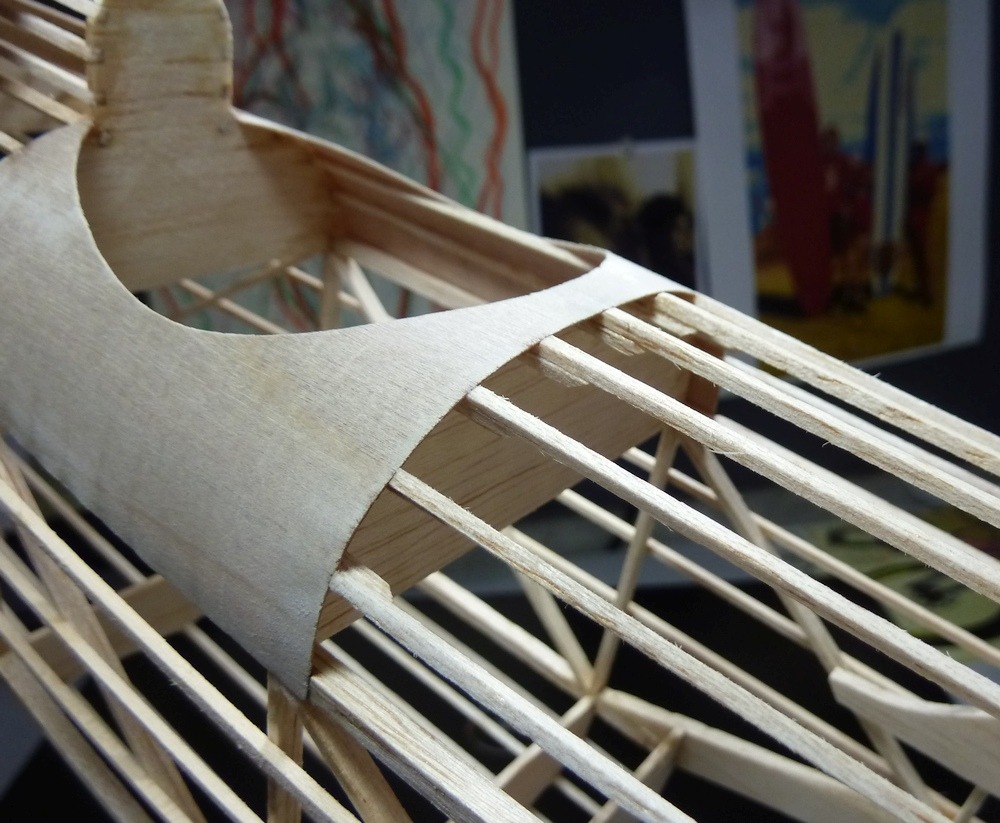
| pfinn, Image # 36114 | 23 May 16 13:26 |
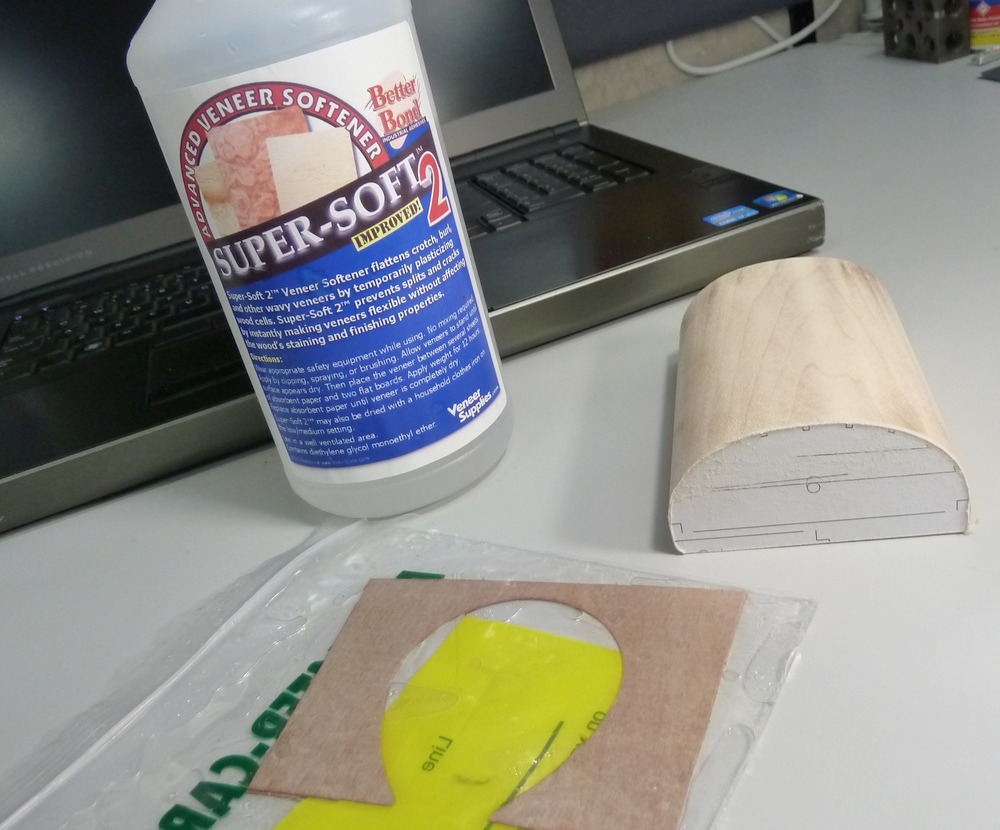
Canopy Fairing. 1/64" ply soaked in "Super Soft 2" veneer softeneir. This stuff doesn't have any amonia or vinegar in it so it doesn't smelll that bad. Works pretty good too. The form is Bass. |
| pfinn, Comment for image # 35842 | 15 Apr 16 09:32 |
| Thanks all |
| poppy, Comment for image # 35842 | 14 Apr 16 03:33 |
| Wow! That is awesome! My Dad made a signet ring for me out of a stainless steel nut. I still treasure it. |
| meku, Comment for image # 35842 | 14 Apr 16 01:10 |
| Very, very good !!! I like this. |
| rayl, Comment for image # 35842 | 13 Apr 16 20:04 |
| Totally freaking AWESOME!!!!!!!!!!! |
| Skyediamonds1985, Comment for image # 35842 | 13 Apr 16 17:37 |
| Very nice indeed. Very artistic. Reminds me of those artistic wooden tables where the ivory is embedded. |
| John M Oshust, Comment for image # 35842 | 13 Apr 16 15:49 |
| Very, very, spiffy! |
| Build Thread, Page :
[ 1 ] 2 3 4 5 (95 posts, 20 posts per page, 5 pages in total)
|
[ Next > ] |
