| Build Thread, Page :
[ 1 ] 2 3 4 5 6 (107 posts, 20 posts per page, 6 pages in total)
|
[ Next > ] |
| bobgood, Comment for image # 4082 | 26 May 24 11:40 |
| ....and one from 2007 too! |
| Skyediamonds, Comment for image # 4103 | 25 Jun 15 09:58 |
| Interesting. Upon closer examination, the RPM gauge on this particular forward cockpit is missing. Discovered one of the unique things about the Stearman is their original RPM gauges rotated counter-clockwise (reversed of most other rotating gauges on other aircraft) & redlined at 2100. -Sky
|
| Skyediamonds, Comment for image # 4103 | 25 Jun 15 09:39 |
| I've seen this exact photo on other websites devoted to the Stearman. I typed in "Cockpit photos of PT-17" & among the dozens of pictures, this one was included. I used this one many times as a reference during the interior detailing of my Guillow's Stearman. Will post images as soon as I figure out how. Going to local college today. -Sky |
| wahdah3L, Comment for image # 4103 | 03 Jul 08 16:47 |
| Brother this would make a great T-shirt picture! |
| moostang51, Comment for image # 4103 | 17 Aug 07 17:42 |
| This is one of the best reference photos I've ever seen!!! Plasticbuddha, so far your work is eye-popping. |
| moostang51, Comment for image # 4104 | 17 Aug 07 17:39 |
| DD, would you add stringers? Plasticbuddha, how do the number of stringers compare in this photo to the Guillow's kit? Now, if Guillow's could make formers to be this thin, how light would this aircraft be? Believe that's a question for James. |
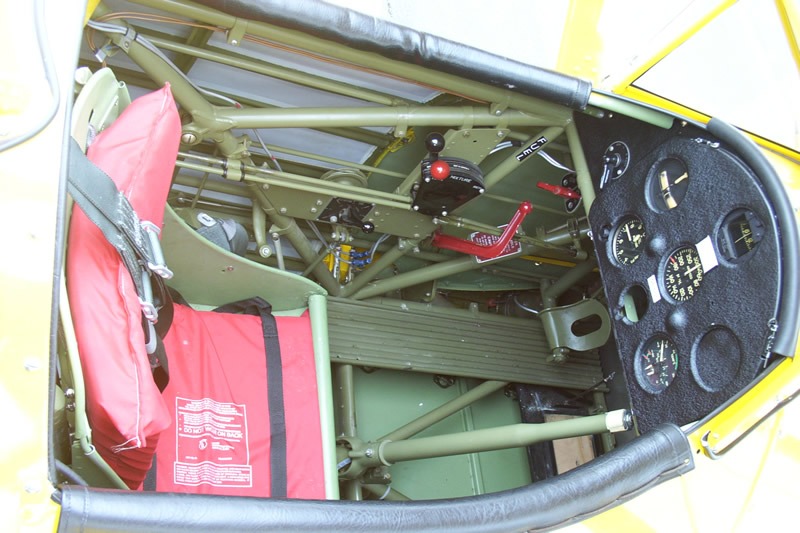
| cdwheatley, Comment for image # 4103 | 17 Aug 07 15:25 |
| That seat and cushion looks familiar! |
| plasticbuddha, Comment for image # 4105 | 17 Aug 07 15:03 |
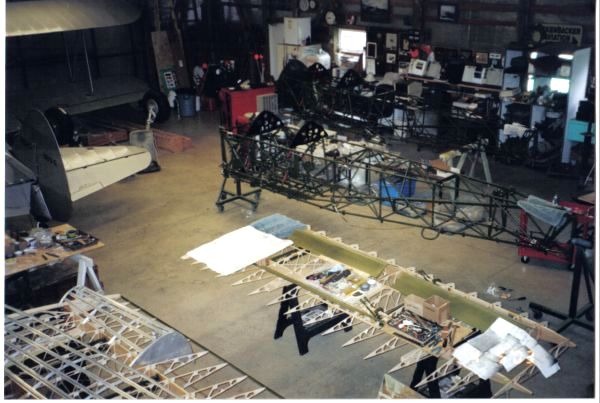
| Here's a shot showing the frame without the birdcage installed. Another interesting note is how the wings are built. |
| plasticbuddha, Image # 4105 | 17 Aug 07 15:01 |
|
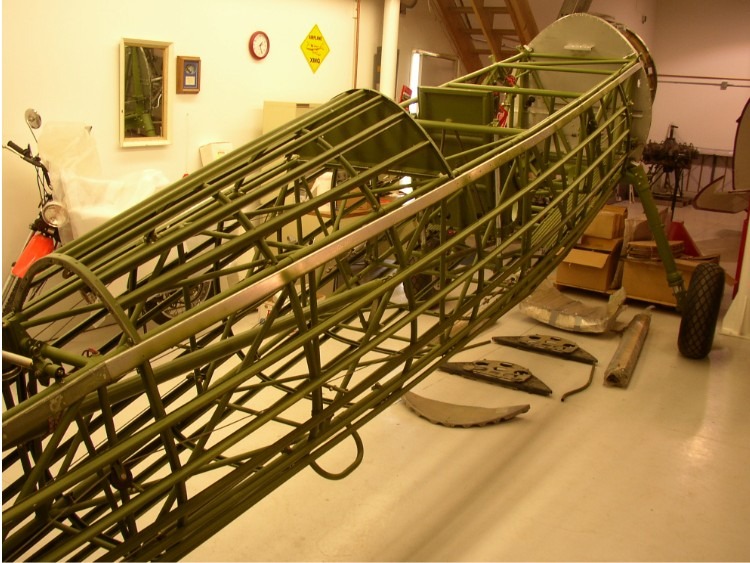
| plasticbuddha, Comment for image # 4104 | 17 Aug 07 14:57 |
| Restoration photo showing the space frame and birdcage. |
| plasticbuddha, Image # 4104 | 17 Aug 07 14:56 |
|
| plasticbuddha, Comment for image # 4103 | 17 Aug 07 14:54 |
| Here is yet another variation. |
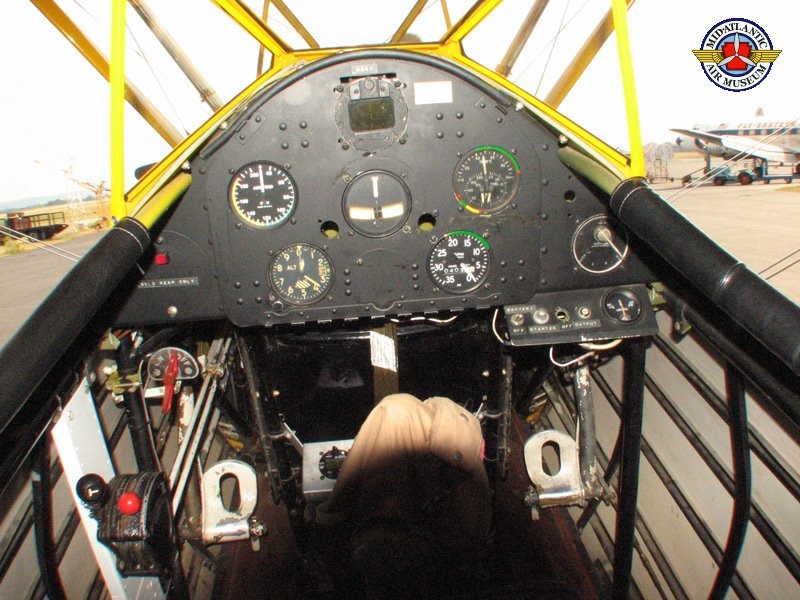
| plasticbuddha, Comment for image # 4102 | 17 Aug 07 14:54 |
| This must be a very early version as it had rudimentary and smaller instrument faces. |
| plasticbuddha, Image # 4103 | 17 Aug 07 14:50 |
|
| plasticbuddha, Image # 4102 | 17 Aug 07 14:50 |
|
| plasticbuddha, Comment for image # 4088 | 17 Aug 07 03:40 |
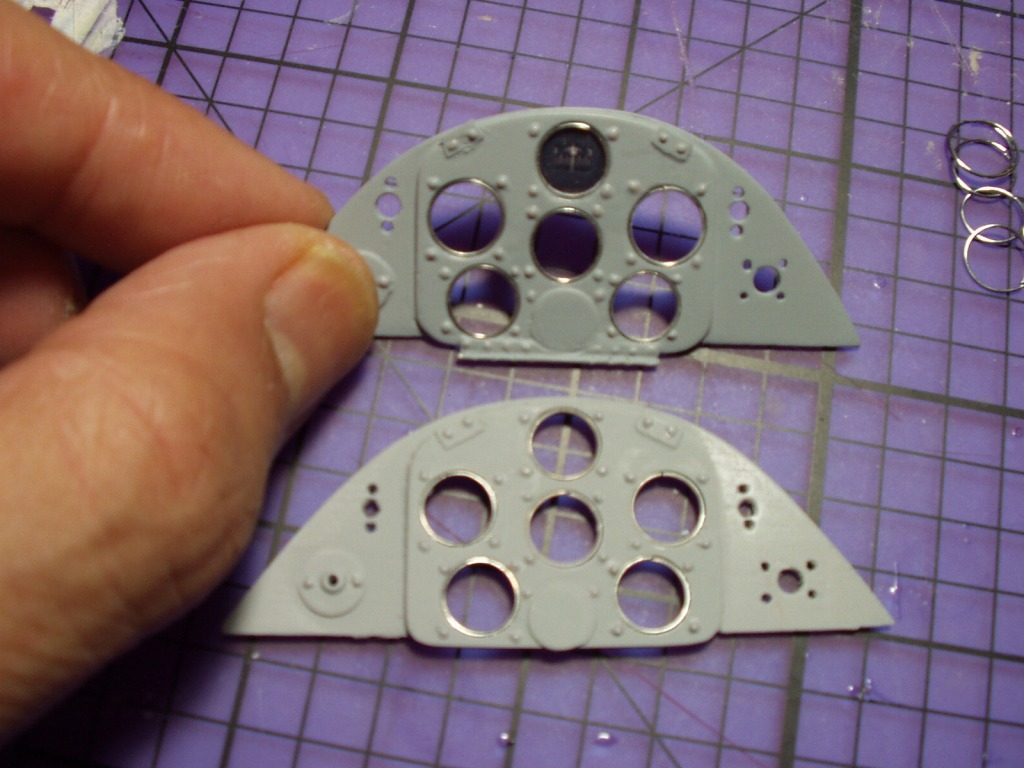
| A bit nerve-wracking this evening trying to get the "bezels" to stay in place while I placed a drop of CA. Just one more hinge to make then it's a thin coat of matt black followed by buffing and washes. I also found a better approach for the instrument faces. |
| plasticbuddha, Image # 4088 | 17 Aug 07 03:38 |
|
| plasticbuddha, Comment for image # 4081 | 17 Aug 07 03:37 |
| Hi moostang! No, the pin heads are way too big. Those are dots of DupliColor scratch filler/primer that I applied with a 0000 ? brush. Although they seem a bit heavy handed, I can control the finised size by repeated dabbing; essentially building up each dot. It's somewhat maddening as you have to get just the right consistency. Too much laquer thinner and the dot settles into a flat blob as opposed to a fasterner/rivet head. |
| moostang51, Comment for image # 4081 | 16 Aug 07 16:28 |
| Great looking bezels. Are those straight pin heads used to create "rivets"? |
| plasticbuddha, Comment for image # 4083 | 16 Aug 07 15:44 |
| Also found this charactrer. Nice details but what really caught my eye was the "nose art"! |
| Build Thread, Page :
[ 1 ] 2 3 4 5 6 (107 posts, 20 posts per page, 6 pages in total)
|
[ Next > ] |
