| Build Thread, Page :
1 2 3 4 5 [ 6 ] 7 8 9 10 11 (214 posts, 20 posts per page, 11 pages in total)
|
[ < Prev ] [ Next > ] |
| John M Oshust, Image # 14179 | 24 Sep 09 15:02 |
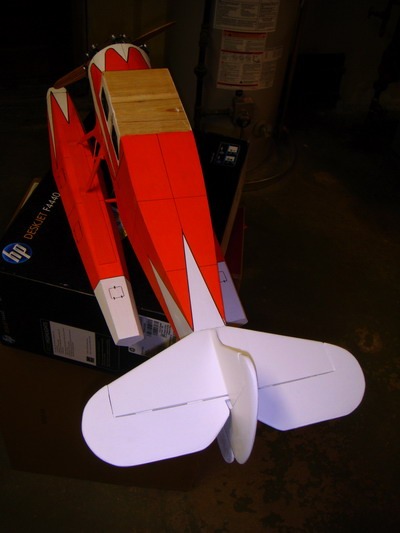
Dorsal view of the feathers. |
| John M Oshust, Image # 14178 | 24 Sep 09 15:01 |

Met my goal. Off to the hills for a few days. Meadows to mow! |
| John M Oshust, Comment for image # 14162 | 23 Sep 09 21:35 |
| Thanks for the wisdom. Another check in the display airplane column. |
| BillParker, Comment for image # 14162 | 23 Sep 09 21:24 |
| That's exactly what I've done! RTF, then CRASH! |
| John M Oshust, Comment for image # 14162 | 23 Sep 09 20:28 |
| The thing is I really have no desire to build one to fly! If that bug ever bites, I shall purchase one all ready to fly, then crash it!!! |
| BillParker, Comment for image # 14162 | 23 Sep 09 20:19 |
| You're supposed to put the grandchildren in the cockpit and fly em aroung the neighborhood.... |
| John M Oshust, Image # 14171 | 23 Sep 09 19:46 |
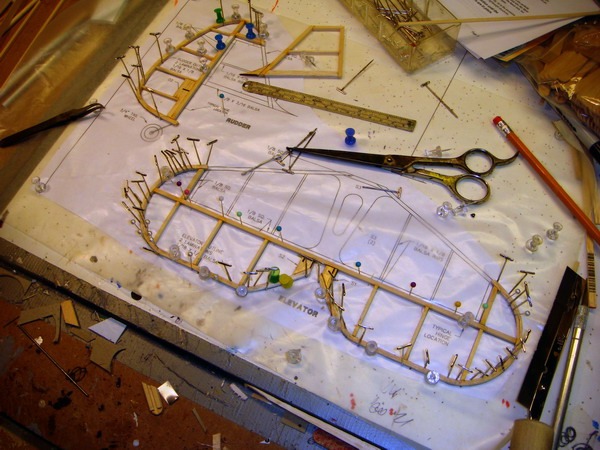
Feather fabrication....I love bending balsa! |
| John M Oshust, Image # 14170 | 23 Sep 09 19:45 |

Covered feathers ist fitting. |
| John M Oshust, Image # 14169 | 23 Sep 09 19:44 |

The feathers...pinned on! |
| John M Oshust, Comment for image # 14162 | 23 Sep 09 19:43 |
| Bill thanks for the direction but they are all to large of scale. After the 6 ft span on my Corsair I have given up large planes....too much work and not enough display space. |
| BillParker, Comment for image # 14162 | 23 Sep 09 15:57 |
| Here's your next project, John... http://www.flygtm.com/web/pages/kits.htm |
| frwyflyer, Comment for image # 14162 | 22 Sep 09 08:13 |
| WOW !! This is looking sharp! |
| John M Oshust, Image # 14163 | 21 Sep 09 22:03 |
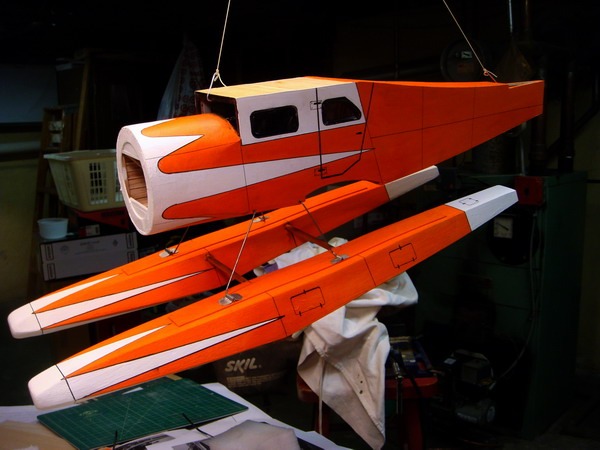
Epoxy set up. Even W/O more struts and bracing flotsam and jetsam are part of the fuse. Fabricated the Al cover plates for the float ferrules. |
| John M Oshust, Image # 14162 | 21 Sep 09 22:00 |
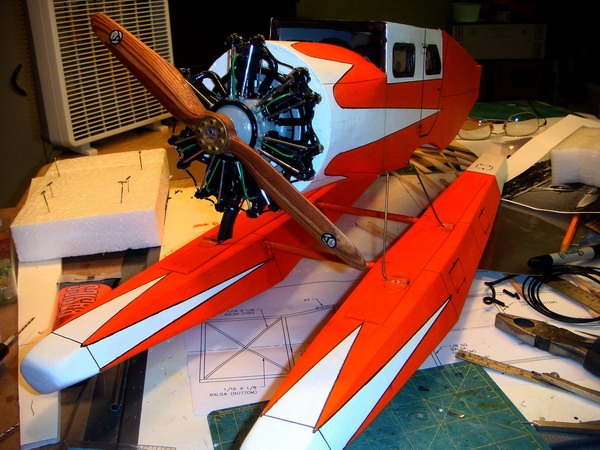
Attached the engine and covered the float mounting plates with a first coat. |
| John M Oshust, Comment for image # 14161 | 21 Sep 09 21:58 |
| DD...I did a bit more tonight...Liquitex Cadmium Orange...I looked at the tube! Thanks my pedagogue! |
| David Duckett, Comment for image # 14161 | 21 Sep 09 20:56 |
| Liquitex Cadmium Red Medium....and it looks great! |
| John M Oshust, Comment for image # 14161 | 21 Sep 09 20:38 |
| P.S. Methinks this areoplane does not look like Thomas the Tank Engine any more! |
| John M Oshust, Comment for image # 14161 | 21 Sep 09 20:32 |
| Thanks...after the wires are installed they will be covered in balsa and shaped. Also the Al ferrules on the floats get capped. The paint is the brand that DD uses. I have tipped a few today and cannot remember the name. The color is Cadmium something or other. Stay tuned for tomorrow's episode! |
| frwyflyer, Comment for image # 14161 | 21 Sep 09 20:25 |
| Thanks John, that was quite an informative tutorial. I will be interested in tomorrow's final pair of strut wires placement aft of the wing. Is this dayglo orange ? It's a great color for a bush plane. |
| John M Oshust, Image # 14161 | 21 Sep 09 20:06 |
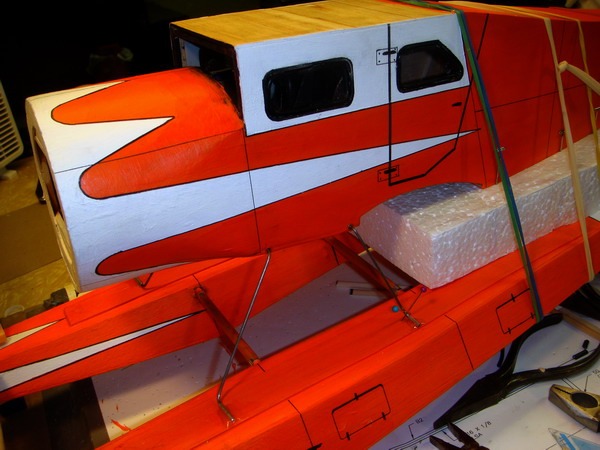
The four main struts are in the hands of the molecules. Tomorrow is another day. One pair of main struts are still required anterior to the lower wing cut out. I should be able to remove the foam block tomorrow and install them. A pair of bracing struts are still required as are bracing wires. |
| Build Thread, Page :
1 2 3 4 5 [ 6 ] 7 8 9 10 11 (214 posts, 20 posts per page, 11 pages in total)
|
[ < Prev ] [ Next > ] |
