| Build Thread, Page :
1 2 3 [ 4 ] 5 6 7 8 9 10 (186 posts, 20 posts per page, 10 pages in total)
|
[ < Prev ] [ Next > ] |
| heywooood, Comment for image # 40482 | 17 Aug 18 22:55 |
| https://www.bedlamcreations.com/
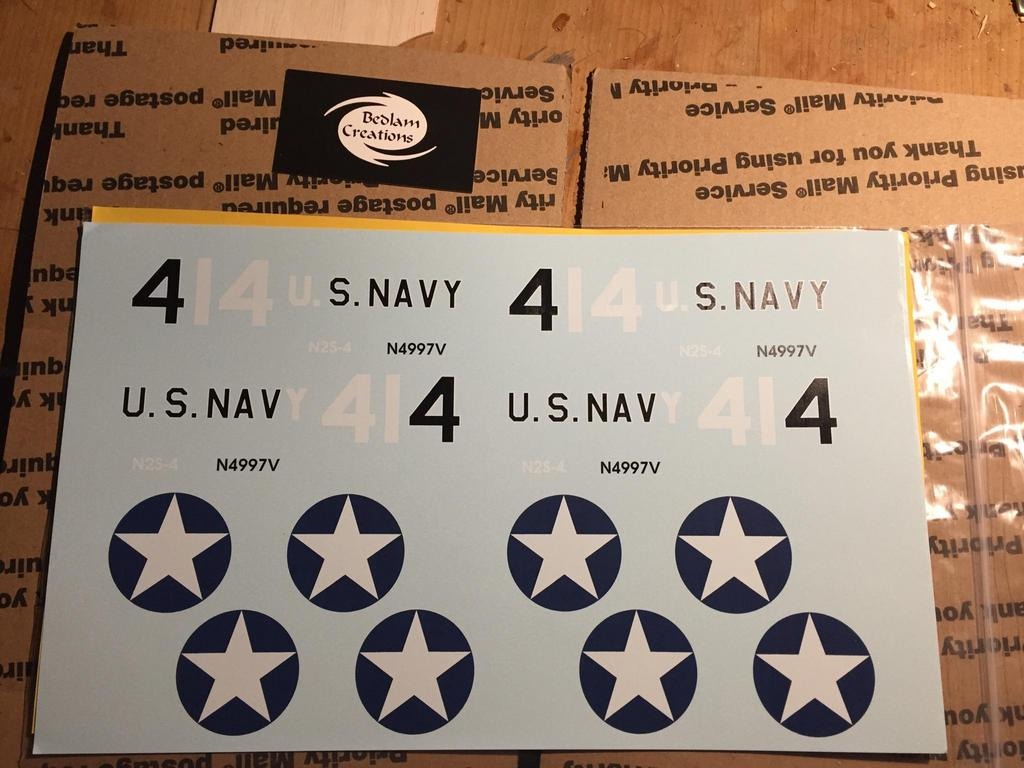
Josh is your contact there - I sent him a photo of the built up fuselage with an extended tape measure for scale and also sent an image I found online from a Stearman site that gave all of the dimensions of every marking for an actual Navy N2S |
| Skyediamonds1985, Comment for image # 40482 | 15 Aug 18 22:43 |
| You have the website link or email address to Bedlam Creations, the maker of the decals? They look very good and promising. |
| heywooood, Comment for image # 40482 | 12 Aug 18 20:34 |
| decals arrived a couple of days ago..Bedlam Creations did the work and these look terrific. |
| heywooood, Image # 40482 | 12 Aug 18 20:31 |
|
| heywooood, Comment for image # 40439 | 04 Aug 18 00:11 |
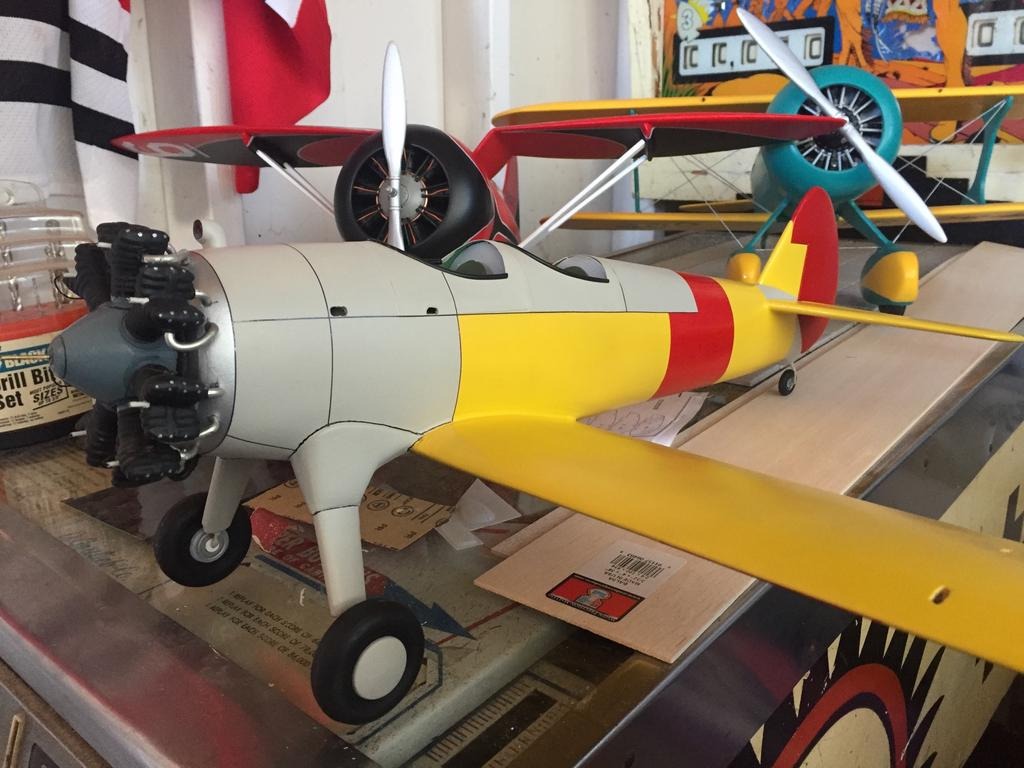
| just noticed something..in this image with the metal prop - the cabane and wing struts are gray...but in the first image I posted with the wood prop, the struts are yellow... |
| Skyediamonds1985, Comment for image # 40447 | 03 Aug 18 07:21 |
| I understand perfectly your concerns, and they're very legitimate. I was just curious. You're also very astute to consider that the thin strips might twist as you pull them taut. I used strips of paper that were cut to the same thinness of the Vape metal strips on my PT-17 with good results. Although a different medium, the paper strips did not exhibit any tendencies to twist. I never thought of that. I just gained a bit of insight. Thank you! I'll continue to watch your build with interest. |
| heywooood, Comment for image # 40447 | 01 Aug 18 22:07 |
| I saw your mention and discussion on this product earlier and in looking into it I had two concerns. First was getting the right size or width - I'm old school - I need to see it and feel it in my hands. And the other main concern is keeping it from twisting as it is installed. Trying to get it tight and keep it from rotating or twisting just seems problematic without all of the correct fittings available for the purpose on a full size aircraft. I would need the same kind of turnbuckles or to come up with some kind of pivoting 'sleeve' for the flat wire that would both be securely captured in the sleeve and yet be able to rotate or 'untwist' once the sleeves were inserted into the balsa.
I got 99 problems already lol..don't get me wrong - I LOVE the idea of it - I just don't think I can implement it at my current skill level. "A man's got ta know his limitations" as Squint Eastwood says |
| Skyediamonds1985, Comment for image # 40447 | 01 Aug 18 21:14 |
| heywoood,
Just a thought. I posted flat wire rigging (called RAFer as it originated from Royal Aircraft Factory) in my S.E.5 build thread. It's amazingly agile, flexible, light weight, and easy to pull taut. Best of all, will look more scale with your model It's called Vape metal strip and you can order a 100' roll for just $8.50 and shipping is free. Oh, the dimensions are: 4mm, 5mm, and 8mm. I would suggest 8mm wide. Just a thought. |
| heywooood, Comment for image # 40443 | 31 Jul 18 20:02 |
| Thank you, Robert - I hope I can finish it off with a proper upper wing assembly. I just ok'd the decal proof sheet so I should have markings for it soon-ish. I still need to add the crew start accessories to the port side and a few other details like wing walks etc..meanwhile I am still infilling the remaining wing. The heatwave is slowing things down a bit |
| heywooood, Comment for image # 40447 | 31 Jul 18 16:30 |
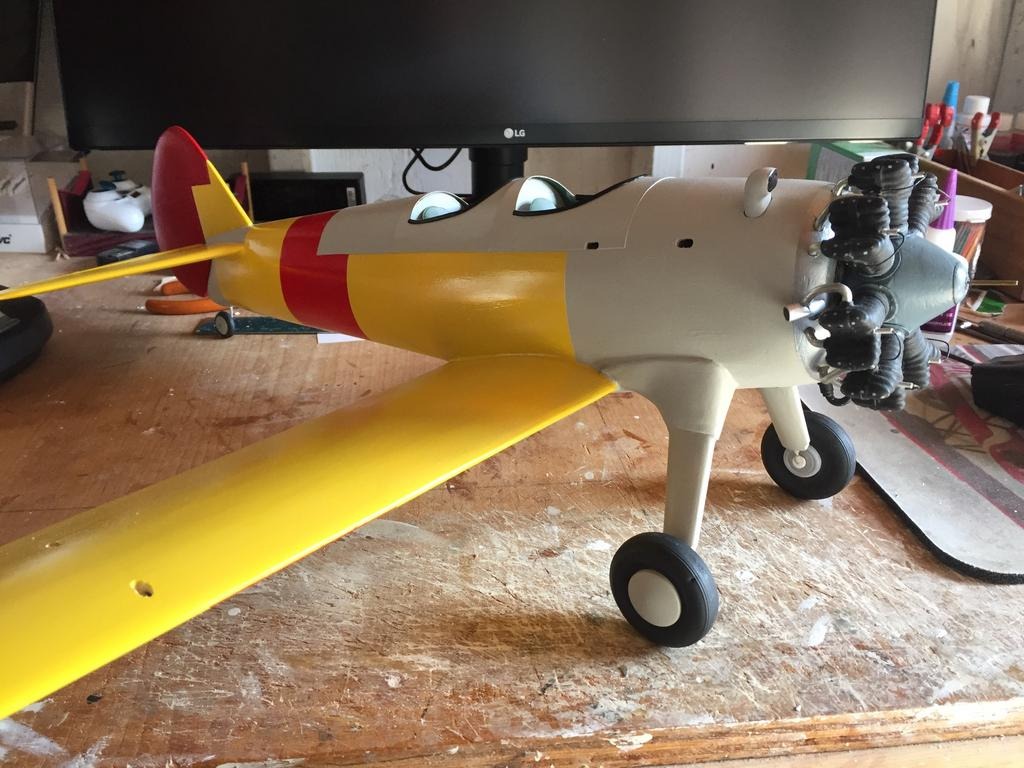
| new and improved - now with panel lines.. |
| heywooood, Image # 40447 | 31 Jul 18 16:29 |
|
| heywooood, Comment for image # 40443 | 30 Jul 18 21:12 |
| Still thinking about that..right now I’m doing the infill on the upper wing.
Lots to do before the rigging but I think I’ll probably use the black cord that comes in the kit augmented with bits n pieces to replicate the fittings. |
| Skyediamonds, Comment for image # 40443 | 30 Jul 18 17:21 |
| Heywoood,
You're doing a great job on your Guillow's PT-17. That's good work on the landing gear strut fairings & the oil cooler intake. Not easy to glue those pieces of plastic & blend them together to hide the seams. I see good work on your Continental radial right down to the spark plugs. What are you going to use for rigging?
|
| rgood, Comment for image # 40443 | 30 Jul 18 16:34 |
| A very super job this is turning out to be - beautiful! |
| heywooood, Image # 40443 | 30 Jul 18 13:26 |
|
| Don C, Comment for image # 40439 | 27 Jul 18 14:50 |
| Thanks for the information. |
| heywooood, Comment for image # 40439 | 26 Jul 18 20:02 |
| lol - Iguess it would be considered three-tone if you count the red 'find me if I crash' stripes |
| heywooood, Comment for image # 40439 | 26 Jul 18 19:48 |
| and to Mr Oshust - this picture struck me as both a definitive and unusual color scheme for the Stearman. A common Navy N2S but in a two tone scheme (as the ubiquitous AAC blue and yellow Stearman) and to date I have not seen any scale model of a Stearman depicting this |
| heywooood, Comment for image # 40439 | 26 Jul 18 19:43 |
| the paint I used was the Testors Model Master Buffing Metalizer in Stainless Steel their SKU# 1452. I have used all of their 'buffing' metallic paints and found I like the Stainless steel as aluminum better than their buffing aluminum
color - just a matter of taste - but I have found that colors tend to be mixed too exactly for 'scale' applications. The colors end up being 'too proud' if you will. They would look fine on a full sized car in broad daylight, but come off as toy-like on a scale model, if that makes sense. I have heard professional model makers talk about fading colors 15-20% or more to keep colors looking 'realistic' on their models. To me - the stainless steel paint conveys the look of aluminum plate, rather than aluminum foil, in the sunlight. If that explanation makes sense |
| John M Oshust, Comment for image # 40439 | 26 Jul 18 17:31 |
| What a wonderful photograph. |
| Build Thread, Page :
1 2 3 [ 4 ] 5 6 7 8 9 10 (186 posts, 20 posts per page, 10 pages in total)
|
[ < Prev ] [ Next > ] |
