| Build Thread, Page :
<< 9 10 11 12 13 [ 14 ] 15 (286 posts, 20 posts per page, 15 pages in total)
|
[ < Prev ] [ Next > ] |
| rayl, Image # 32846 | 12 Jan 15 14:54 |
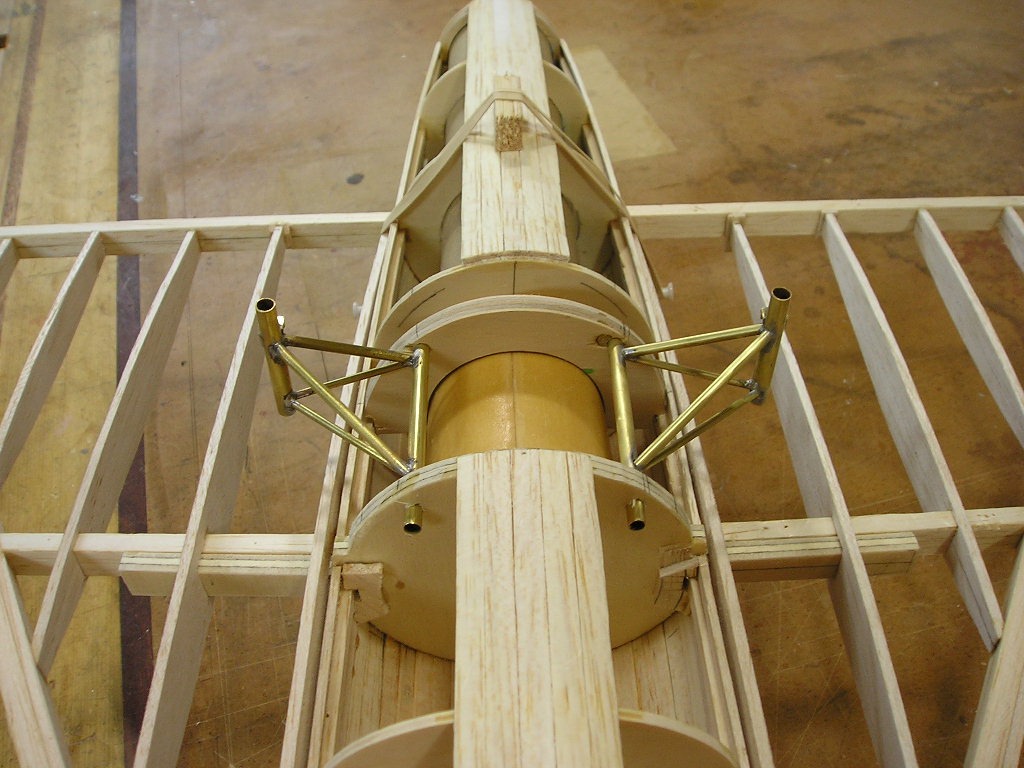
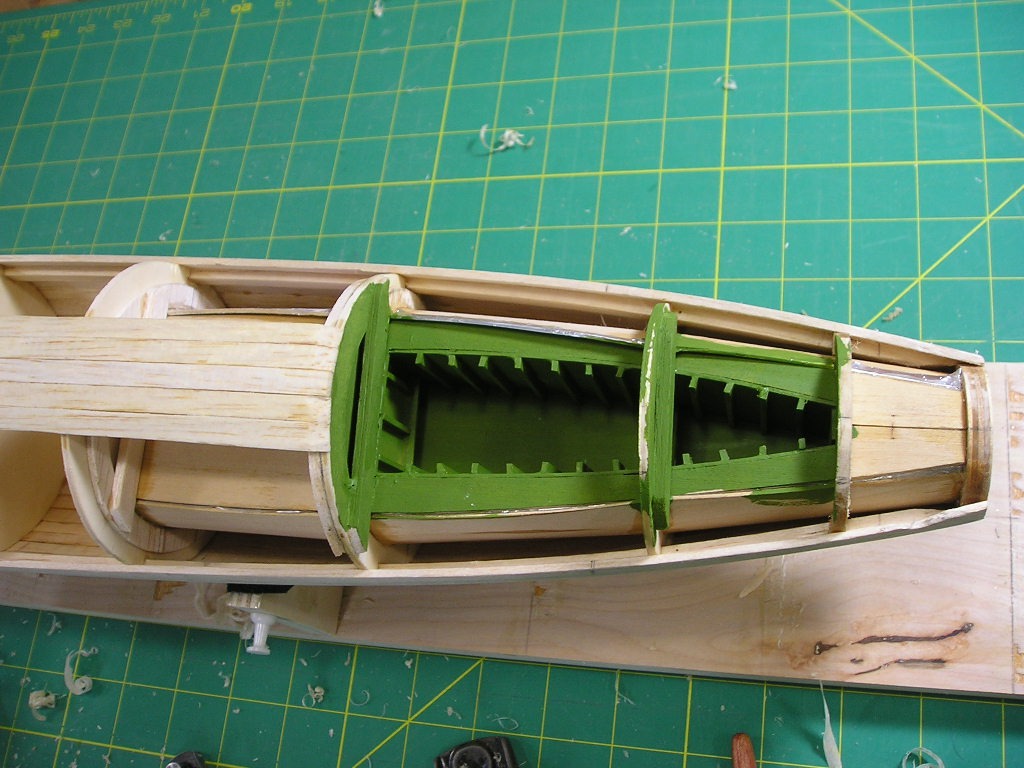
A better shot of how the main L/G is mounted into the fuse. The L/G will be cross-pinned through the 1/4" ply bulkheads when I get that far. Once I test mounted the wings the actual size of this model suprissed me. |
| rayl, Image # 32845 | 12 Jan 15 14:51 |

OK. The wings are started, they will be sheeted with 1/16" hard stock. The main gear wheels are starting to take shape. Again, there just are not many photos of this A/C to work from so any "rivet counters" ou there will have a hay-day with the wells. |
| Don C, Comment for image # 32814 | 10 Jan 15 11:12 |
| All of the above! |
| Don C, Comment for image # 32812 | 10 Jan 15 11:06 |
| I wish I had known that when I was doing my B-17. I heated plastic from packages over the forms. Took lots of tries and a few overheated fingers. Nice work. I am enjoying your build. |
| David Duckett, Comment for image # 32814 | 10 Jan 15 10:39 |
| Makes me want to paint on canvas. The talent going on here is impressive! |
| julinick, Comment for image # 32814 | 10 Jan 15 10:33 |
| Awesome!!! |
| rayl, Image # 32814 | 10 Jan 15 10:08 |
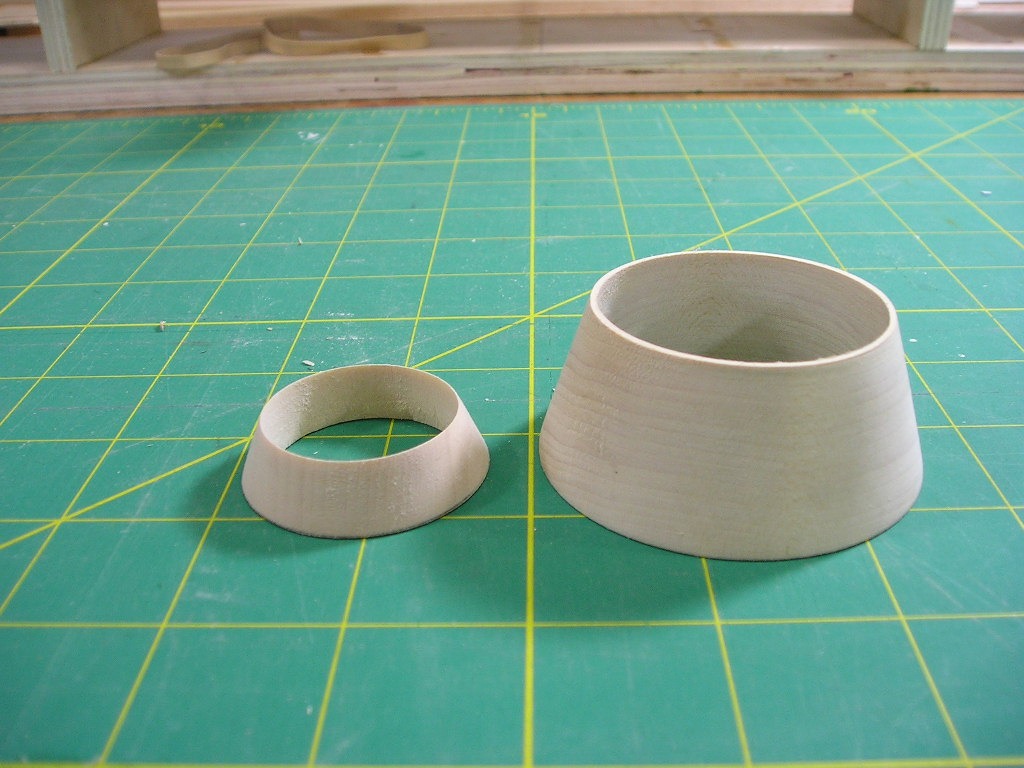
After a cup of coffee and muttering a few choice phrases, I tried my luck on the lathe again: success! I had to laminate a poplar wood blank to make the Afterburner cone due to it's height. Turned out pretty good if I say so myself. THese will be attached later after all the planking is completed and the Exhaust duct/flame-holder has been fabricated and installed. |
| rayl, Image # 32812 | 10 Jan 15 10:00 |
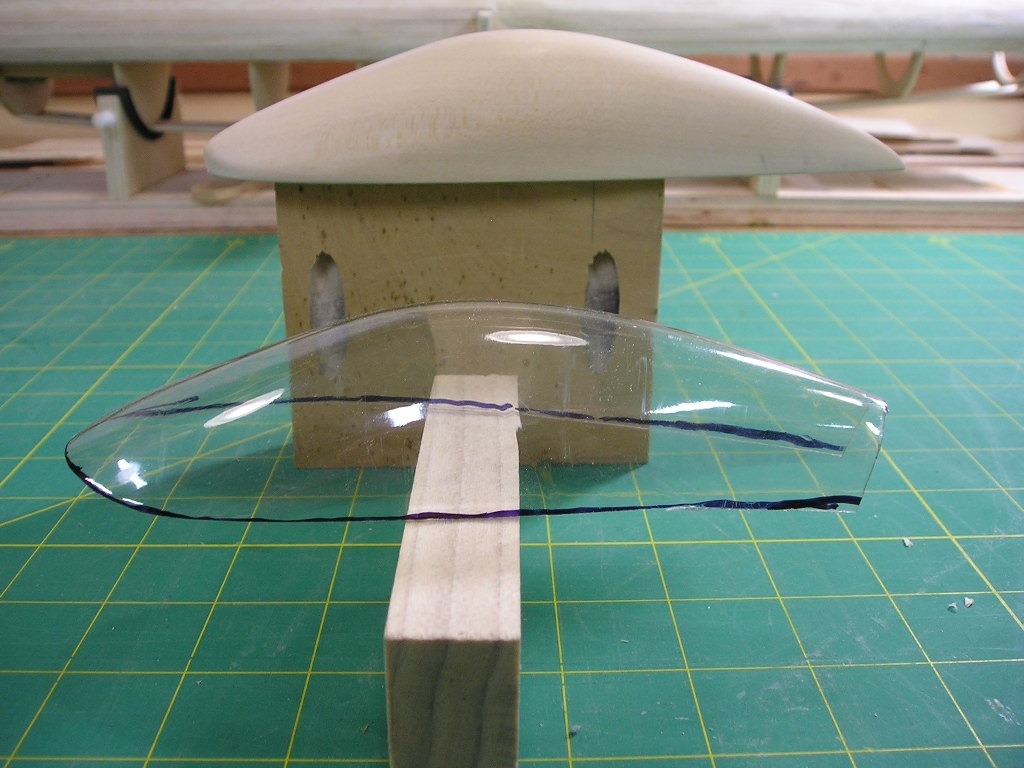
The finished master with my first attempt at forming the canopy. This is a totaaly new process to me: SLip the form into a soft-drink 2 liter bottle that has been cut off at both ends then apply heat from a heat gun and teh plastic magically shrinks the shape of the master. Cool! |
| rayl, Image # 32811 | 10 Jan 15 09:57 |

Next project is to carve the master for the canopy. I used Basswod that I picked up at the local big-box home improvement store. This is a progress shot about a 1/2 hour into the process. |
| rayl, Image # 32810 | 10 Jan 15 09:54 |
Here are completed main gears. They need to be cleaned up a little now. The grand plan is to leave these in this form until I have them mounted in the airframe and trued up then I will guzzie them up with plastruct tubing and othe do-dads to give them the correct appearance. |
| rayl, Image # 32809 | 10 Jan 15 09:49 |
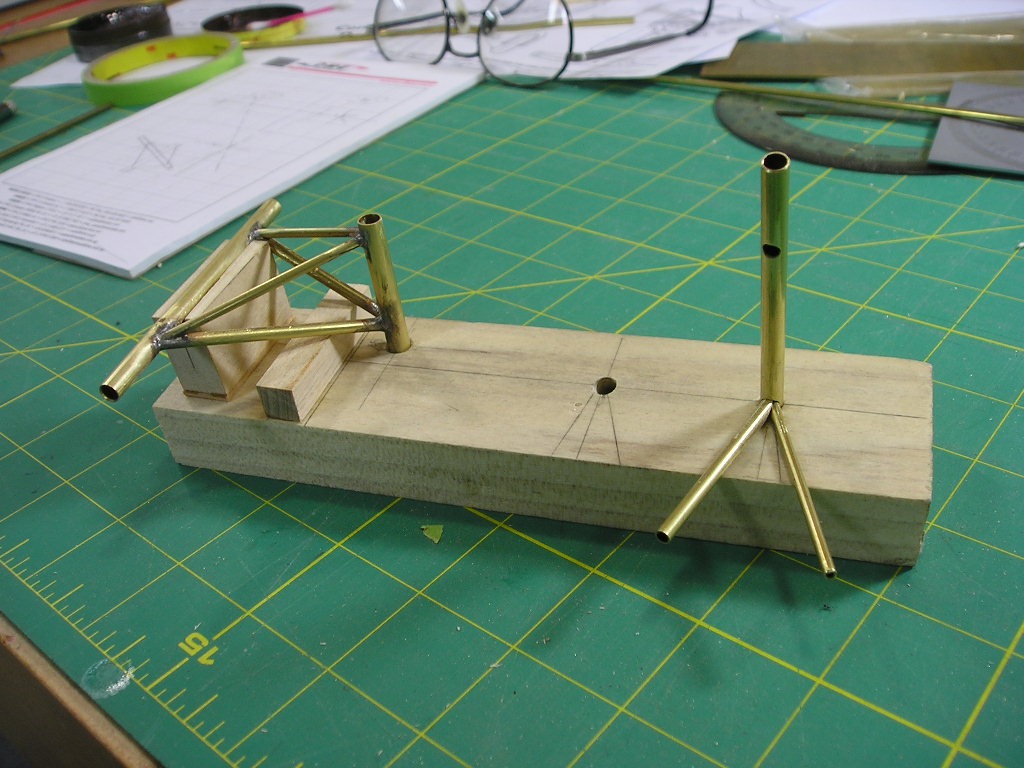
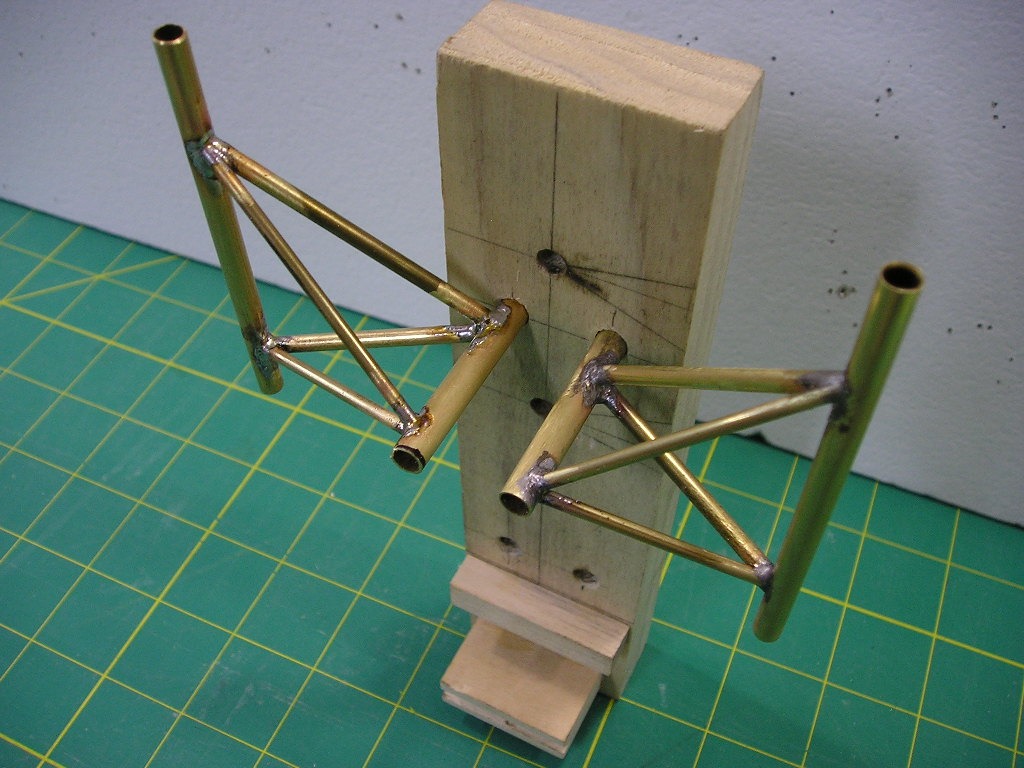
It's getting interesting now. The main L/G of this A/C has a main support axle with 4 struts attaching it to the oleo strutt. Each of the strutts is at a different angle and lenght. I made the jig shown to be able to make sure that the gears are identical. The gears are made of various sizes of brass tubing silver solderd together. |
| Creosotewind, Comment for image # 32805 | 09 Jan 15 16:31 |
| Keep it up. An interesting build.
|
| Creosotewind, Comment for image # 32795 | 09 Jan 15 16:30 |
| Cut and fiddle, fiddle and cut. That's the way I do it as well. This plane is looking great. |
| rayl, Image # 32805 | 09 Jan 15 13:12 |
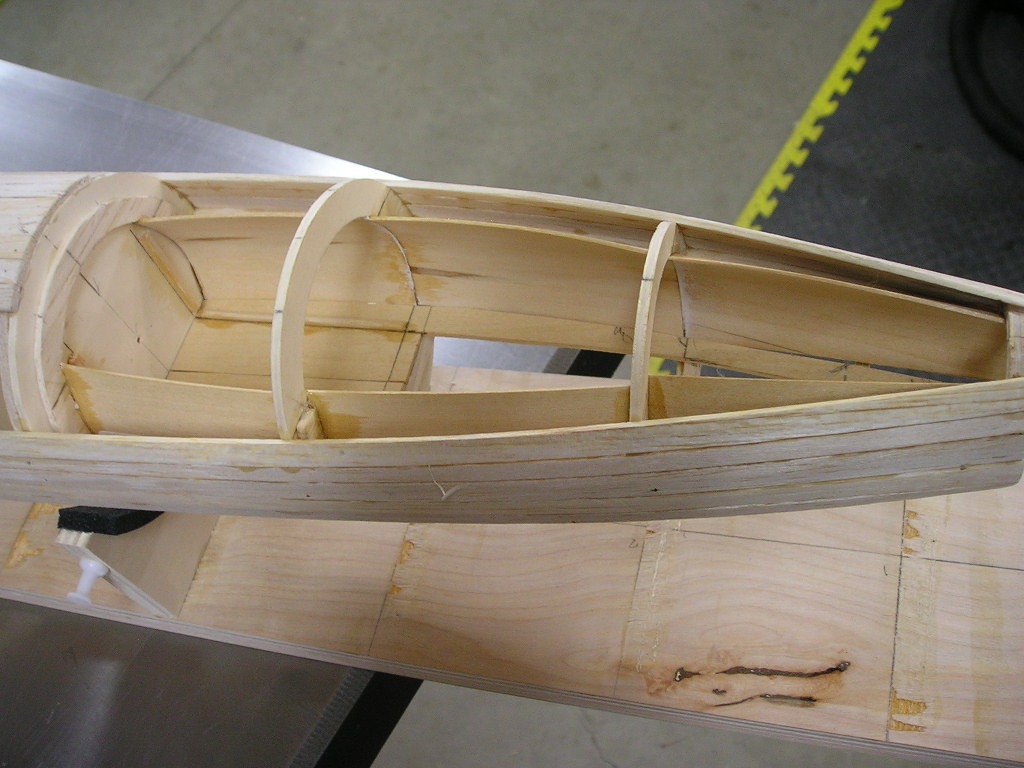
Here is the nose gear well that has been fabricated within the inlet duct. It has been really hard to find good detail photos of some areas of the A/C, so there ia a little "Imagineering" going on here. I also laid on five planks on the bottom of the fuse to keep everything lined up. I did not want to apply any more planks that this as I need to keep the main L/G well area open for fabrication. |
| rayl, Image # 32804 | 09 Jan 15 13:06 |
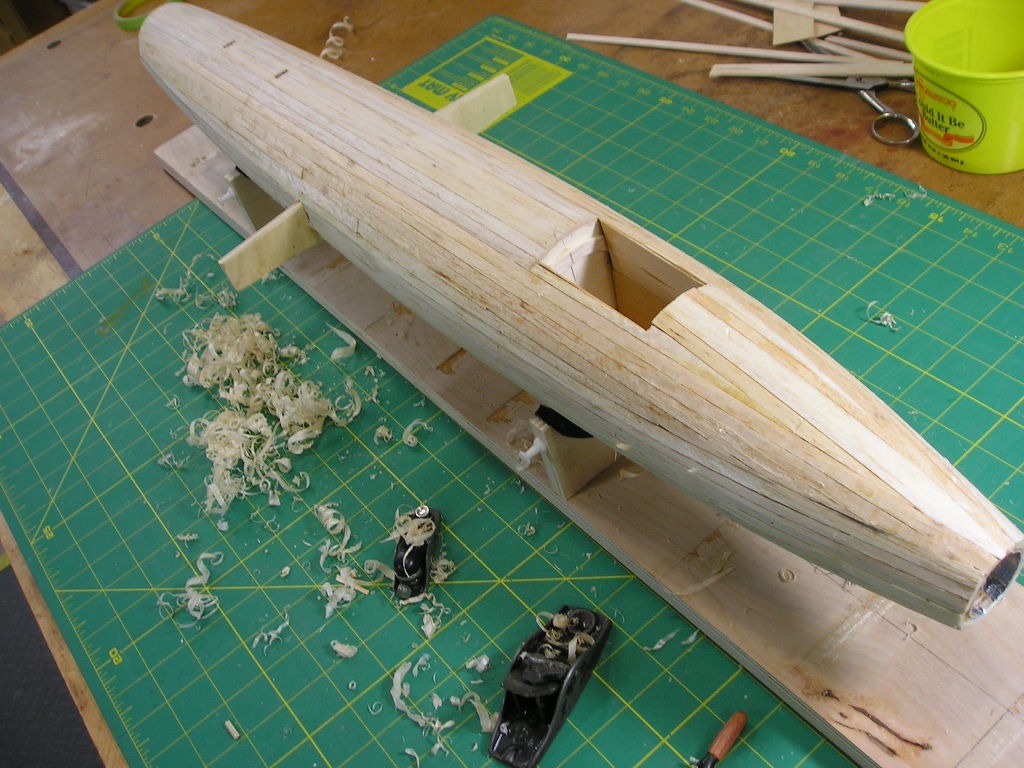
Impatience strikes! I just had to start fairing the planking to see how it was going to turn out. My little Stanley planes, which are older than I am, worked just fine once they were set a little deeper that what I normally have them. The soft balsa requires a more aggressive approch than pine or hardwoods. |
| rayl, Image # 32803 | 09 Jan 15 13:02 |
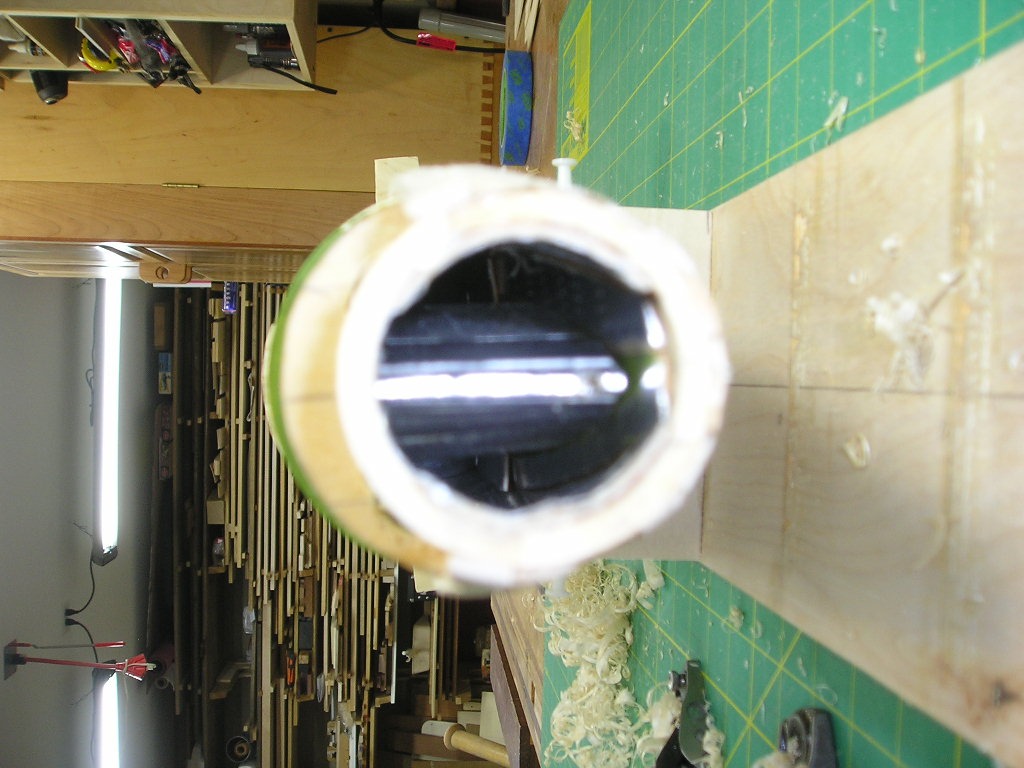
Really not good picture as my "shop" digital camera does not have a Macro mode. If you look close, you can see the rivets and foil joint lines. Still have some work to do fairing the duct into the AIr Inlet nossepiece, ( which I haven't fabricated yet). |
| julinick, Comment for image # 32794 | 08 Jan 15 20:15 |
| WOW!!!.. I love watching scratch built projects. Looking mighty fine!! |
| rayl, Image # 32795 | 08 Jan 15 17:17 |
Starting to build the air inlet ducting. It is such a prominent feature that I felt that it had to be included. I spent several days re-learning the trig required to generate the patterns for the curved conical duct sections. Finally said the hell with it and cut and fir posterboard patterns until I wa satisfied with the shapes. There are three sections of inlet ducting per side. |
| rayl, Image # 32794 | 08 Jan 15 17:12 |
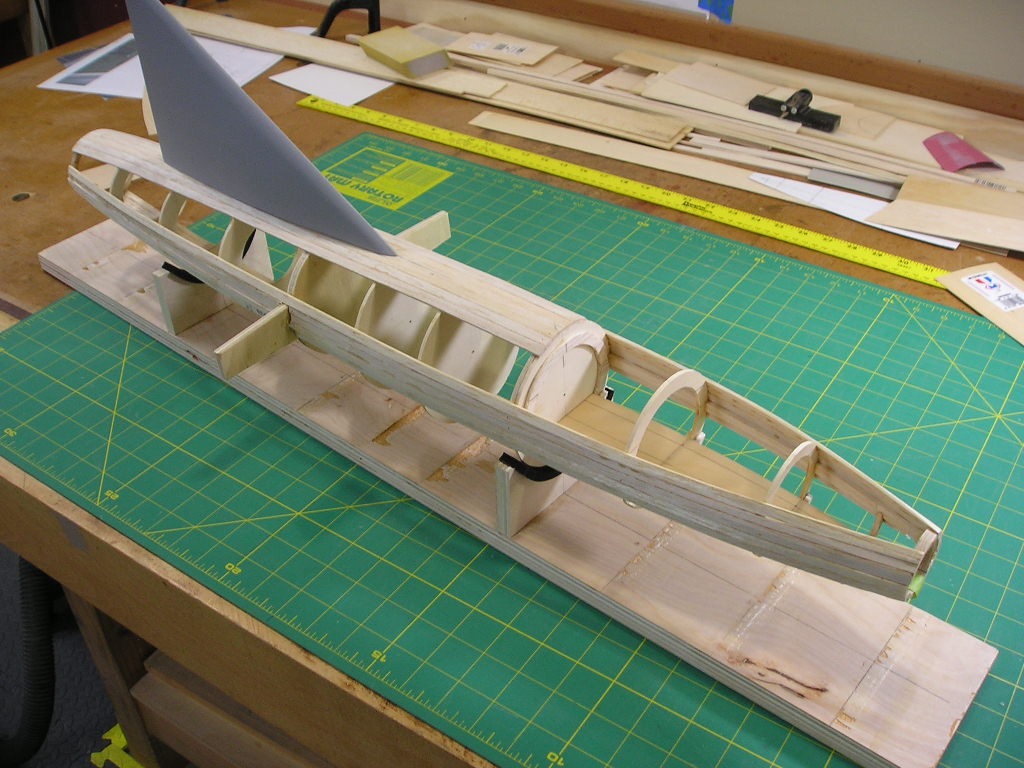
About a week later: The fuse has been removed rom the jig, which was modified to be a building cradle. The vertical fin has been sealed with Cabots "Quick-Dry" lacquer basec spray sanding sealer. In our new Eco-Friendly world, these high VOC items are getting really hard to find. The fin has been primed with a high-fill automotive rattle can lacquer. |
| rayl, Image # 32793 | 08 Jan 15 16:57 |
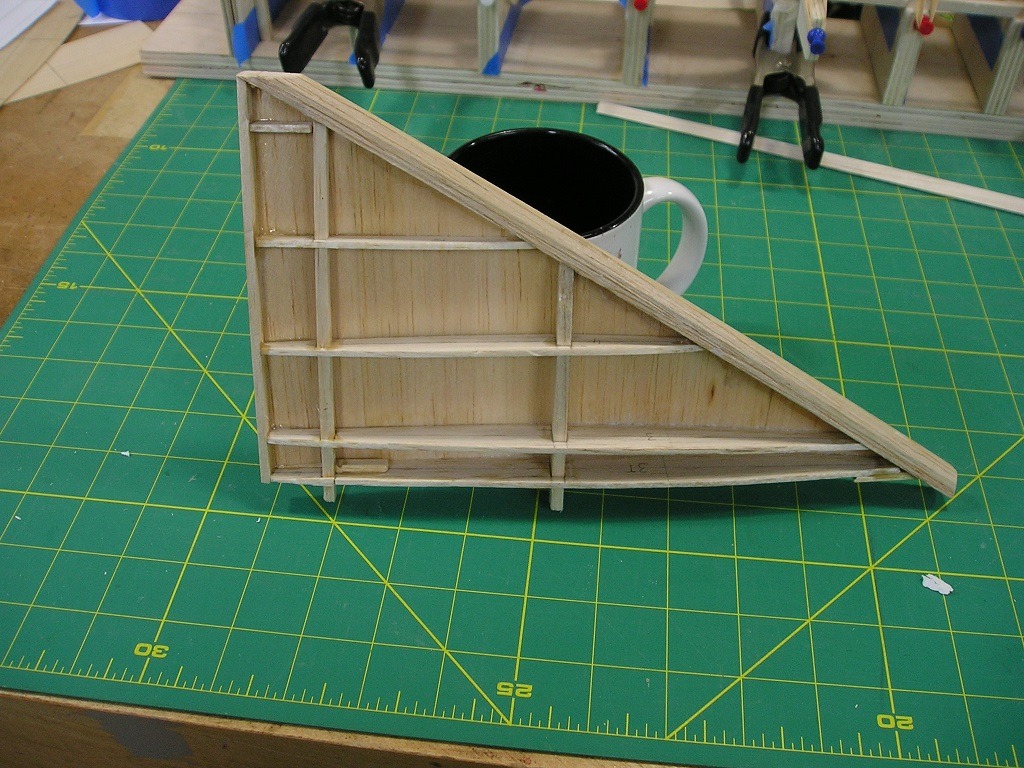
This is the third attempt at constructing the vertical fin. It's been a long time since I built a balsa model (about 50 years), so I expect to have bad days. The ribs are 1/8" and the sheathing is hard 1/16" stuff. |
| Build Thread, Page :
<< 9 10 11 12 13 [ 14 ] 15 (286 posts, 20 posts per page, 15 pages in total)
|
[ < Prev ] [ Next > ] |
