| Build Thread, Page :
<< 22 23 24 25 26 27 28 29 (570 posts, 20 posts per page, 29 pages in total)
|
[ < Prev ] [ Next > ] |
| rayl, Image # 34214 | 21 Jun 15 16:01 |
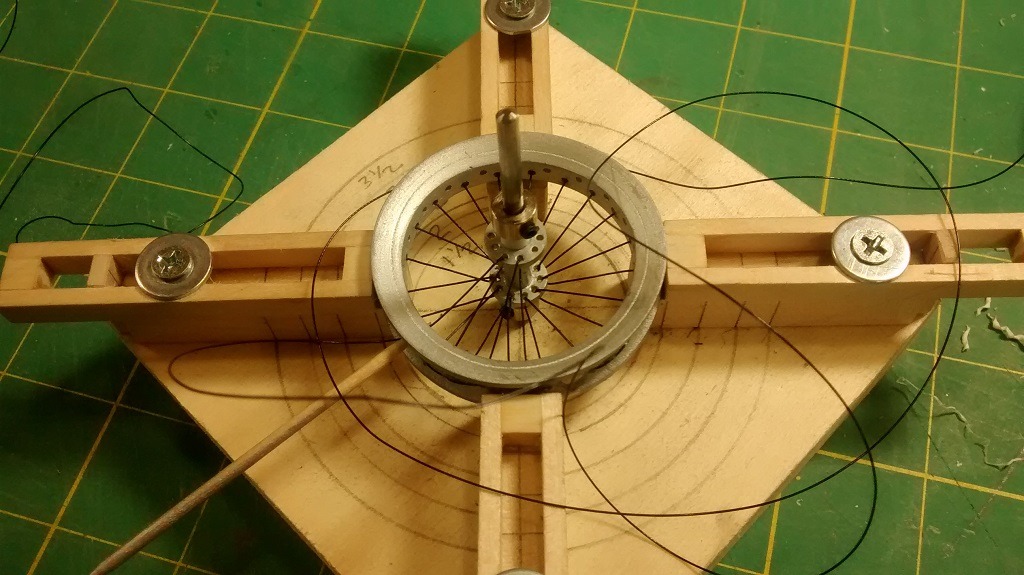
Working on the top side with the wire all tangled up. I found that you should take time to un-tangle the wire about every three holes. Also, as John O intoned, MAKE SURE that the length of the piece of the spoke material is long enough!!! (40 spokes) X (1 1/8 radius) = 50 inches. I added 10 inches for a comfort factor. |
| rayl, Image # 34213 | 21 Jun 15 15:57 |

here the bottom side is done, starting on the top side. |
| rayl, Image # 34212 | 21 Jun 15 15:56 |
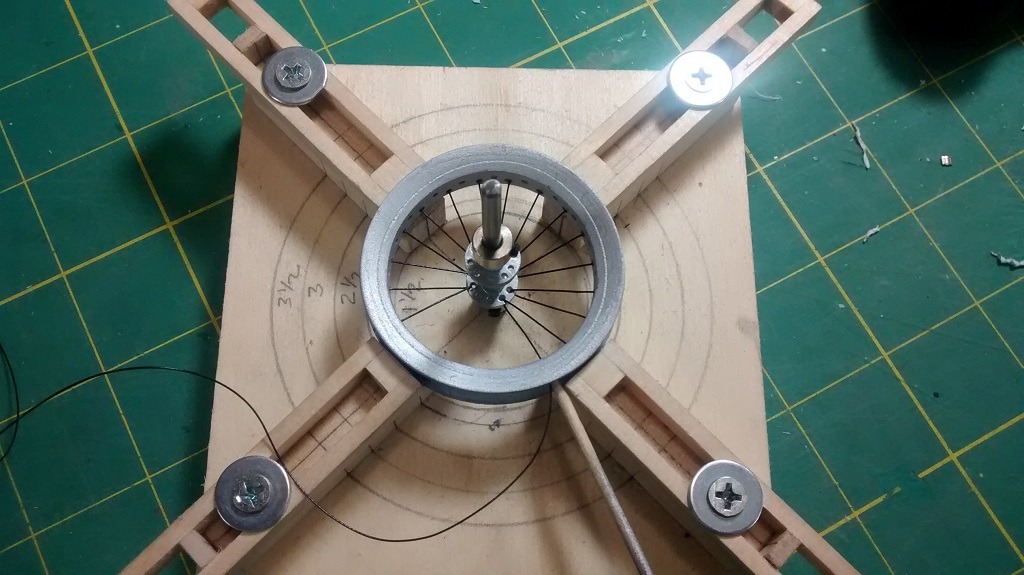
Starting to weave the spokes. Do the lower side first. Note that when I drilled the holes in the rim, I offset thealternating holes by about the with of my drill bit to allow for full access to the holes as the weaving progresses. ANother nice thing about this jig is that you can offset the hub to either side of center to replicate wheels that have offset spokes in real life. The toothpick (lower right) is jambed into the last filled spoke hole to maintain the tension as the weave progresses. |
| John M Oshust, Comment for image # 34207 | 21 Jun 15 15:53 |
| Kevlar thread works well as does fishing monofilament. I made a wheel with mono, hit it a bit with a heat gun. The mono shrank and pulled the spokes tight. |
| rayl, Image # 34211 | 21 Jun 15 15:51 |
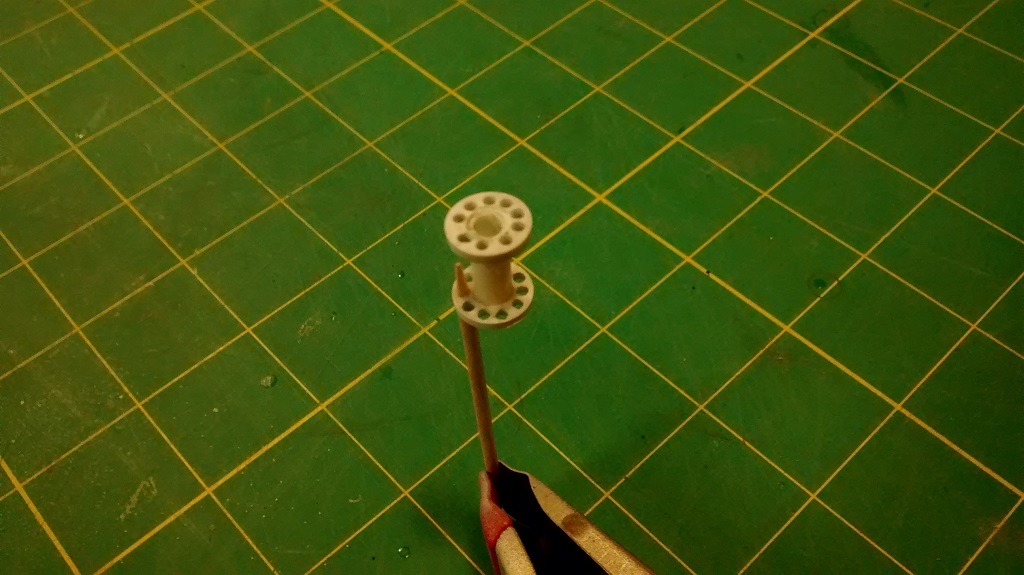
Completed hub. In this instance I used a 1/2" long piece of 1/8" ID Evergreen tubing. |
| rayl, Image # 34210 | 21 Jun 15 15:49 |
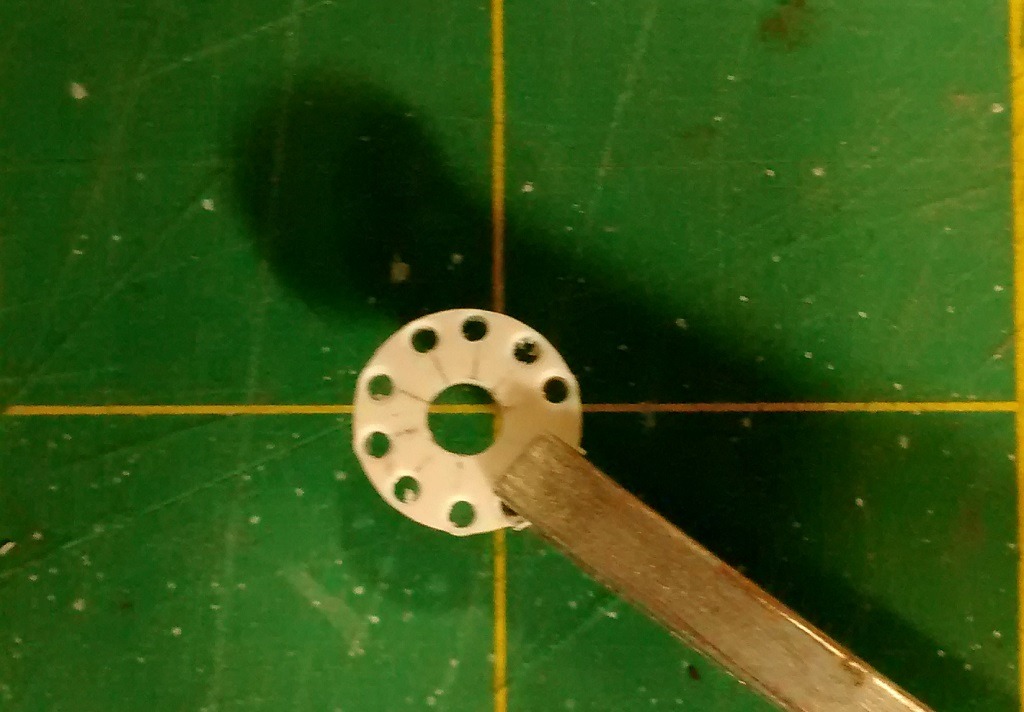
My apologies for the horrendous spelling, I'll do better. This is the hub after the 10 holes have been drilled. Now, do it again. |
| rayl, Image # 34209 | 21 Jun 15 15:47 |
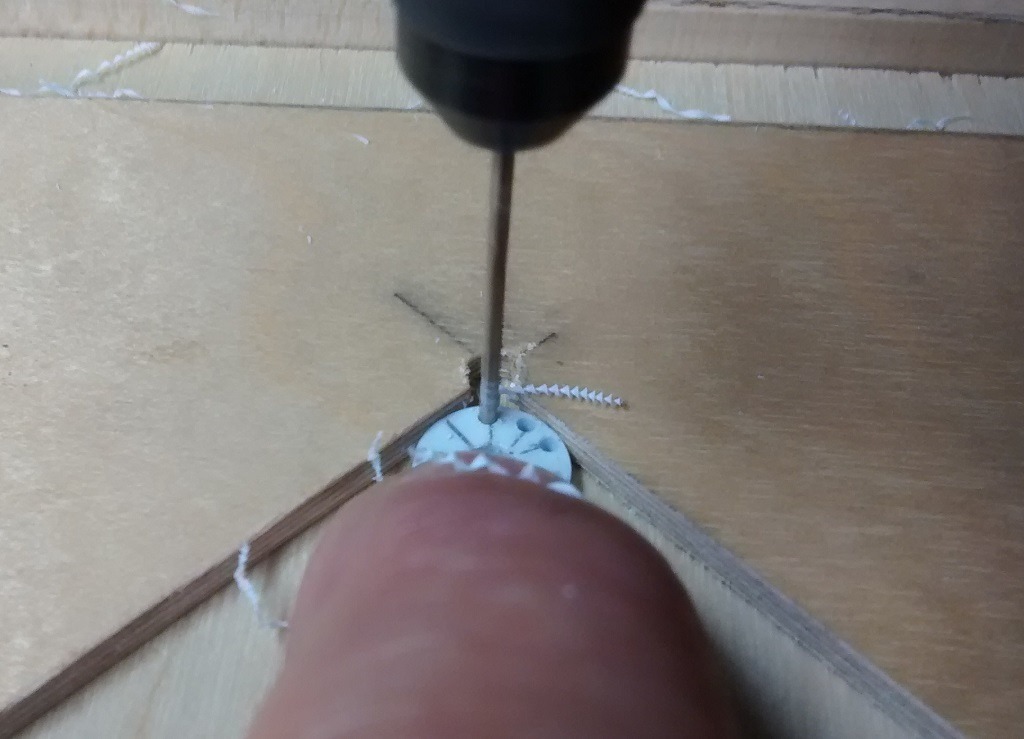
Not that you need it, but I made a small "V-notch" jig to cradle the hub. It is rather finicy to set up but once it is set, the distance of the holes from the edge of the hub is locked in. Note the high tch clamping mechanism, so all help is appreciated. I used a No. 47 drill which is probably oversized for the spoke material. |
| rayl, Image # 34208 | 21 Jun 15 15:38 |
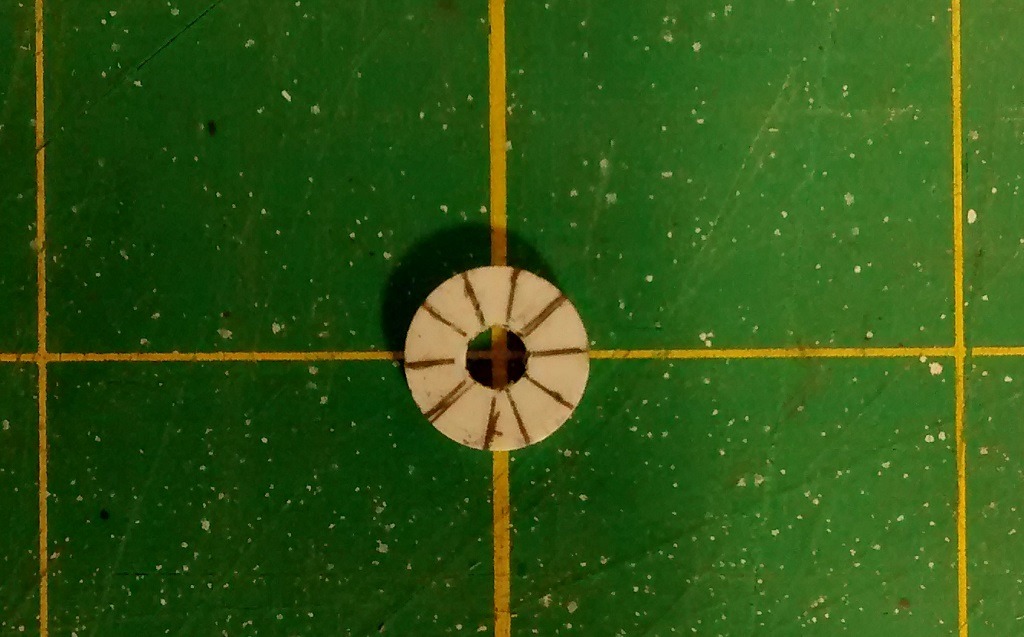
Laying out the number of holes on one of the hub pieces. This is a piece of 0.060" styrene about 1/2 " in diameter. |
| rayl, Image # 34207 | 21 Jun 15 15:36 |
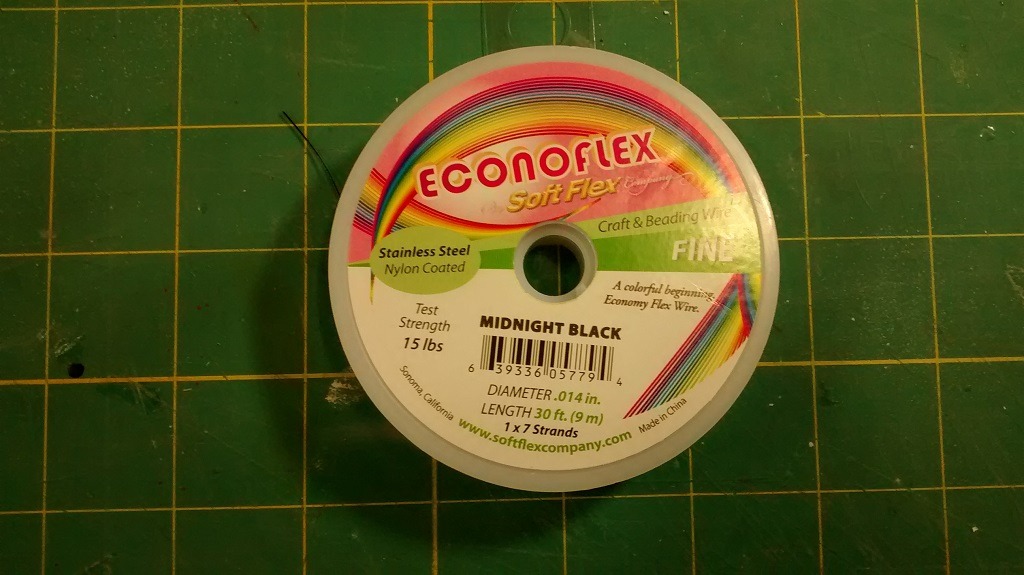
THis is what I used for the OL-8 wheels. The "stretchy stuff" also works well and due to it bigger diameter, visually fills the spoke area more. I couldn't find any surgical thread locally like John O used so I went with what I could find. I don't think that regular thread is a good choice if you live in an area that has big swings in humidity. |
| rayl, Image # 34206 | 21 Jun 15 15:31 |
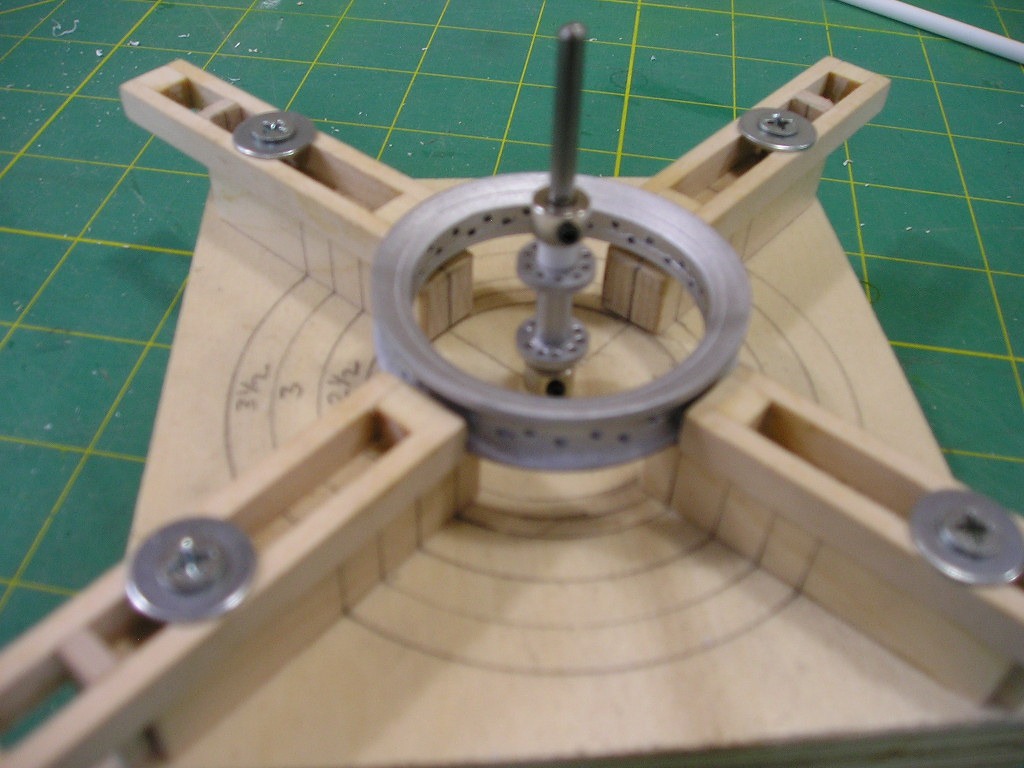
I thought that I wouls share my method of building spoked wheels. John O is the inspiration but I have added a few of my own twists to the process. Several things that I need to mention before progressing: (1) After determining the number of spokes that you want, the hub has to have 1/4 the number of holes (per side) that the wheel rim does, i.e, if the rim is going to have 40 spokes the hub requires 10 holes per side. (2) when assembling the wheel hub, I think that it looks better if the hub holes are staggered. (3) The jig, as shown does not have to have a tight hold on the rim, I like to be able to rotate the hub/rim assembly while lacing up the spokes. |
| rayl, Comment for image # 34188 | 21 Jun 15 10:09 |
| Thanks Don. I have no idea why I need 16(+) handsaws, but they seem to keep following me home. |
| Don C, Comment for image # 34188 | 19 Jun 15 10:32 |
| Never did learn how to use one of these, but just looked at your wheels and am humbled. However, I am quite familiar with all those wooden handled things in the background. |
| rayl, Comment for image # 34188 | 17 Jun 15 10:09 |
| I don't know if I can list the buyer of the plastic models, but I will because he also has balsa kits. Be forewarned, his prices are on the high side, but comparable with Evil-Bay. His web site is: oldmodelkits.com. |
| rayl, Comment for image # 34188 | 17 Jun 15 07:33 |
| Been waiting for years to get a small lathe but the price always scared me too. Remember the pile of plastic kits that I was sorting out several months ago? I sold about a third of them to a collector, so I had the funds available to purchase it. |
| poppy, Comment for image # 34188 | 17 Jun 15 05:39 |
| Lucky you! I've always wanted one but like JO, price kills it for me. |
| John M Oshust, Comment for image # 34188 | 16 Jun 15 18:27 |
| Just checked the price tag....do not need it that much! |
| John M Oshust, Comment for image # 34189 | 16 Jun 15 18:23 |
| Sweet design, must copy it! |
| John M Oshust, Comment for image # 34188 | 16 Jun 15 18:20 |
| Must have one of these! |
| Creosotewind, Comment for image # 34190 | 16 Jun 15 18:06 |
| Very cool. I'd like to get a lathe someday, but I'm pretty fond of all my appendages. |
| TJH, Comment for image # 34185 | 16 Jun 15 15:33 |
| Just saw this in my area a little over a week ago. |
| Build Thread, Page :
<< 22 23 24 25 26 27 28 29 (570 posts, 20 posts per page, 29 pages in total)
|
[ < Prev ] [ Next > ] |
