| Build Thread, Page :
1 2 3 4 [ 5 ] (93 posts, 20 posts per page, 5 pages in total)
|
[ < Prev ] |
| lukebozek1, Image # 20209 | 22 Nov 10 09:57 |
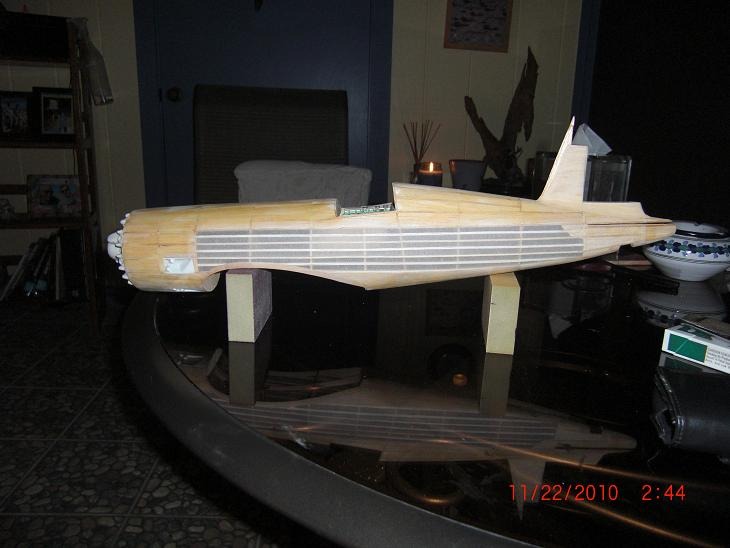
Tissue on fuselage came out okay, on the second try. Two areas might be repaired/replaced later. |
| lukebozek1, Image # 20208 | 22 Nov 10 09:55 |
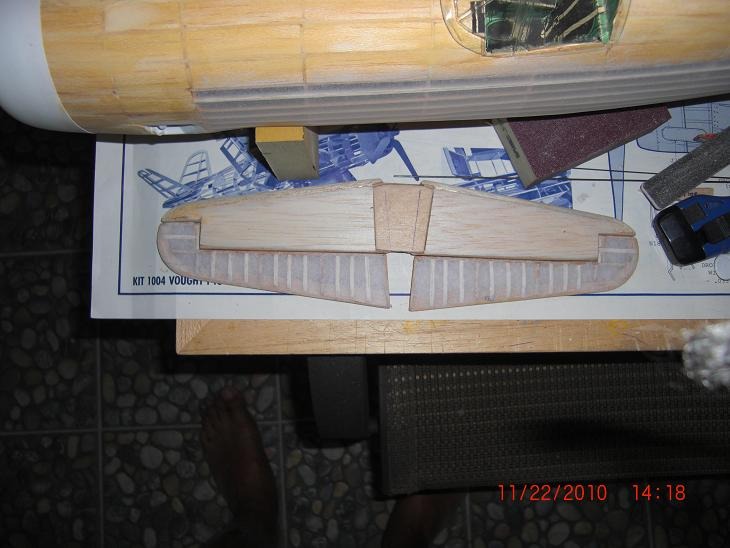
Elevator control surfaces, more difficult to tissue than I had anticipated, used the Esaki tissu instead of the silkspan which did not shrink. |
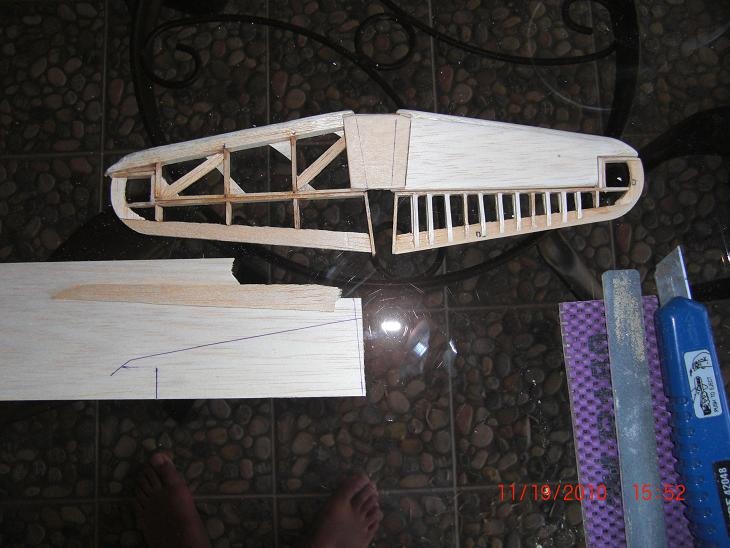
| lukebozek1, Comment for image # 20162 | 19 Nov 10 15:35 |
| One other tip, on building to the plans. I did the port side first using te plans, and found it very difficult to fit some of the interior 1/4 inch framing. The other side, I built the elevator seperatly and it went very quick without the interference. |
| lukebozek1, Comment for image # 20140 | 19 Nov 10 15:32 |
| Hobbylite is the brand name, I don't apply this to the stringers. I filled in the gap between the stringers with 1/16 inch sheet, cut to oversize and bevel the edges so that it sinks in. I use the filler for any gaps and the areas that sanded low. I watched some of the other people do this using heavier or thicker balsa. I did it once with 1/32 sheets but it is too thin, I found myself snding through. This 1/16 is so thin I can see through it in places, but it is easy to cut and after gluing in place is very strong. This frame is the strongest frame I have ever built, very stiff no flex at all. |
| RTD89, Comment for image # 20140 | 19 Nov 10 10:49 |
| Thanks for the info. I've seen a bunch of people using this filler technique while I've just been using fabric to cover my planes and I wanted to try it out on a future project. What brand name was the filler? How do you keep it from simply falling through the stringers when you apply it? |
| lukebozek1, Image # 20162 | 19 Nov 10 08:53 |
The thin plywood shet in the center should slide right into the fuselage slot, but the angle shown in the plans is too small for the fuselage so I added another piece on teh inside, epoxied and sanded till it fit like a glove. So if you use that piece marked "SA" add a little more width to be sure of the fit. |
| lukebozek1, Comment for image # 20140 | 19 Nov 10 08:41 |
| I bought the balsa colored filler from Hobby Lobby (2 jars for under 10 bucks. When I thinned it out with a little water I could apply it with my calibrated popsicle stick, otherwise it is not very easy to use. Before I use it, mix it up because the water sinks to the bottom of the jar. It sands great, but I feel like 99% of what I apply goes out the window. Around the stabilizer-rudder I use an Elmers wood filler in a tube. I wet my fingers and smooth it out around the rudder. It dries very hard and very smooth. Very little sanding is required. |
| RTD89, Comment for image # 20140 | 18 Nov 10 23:20 |
| What are you using for filler? |
| lukebozek1, Image # 20142 | 18 Nov 10 07:48 |
|
| lukebozek1, Image # 20141 | 18 Nov 10 07:46 |

|
| lukebozek1, Image # 20140 | 18 Nov 10 07:45 |
|
| Creosotewind, Comment for image # 20094 | 15 Nov 10 15:38 |
| Very nice.
|
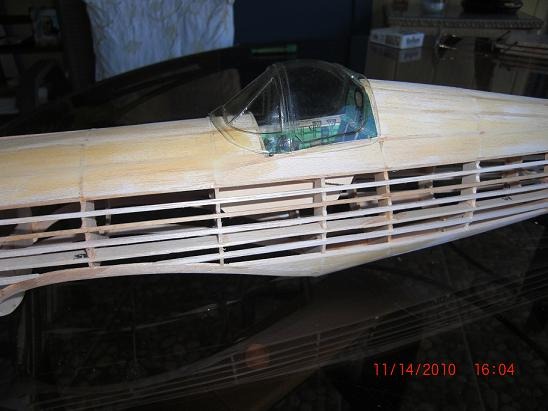
| lukebozek1, Image # 20094 | 15 Nov 10 10:18 |
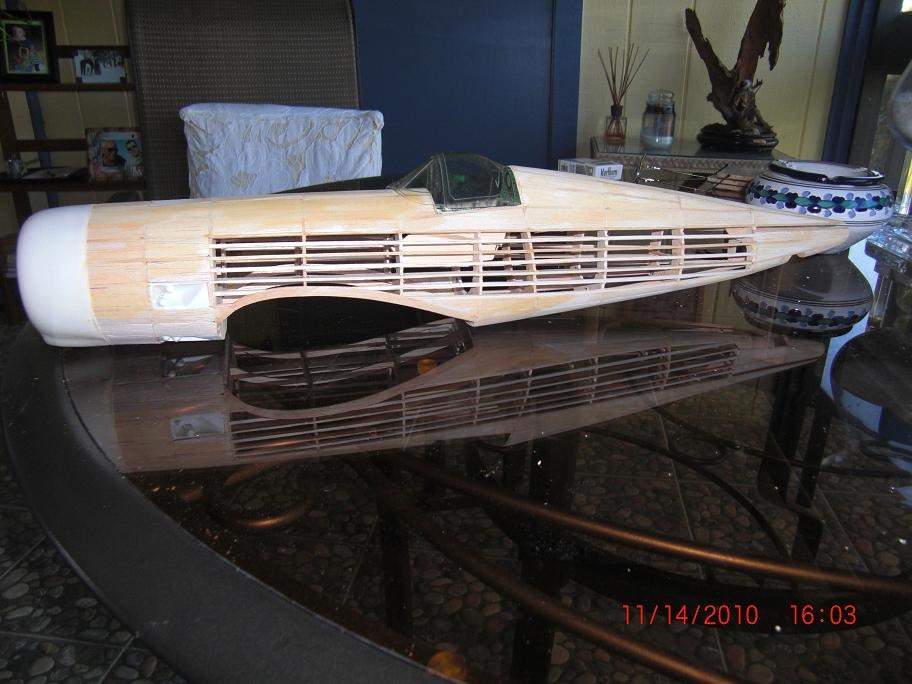
Half way there, only 62 more panels to install. I ordered new plastic and decals, this is a 1972 kit, so the material has age-hardened. Balsa stringers like oak. |
| Build Thread, Page :
1 2 3 4 [ 5 ] (93 posts, 20 posts per page, 5 pages in total)
|
[ < Prev ] |
