| Build Thread, Page :
<< 2 3 4 5 6 [ 7 ] 8 9 (166 posts, 20 posts per page, 9 pages in total)
|
[ < Prev ] [ Next > ] |
| moostang51, Image # 3419 | 01 Jul 07 18:21 |
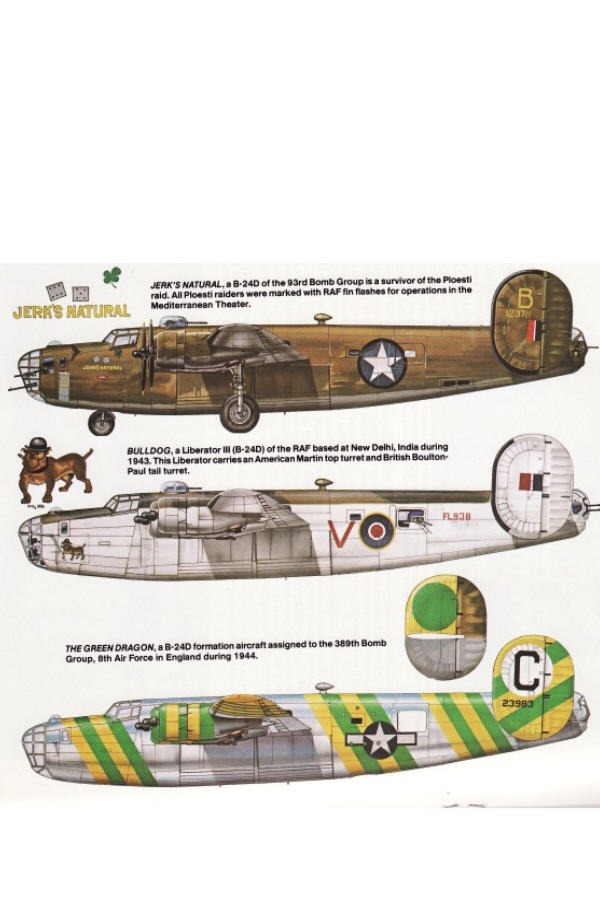
A few possible paint schemes. Jerk's Natural is the detailing provided by Guillow's. I like the Green Dragon at the bottom. Lot's of masking though. |
| moostang51, Image # 3418 | 01 Jul 07 17:53 |
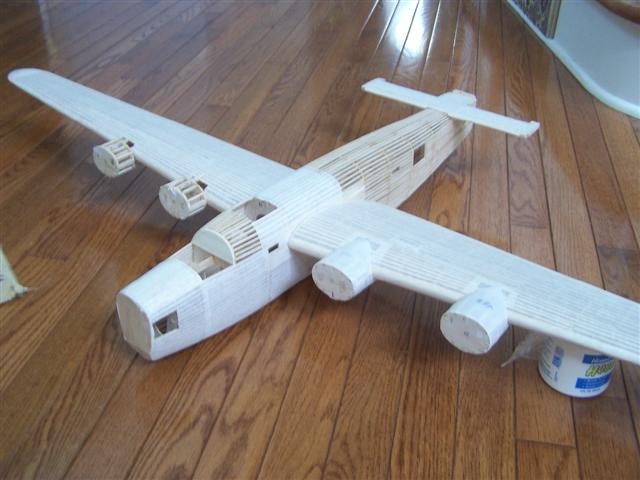
Little bit more of everything, some nacelles and partial fuselage covering. Rudders still in progress, going with solid carved main and tissue covered flap. |
| poppy, Comment for image # 3327 | 22 Jun 07 18:17 |
| Nice work. |
| moostang51, Image # 3328 | 22 Jun 07 17:44 |
Cut tissue one stringer too far. Guess I have to patch with additional silkspan. Next time I'll test fit the plastic prior to building nacelles. Thought thats what the picture showed. Oops!! |
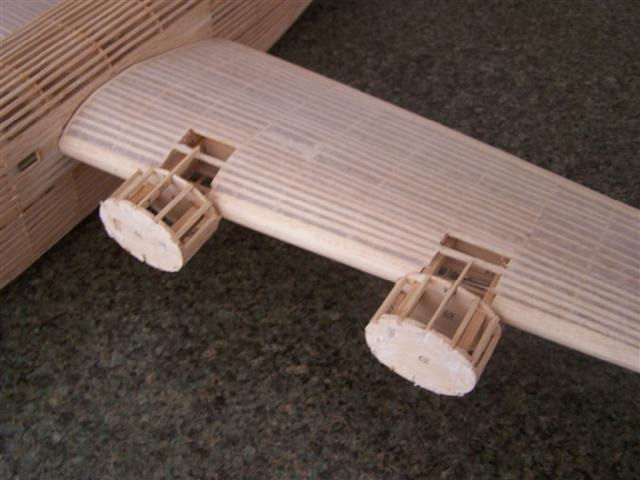
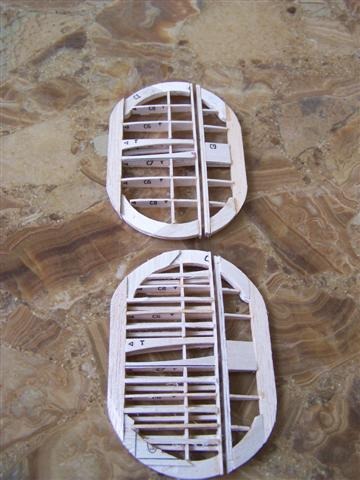
| moostang51, Image # 3327 | 22 Jun 07 17:40 |
Nacelles framed and filled, not yet sanded. Notice how cutout is different on tissue between left and right wing. |
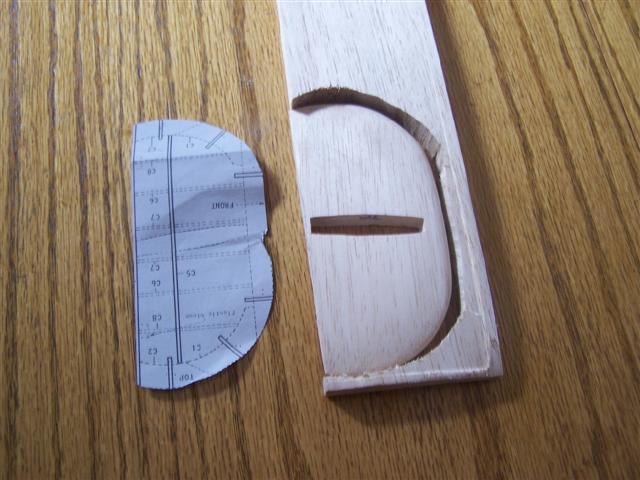
| moostang51, Image # 3229 | 15 Jun 07 18:42 |
Lots of trial fitting onto stabilizer before shaping but fit is perfect. Going to use the pre-built moveable rear rudder assemly and the cardboard overlays so panel lines can be used as per plan. Only thing, should have doped the stabilizer prior to multi |
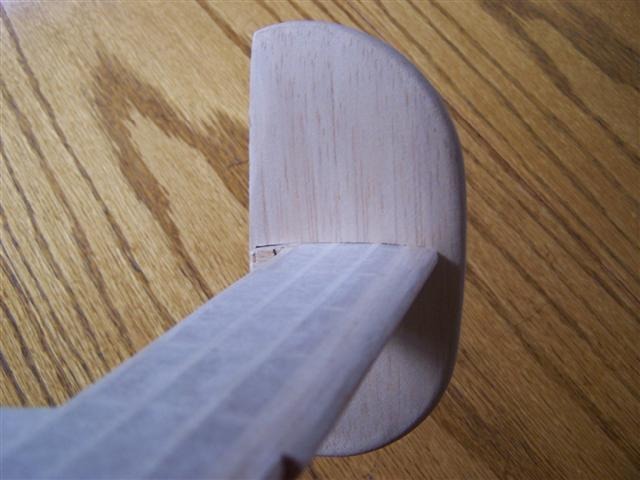
| moostang51, Image # 3228 | 15 Jun 07 18:35 |
New carved rudder. Starts as a 1/2 stock. First cut through notch for stabilizer then lots of shaping and sanding. Used the Guillows plan for final profile. |
| moostang51, Comment for image # 3156 | 11 Jun 07 17:17 |
| Thanks Cd. The build will only be as good as the final product, so if I can get it anywhere near your Focke-Wulf 190 (SUPERB!!! btw..) then all the extra work will pay off. Considering "desert pink" camo based on the USAF African based B-24's. My research shows a lot more "J" models than "D" to pick from. Anyway, paintings a long way off. |
| cdwheatley, Comment for image # 3156 | 11 Jun 07 11:38 |
| Those wings look absolutely immaculate moostang51, well done. |
| mattolson, Comment for image # 3156 | 10 Jun 07 19:39 |
| Wings looking good....I have to get som heavy grade paper. The light grade that came with the Spitfire left a lot of grouped little pinholes....very frustrating as I didn't detect them till I was painting. |
| moostang51, Comment for image # 3156 | 10 Jun 07 18:58 |
| Thanks. Your technique of an added 3/32 wing root and the solid wing tip made the tissue application a snap. Keep us all up to date with photos of your builds, I know I reference them quite often.... repeat....quite often. |
| David Duckett, Comment for image # 3156 | 10 Jun 07 18:39 |
| Things of beauty!! |
| moostang51, Image # 3157 | 10 Jun 07 18:10 |
Whatever is on the plane has been prepped for covering. Had a little issue with the shaping of the right rudder. The rudder construction on this plane proved to be quite a challenge since it will be moveable. Cosidered carving it out of 3/8 solid stock bu |
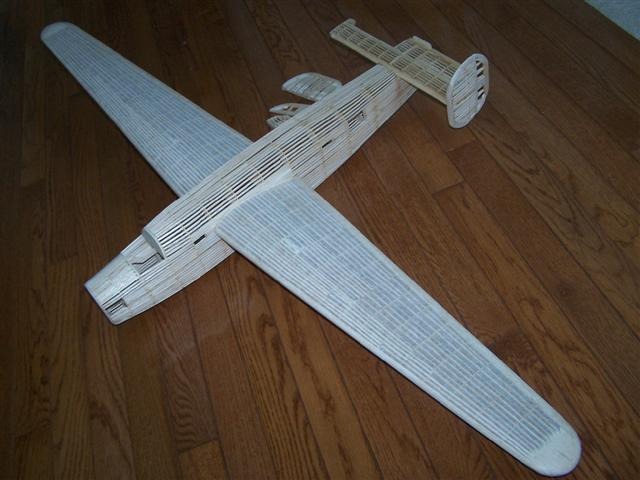
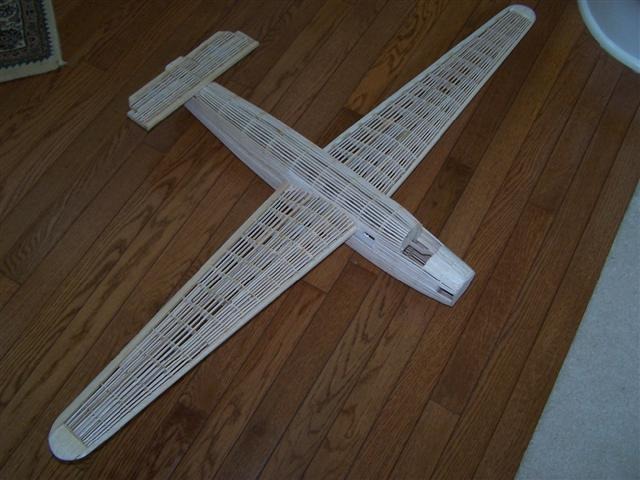
| moostang51, Image # 3156 | 10 Jun 07 18:01 |
Wings completed. Extra stringers and the use of heavy grade silkspan makes for a much better finished product. |
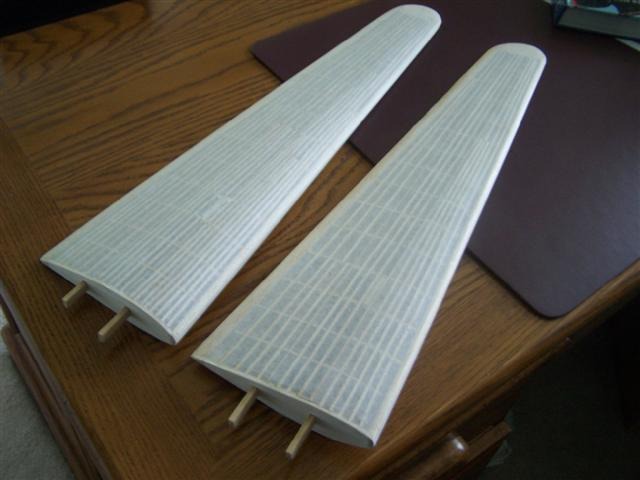
| moostang51, Image # 3155 | 10 Jun 07 17:58 |
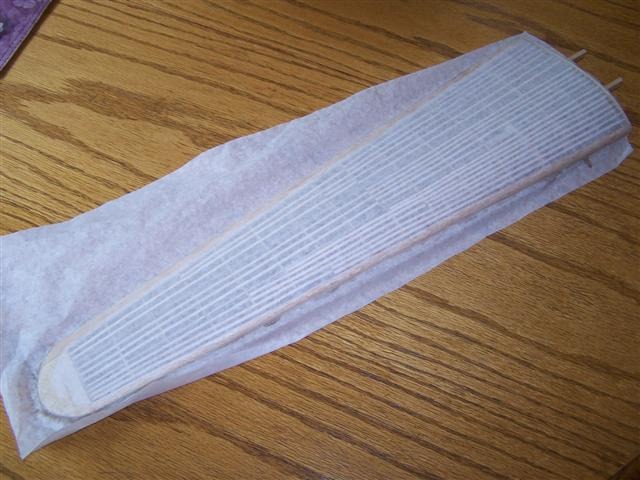
One piece wet SGM tissue applied. Used dope to seal balsa, white glue to attach silkspan and dope for sealing tissue. |
| moostang51, Image # 3015 | 28 May 07 17:49 |
This part is ready for shaping and trial fitting of plastic. Haven't touched the monster in about a month, but I still find time to check out the website daily and occasinally comment. Keep up the good work. |
| moostang51, Image # 3014 | 28 May 07 17:45 |
Most tedious part of the project so far. Still a little more wood to go but had to stop.... all strung out. |
| John M Oshust, Comment for image # 2589 | 19 Apr 07 21:21 |
| Though I just cut my notches by hand I made a mini chalk line with blue chalk dust and string. I quickly snapped lines where I wanted the stringers. |
| John M Oshust, Comment for image # 2589 | 19 Apr 07 21:19 |
| Super, I am willing to give it a go the next time I need to notch for stringers. My Dremel is 20 years old and the slowest speed is still fast, maybe I will spring for a newer model. |
| mattolson, Comment for image # 2589 | 19 Apr 07 20:18 |
| Yea, same as moos. I use the flex shaft with the dremel which makes it a little easier to control and to get into some of the more difficult areas. But, I still end up with some deep cuts. If only I could find a 1/16" cutter. |
| Build Thread, Page :
<< 2 3 4 5 6 [ 7 ] 8 9 (166 posts, 20 posts per page, 9 pages in total)
|
[ < Prev ] [ Next > ] |
