| Build Thread, Page :
1 2 3 4 [ 5 ] 6 7 (131 posts, 20 posts per page, 7 pages in total)
|
[ < Prev ] [ Next > ] |
| SteveM, Comment for image # 6795 | 26 Feb 08 13:39 |
| Rudder was covered dry then shrunk with water - it warped. The stabilizer was covered dry then sprayed with crystal clear - not enough shrinking. Basically I will run out of kit tissue before I figure out the proper way to use this stuff. Dumas will sell me more at $0.50 a sheet plus $7 shipping, but I'd just as soon order from Easy Built Models and get tissue for other kits as well. Suggestions of other sources of colored tissue are welcome. |
| SteveM, Image # 6795 | 26 Feb 08 13:35 |
Still having issues with the kit tissue. |
| SteveM, Comment for image # 6759 | 24 Feb 08 15:23 |
| I may need to pre-shrink as this is nothing like the Guillow's kit tissue. When wet it got very loose then when dry it twisted the frame. I sprayed it with water again and am holding it flat while it dries.
Skip, no dope or wood sealer used so far. I have been following the guide by Easy Built Models for the most part. I did not need any alcohol for this part but will have to use it if I need to take the paper off of the rudder and try again. To seal the paper I will use nothing but crystal clear as described in the guide. |
| Skip, Comment for image # 6759 | 24 Feb 08 11:56 |
| Does the balsa framework require clear doping and sanding prior to using the glue stick? The reason I ask is because I've always used clear dope to cover my frames. I stumbled across this site and am marveling at the workmanship in the building of these kits. |
| Xanadu, Comment for image # 6759 | 24 Feb 08 10:38 |
| I have heard some pre-shrinking the tissue and then glue sticking it on, especially for very light, flimsy structures. |
| SteveM, Image # 6759 | 24 Feb 08 04:48 |
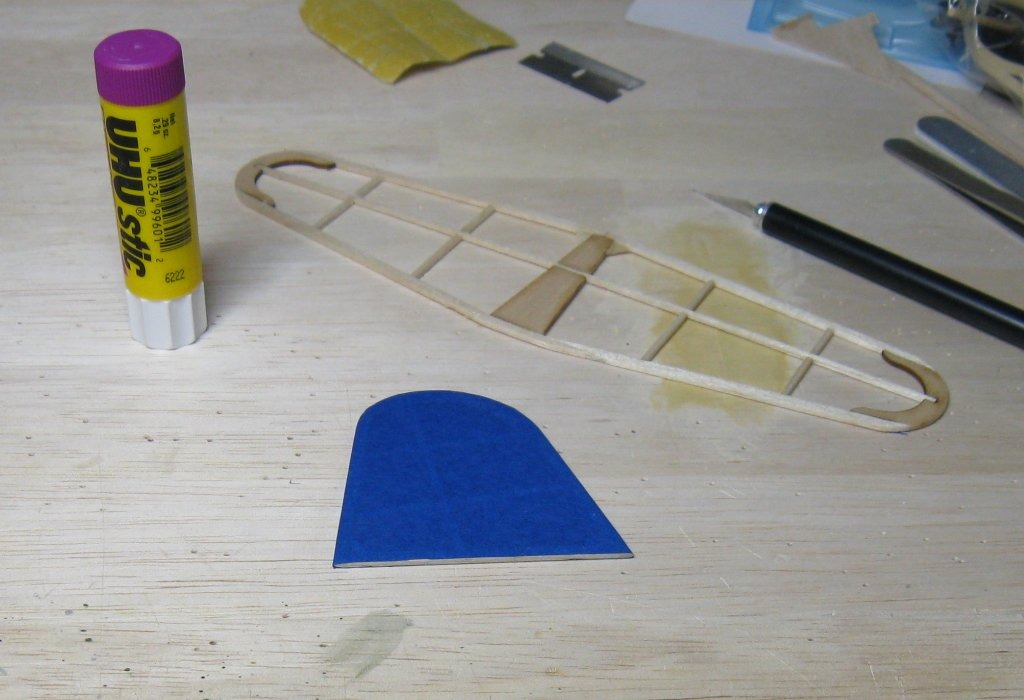
Rudder covered using the glue stick method (not yet shrunk with water). No fumes and no mess. |
| SteveM, Image # 6531 | 11 Feb 08 03:54 |
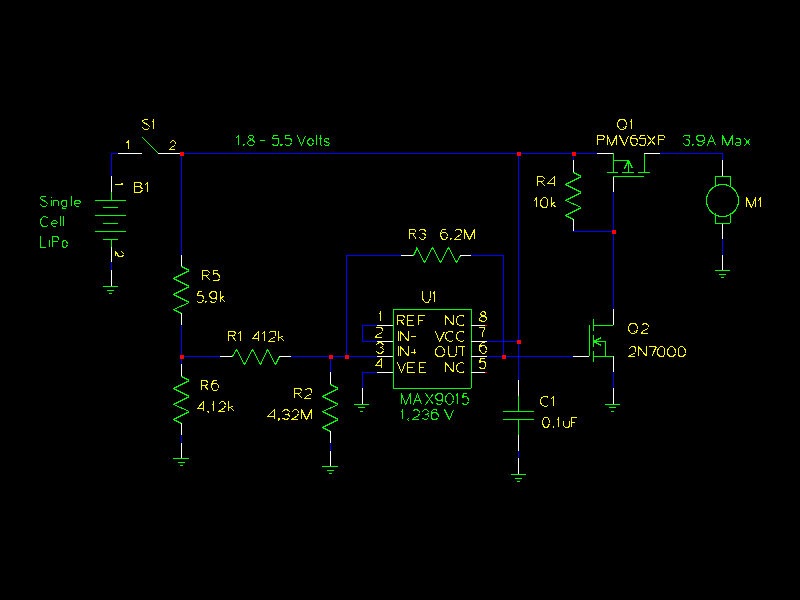
A little LiPo protection circuit designed from parts from my "magic box". Will shut down at 3V and stay off till 3.5V or higher. |
| SteveM, Comment for image # 6329 | 03 Feb 08 20:40 |
| This is a Mini Micro-4 motor with 2x50 mAH NiCd battery pack. The motor, battery, wires, and switches all came in a handy pack from Sky Hooks & Rigging in Canada. In the future I will try to find electric motors from U.S. suppliers, but it seems most are made in the U.K. I will also probably be switching to Li-Poly batteries, though that does mean buying or building circuitry to prevent over discharging the battery. |
| harve, Comment for image # 6329 | 03 Feb 08 20:20 |
| Too cool! Please provide details of the motor and battery - are available in the UK only? |
| SteveM, Comment for image # 6328 | 03 Feb 08 14:55 |
| I have never tried this before, it is one of the methods described by Don Ross in his second book "Flying Models". It has several benefits, the motor alignment is not critical, the rubber band can break if the prop gets caught, front end damage is not transfered to the motor, and the prop thrust angle can be adjusted without fussing with the alignment of the motor. I would probably just mount the motor directly to the cowl if I wasn't trying to make a power plant that can be moved from one model to another. |
| jgood, Comment for image # 6328 | 03 Feb 08 11:50 |
| I was wondering how you were going to get that motor coupled up to the prop. Have you tried this before? |
| cdwheatley, Comment for image # 6328 | 03 Feb 08 09:16 |
| You're going to use an electric powered rubber band to turn the prop?! Different! |
| SteveM, Image # 6329 | 03 Feb 08 04:32 |
On/Off switch and battery charging connection access by removing the canopy. Adjustable nose button is from Shorty's Basement. |
| SteveM, Image # 6328 | 03 Feb 08 04:28 |
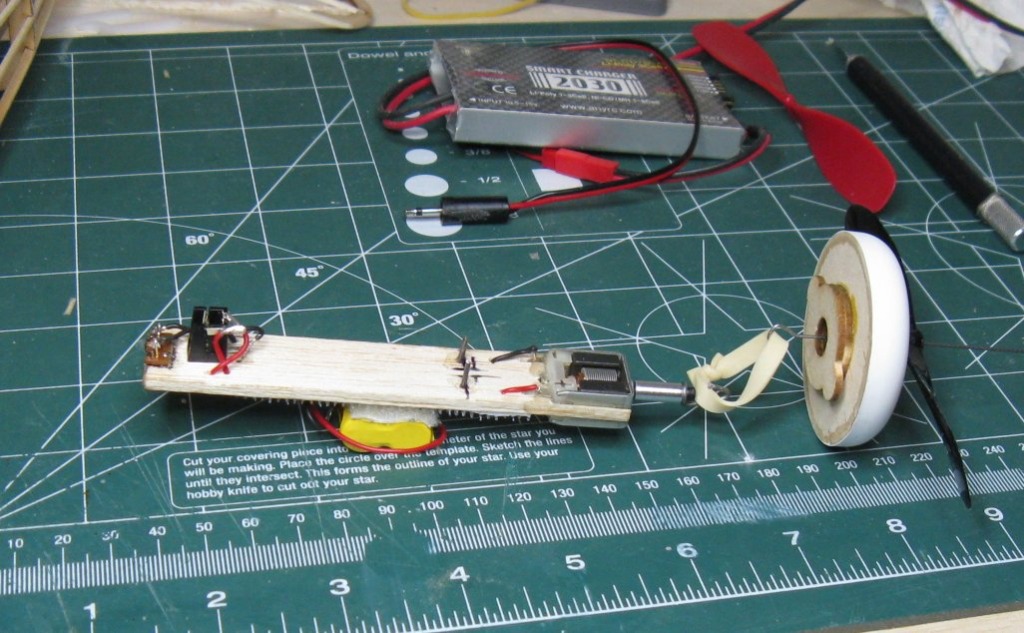
Underside view. Also showing how the motor attaches to the prop. |
| SteveM, Image # 6327 | 03 Feb 08 04:26 |
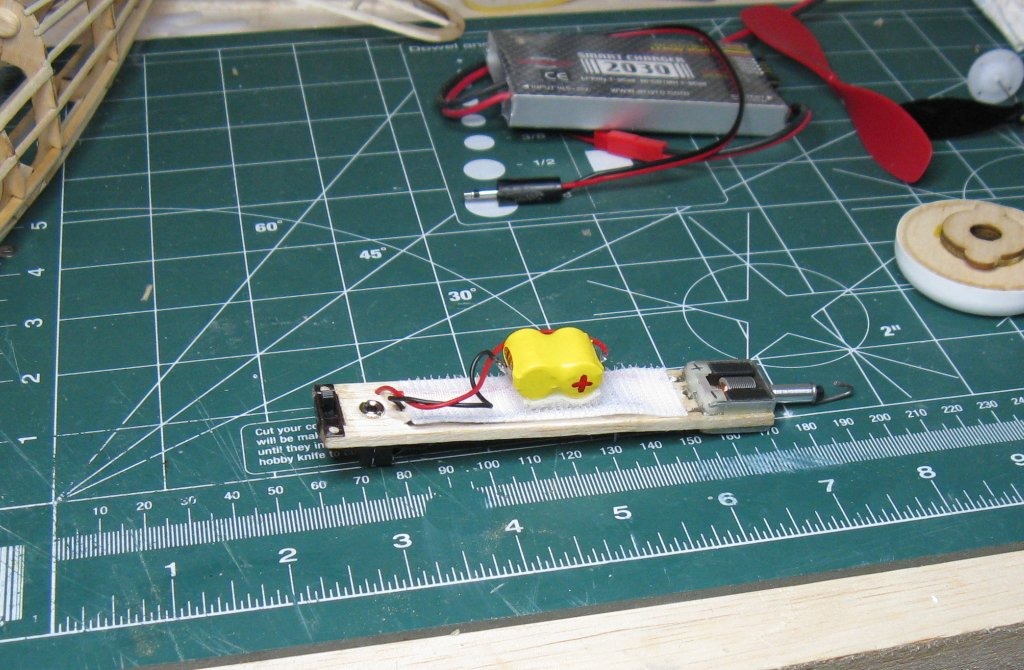
Removable electric power plant, it can be removed to be used in other planes. Velcro to allow the battery to be shifted for balance. |
| SteveM, Image # 6326 | 03 Feb 08 04:20 |
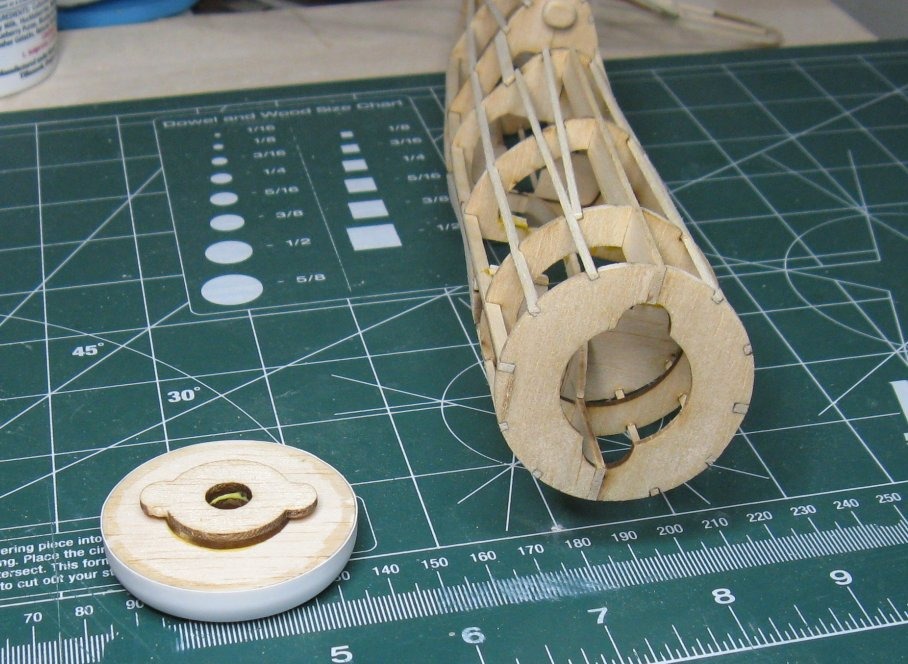
Took a break to work on the Corsair while primer dried on the F15. Here you can see the clever cowl alignment and locking mechanism. |
| SteveM, Image # 5463 | 26 Dec 07 15:08 |
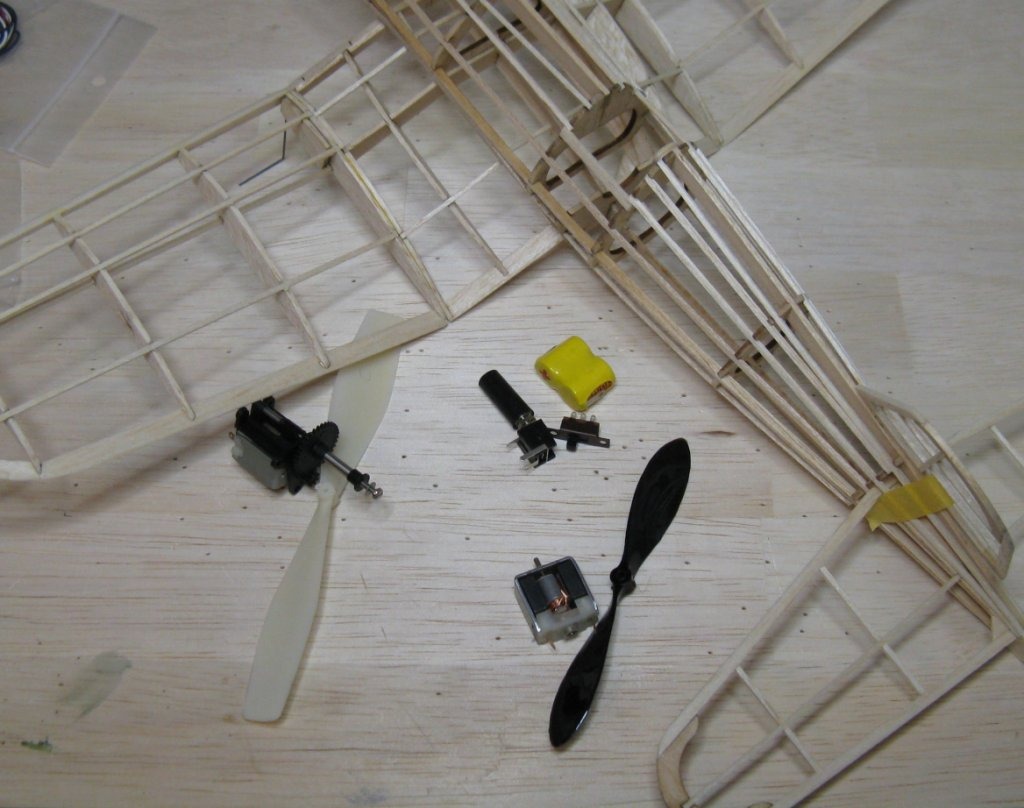
Long awaited KP01 and HL Micro-4 have arrived. Flying weather won't be here for a few months so I will continue to wait on this build. |
| jgood, Comment for image # 5040 | 14 Nov 07 19:08 |
| OK Steve, those aircraft are there now. |
| jgood, Comment for image # 5040 | 13 Nov 07 14:19 |
| Steve, sorry you haven't been able to email me. I'll add these aircraft tonight. Looking forwards to them both, especially the Shuttle! |
| SteveM, Comment for image # 5040 | 13 Nov 07 14:02 |
| Haven't had any luck emailing him (the address listed on this site bounces), so I thought I'd try this way again. |
| Build Thread, Page :
1 2 3 4 [ 5 ] 6 7 (131 posts, 20 posts per page, 7 pages in total)
|
[ < Prev ] [ Next > ] |
