| Build Thread, Page :
<< 2 3 4 5 6 [ 7 ] 8 9 10 11 (216 posts, 20 posts per page, 11 pages in total)
|
[ < Prev ] [ Next > ] |
| pfinn, Comment for image # 14199 | 27 Sep 09 22:33 |
| Sorry, no. But I've got the "Jetco" Thermic "50" plans and a half built wing! |
| frwyflyer, Comment for image # 14199 | 27 Sep 09 21:14 |
| Very nice looking bird. In your clean out did you happen across any Jetco Thermic 36 plans. The kit I bought from ebay was missing plans. |
| pfinn, Comment for image # 14199 | 27 Sep 09 19:04 |
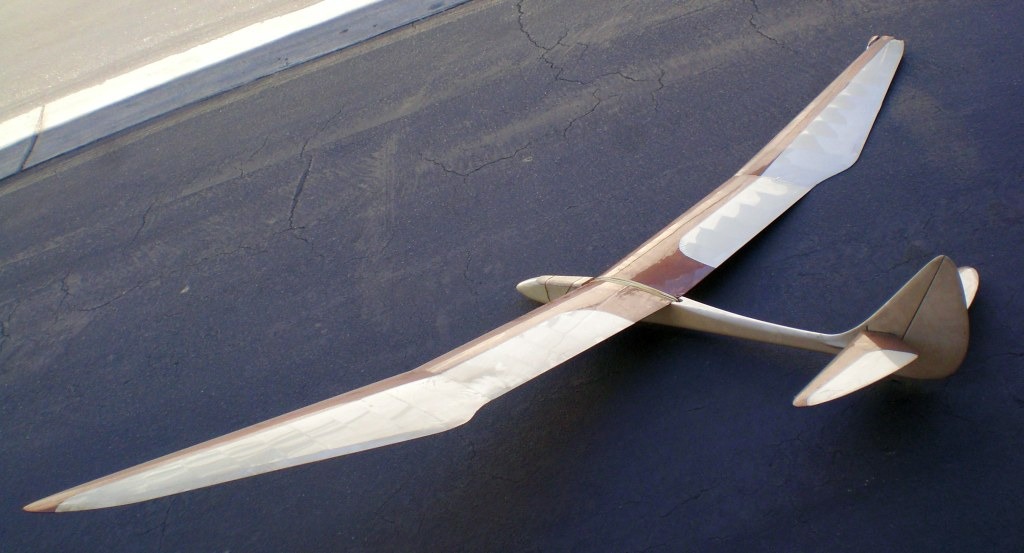
| Quite a bit. It has a releasable towhook for winch launching. As you can see it's old enough that it still uses rubber bands to hold the wing on. I was thinking of changing to bolt on but the wood seems a "Touch" brittle so this glider won't be seeing a winch anymore. Just the slope (although it's a handful to land in 15-20 mph winds) and leasurly flights.... well, if I can keep Jimmy from getting a bit overzealous with it that is! This was pretty much the epitomy of FAI F3B competition (multi task sailplane) in it's day and also one of the last rudder/elevator only control. If you load it up with a pound or two of lead, it's surprisingly quick. They're rekitting this glider with a fiberglass fuselage for the "Nostalgia" events. I guess I am getting old! |
| jgood, Comment for image # 14199 | 27 Sep 09 18:32 |
| That's a beautiful looking machine, Phil. Did it ever fly? |
| pfinn, Image # 14201 | 27 Sep 09 18:13 |
The wingtip was trod upon ...15 years ago. Jimmy wants to fly it so, repair time! |
| pfinn, Image # 14200 | 27 Sep 09 18:09 |

All wood construction. Needs a bit of TLC. The dust wouldn't brush off! It's the dreaded "Petrified" kind! |
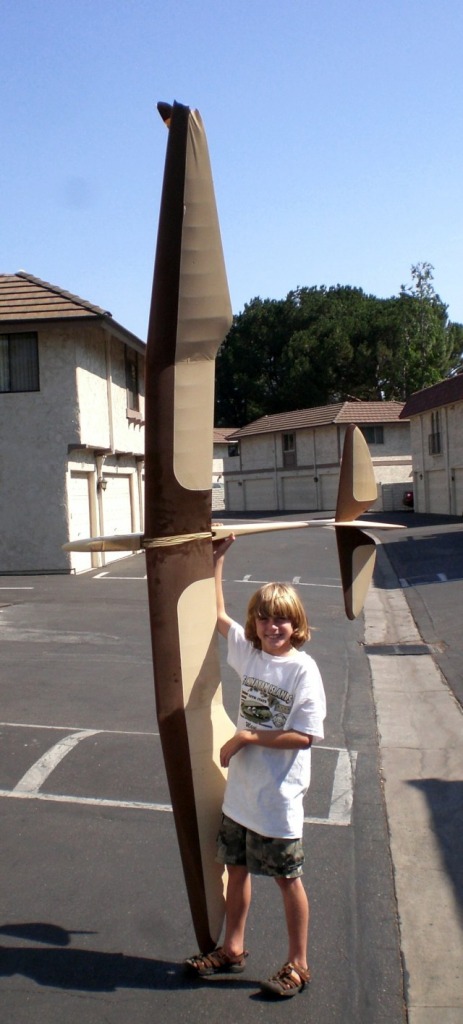
| pfinn, Image # 14199 | 27 Sep 09 18:07 |
Cleaning out the garage for winter building. This was my high school "Wood Shop" project. "Bird of Time". |
| pfinn, Comment for image # 13504 | 27 Jul 09 20:03 |
| Yes you are correct.
Hence the compound miter joint comment. The crosss members should be cemented a bit shy of the top corner of the twisted stringer so after assy. you can sand the top surface planar. I started at the firewall and went back. I glued both top and bottom crossmembers at the same time. With the non-parallel sides one clue to get the fuse true is to make sure the top and bottom spreaders are absolutley parallel. This is not vey difficult because with the Trapazoid shape it's very apparant when they're not. Some lightweight rubber bands and some small sticker "Dots" may help hold things together. Built mine off the workbench in midair sighting down center-line as I held each "F" position manually while I glued. I got lucky and it came out straight. Phil |
| scirocco14, Comment for image # 13504 | 27 Jul 09 18:49 |
| pfinn, I thought about what you said and then looked at the last three formers (F7, F8, F9). The triangles show the vertical former sides are attached at an angle, not 90º as if I built the frame flat. If I build it flat and then try to connect the frame at the bottom won't that twist the top former?
Thanks,
Mark |
| pfinn, Image # 13504 | 27 Jul 09 13:44 |
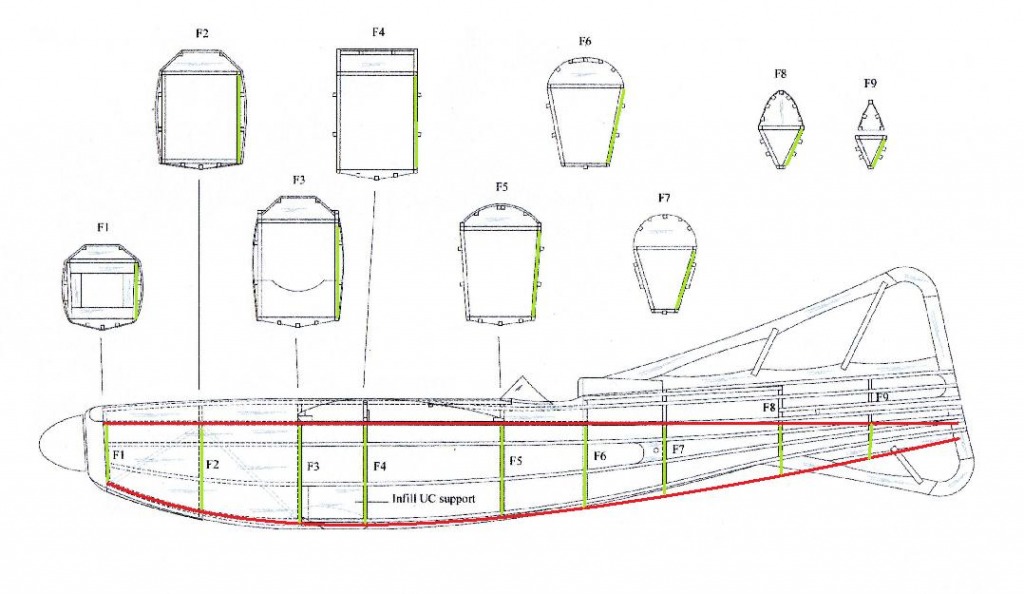
Hello scirocco14. Here's my $.02. This looks strikingly similar to what happened to my "Holiday" fuselage (actually my plane looks like this since this came first!). Here we go. The red and green lines represent the side frames to be built first. Note that the top stringer is straight! The green vertical formers' lengths are measured from the angled lines on the cross sections to define the bottom stringers curvature. The side view on the plan is the fuselage is a depiction of the completed fuse therefore the verticals are "Forshortened" (not perpendicular to the view). After building two side frames use crossmembers measured from the cross sections (F#'s) to build the fuse. See on the side view that the aft portion of the fuse curves up? This happened to me while making the Holiday quite by accident. By changing the cross section from nearly rectangular to trapazoidal to triangular, one is forcing the top stringer to travel further. But since it is already at a set length it will pull the rear of the fuse in an upward curve like a canoe. I'd leave the stringers long on the tail-end and trim after the vert fin position is determined. Don't use my little sketch as a plan cause I just "Eyeballed" it to give visual reference. Get ready for some compound angle miter sanding on those crossmembers! He He! But seriously, this should make a really sweet fuselage. Hope this helps, and moreover, hope it works! |
| scirocco14, Comment for image # 13503 | 27 Jul 09 13:37 |
| Thanks again! This is exactly what I was looking for in terms of experienced help!
Mark
|
| jgood, Comment for image # 12966 | 28 Jun 09 13:23 |
| What a great picture! |
| pfinn, Image # 12966 | 28 Jun 09 02:08 |
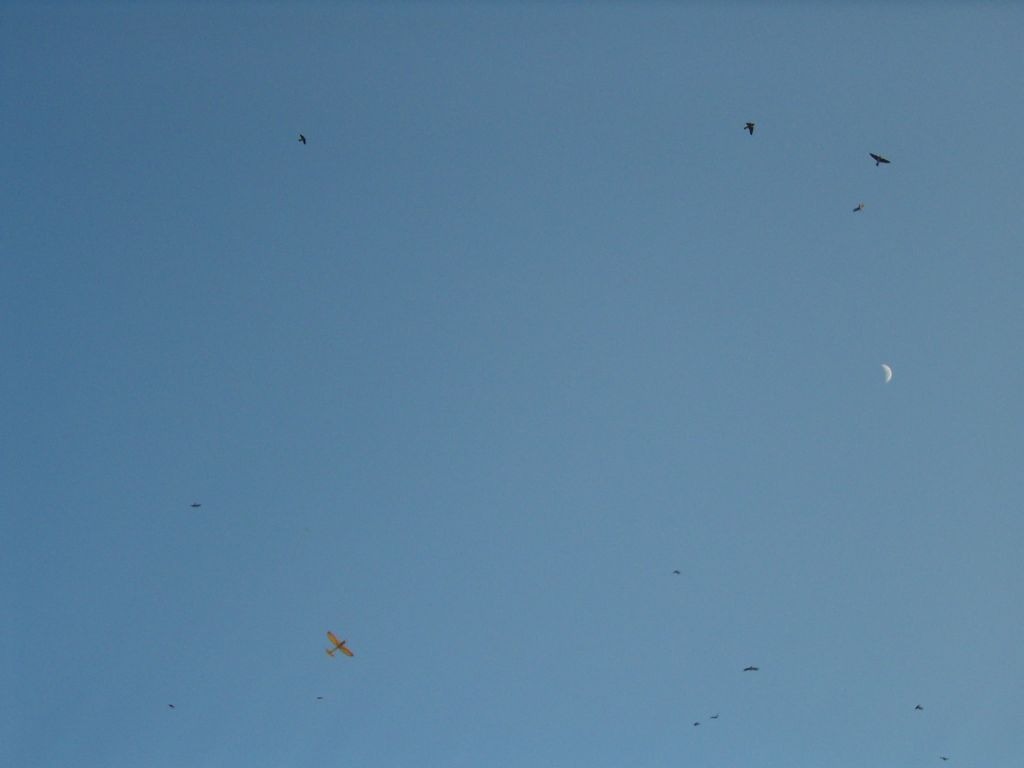
Flying with Swallows at my Dad's place in Solvang CA. There was about fifty of them. Maybe they thought I found them dinner! |
| pfinn, Image # 12963 | 28 Jun 09 01:55 |
Added both fresh air intake and rear facing "exhaust" vents. Was getting a bit warm inside. Both of these are to replaced with internal ducting. These kinda ruin the clean lines of the plane. They just looked so small when I was making them. |
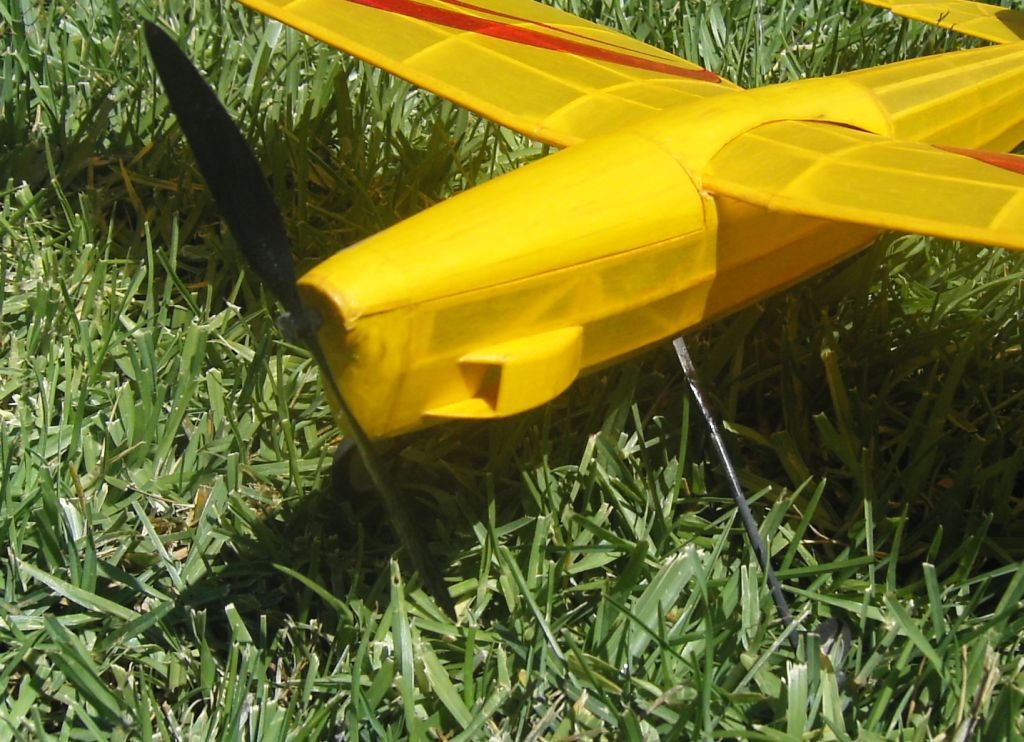
| pfinn, Image # 12962 | 28 Jun 09 01:45 |
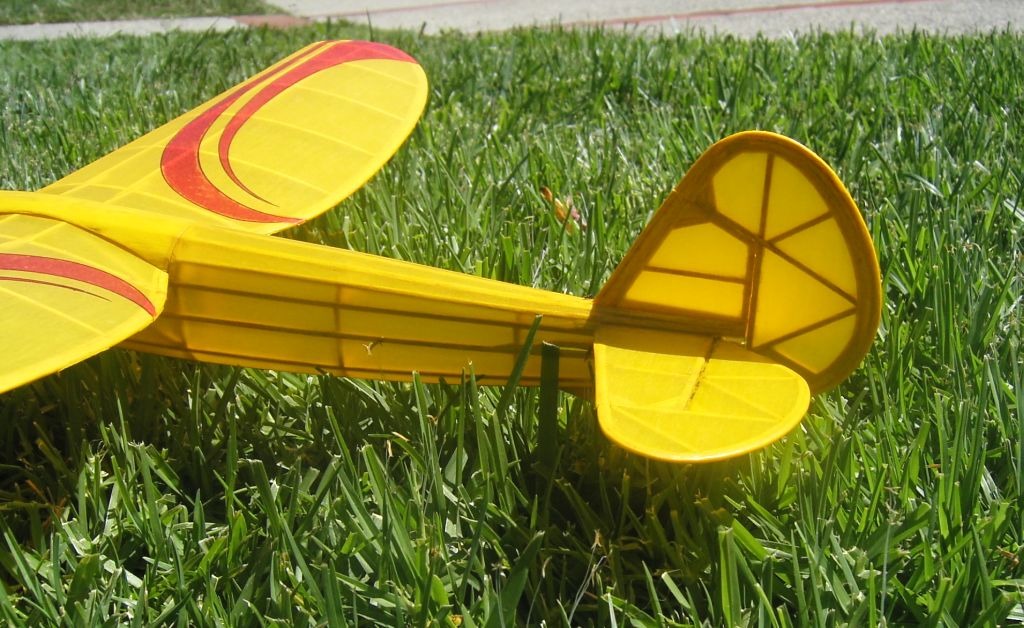
Adding 1/8" to the perimeter of the vertical stabilizer added about 3/4 sq" area. This solved the "Wandering Tail" issue. Also reduced wing incedence a smidge. |
| TJH, Comment for image # 12916 | 26 Jun 09 07:17 |
| Well said Poppy! |
| poppy, Comment for image # 12916 | 21 Jun 09 19:53 |
| Now that's what Father's day is all about. I am glad to see him doing this instead of video games. |
| pfinn, Image # 12918 | 21 Jun 09 19:23 |
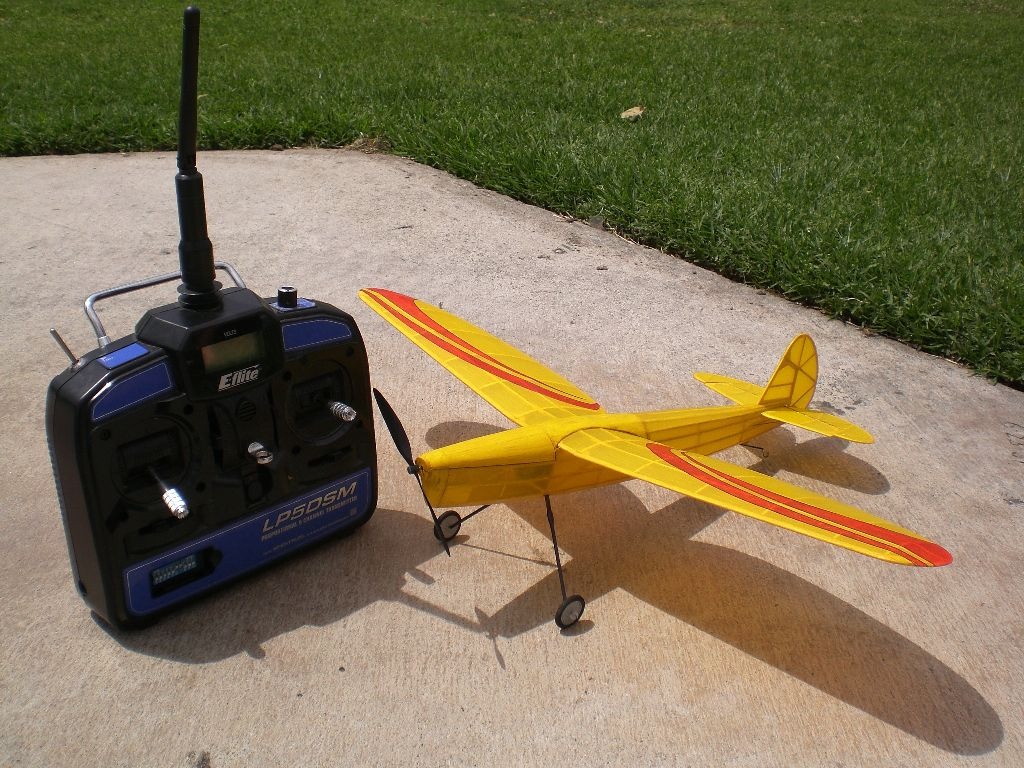
Well, that's it I suppose. Just n less downthrust and more verttical stab area, both easy fixes. Overall I'm quite pleased with the performance and the "Nostalgic" look. Back to the EIII for now. |
| pfinn, Image # 12916 | 21 Jun 09 19:09 |
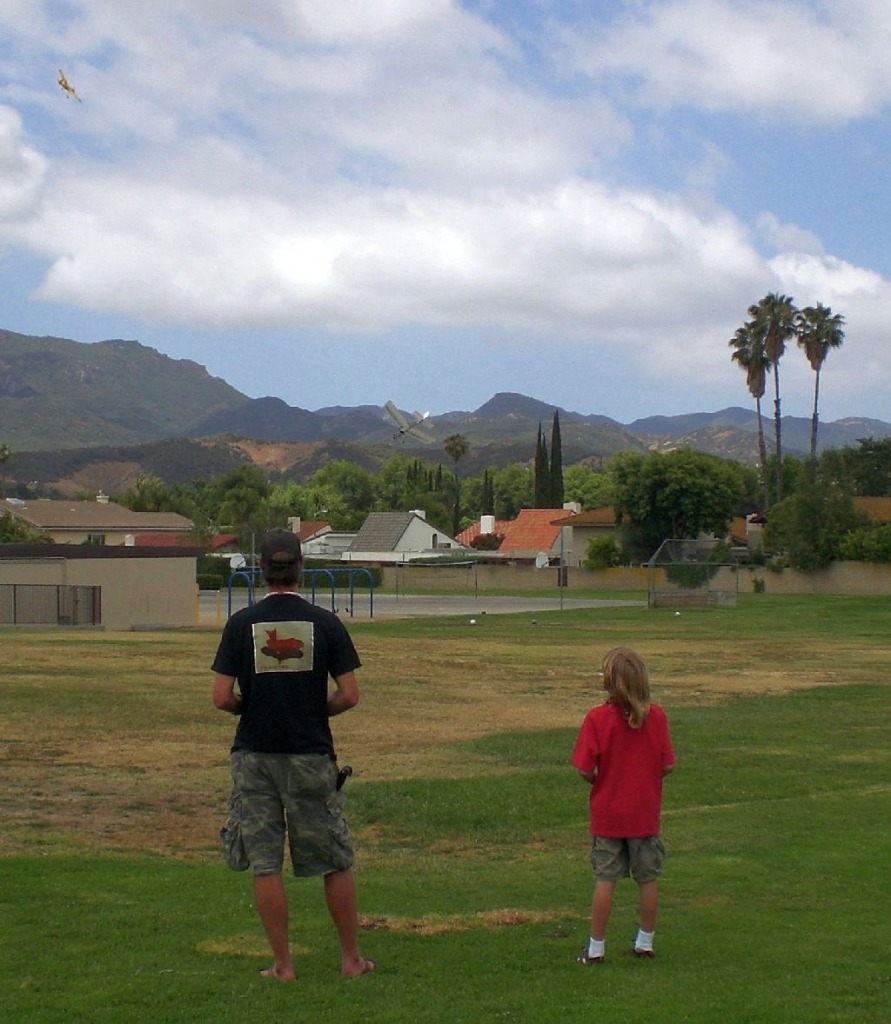
He got inside my turn but lost it in some turbulence. Phew! |
| pfinn, Image # 12915 | 21 Jun 09 19:07 |
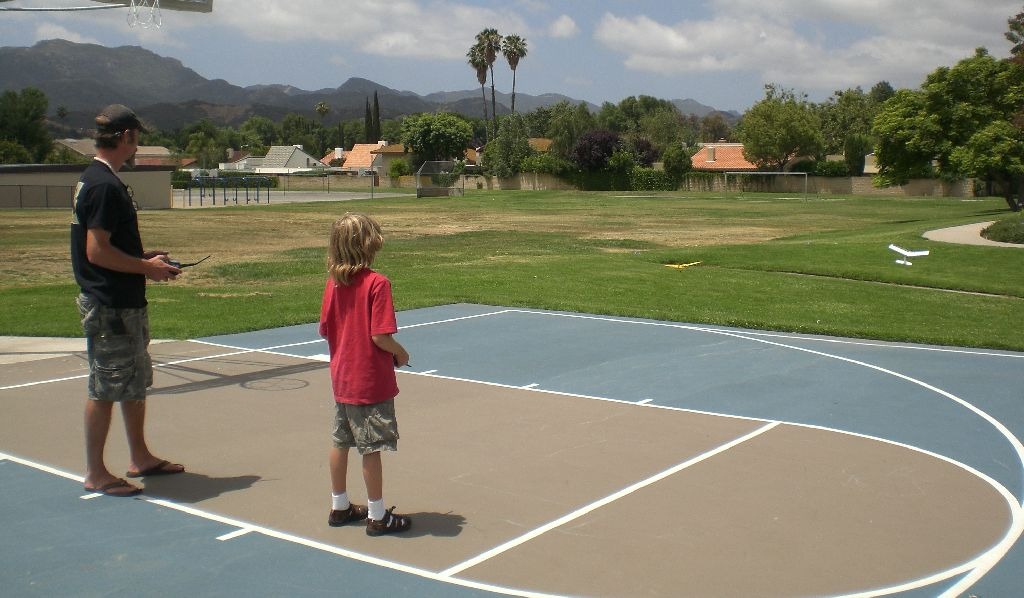
Had a great Father's Day flying with my son. |
| Build Thread, Page :
<< 2 3 4 5 6 [ 7 ] 8 9 10 11 (216 posts, 20 posts per page, 11 pages in total)
|
[ < Prev ] [ Next > ] |
