| Build Thread, Page :
<< 6 7 8 9 10 [ 11 ] 12 (223 posts, 20 posts per page, 12 pages in total)
|
[ < Prev ] [ Next > ] |
| pfinn, Image # 13268 | 14 Jul 09 02:12 |
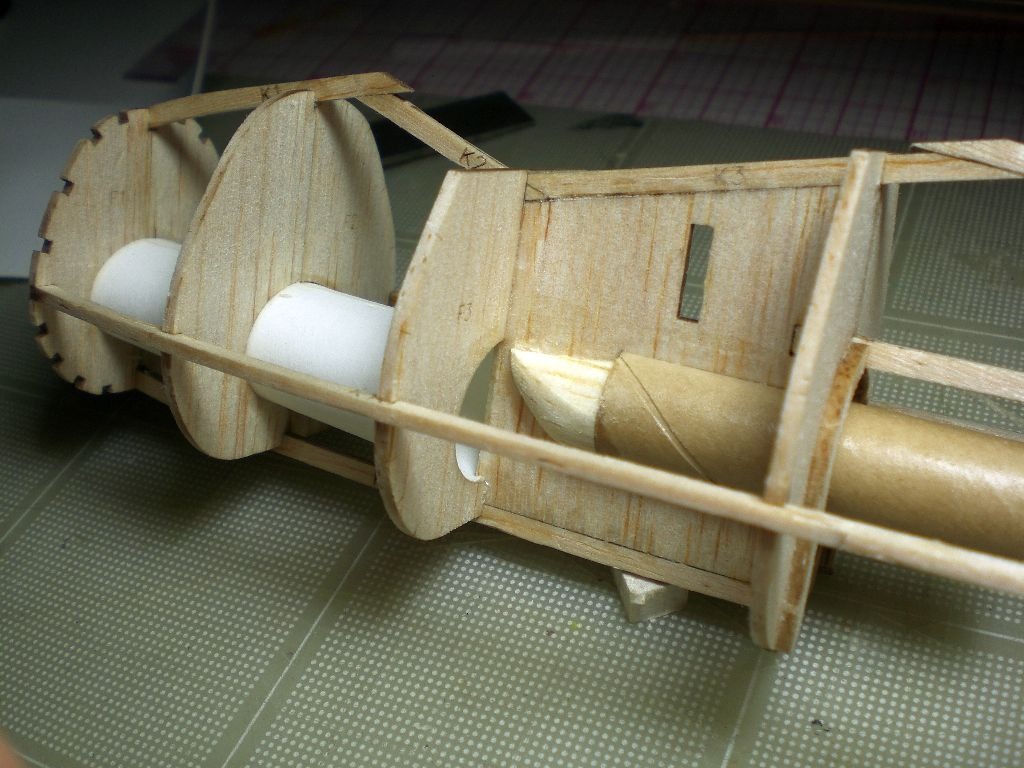
Installing the "Rapier" L2 or L2HP motor tube and the "Active Ducting". |
| pfinn, Image # 13232 | 12 Jul 09 03:49 |
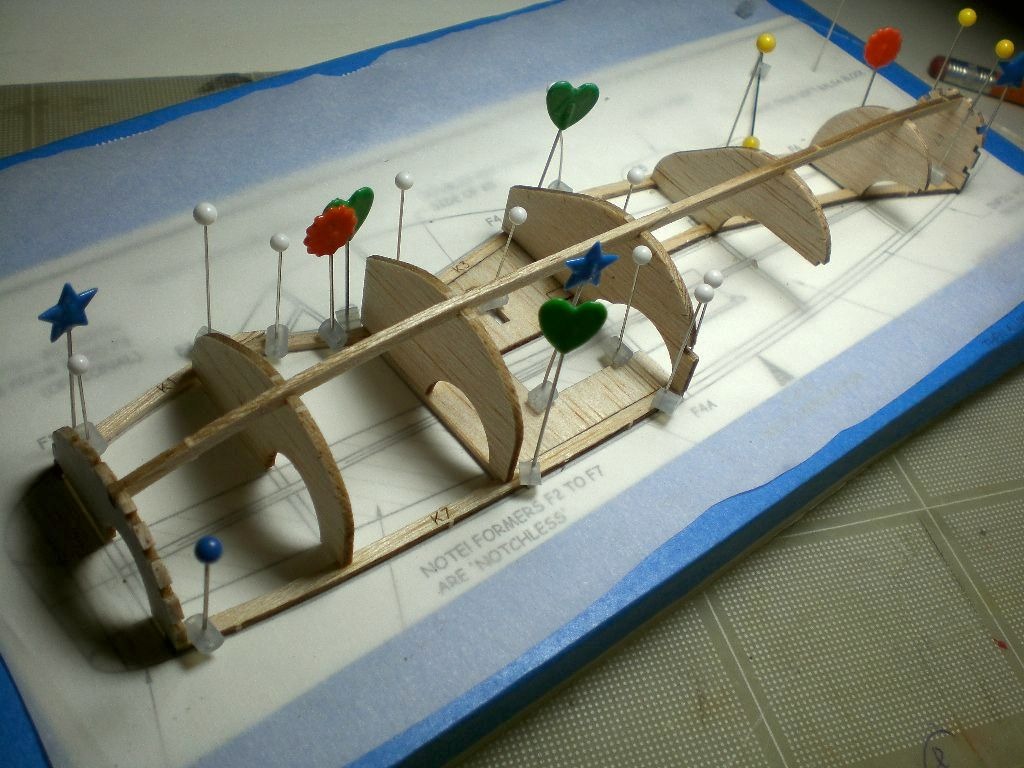
Formers and outer keel strip in place. Ready to come off and add other side. Onlt the forward and aft formers have notches for the stringers. The remainder have small laser marked centerlines indicated on the formers. If you look closely you can see them. |
| pfinn, Image # 13231 | 12 Jul 09 03:42 |
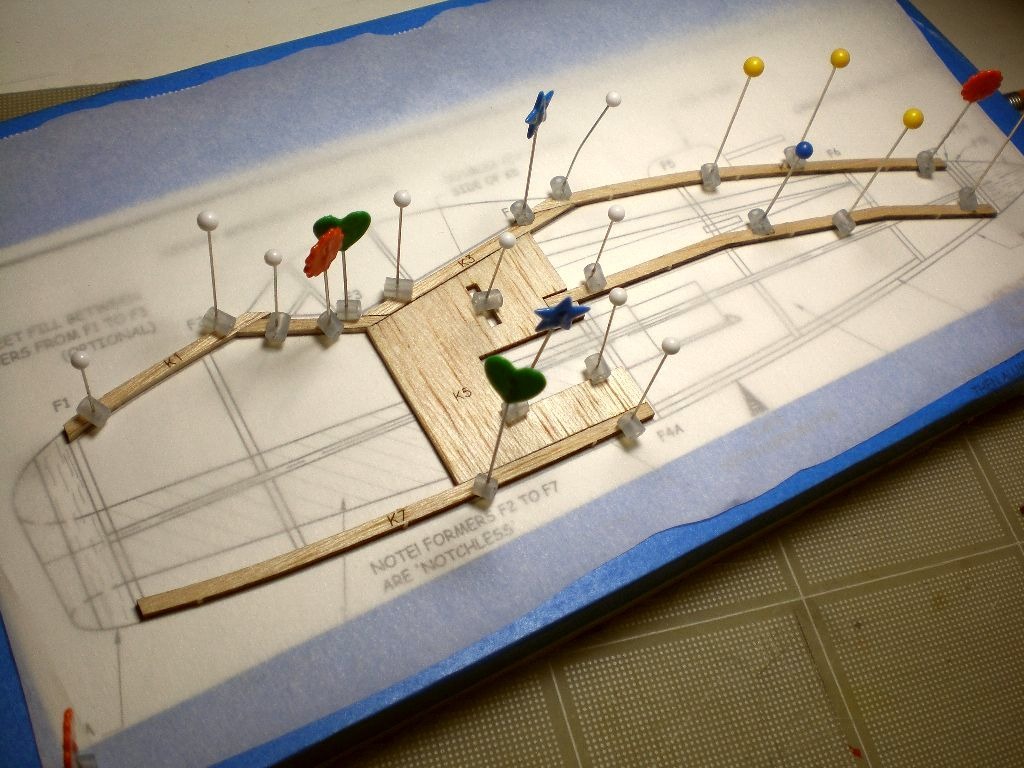
Started fuselage. Keel parts down. |
| pfinn, Image # 13174 | 09 Jul 09 05:22 |
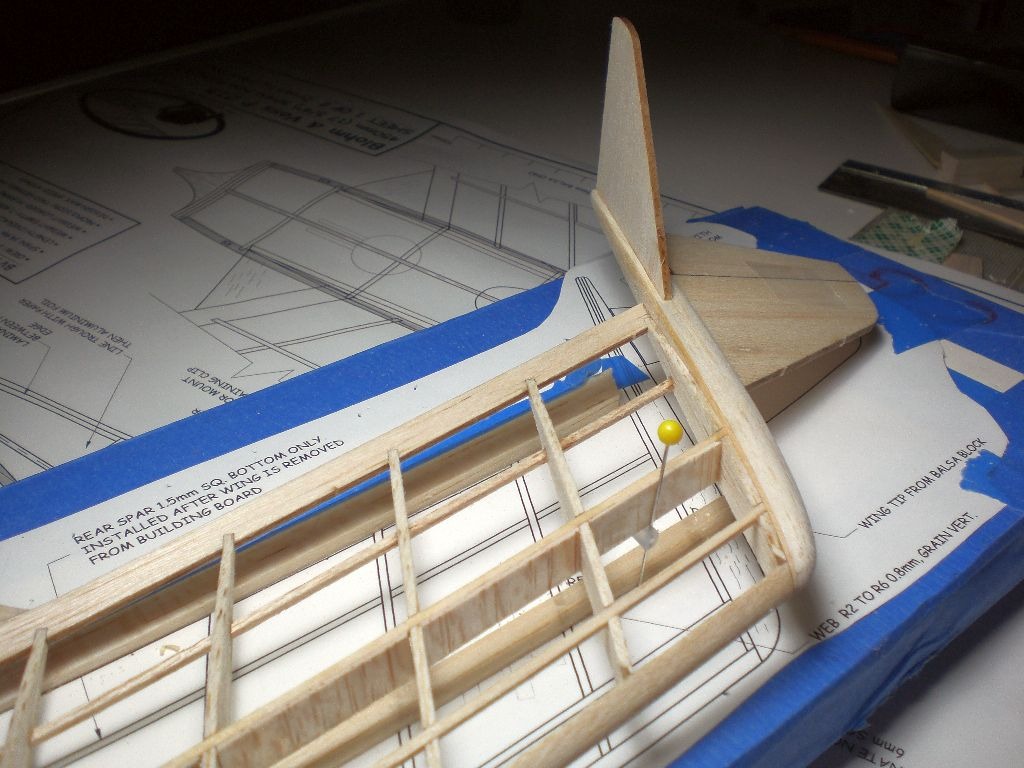
This kit has some pretty complex wingtips. The vert fin is, well, vertical, but offset by the 6 deg. diherdral angle and the horizontal "Diffuser" (it's what the plans call it) has anhedral as well as being angled to match the bottom surface of the airfoil. A bit confusing. Twice. |
| pfinn, Image # 13173 | 09 Jul 09 05:09 |
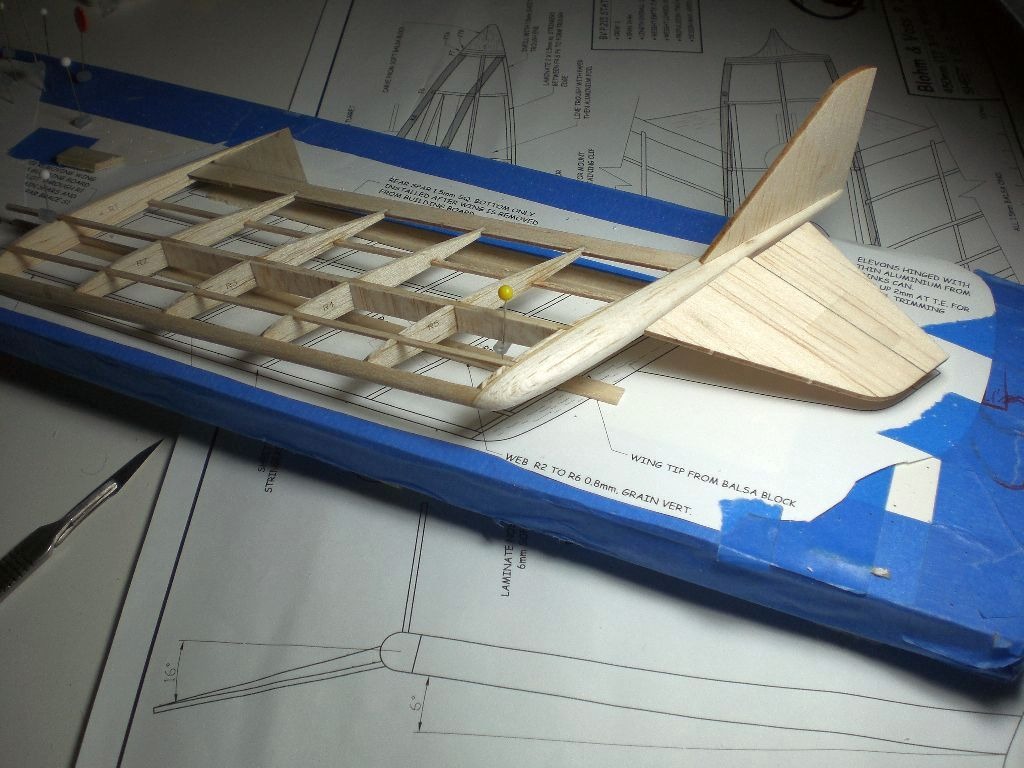
And some more sanding! Tips with inset surfaces. |
| pfinn, Comment for image # 13117 | 07 Jul 09 12:02 |
| Try searching "Rhinoceros cad" Then select "Rhinoceros- Nurbs modeling for Windoows" It's 3-D modeling for designers. Their homepage has a view of a yacht zooming through the water. If you put the cursor on the "download"
button in the horizontal menu bar, the first option is "Rhino evaluation". If you wish to try it out, then select it and go thru the steps, and viola, you can play with Rhino. It comes with some tutorials to get you going but remember you only get 25 saves. |
| hjlittman, Comment for image # 13117 | 07 Jul 09 11:51 |
| Damn! You really can't believe what you see any more. |
| jdaawa, Comment for image # 13117 | 07 Jul 09 09:35 |
| I'm impressed with what you've done mistakes and all. but when I went to www.rhino3d.com I couldn't find anything that I thought was this program. |
| pfinn, Comment for image # 13117 | 06 Jul 09 20:26 |
| There's lots of discrepencies on this assy. For this Fi 167 I used a drawing I downloaded off the net. As for the mis-aligned stringers, I take full credit for those "Customizations" (mistakes)! It depends upon which "Bezier" curve tool you select (near or thru) as well as ..blah, blah,blah. As always, "Good enough" in the beginning of a project usually bites you in the keester later on! But even with this first little project the learning curve is swift. And Creosotowind, you can just import all your f9f drawings into Rhino and build it. |
| jdaawa, Comment for image # 13117 | 06 Jul 09 18:36 |
| It looks like one stringer on the left side at the flat topped former is turned in. Anyway its different from the corresponding stringer on the right. Is that by design? |
| pfinn, Comment for image # 13117 | 06 Jul 09 17:22 |
| Oh, hjlittman, it's just file on a hard drive. This was rendered with the included Rendering software. With an add-on renderer (Famingo or Brazil) you can achieve photo realism (but that takes a bunch of computing power so if you're like me and don't have the "Super Dilly Delux Hyper-Turbo 8000" processor and use a "Costco" bargain computer, the stock is good enough...for now. |
| pfinn, Comment for image # 13117 | 06 Jul 09 15:25 |
| This is Rhinoseros ( http://www.rhino3d.com/ ). It's a very, what they call, "Intuative" software. You can download a free trial at their site and try it out! You just get 25 saves though, but it's really fun to play with and see if you like it and you'll still have it after those saves are used up for continual experimentation. You can spend hours just playing with the lighting:)! It seems a bit pricey, but for what it's meant for it's an extreme bargain. It's for my actual "work" anyway so I can write it off. When I get the "Holiday" bulletproof I'm gonna cad it up (this software will generate drawings for you) and maybe try some kits or something. Thanks. Phil |
| hjlittman, Comment for image # 13117 | 06 Jul 09 14:56 |
| That structure looks gorgeous, so crisp, so clean! (Emphasized by your very artistic and dramatic lighting, of course.) O.K. Maybe I missed something in the build thread. If it ain't wood, what is it? |
| Creosotewind, Comment for image # 13117 | 06 Jul 09 13:35 |
| What software is this? I designed the f9f using Adobe Illustrator (MAC), but I am considering CAD for my next model. I like the opportunities for modeling that the 3-D architecture provides. |
| scirocco14, Comment for image # 13117 | 06 Jul 09 08:28 |
| That is just so amazing!! |
| pfinn, Image # 13117 | 06 Jul 09 04:03 |
Well, I know it ain't wood but, what do you think the first thing I decide to make on my new CAD software should be anyways?! My first build. Fi 167. I like wood much more. MUCH more. |
| pfinn, Image # 13096 | 04 Jul 09 10:05 |
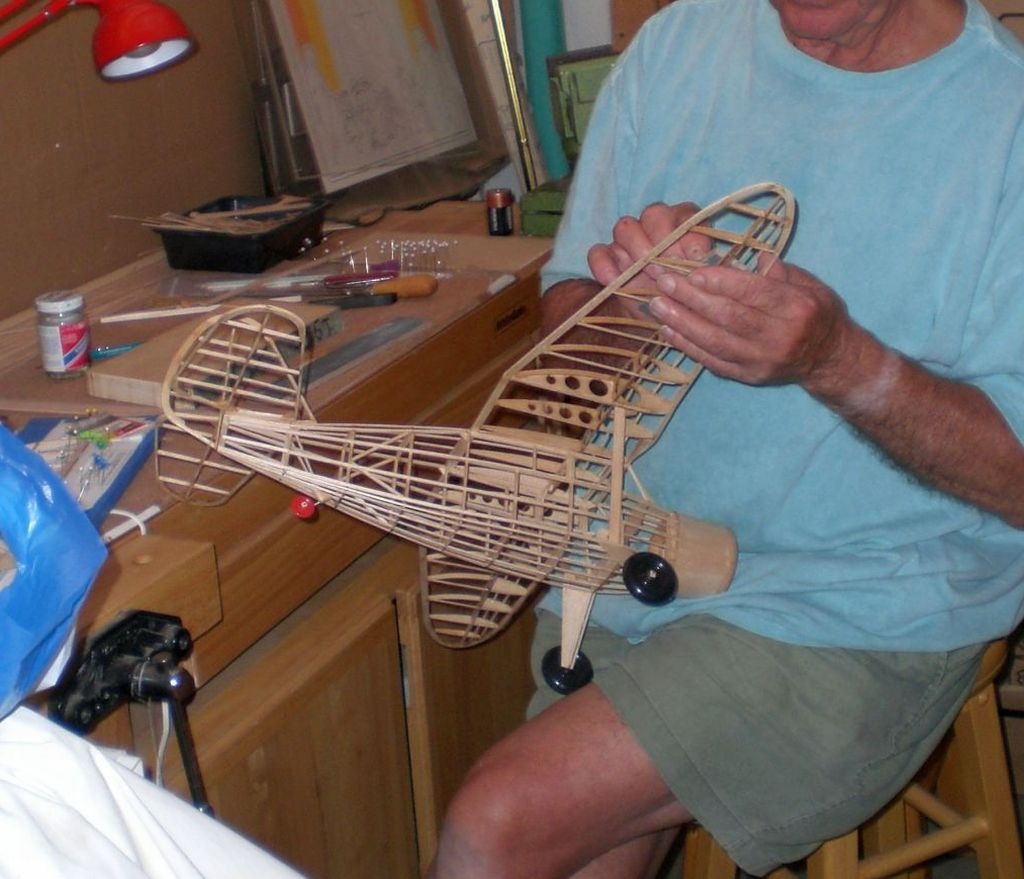
Dumas Stinson Reliant I built for my Dad a couple years back over a period of a year or two. He likes them in the "Skeleton" state. Now he wants this one covered since I've gotten back "into" this stye of modelling. I told him " You dope it and sand it, then I'll cover it." Well, here he is sanding. Guess I've got a covering job coming up! The drag is that it's already fully assembled. |
| pfinn, Image # 13091 | 03 Jul 09 17:03 |
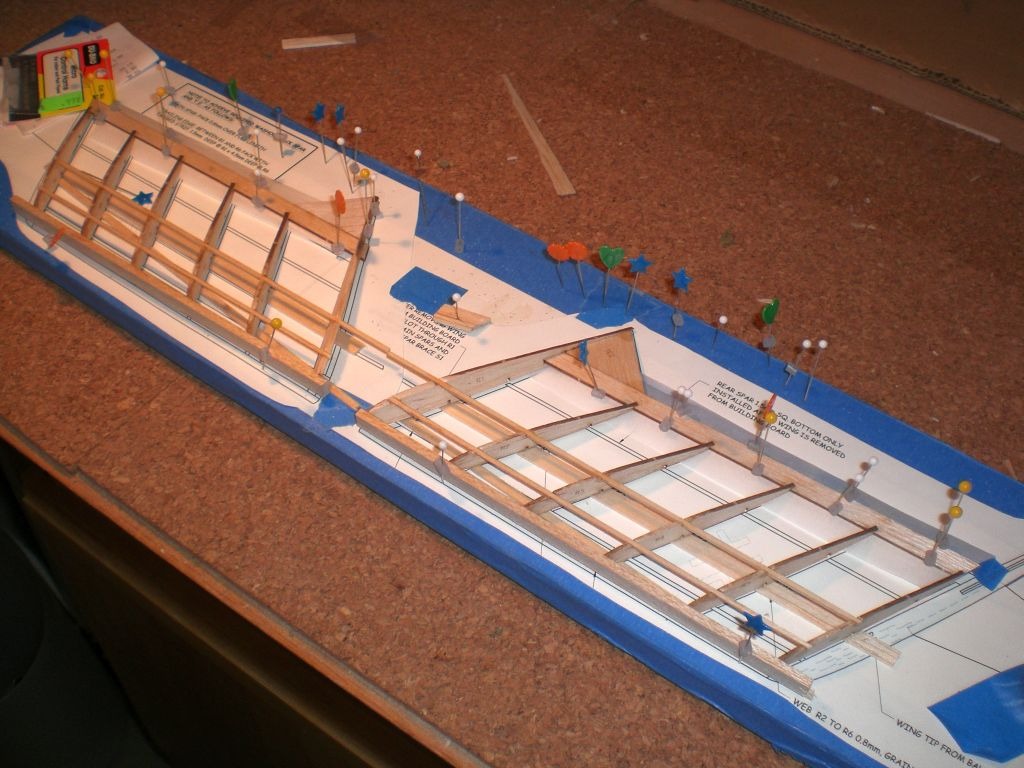
Wing framed up quicker than setting up the shims. The notches for the stringers are laser cut undersize so the builder can open them up at the correct angle (sweep-back) for a nice fit. Quite thoughtful designing. |
| pfinn, Image # 13090 | 03 Jul 09 16:59 |
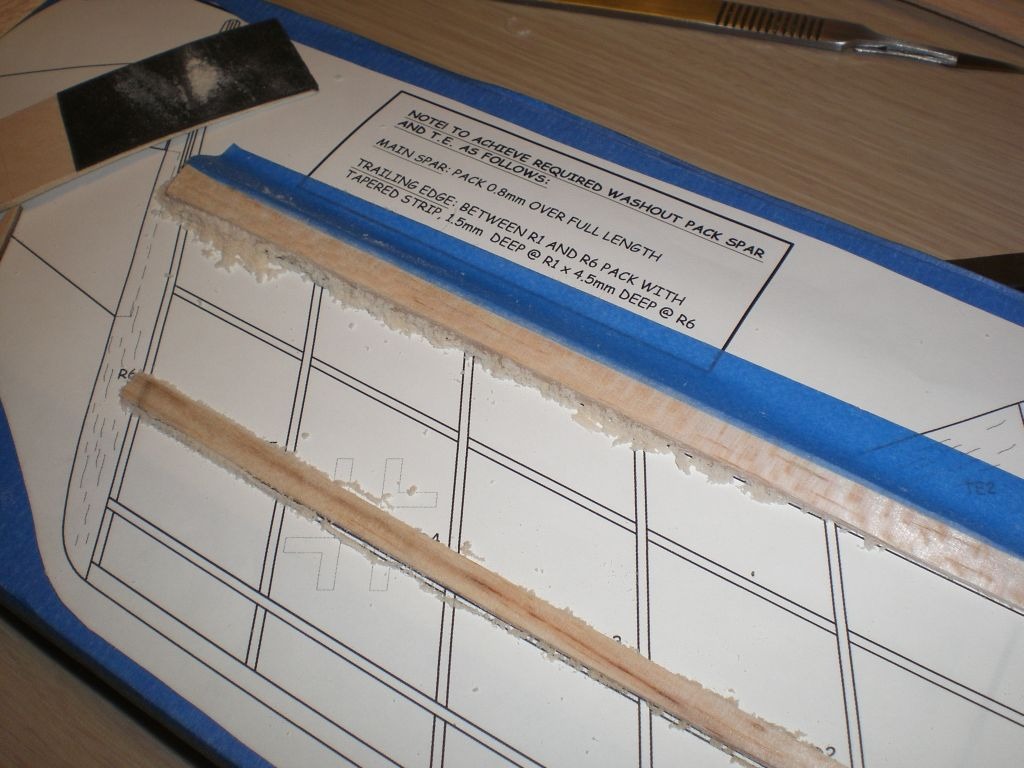
Instructions are quite implicit to insure correct washout. After making th shims, I matched the bottom of the airfoil profile on a sanding block (tounge depresser) and slightly sanded the shims so the trailing edge stock conforms to the airfoil shape during assy. |
| pfinn, Image # 13089 | 03 Jul 09 16:54 |
Since the airfoil is semi semitrical, some jigs are in order. |
| Build Thread, Page :
<< 6 7 8 9 10 [ 11 ] 12 (223 posts, 20 posts per page, 12 pages in total)
|
[ < Prev ] [ Next > ] |
