| Build Thread, Page :
1 2 3 [ 4 ] 5 6 7 (137 posts, 20 posts per page, 7 pages in total)
|
[ < Prev ] [ Next > ] |
| John Cooper, Comment for image # 15472 | 15 Dec 09 11:54 |
| It is hard enough just to hook up the tiny servo, but you have also added flaps, and set up the linkages for a removable wing. On top of that it all works around that complex canopy frame - fantastic! |
| jgood, Comment for image # 15472 | 15 Dec 09 11:04 |
| I think I need to rename this site 'VirtualMasterpiece'. There are so many on here. |
| pfinn, Image # 15472 | 15 Dec 09 05:26 |
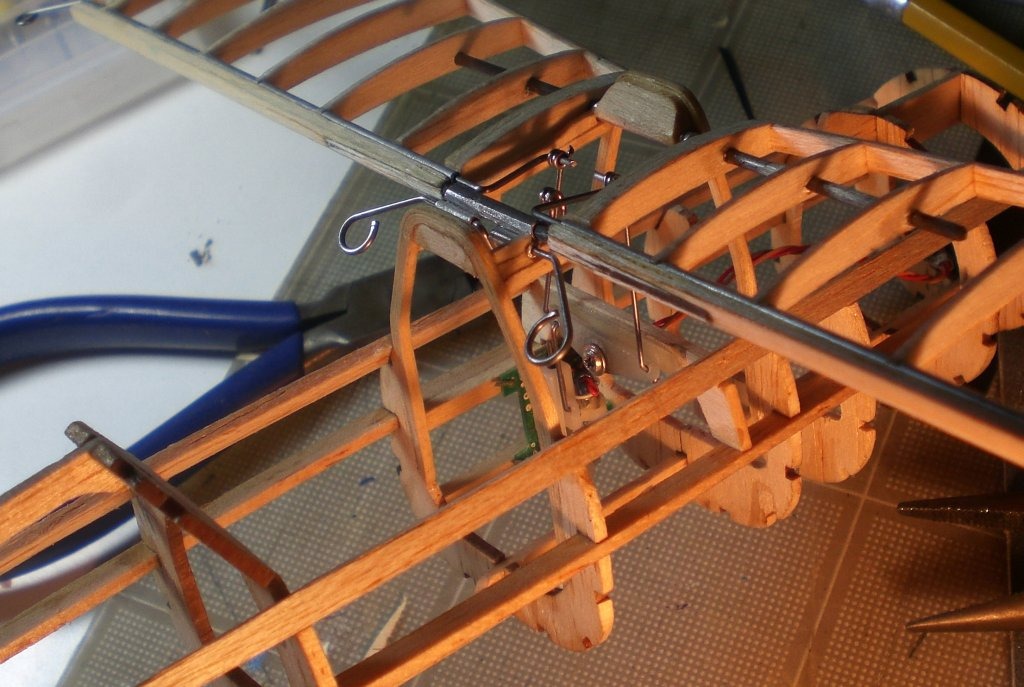
More "Monkey Motion". Aileron linkage pretty much figured out. Flaps just need servo and pushrod install. The wings will slide on and off and be held in place with some neodymium magnets as well as the struts. |
| pfinn, Comment for image # 15368 | 08 Dec 09 14:59 |
| Oh, I think you're confusing "Dazzling" with "Baffling", to coin a common phrase. |
| pfinn, Comment for image # 15368 | 08 Dec 09 14:56 |
| I beg to differ on both your comments there. So there! |
| David Duckett, Comment for image # 15368 | 08 Dec 09 14:35 |
| Yeah, mine, too, but it's great to see. |
| Luke War, Comment for image # 15368 | 08 Dec 09 14:03 |
| VERY impressive! Far beyond my building abilities thats for sure! |
| pfinn, Image # 15368 | 08 Dec 09 03:30 |
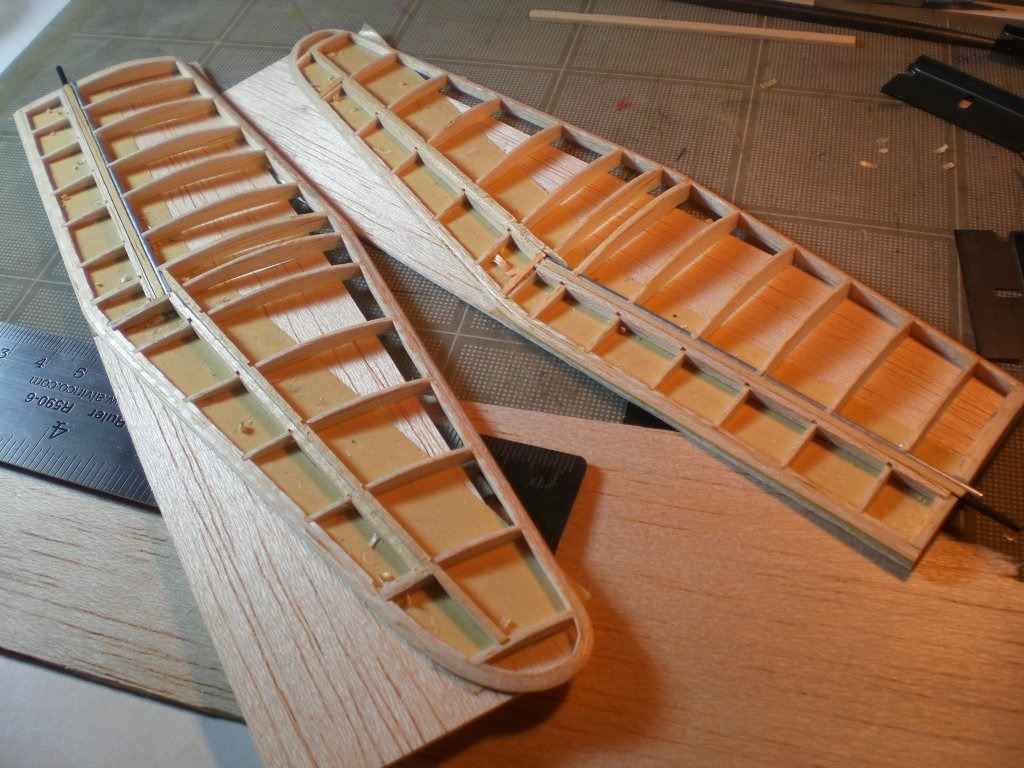
Remove from taped support (need a bit of patience there), cut control surfaces. in this case, two cuts through the trailing edge lamination. Viola! Ailerons and flaps. Flaps are bottom hinged, ailerons, top. |
| pfinn, Image # 15367 | 08 Dec 09 03:23 |
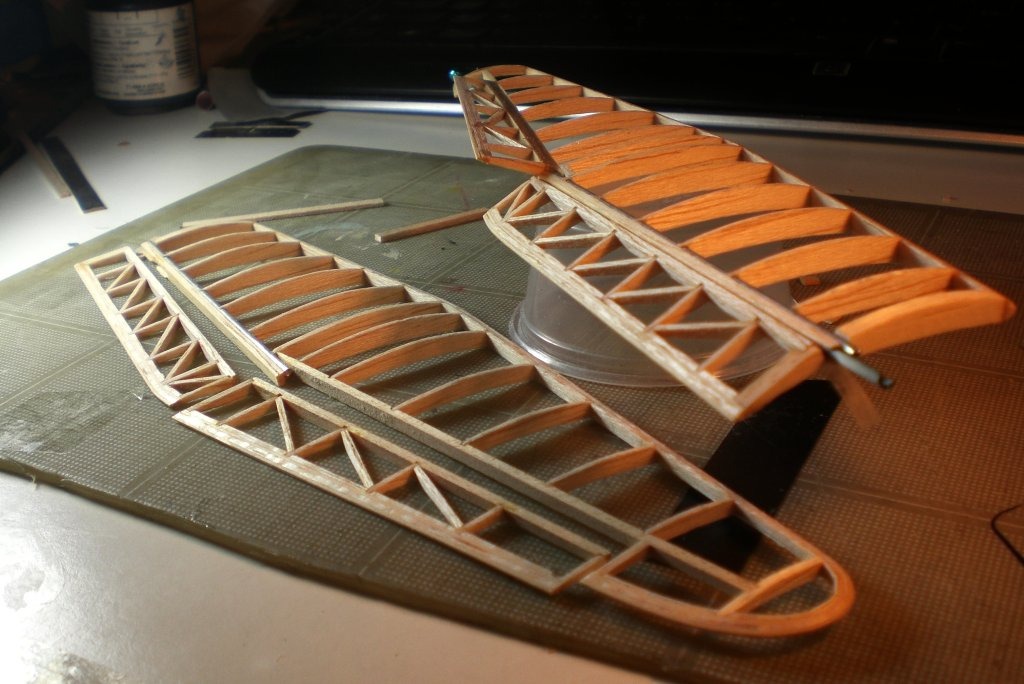
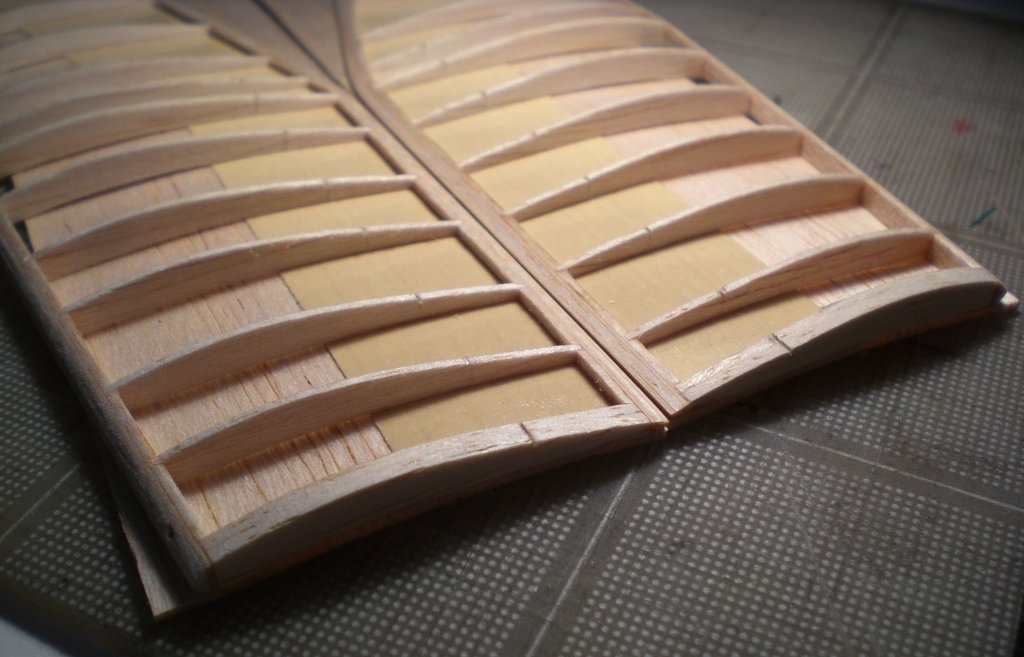
Bonded, sanded, and tortional stiffeners installed. Gusseting comes later. |
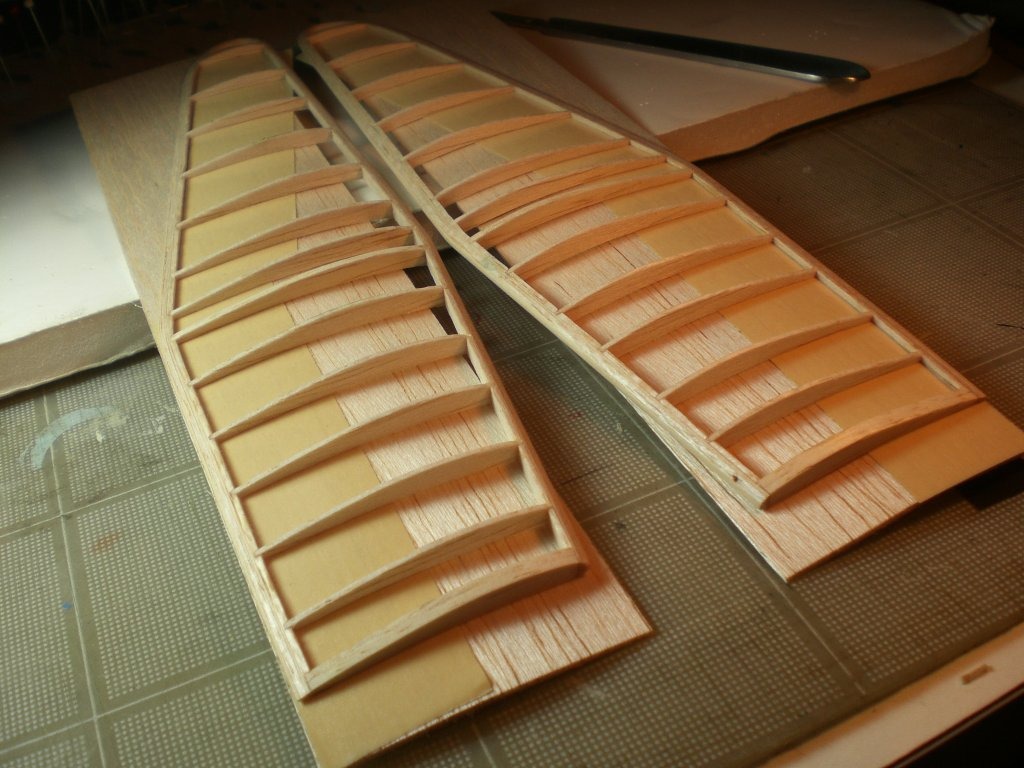
| pfinn, Image # 15366 | 08 Dec 09 03:21 |
Then just continue with main wing then control surfaces and box in (where needed). Ileft all these oversize in heighth for sanding after bonding. These are not bonded yet because the tape is holding it all together till I'm sure it's satisfactory. |
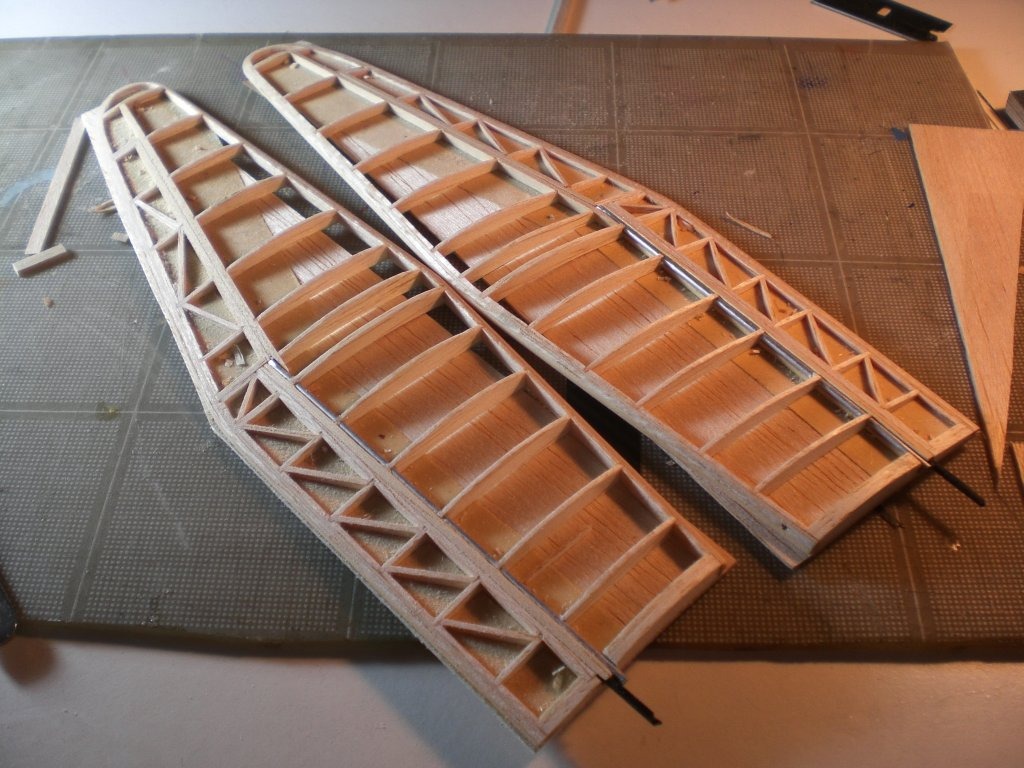
| pfinn, Image # 15365 | 08 Dec 09 03:15 |
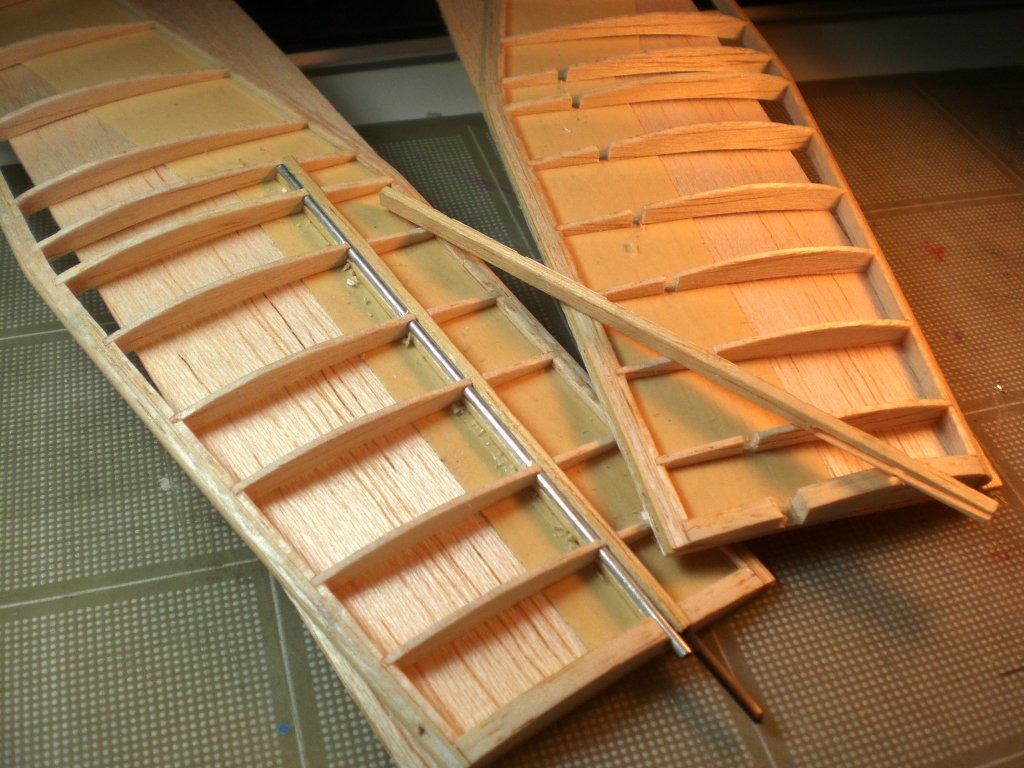
Starting with the main wing side, I opened up a slot to accept the sub spar(?) with clearance for the aileron torque tube, notches for ribs, and a 1.5 degree angled slot for carbon fiber locator pin. |
| pfinn, Image # 15364 | 08 Dec 09 03:07 |
cutting. I cut down the hinge line with a razor. |
| pfinn, Image # 15363 | 08 Dec 09 03:05 |
Back to the wings. Cutting control surfaces. After an almost finish sanding, I double stick taped the wings to some 1/32" balsa sheet to keep things in place while... |
| pfinn, Comment for image # 15318 | 06 Dec 09 17:00 |
| Holy Smokes Menu jr.! I better check it out! Thanks. Learn something new every day! |
| menu jr, Comment for image # 15318 | 06 Dec 09 11:23 |
| www.eastwood.com Has evercoat gallon can's $20.00 They have good price's on primer also.Evercoat also has filler called rage I think it sand's even better then this one.. |
| frwyflyer, Comment for image # 15318 | 06 Dec 09 09:59 |
| Thank you for your step by step instructions. Lots of good solid information here. |
| pfinn, Comment for image # 15318 | 06 Dec 09 01:11 |
| "by and far"....doh! |
| pfinn, Image # 15320 | 06 Dec 09 00:47 |

This is the primer I use. It's the best "Rattle Can" primer I've ever used. EVER. High build, recoat every 5 min. (three coats fills and hides 220 scratch) at 75-80 deg F (10 min today at 60 deg), ready to sand in 1 hour. Sands like a dream come true. Non filling puffy dust. The picture is unsanded. Both my Guillows ser 500 me 109 and jfinn's FW 190 were both primed with this. Covering flexibilty is not an issue. Once again, pricey. $20.00 a can. And again, worth every penny. |
| pfinn, Image # 15319 | 06 Dec 09 00:29 |
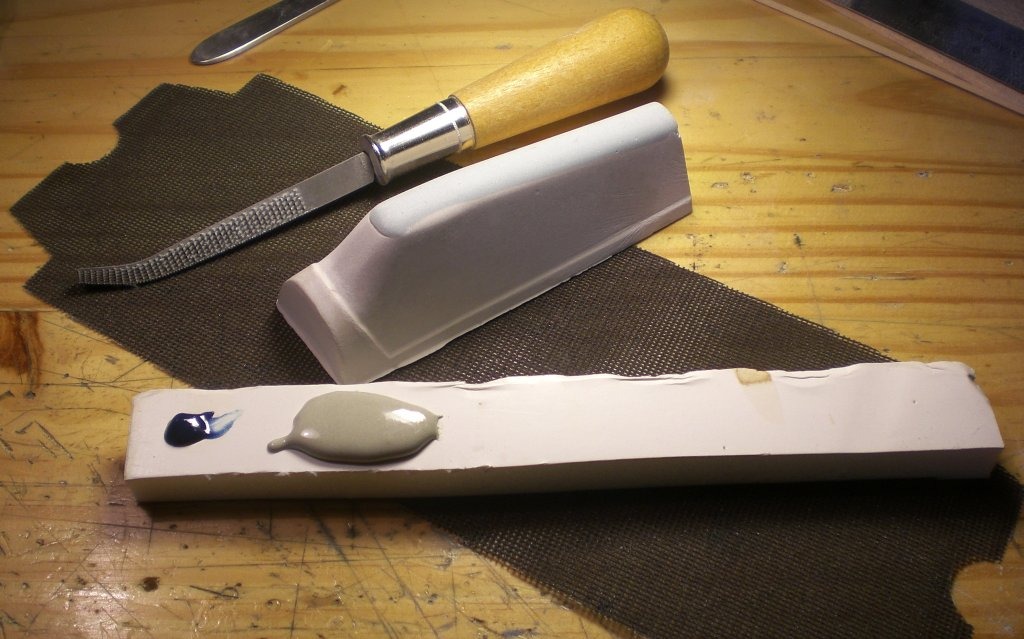
Rasp for roughing (that's actually my Soapstone rasp). The abrasive mesh is actually a Drywall Mud sanding sheet. Works great with plaster, flller without clogging plus there's abrasive on both sides and waterproof. Home Depot and such. And finally if you don't already, for small, multiple fills (pinholes, accidental rasp diggers ;o0 ), I'll plop down some filler and catalyst. Use a small spatula, oil painting pallette knife works great, scoop up some filler, about a 1/4" bead or so, off to the side, dab the tip of the spatula and pick up a tiny bit of catalyst and mix a small portion, apply, scrape off unused filler before it goes off, wipe off spatula. repeat. This ensures a good bond because you don't end up trying to get that last 10 second too late batch to stick and smooth out. If you don't get it, I'll take a series of pics to show how. My explaination may be a bit....vague. |
| pfinn, Image # 15318 | 06 Dec 09 00:06 |
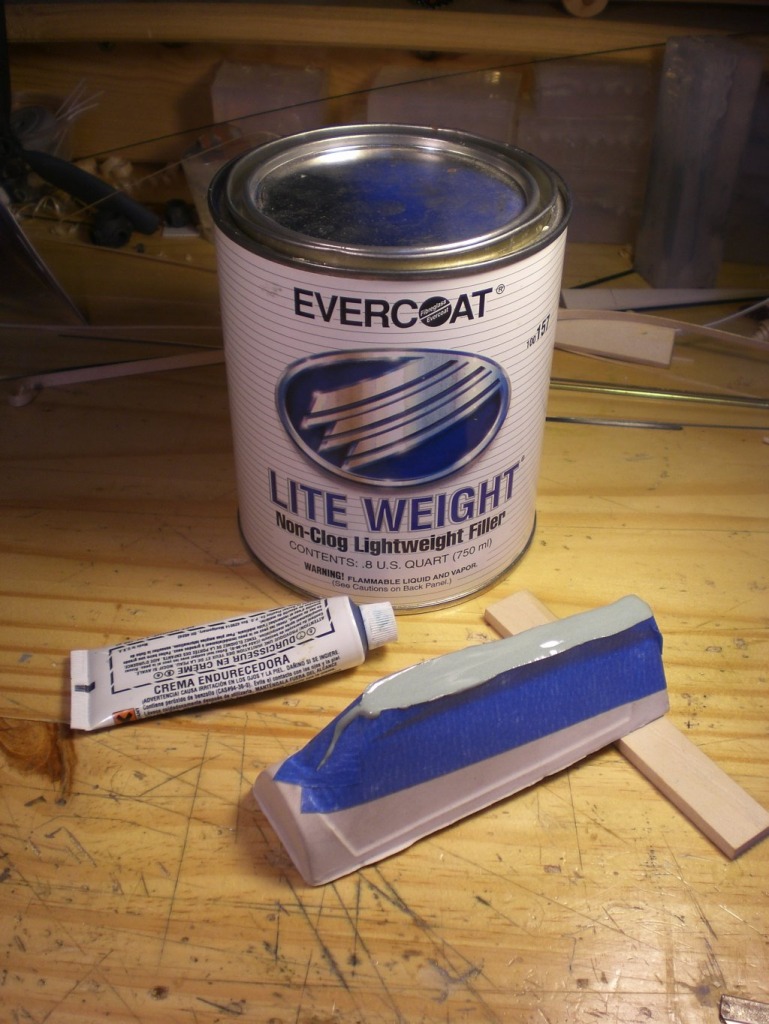
I like this filler. It's by fad far superior to "Bondo". You pay for it though. $50.00 per Quart. I think it's worth it. If you try it, you'll never go baack to "Bondo". |
| Build Thread, Page :
1 2 3 [ 4 ] 5 6 7 (137 posts, 20 posts per page, 7 pages in total)
|
[ < Prev ] [ Next > ] |
