| Build Thread, Page :
1 2 3 4 5 [ 6 ] 7 8 (148 posts, 20 posts per page, 8 pages in total)
|
[ < Prev ] [ Next > ] |
| heywooood, Comment for image # 40419 | 22 Jul 18 22:45 |
| I like your solution for the wing trailing edge fairings |
| heywooood, Comment for image # 40418 | 22 Jul 18 21:28 |
| Dave - have you seen this video? it shows the wing root fairings in good detail (as well as several other details)
https://www.youtube.com/watch?v=ADpfLN3cDzQ |
| heywooood, Comment for image # 40418 | 22 Jul 18 21:26 |
| humidity slows things way down - especially with the water based products..no news there really, but when it is both hot and dry (less than 10-20% humidity) things are greatly accelerated. At anything over 100deg. though I begin to worry that sanding wood will start a fire lol |
| Don C, Comment for image # 40418 | 22 Jul 18 20:51 |
| That's why I asked about drying time. I've found sometimes over night is necessary even with a thin layer. |
| heywooood, Comment for image # 40418 | 22 Jul 18 19:49 |
| it got up to 89 here at the beach and I was dyin' - certainly no work at all was done on the Stearman between 10 and 5 o'clock. 107 is bananas. Reminds me of a far side drawing I saw of the devil sitting at a bar having a cocktail with tourists and saying "yeah - but it's a DRY heat.." |
| David Duckett, Comment for image # 40418 | 22 Jul 18 16:55 |
| The second layer is on and drying and it's starting to look right. I am letting it dry overnight, not to make sure it's dry but because it's 107 outside! |
| heywooood, Comment for image # 40418 | 22 Jul 18 15:43 |
| I think I spent almost a week, between getting enough filler in there and sanding it to shape, to sealing it |
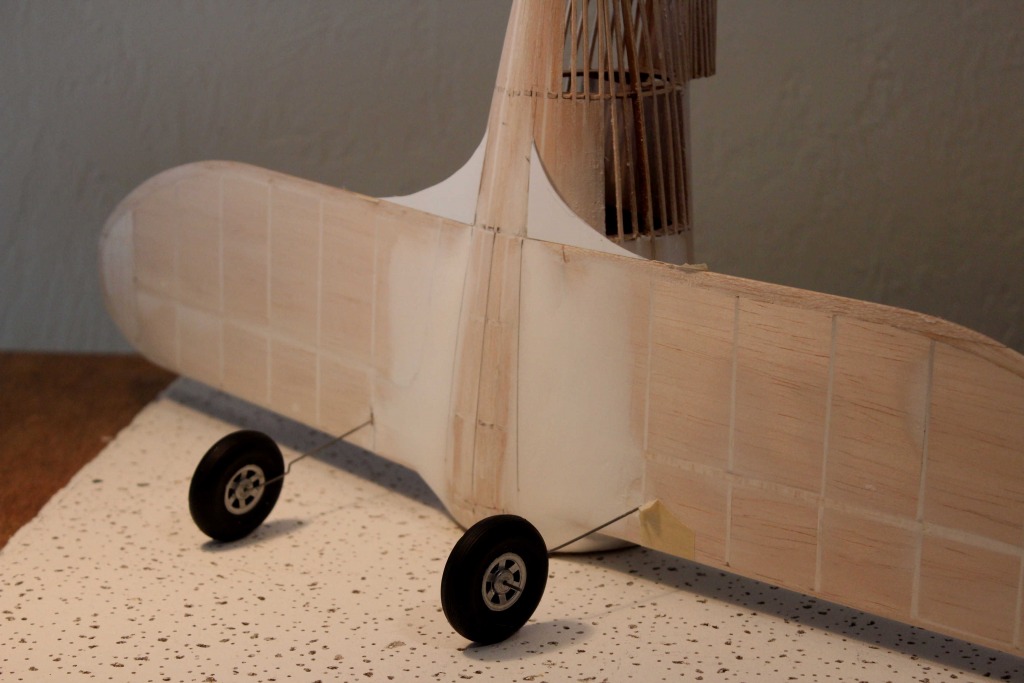
| David Duckett, Image # 40419 | 21 Jul 18 07:53 |

Taped up for a photo. |
| David Duckett, Image # 40418 | 21 Jul 18 07:52 |
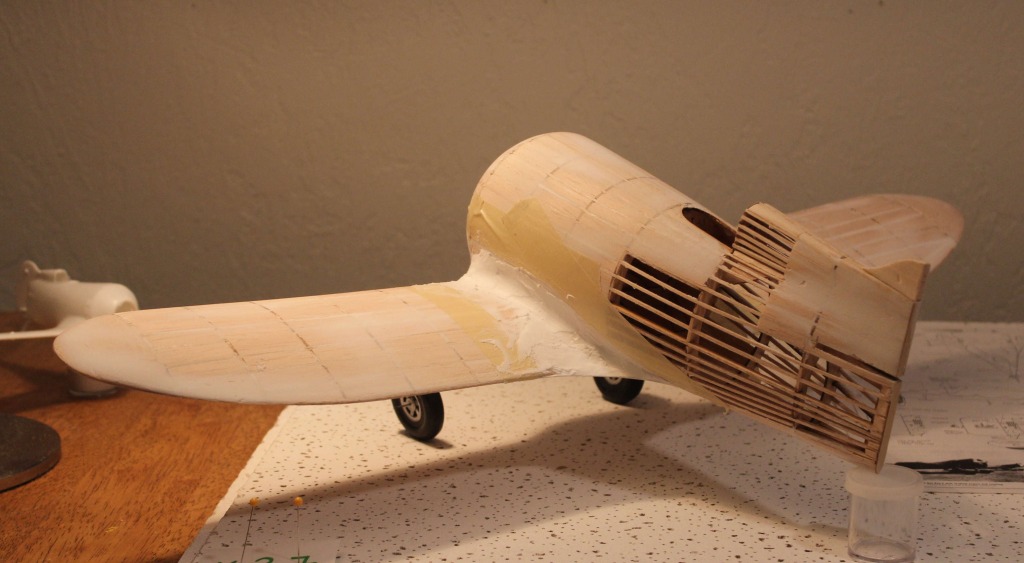
The urge is to try to make it all at once but experience dictates that is not the case. There's a lot on there so it will take some time to dry. I'll be drunk! |
| David Duckett, Image # 40417 | 21 Jul 18 07:49 |

|
| David Duckett, Image # 40416 | 21 Jul 18 07:49 |

The area of the filet is masked. |
| David Duckett, Image # 40415 | 21 Jul 18 07:48 |
THe fairings are made of .020" styrene. |
| heywooood, Comment for image # 40404 | 20 Jul 18 23:38 |
| yeah those wing roots are something else entirely to any other aircraft I know of. Makes you wonder how much faster this plane would have been with a Corsair style inverted gull wing.. |
| heywooood, Comment for image # 40406 | 20 Jul 18 23:35 |
| this is fun to follow having built this kit. I love the size of it, and the other Dumas racers, because you get just that much better of a sense of the real aircraft. Of all the kits I have built the Z is the one I pick up most often. I can only imagine the courage it must have taken to get in it and race it at top speed in a crowded field at the speed it was built for. Mr Duckett appears to be well on his way to creating another showstopper. Can't wait to see the baby pictures. |
| rayl, Comment for image # 40406 | 20 Jul 18 22:17 |
| That is the exact amount of time required to smoke a fine Cuban and sip some old Scotch. |
| Don C, Comment for image # 40406 | 20 Jul 18 15:20 |
| Thanks |
| David Duckett, Comment for image # 40406 | 20 Jul 18 10:35 |
| Normally about 30 minutes but these coats are thicker so I'm letting them dry for a couple of hours. |
| Don C, Comment for image # 40406 | 20 Jul 18 09:58 |
| Looking good. How long does it take for an application of filler to dry down there? |
| David Duckett, Image # 40406 | 19 Jul 18 18:59 |

And this is with two applications. I'll just keep adding filler 'til it's right. The top filets will be done in layers, also. |
| David Duckett, Image # 40405 | 19 Jul 18 18:55 |

So now I have to completely rebuild the bottom. This is the first application of filler. |
| Build Thread, Page :
1 2 3 4 5 [ 6 ] 7 8 (148 posts, 20 posts per page, 8 pages in total)
|
[ < Prev ] [ Next > ] |
