| Build Thread, Page :
<< 2 3 4 5 6 [ 7 ] 8 9 10 (189 posts, 20 posts per page, 10 pages in total)
|
[ < Prev ] [ Next > ] |
| Creosotewind, Image # 22721 | 17 May 11 14:44 |
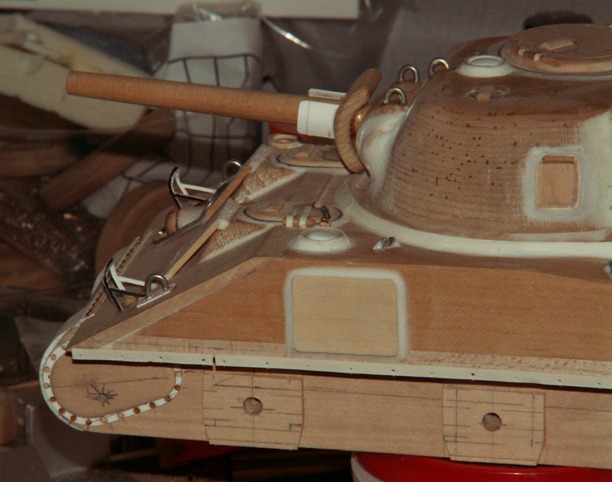
Applique armor on the hull side, and the revised turret machine gun port. Oh, and the turret hatch is also new. |
| Creosotewind, Image # 22720 | 17 May 11 14:42 |
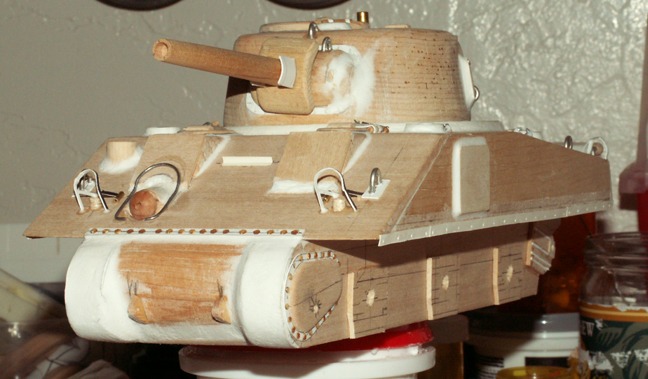
Details added to the tank include light guards made from card stock stiffened with white glue. |
| poppy, Comment for image # 21668 | 18 Mar 11 21:38 |
| Beautiful details!!! |
| Roring40, Comment for image # 21668 | 16 Mar 11 19:26 |
| Good grief ! That is remarkable ! |
| pfinn, Comment for image # 21668 | 16 Mar 11 18:34 |
| Wow! |
| moostang51, Comment for image # 21667 | 16 Mar 11 17:25 |
| Nice job, the mounting of that idler wheel looks mint. |
| JohnG., Comment for image # 21668 | 16 Mar 11 17:23 |
| Intricate little suckers, aren't they?? SUPER |
| John M Oshust, Comment for image # 21668 | 16 Mar 11 17:12 |
| Mucho preciseo!!! Details....love them! |
| frwyflyer, Comment for image # 21668 | 16 Mar 11 16:31 |
| I am in AWE!! That is a bunch of "itsy bitsy" pieces to come together in such precision. |
| Creosotewind, Image # 21668 | 16 Mar 11 14:43 |
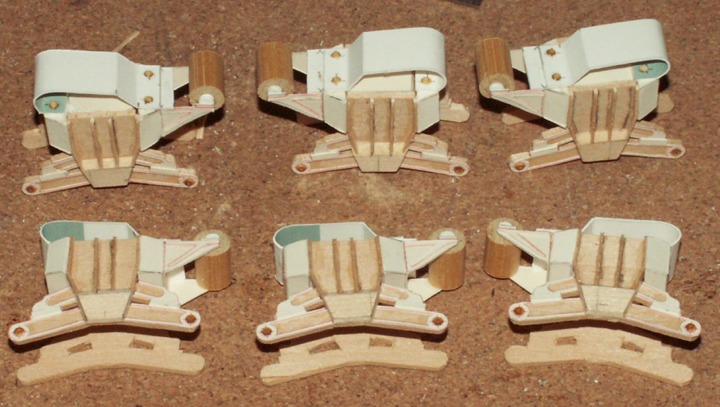
All 6 are done. Now I just need to add them to the tank. Oh, and cut out the track. Should be fun. |
| Creosotewind, Image # 21667 | 16 Mar 11 14:38 |
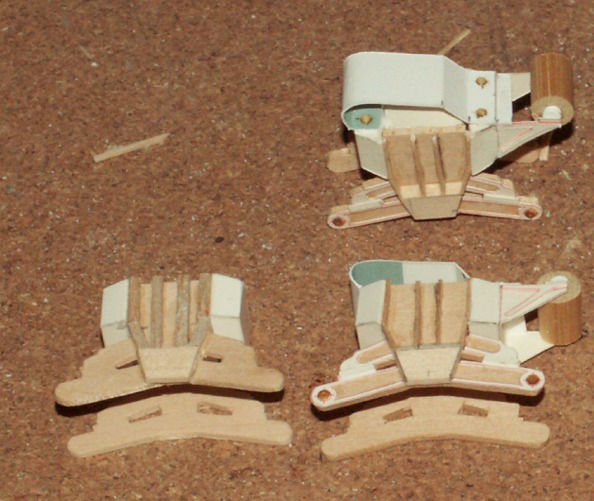
To the left is my first attempt. The "grill" was too heavy so I tried again. Each bogie has about 35 pieces when completed. |
| Creosotewind, Image # 21666 | 16 Mar 11 14:34 |
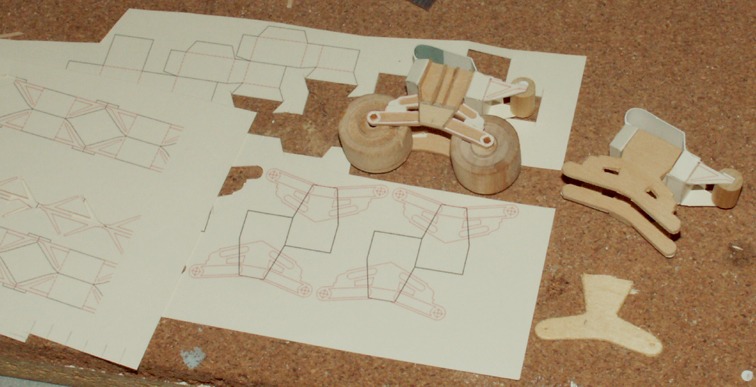
Starting on the bogies for the Sherman. In the lower right is the kit part. They would have you add some 1/16" pieces to the front, drive a nail through each end piece, through the wheel and into the tank side. Not to realistic. The top two are the front and back, my solution. I couldn't figure out how to cut the compound shapes so I made them out of cut and folded paper. You can see the patterns |
| moostang51, Comment for image # 21297 | 22 Feb 11 17:06 |
| And I thought detailing a 1/35 armor kit was tough. Being a carpenter I am definitely fascinated with this "wood thing" you got going on here. |
| Creosotewind, Comment for image # 21297 | 22 Feb 11 09:58 |
| thanks, Ted. The hinges are card stock and the barrels of the hinges are short pieces of solder. Same with the handle. |
| frwyflyer, Comment for image # 21297 | 21 Feb 11 19:39 |
| All those little details.. I like those hinges!! |
| Creosotewind, Image # 21297 | 21 Feb 11 12:04 |
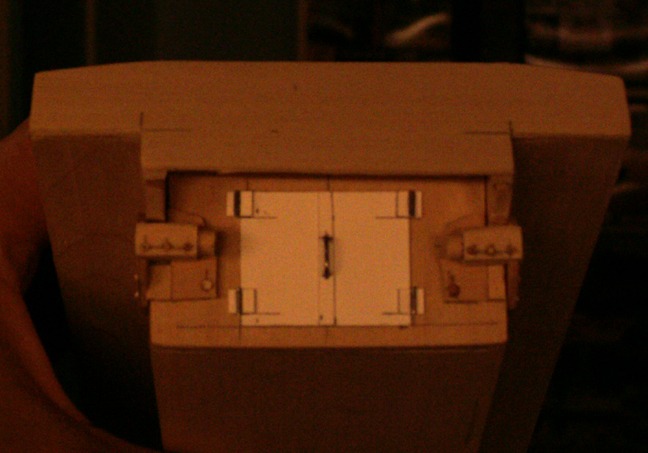
More details on the backside, including bolts on the return wheel gears and an access door for the engine. That may end up getting covered by a deflector shield that diesel powered Sherman tanks used to keep exhaust fumes from getting sucked back into the intake filters. |
| Creosotewind, Image # 21296 | 21 Feb 11 12:02 |
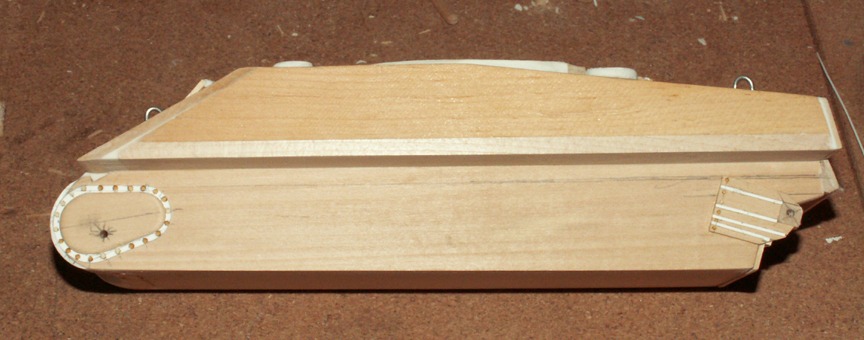
The transmission cover at the front (left) has multiple bolts, as well as the rear return wheel bracket. |
| Creosotewind, Image # 21295 | 21 Feb 11 12:01 |
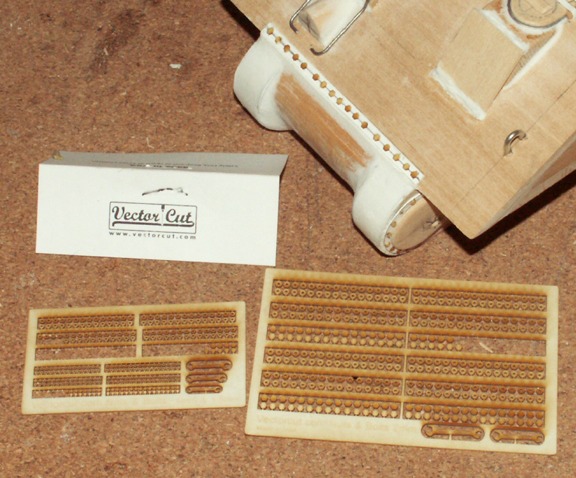
I'm back after a brief pause. Spent time in Kennesaw Georgia at the National Battlefield. Very interesting site and history. Anyways, I found a company Vectorcut (www.vectorcut.com) who makes laser cut nuts, tools, building, etc. They perfectly fit the bill for some of the details I needed for the Sherman. |
| Roring40, Comment for image # 20726 | 20 Jan 11 20:42 |
| Detailed to perfection - nice job |
| Creosotewind, Comment for image # 20726 | 20 Jan 11 16:25 |
| The hatch has a dowel glued to the underside, with a corresponding hole in the turret. That way, the hatch can rotate, just like the real thing. But the hatch won't open, unlike the real thing. (apparently, this comment was sponsored by Coke;) |
| Build Thread, Page :
<< 2 3 4 5 6 [ 7 ] 8 9 10 (189 posts, 20 posts per page, 10 pages in total)
|
[ < Prev ] [ Next > ] |
