| Build Thread, Page :
<< 4 5 6 7 8 [ 9 ] 10 (191 posts, 20 posts per page, 10 pages in total)
|
[ < Prev ] [ Next > ] |
| jgood, Comment for image # 11098 | 04 Mar 09 15:36 |
| This is great, Phil, a great resource for others modellers... |
| SteveM, Comment for image # 11098 | 04 Mar 09 14:52 |
| That is simple marvelous, thank you for taking the time to share your technique. |
| pfinn, Image # 11098 | 04 Mar 09 14:35 |
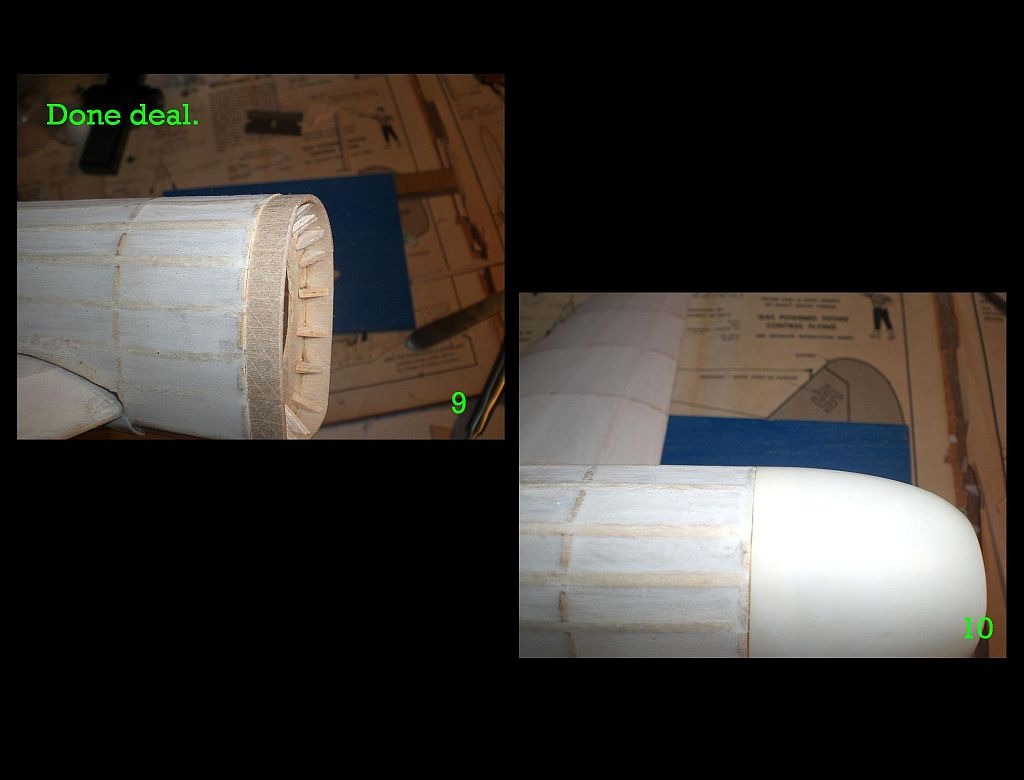
I'd reinforce the "Seating" edge next time. Edge got pretty beat-up after a few on n' offs. 1/64" ply matching former profile before adding extention thingee? |
| pfinn, Image # 11097 | 04 Mar 09 14:28 |
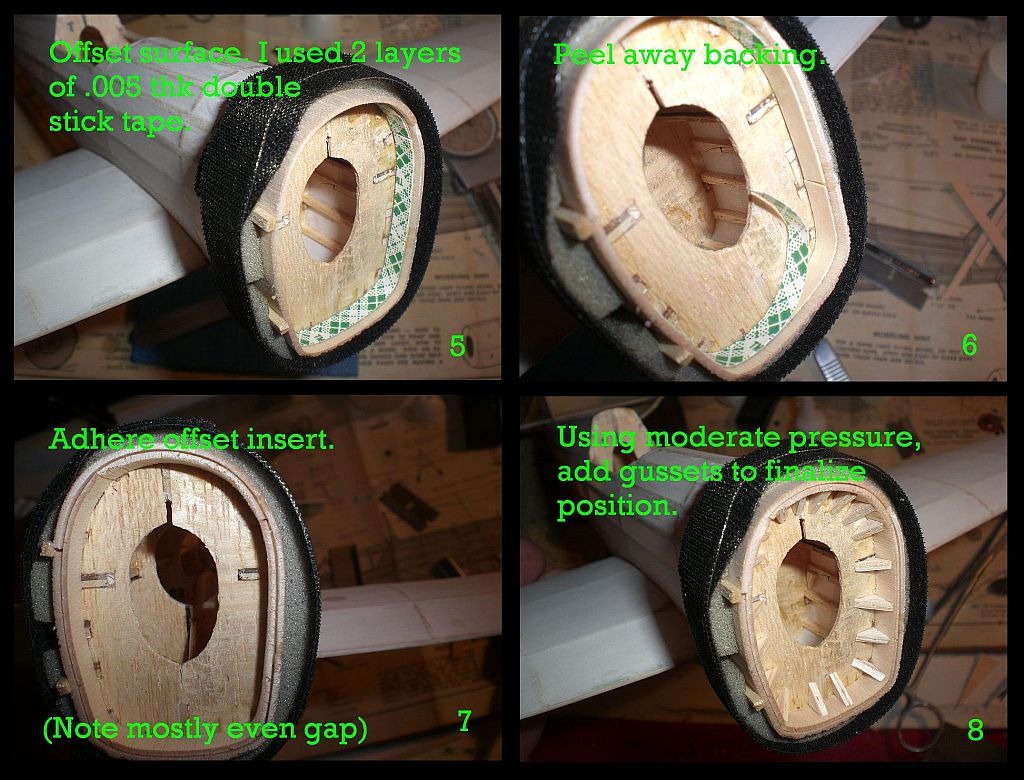
I used one wedge for the seam, and the other for a cra.., ill-shaped former. |
| pfinn, Image # 11096 | 04 Mar 09 14:24 |
Here' one way to do it. |
| jgood, Comment for image # 11091 | 04 Mar 09 10:43 |
| That is extremely neat... |
| pfinn, Comment for image # 11091 | 04 Mar 09 09:28 |
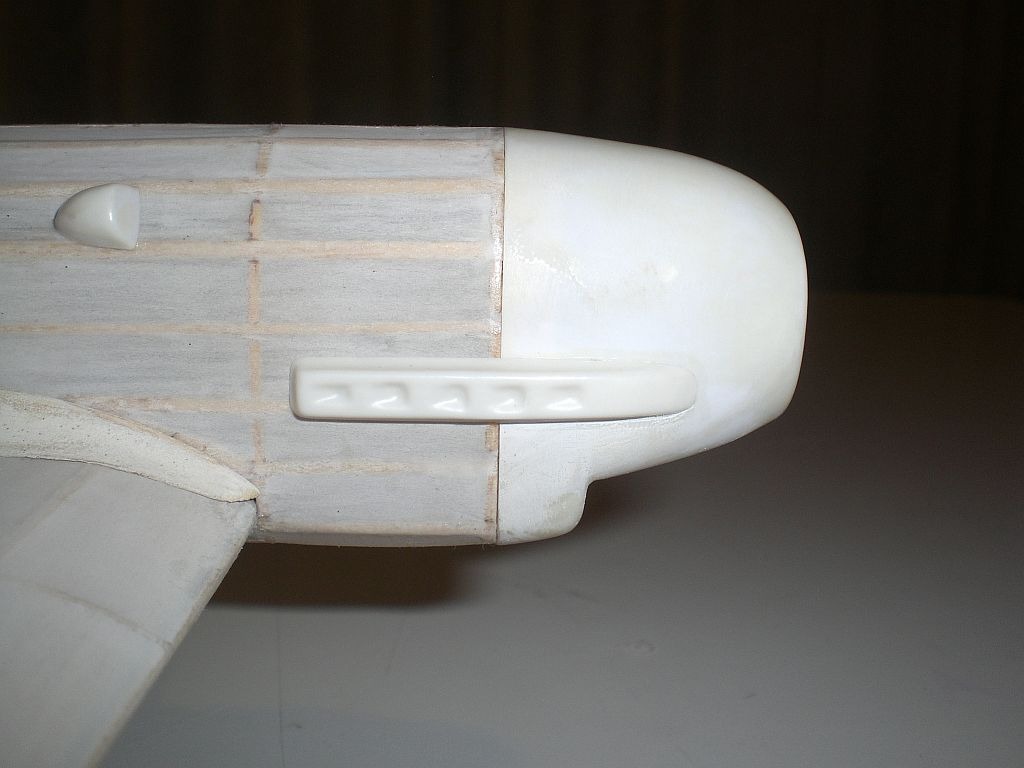
| Had to shrink the perimiter of the cowl though.Bit of a pain in the... though. Still not there, yet. |
| SteveM, Comment for image # 11091 | 04 Mar 09 04:01 |
| Yes, that is very slick. |
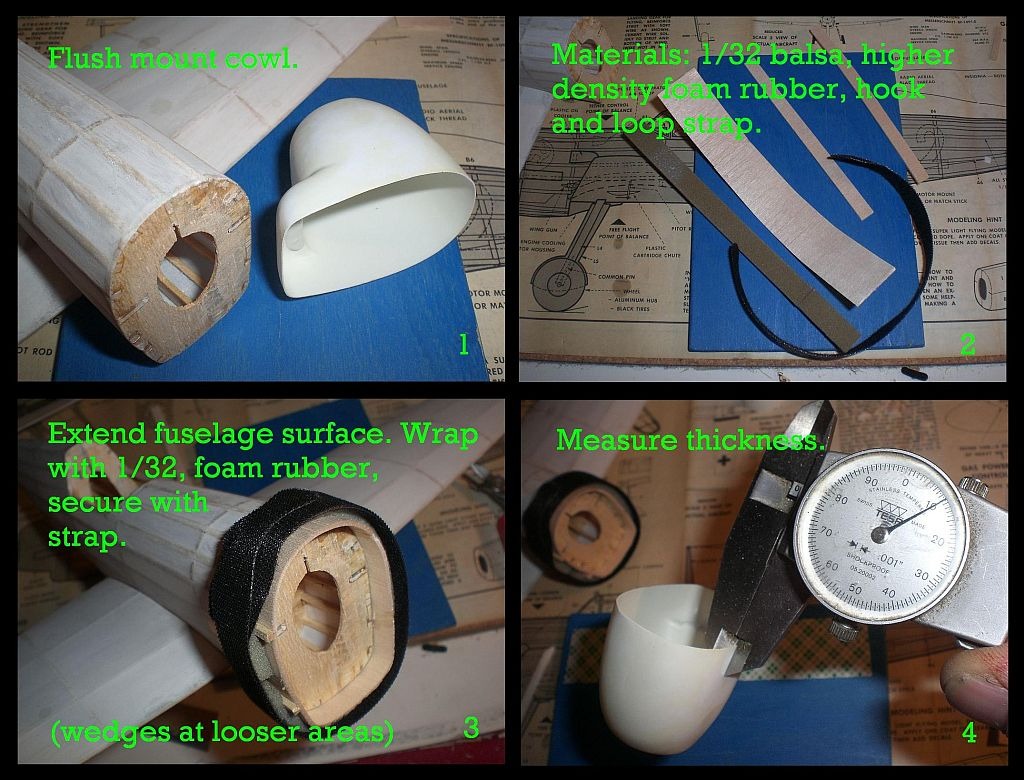
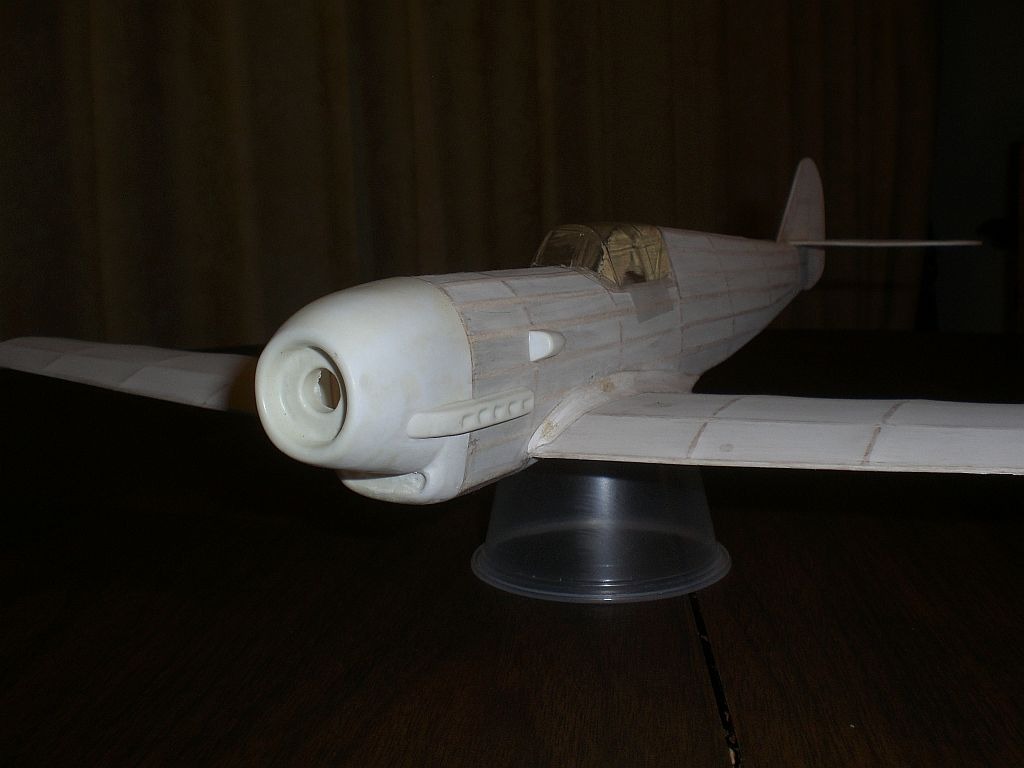
| pfinn, Image # 11091 | 04 Mar 09 02:33 |
Built it flush and removable. I think somebody was wondering about something like this. |
| pfinn, Image # 11090 | 04 Mar 09 02:29 |
Oops! |
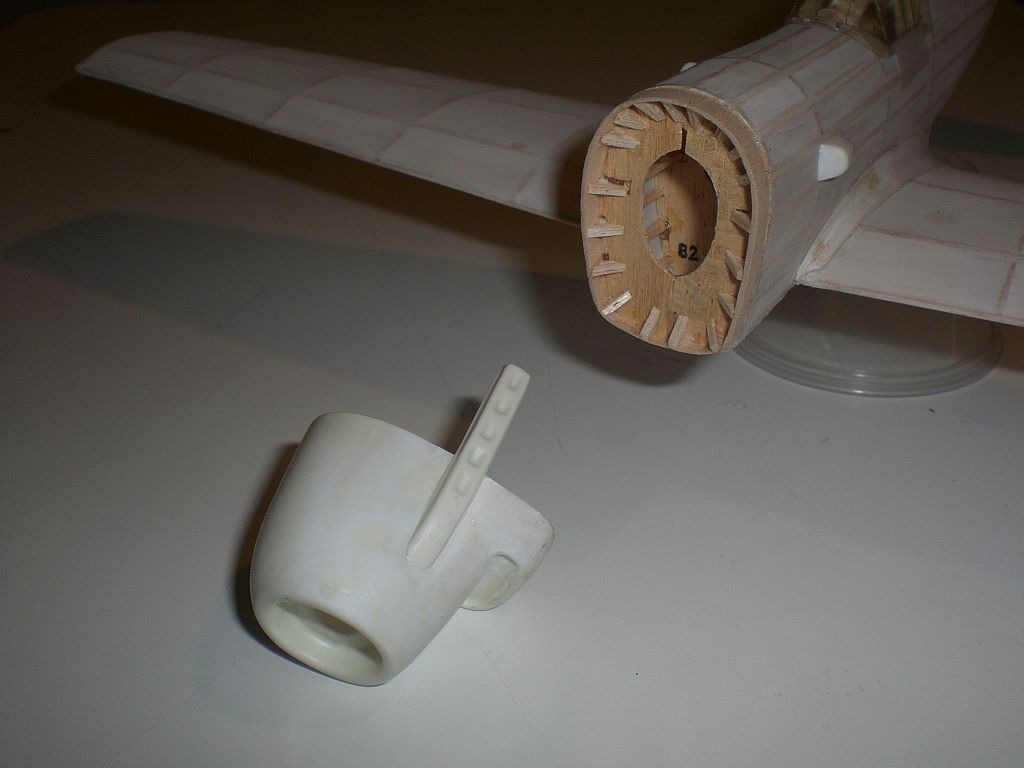
| pfinn, Image # 11089 | 04 Mar 09 02:27 |
Really need that spinner. |
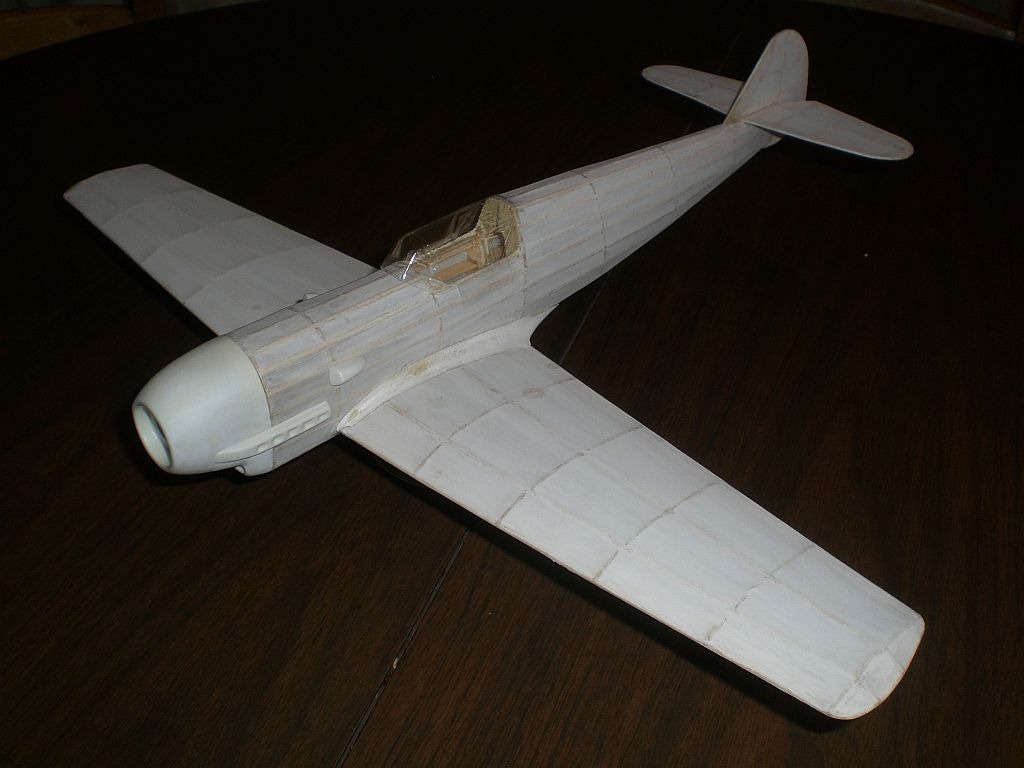
| pfinn, Image # 11088 | 04 Mar 09 02:26 |
Just about ready for prime and color. Gear and prop next. Cockpit? Yes...no...yes...no... |
| pfinn, Image # 11035 | 28 Feb 09 17:17 |
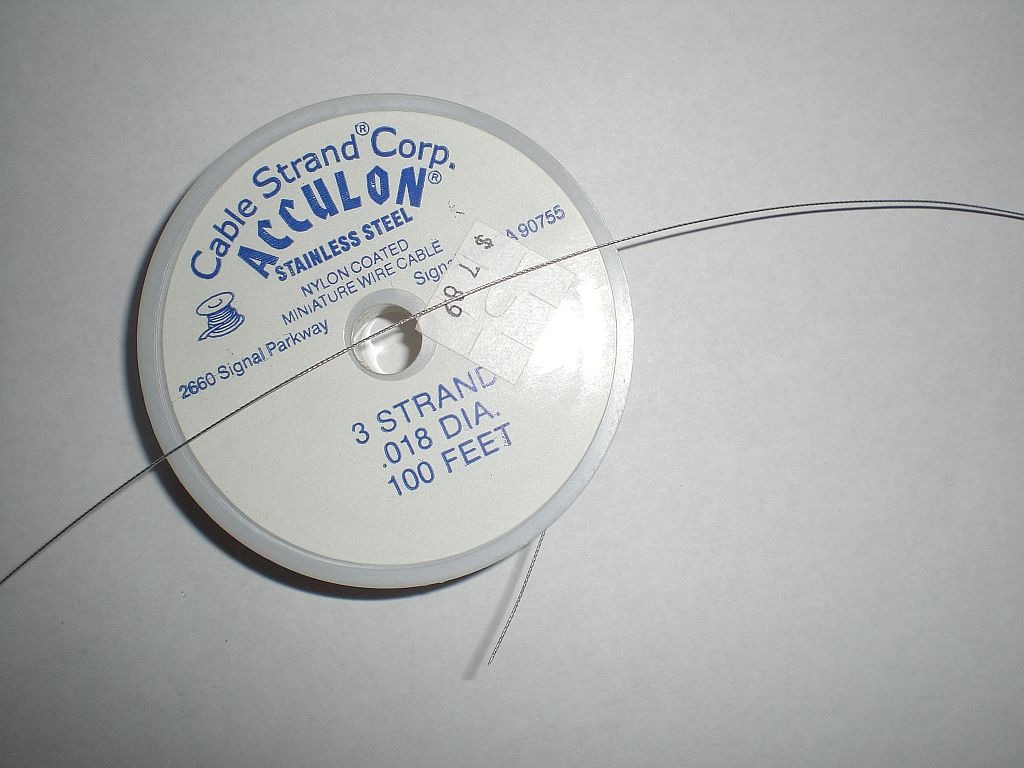
Tried this mini-cable for rigging? Sizes from .010" to At least .019. Get it at a "Beading" store. They aslo stock very nice nynon, poly, and cotton very tight weave threads that are larger in Dia. (no fuzzies). |
| pfinn, Image # 10988 | 25 Feb 09 17:18 |
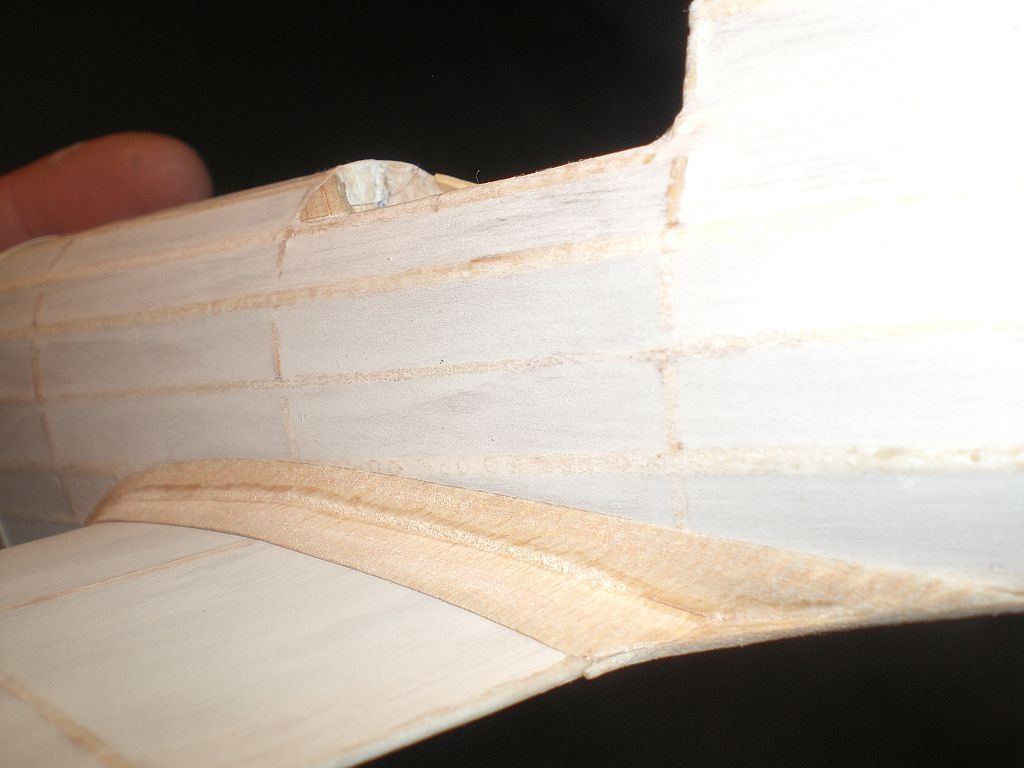
Feather the edges as close to tangent to surface as possible. This way you'll have only one texture to deal with (i.e. just filler) when finishing.You're going to want to coat the back (side facing model) with CA for reinforcment to help with retaining a sharp edge while feathering the edge. Phil. |
| pfinn, Comment for image # 10973 | 25 Feb 09 17:04 |
| Thanks Steve. I've got something in mind. I'll doc it and post it if it turns out. |
| SteveM, Comment for image # 10973 | 25 Feb 09 16:02 |
| I probably saw someone else here on the VA extend the covering over the cowl and decided to try it. It still leaves a ridge rather than a smooth transitions so I'll be looking for better ways to make the cowl joint in future builds (flying and display). |
| John M Oshust, Comment for image # 10973 | 25 Feb 09 15:53 |
| pfinn...Timing is everything. The fillet on Klaus I drove me nuts. This should make the fillet for Klaus II tolerable..."Tanks!" |
| pfinn, Comment for image # 10973 | 25 Feb 09 15:06 |
| Thanks. Coming from both of you (just took a gander at your hangers) I take it as a great compliment. SteveM, examined your 109 build, as well as others, is it common practice to cover up over a bit the vac-form cowl (I never did in the past)? It does clean things up quite a bit. My 109 kit is old (35 yrs) with styrene parts, will dope affect it. I've noticed that CA causes styrene to become brittle and crack easily. |
| SteveM, Comment for image # 10973 | 25 Feb 09 12:45 |
| Yes, I do believe I will try this instead of the cereal box method that never seems to work for me. |
| Creosotewind, Comment for image # 10973 | 25 Feb 09 09:27 |
| Very informative reference. Thanks. |
| Build Thread, Page :
<< 4 5 6 7 8 [ 9 ] 10 (191 posts, 20 posts per page, 10 pages in total)
|
[ < Prev ] [ Next > ] |
