| Build Thread, Page :
1 2 3 4 5 [ 6 ] 7 8 9 10 11 >> (570 posts, 20 posts per page, 29 pages in total)
|
[ < Prev ] [ Next > ] |
| poppy, Comment for image # 37813 | 25 Jan 17 08:50 |
| So realistic in miniature. Beautiful!!!! |
| LASTWOODSMAN, Comment for image # 37813 | 24 Jan 17 21:36 |
| RayL - Howwwwww do you do that!?! |
| rgood, Comment for image # 37813 | 24 Jan 17 18:56 |
| Less than 2" across - very life-like. I like! |
| rayl, Image # 37813 | 24 Jan 17 12:25 |
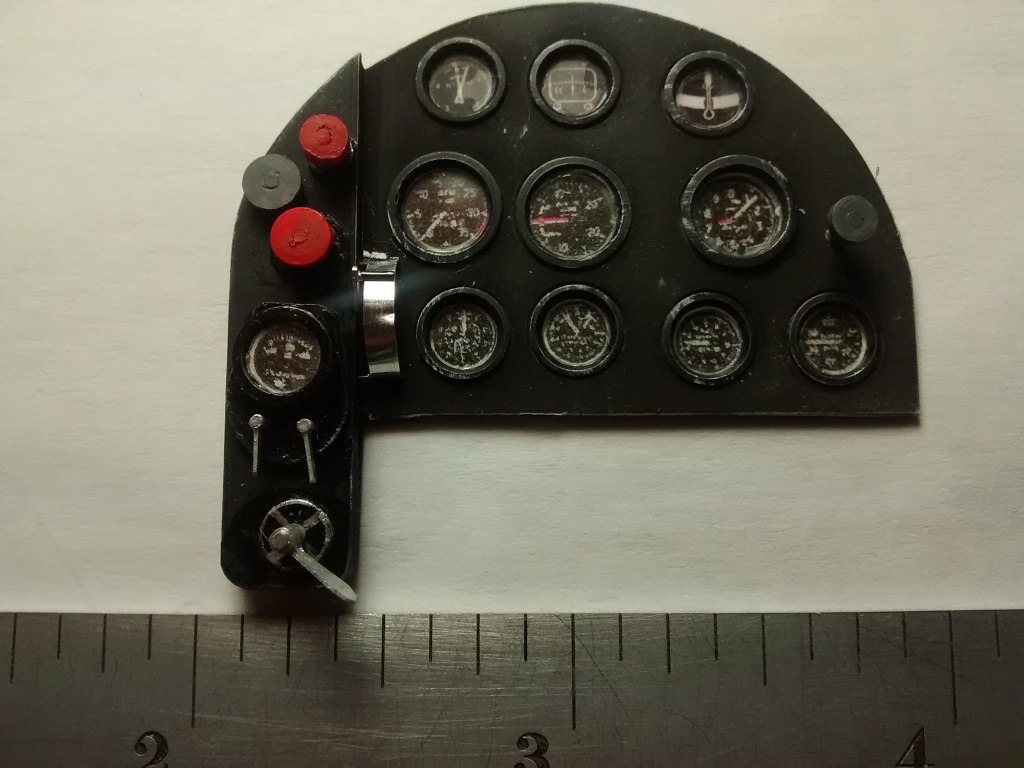
FRont Instrument panel done. |
| rgood, Comment for image # 37810 | 23 Jan 17 23:35 |
| I love this model too - beautiful job. |
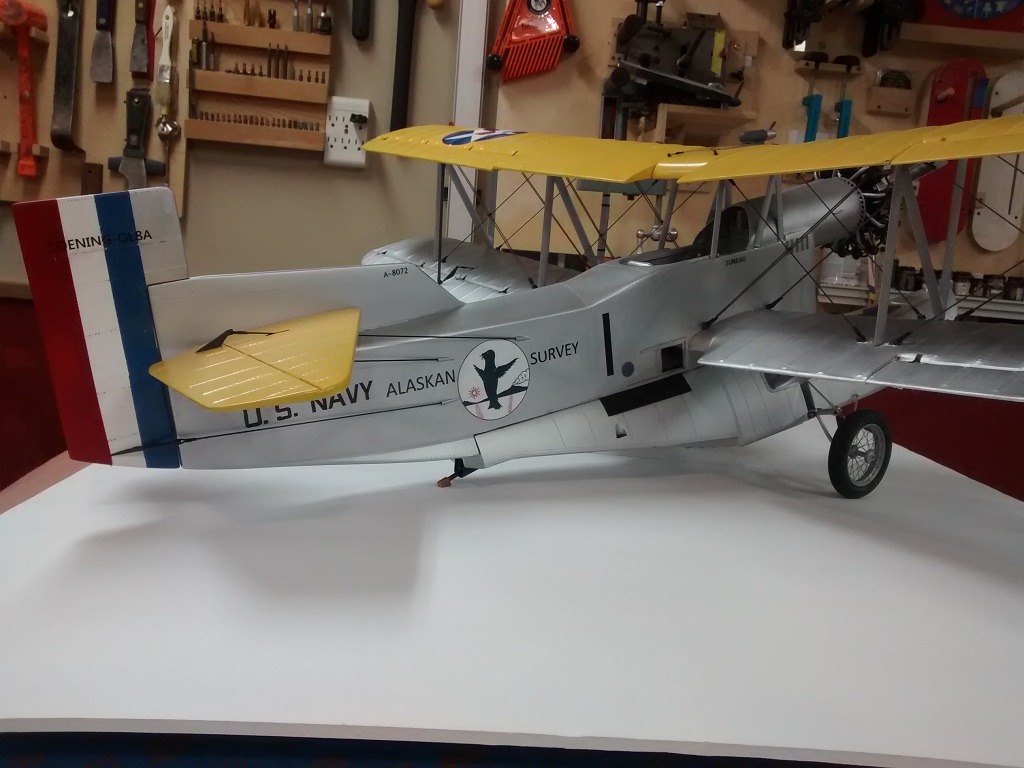
| John M Oshust, Comment for image # 37810 | 23 Jan 17 17:00 |
| Outstanding. Very crisp and life like. |
| LASTWOODSMAN, Comment for image # 37810 | 23 Jan 17 16:19 |
| What a great "Flying Seal" logo for the Alaska Aerial Survey Expedition of 1929 - by Artist Emil Chouree - that just tops off the rugged and handsome good looks of a magnificent air plane!! |
| rayl, Image # 37812 | 23 Jan 17 13:06 |
Kind of a crappy shot of what I have so far in the cockpit. |
| rayl, Image # 37811 | 23 Jan 17 13:05 |

Starting to fab the Instrument Panel. |
| rayl, Image # 37810 | 23 Jan 17 13:03 |
More decals. They were prinited out on White and Clear sheets. White for the Stars and the Seal emblem, clear for the rest. The Seal emblem was cleaned up and sized for be by Rueben AKA "F86_Sabre" over on the RC Groups website. |
| rayl, Image # 37809 | 23 Jan 17 12:59 |
Got the decals applied. They were printed out on my Inkjet printer from a "Word" template. |
| rayl, Image # 37784 | 19 Jan 17 13:59 |
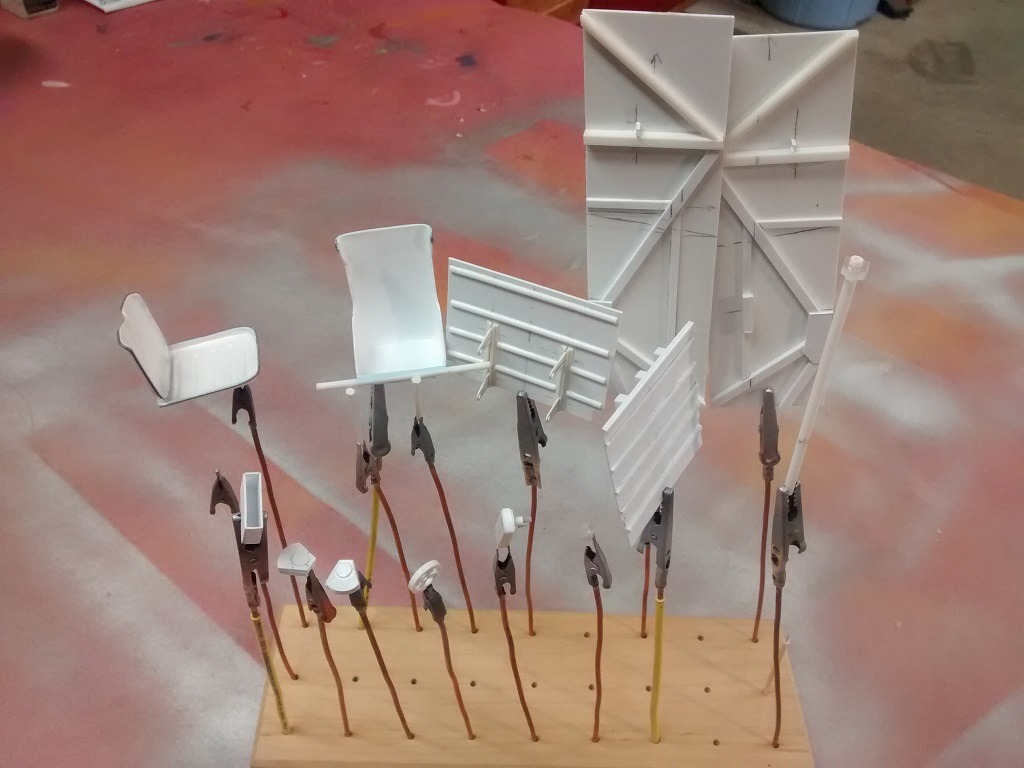
Some of the cockpit components on the way to the paint shop. |
| Skyediamonds1985, Comment for image # 37781 | 17 Jan 17 23:26 |
| Thank you for thinking of me enough to post this picture. This is absolutely great! From what I can see, it looks as though your "attempts" of replication has been extremely successful. Very well done, indeed. This is what I was attempting to do on my PT-17. Since it was my first build after almost 35 years, it was far more crude in my attempts to replicate such fine detailing as we see here. Excellent job! You've really set the bar at a new height and as a source of inspiration for us all. Skye |
| LASTWOODSMAN, Comment for image # 35947 | 17 Jan 17 10:27 |
| Very clever! Thanks Ray. |
| poppy, Comment for image # 35947 | 17 Jan 17 10:03 |
| Now this as good as it gets!! Amazing! |
| rayl, Comment for image # 35947 | 17 Jan 17 09:24 |
| Richard: I started out with a piece of 5/32" K&S brass channel. Used a machinist dye to coat the channel so I could see my lay-out lines. Laid out all of the holes and drilled them with (IIRC: a No. 60 drill). Used my Dremel tool with a cut-off wheel to remove most of the metal [down to my lay-out lines], then finished up with Swiss files. The cross pieces are .063" dia. K&S brass rod soft soldered and cleaned up, again, with Swiss files. Hope this answers your questions. |
| LASTWOODSMAN, Comment for image # 35947 | 17 Jan 17 08:07 |
| Ray - what is the thickness of the clevis metal? - about 20 thou or so? |
| LASTWOODSMAN, Comment for image # 35947 | 16 Jan 17 20:20 |
| Rayl - superb rigging - it is agonizing and arduous... especially the planning part. How did you stamp out these flat metal (what metal is it?) clevis blanks, and how did you drill the holes, and how did you bend the two round flanges up? Is there a pin and sleeve bushing between the flanges? |
| rayl, Image # 37781 | 16 Jan 17 15:33 |
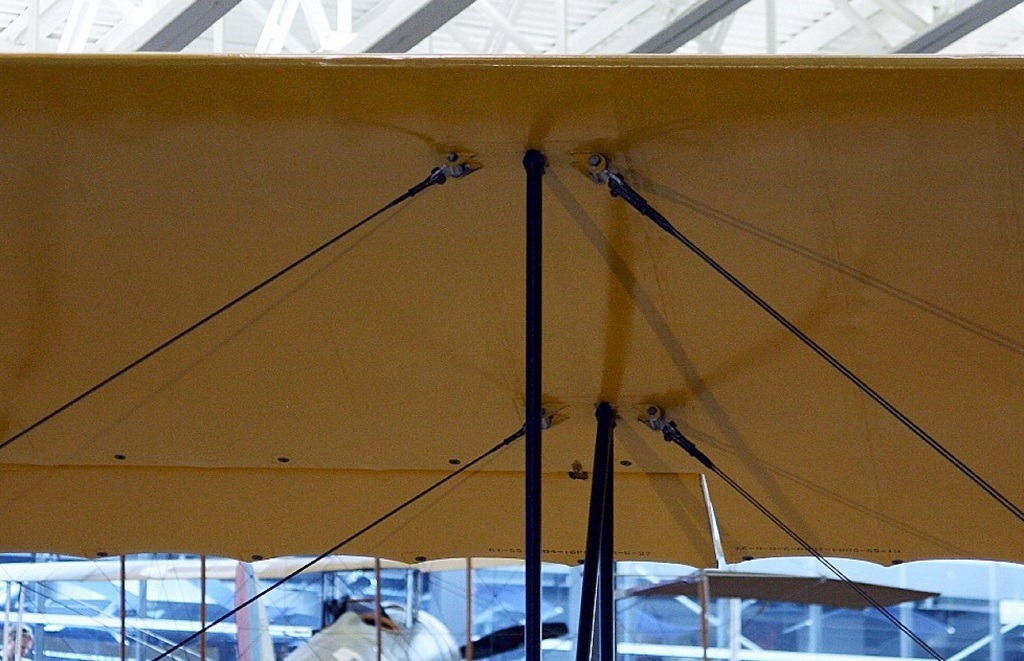
Sky: This is what I was trying to replicate. |
| rayl, Comment for image # 37765 | 16 Jan 17 15:27 |
| Yep, that's what I did. |
| Build Thread, Page :
1 2 3 4 5 [ 6 ] 7 8 9 10 11 >> (570 posts, 20 posts per page, 29 pages in total)
|
[ < Prev ] [ Next > ] |
