| Build Thread, Page :
1 2 3 4 5 [ 6 ] 7 8 9 10 (189 posts, 20 posts per page, 10 pages in total)
|
[ < Prev ] [ Next > ] |
| moostang51, Comment for image # 21395 | 01 Mar 11 16:17 |
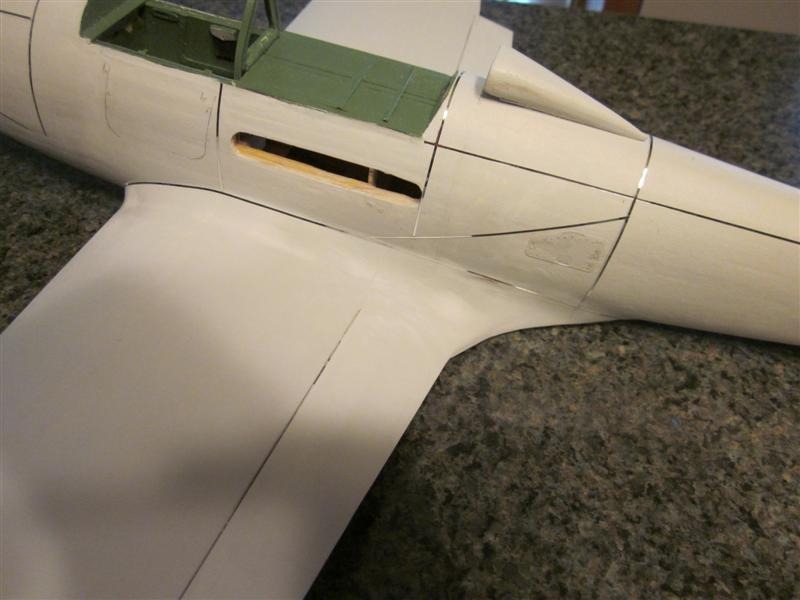
| Future builders of this bird should keep in mind that if you want to depress the oil cooler intake openings at the leading edge; add an additional strip of balsa behind the kit leading edge is required at this area. Missed it!!! |
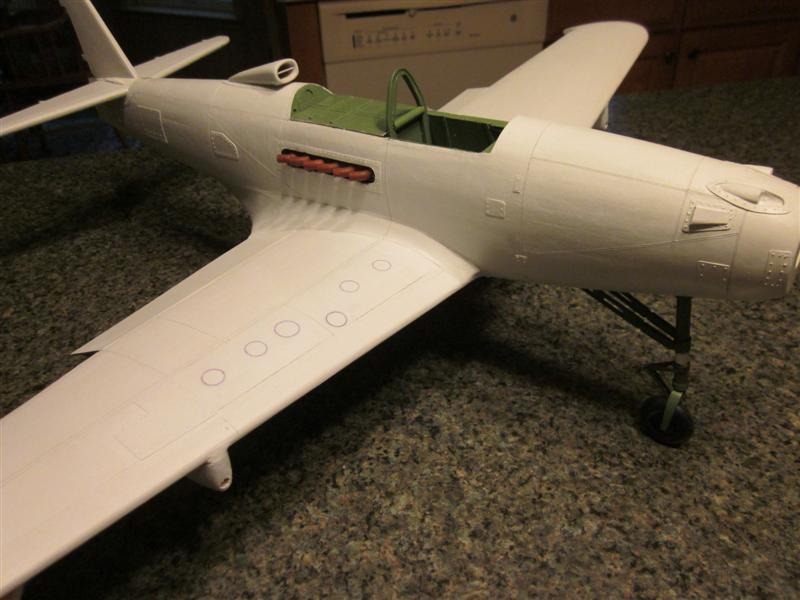
| moostang51, Image # 21395 | 01 Mar 11 16:00 |
Installed hydraulics, electric and prop shaft in front wheel well. Running out of things to do. Need more Chartpak tape for balance of panel lines prior to final paint. Getting very antsy!!!! |
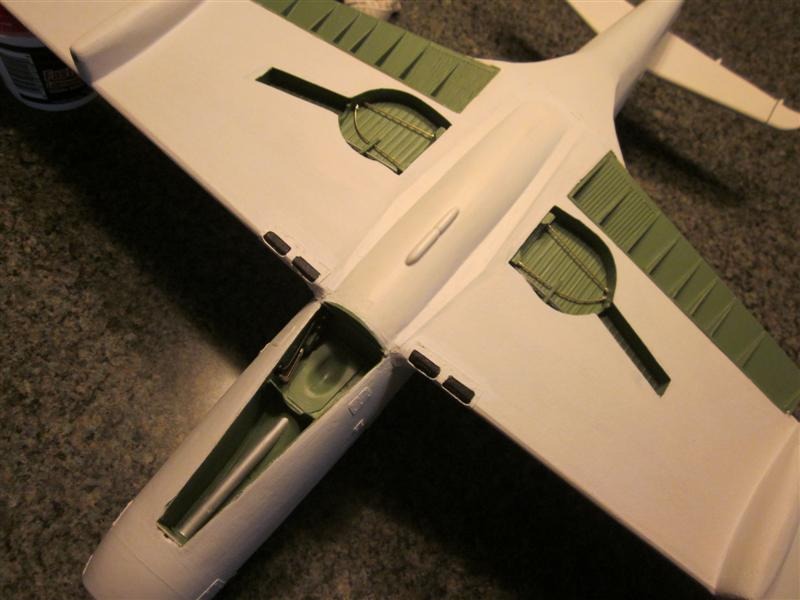
| moostang51, Image # 21394 | 01 Mar 11 15:54 |

Break flaps complete. |
| Brian Kostecki, Comment for image # 21372 | 28 Feb 11 20:20 |
| Wow...just...wow. |
| Roring40, Comment for image # 21372 | 28 Feb 11 18:54 |
| Great job ! Looking spectacular. |
| FLYBOYZ, Comment for image # 21372 | 28 Feb 11 18:43 |
| Beautiful moostang51! |
| John M Oshust, Comment for image # 21372 | 28 Feb 11 17:47 |
| Scrumptious! |
| moostang51, Image # 21372 | 28 Feb 11 16:26 |
1/32" tape on fuse stripped easily. |
| Brian Kostecki, Comment for image # 21323 | 25 Feb 11 08:34 |
| Thanks again! That Tom Pierce seems to be quite the renaissance man. |
| moostang51, Image # 21328 | 25 Feb 11 07:41 |
RTD, something like this. |
| moostang51, Comment for image # 21323 | 25 Feb 11 03:54 |
| Did a lot of researching when I started The TF Spitfire and came across this site. Great for reference.http://www.tompierce.net/190/htm/paint/panelines.htm |
| Brian Kostecki, Comment for image # 21323 | 24 Feb 11 23:24 |
| Thanks Moos! These fillets are similar to my P-47, where I gave up on the cardstock and went with Bondo. Your recessed panel lines are ingenious; not sure if I'd seen that technique applied before. Have you done that on any of your previous builds? |
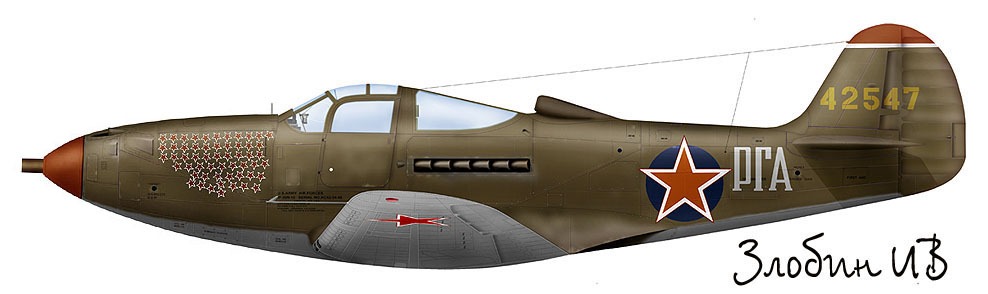
| RTD89, Comment for image # 21325 | 24 Feb 11 20:47 |
| Very nice, what paint scheme are you gonna use?
|
| David Duckett, Comment for image # 21325 | 24 Feb 11 19:06 |
| Looking great! You really nailed those filets!! |
| John M Oshust, Comment for image # 21324 | 24 Feb 11 17:58 |
| The difference is in the details....wonderful! |
| moostang51, Image # 21325 | 24 Feb 11 17:08 |
Two additional coats of light gray primer installed over the tape. Will lightly sand to expose the chrome tape and then remove. It better work. If it does I'll follow with the remaining surfaces. |
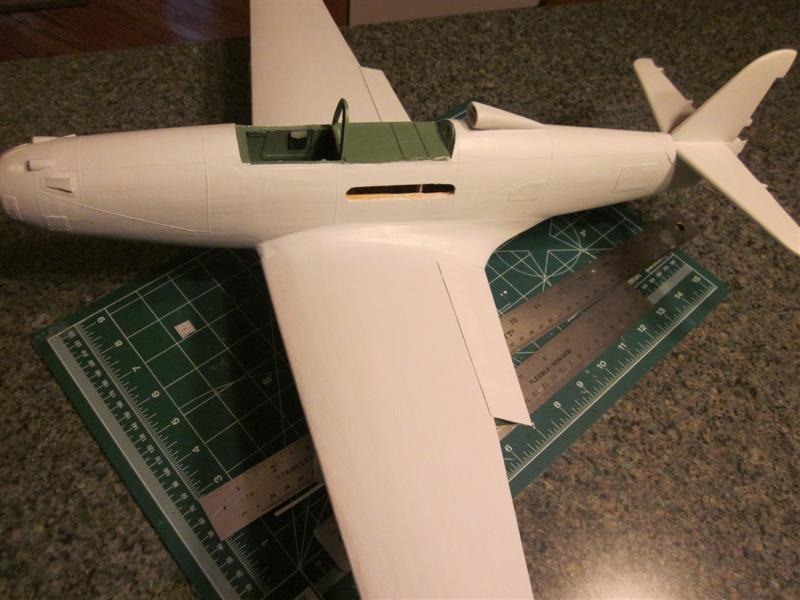
| moostang51, Image # 21324 | 24 Feb 11 17:05 |

Substitiuted very thin clear styrene and formed the cardstock parts applicable to a Q version. |
| moostang51, Image # 21323 | 24 Feb 11 17:02 |
For Brian. Took a lot of sanding, filling and shaping to get the fillet to this point. The 1/32 tape will be scaled recessed panel lines. |
| moostang51, Comment for image # 21308 | 24 Feb 11 16:51 |
| Brian, the plywood is the same. 1/64 soaked in warm water works great. Unfortunately the L7 former at the trailing edge will not allow a smooth transition to the fillets' end. This was after the first sanding and filling. Two more similar steps followed. I would suggest a one piece fillet marked and then cut your own supporting ribs or shape it completely out of filler. |
| Brian Kostecki, Comment for image # 21308 | 24 Feb 11 11:41 |
| Moos, are these the same 1/64" ply fillets from your previous post? I'd assume you didn't need to use the fillet formers supplied in the kit? |
| Build Thread, Page :
1 2 3 4 5 [ 6 ] 7 8 9 10 (189 posts, 20 posts per page, 10 pages in total)
|
[ < Prev ] [ Next > ] |
