| Build Thread, Page :
<< 2 3 4 5 6 [ 7 ] 8 9 10 (189 posts, 20 posts per page, 10 pages in total)
|
[ < Prev ] [ Next > ] |
| maconguy, Comment for image # 20628 | 23 Feb 11 03:48 |
| Gotcha. Looks like it's well worth the effort though. I have an older P-40 I didn't cover. May give it a try. Thanks for the information. Both of you are truly Masters of the Craft !!!! |
| moostang51, Comment for image # 20628 | 23 Feb 11 03:44 |
| One at a time is correct. I precut and install (no glue yet)all the pieces between let's say former B3 and B4. Then remove and glue all them back in. Also since they should be the same length, just cut the sides on a bevel so it stays up higher than the stringers. Each piece is actually one cut since I flip the stock material over and the bevel is already on one side. Use a wood glue or cement and not CA also. |
| David Duckett, Comment for image # 21307 | 23 Feb 11 02:58 |
| Some thoughts on the color you requested will be coming your way shortly. Beautiful work! |
| David Duckett, Comment for image # 20628 | 23 Feb 11 02:53 |
| Allow me: You are absolutely correct about the technique and you have to fit each one. |
| maconguy, Comment for image # 20628 | 23 Feb 11 02:11 |
| Hey Moose, Newbie here. I left a comment on one of Dave's pics from when he built the THUD about using filler to finish the fuselage. SO if I am reading and seeing right here, you actually have to cut a plank to fill each void then apply the filler and sand? I had never seen any comments or "tutorials" on it until i saw your comment about "290 planks later". Any trick to bulk cutting or do you have to fit each one? |
| poppy, Comment for image # 21307 | 22 Feb 11 19:42 |
| The extra work and the details are truly grand!! |
| John M Oshust, Comment for image # 21307 | 22 Feb 11 18:36 |
|
Scrumptious |
| frwyflyer, Comment for image # 21307 | 22 Feb 11 18:08 |
| VERY VERY NICE!!! |
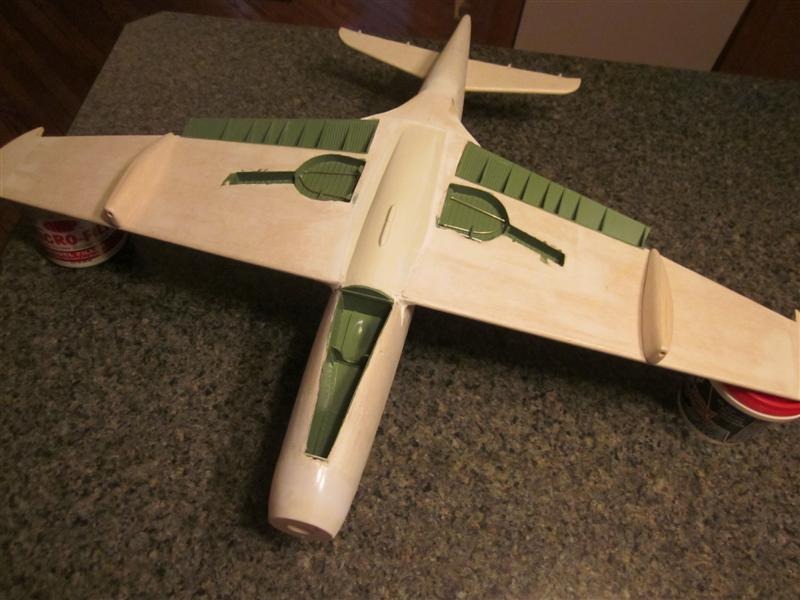
| moostang51, Image # 21308 | 22 Feb 11 17:01 |

While the filler in the reconstructed wing fillets sets up, had the time to carve and install a better air intake. |
| moostang51, Image # 21307 | 22 Feb 11 16:57 |
The underside of this bird was quite challenging to make work. The wing fillet tie ins are a PIA. If you build per plan you will end up doing it over. Other than that this 800 series kit like the Mossie is great. |
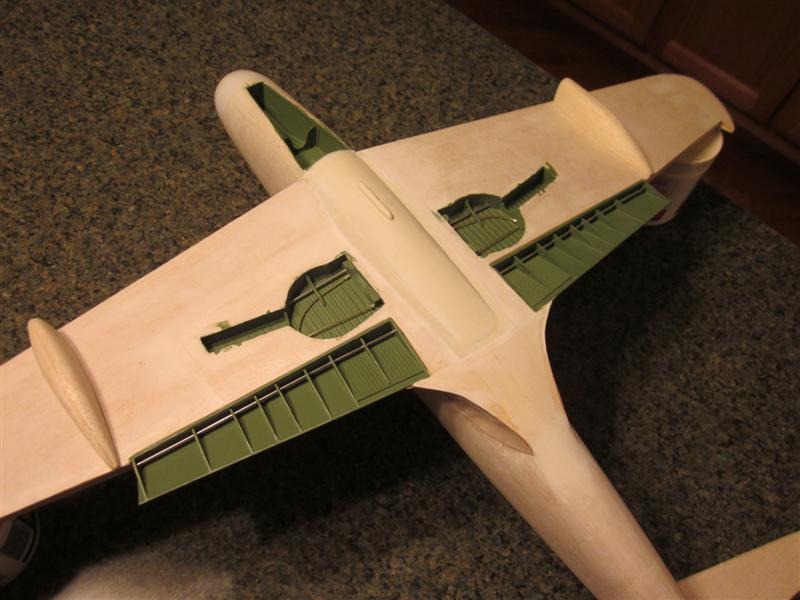
| moostang51, Image # 21306 | 22 Feb 11 16:52 |
A p-39Q in the works ....ergo 50 cal. underwing gun pods. |
| Creosotewind, Comment for image # 21286 | 21 Feb 11 17:13 |
| I've always loved how offbeat this plane was with its mid engine and big gun and trike landing gear. You are doing great credit to the real thing. |
| moostang51, Image # 21294 | 21 Feb 11 07:53 |
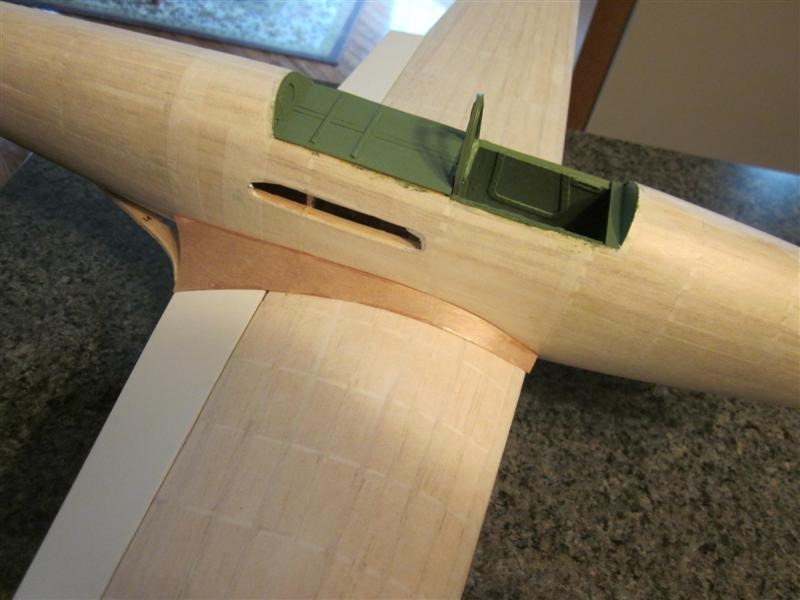
1/64" plywood and thin CA makes wing fillets much simpler. |
| John M Oshust, Comment for image # 21286 | 20 Feb 11 17:55 |
| Nice wheel wells super! |
| frwyflyer, Comment for image # 21286 | 20 Feb 11 15:50 |
| Great work!! |
| Roring40, Comment for image # 21286 | 20 Feb 11 12:21 |
| This is looking fantastic, great detailing. |
| FLYBOYZ, Comment for image # 21286 | 20 Feb 11 11:39 |
| Fantastic!Love it |
| moostang51, Image # 21286 | 20 Feb 11 10:30 |
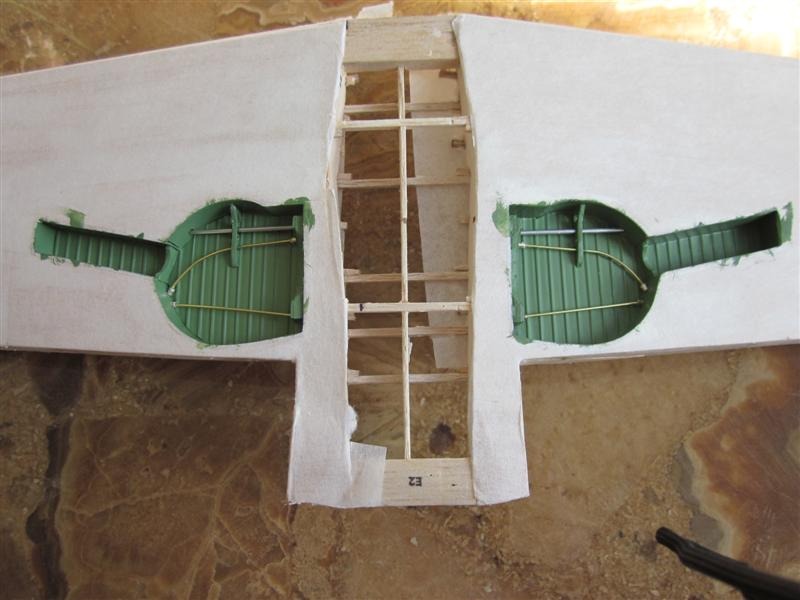
Now onto the nosewheel well. |
| David Duckett, Comment for image # 21251 | 18 Feb 11 20:13 |
| Looking great!! Details do make a difference. |
| moostang51, Image # 21251 | 18 Feb 11 14:57 |

Tried feathers two different ways. Painting will dictate the path for future builds. |
| Build Thread, Page :
<< 2 3 4 5 6 [ 7 ] 8 9 10 (189 posts, 20 posts per page, 10 pages in total)
|
[ < Prev ] [ Next > ] |
