| Build Thread, Page :
1 2 3 [ 4 ] 5 6 7 8 9 10 11 (239 posts, 20 posts per page, 12 pages in total)
|
[ < Prev ] [ Next > ] |
| heywooood, Comment for image # 40154 | 09 May 18 15:39 |
| Outstanding P-61 model, Dave - what a brute |
| heywooood, Comment for image # 40154 | 09 May 18 15:37 |
| http://www.stories.windmillpro.com/ww24P61.htm
|
| heywooood, Comment for image # 40154 | 09 May 18 15:37 |
| have a glance at this blurb..see next comment for the link
|
| BriandKilby, Comment for image # 40180 | 09 May 18 13:48 |
| nice interceptor david! |
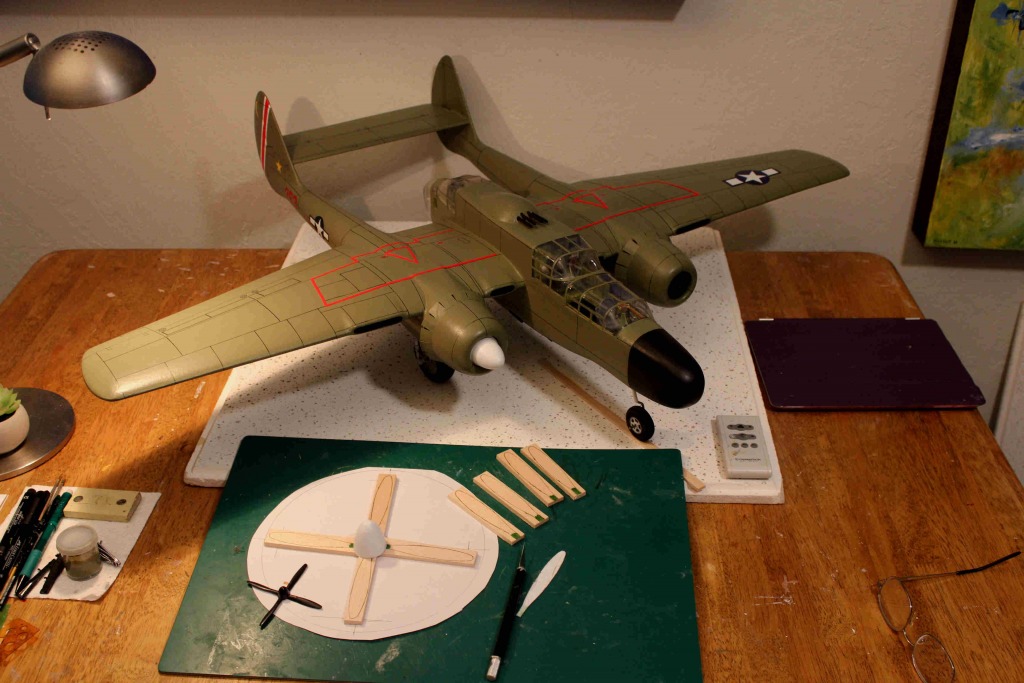
| David Duckett, Comment for image # 40180 | 09 May 18 10:39 |
| I should have mentioned that a piece of 3/16" wood was glued into the bottom of the spinner for the blades to be glued to....... |
| Don C, Comment for image # 40180 | 09 May 18 10:37 |
| Look really nice. Did you use any fill in the back of the spinners or just glue the blades in? |
| David Duckett, Image # 40180 | 09 May 18 09:28 |
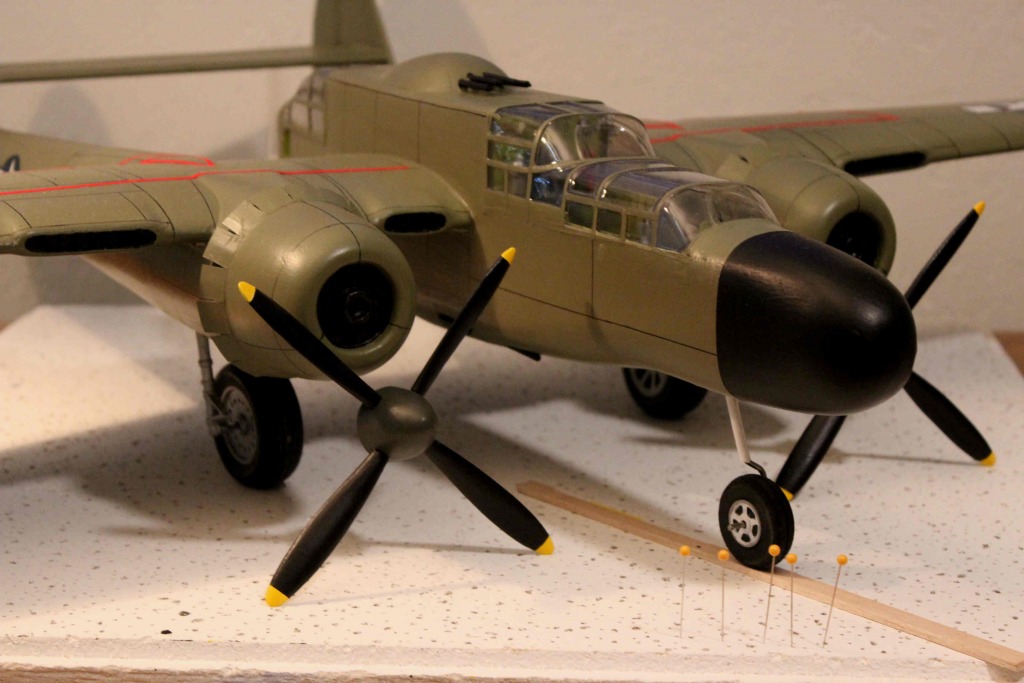
I used a hint found here and shaped the blades using sanding only. It took awhile but it will be the preferred method now. Black was added to the OD for the spinner color. These will be the last things glued on. |
| David Duckett, Image # 40179 | 09 May 18 09:26 |
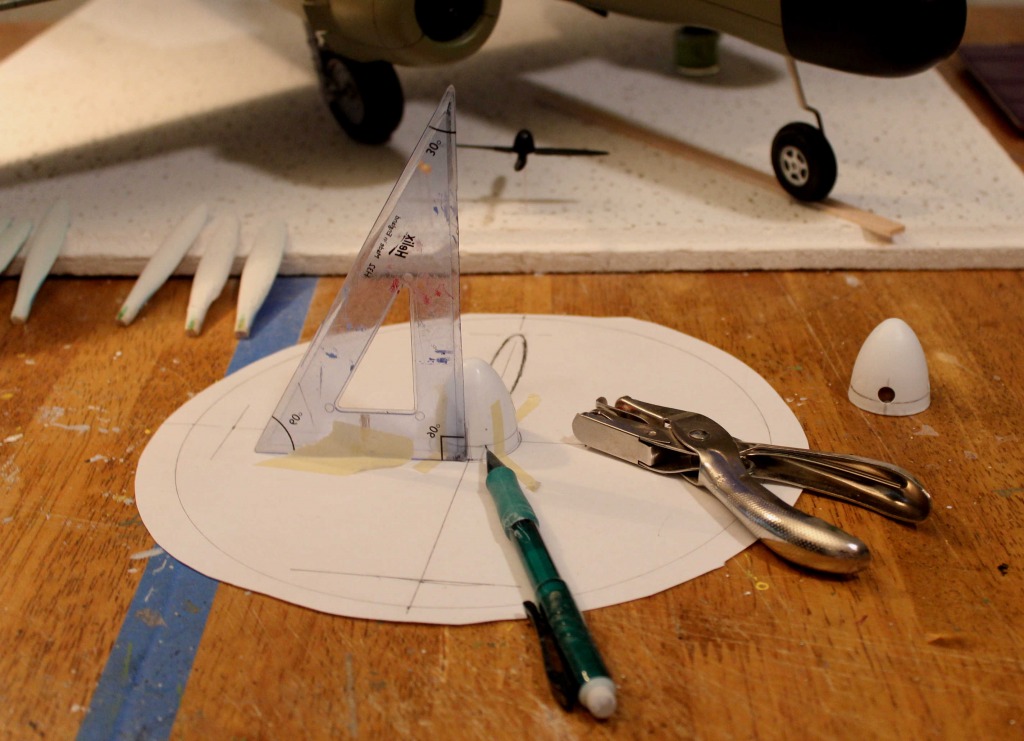
Using the spinner and pencil, hold one and turn the other for the bottom line, 3/16" in this case. Use the triangle to mark the vertical line intersecting the bottom line. The hole punch makes a 3/16" hole. Line it up with the vertical line and where ever you want it relative to the bottom line, making sure they are all the same. |
| David Duckett, Image # 40176 | 06 May 18 21:07 |
Most of the panel lines are done, the tail feathers are glued in place, the guns are mounted, so it's time to make the props. |
| heywooood, Comment for image # 40170 | 05 May 18 23:26 |
| terrific technique and execution - and all new to me! I love it. |
| David Duckett, Comment for image # 40169 | 03 May 18 09:08 |
| I take a lot of breaks:-) |
| rayl, Comment for image # 40169 | 03 May 18 08:50 |
| That's a lot of panel lines David. How are Your eyes doing? |
| David Duckett, Image # 40170 | 03 May 18 07:14 |
Then I used a thin piece of styrene, pre-curled on the dowel, to fill the hole. A bit of filler sanded smooth and painted finishes the installation. |
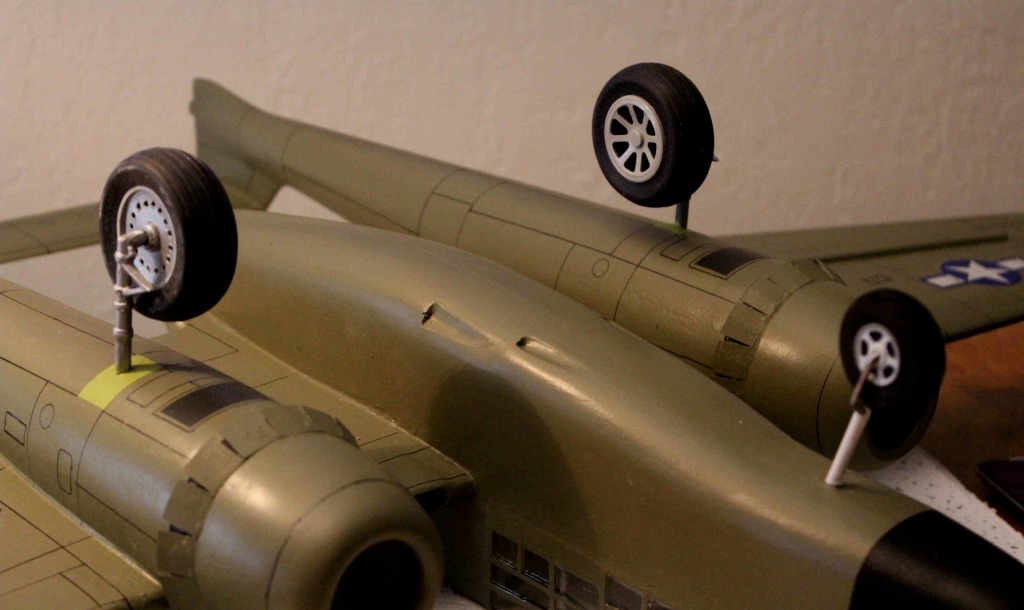
| David Duckett, Image # 40169 | 03 May 18 07:11 |
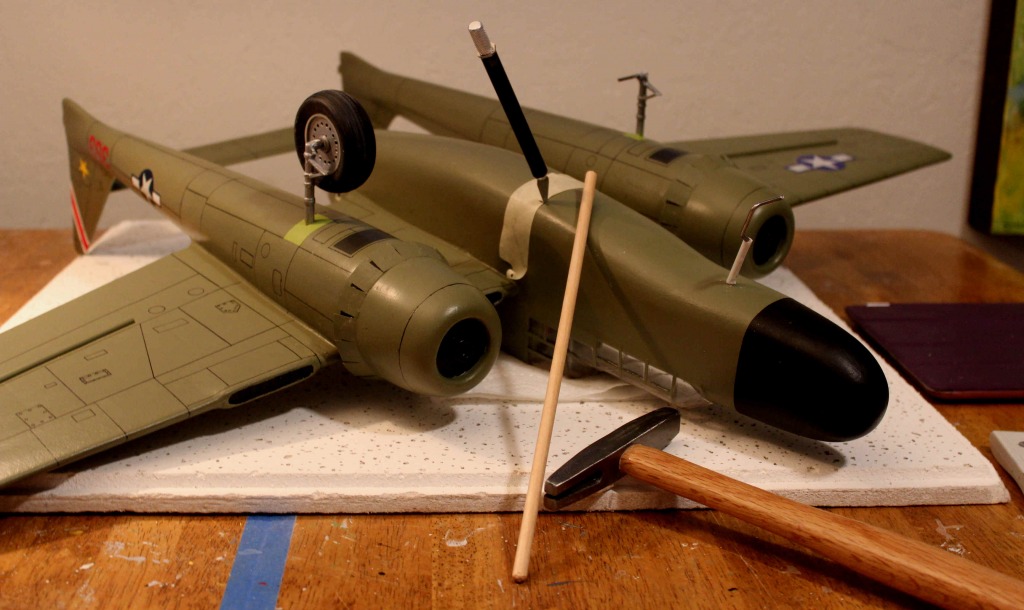
For the gun troughs I first cut at the back and then a couple of taps with the hammer. |
| David Duckett, Comment for image # 40152 | 29 Apr 18 18:25 |
| If you mean the tape between glue spots, no. |
| Don C, Comment for image # 40152 | 29 Apr 18 16:54 |
| I saw that, but no problems with in between? |
| David Duckett, Comment for image # 40152 | 29 Apr 18 16:04 |
| And that's why it's glued:-) |
| Don C, Comment for image # 40152 | 29 Apr 18 12:54 |
| I wondered if the masking tape would eventually dry and lift. That's happened to me in different applications. |
| David Duckett, Comment for image # 40152 | 29 Apr 18 10:39 |
| I used a pin to CA it at the ends and junctions and will paint where you can see the shiny CA on the red and OD. I've been thinking matte medium would seal it and might try that before painting again. |
| Don C, Comment for image # 40152 | 29 Apr 18 09:49 |
| Do you seal it down with some clear? |
| Build Thread, Page :
1 2 3 [ 4 ] 5 6 7 8 9 10 11 (239 posts, 20 posts per page, 12 pages in total)
|
[ < Prev ] [ Next > ] |
