| Build Thread, Page :
<< 5 6 7 8 9 [ 10 ] 11 12 (230 posts, 20 posts per page, 12 pages in total)
|
[ < Prev ] [ Next > ] |
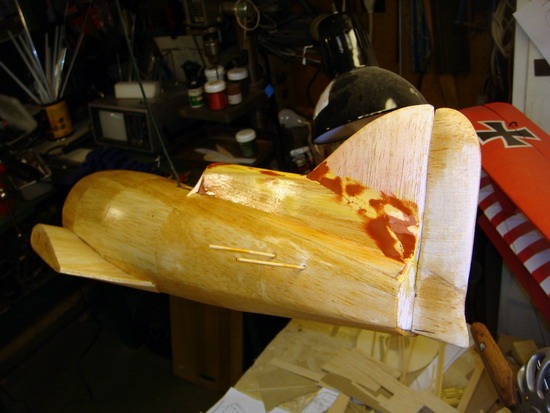
| John M Oshust, Image # 11417 | 17 Mar 09 19:28 |
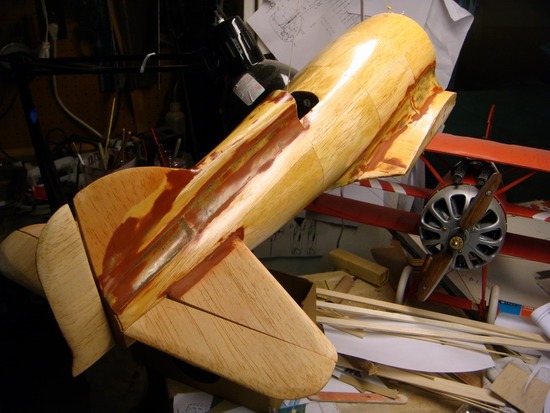
Feathers added, second filling, sanding and sealing. |
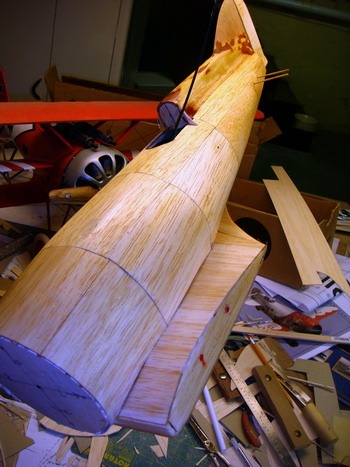
| John M Oshust, Image # 11416 | 17 Mar 09 19:27 |
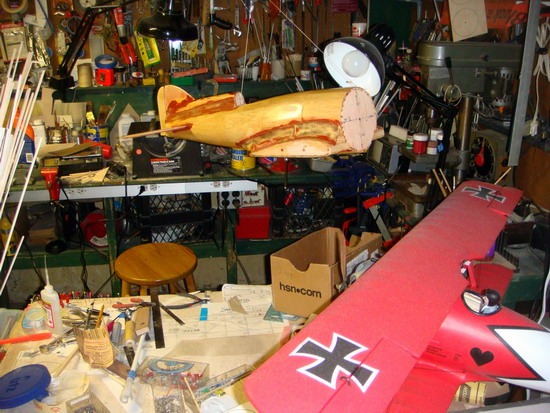
The "O"ster flies thru my functional workspace. |
| wingspanner, Comment for image # 11238 | 16 Mar 09 19:50 |
| I have a cheap badger single action brush and its superb. The finish is so clean.Also Tamiya acrylics are quite cheap and are easy to clean with water although they do need to be thinned with An acrylic thinner. All the planes in my hangar were airbrushed. |
| John M Oshust, Comment for image # 11238 | 16 Mar 09 19:48 |
| Thanks, you have made up my mind. I will stick to a brush. I use Ben Moore house paint.....the sample jars! |
| Creosotewind, Comment for image # 11238 | 16 Mar 09 19:37 |
| Get a single action brush, for the size projects you work on. You could actually use an auto detail brush for the size projects you work on! It is not tough, just getting the right consistency of paint. Acrylics work well, as do dyes and enamels and lacquers. The last two need a spray booth. All need face masks (lungs ain't cheap). Oh, and a large four letter vocabulary helps, when things aren't quite right. The plane looks great so far. |
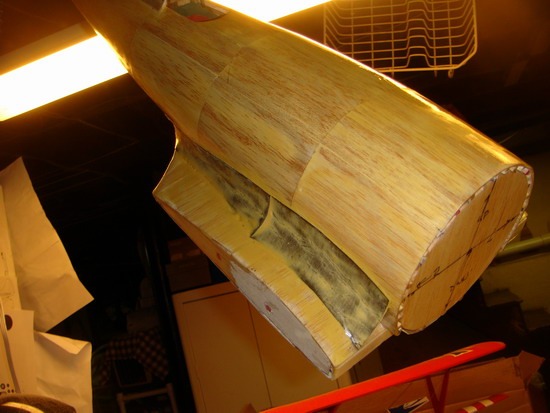
| John M Oshust, Image # 11390 | 16 Mar 09 17:27 |
While things were drying I also made the hor. stab. If I am lucky I can shape, sand and attache it tonight. |
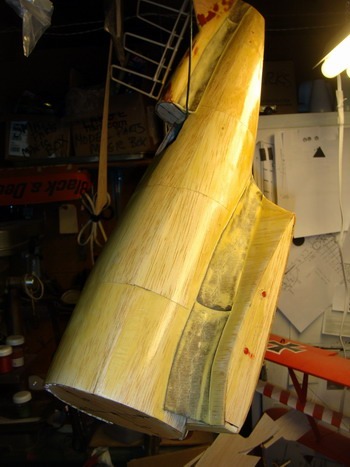
| John M Oshust, Image # 11389 | 16 Mar 09 17:25 |
Fillets fabricated and attached, first coat of filler applied, first sanding, and second coat of sealer. All in all a good day. |
| John M Oshust, Comment for image # 11361 | 15 Mar 09 22:10 |
| Ah those things we do and love! |
| Xanadu, Comment for image # 11361 | 15 Mar 09 20:21 |
| Man, I can sure relate with all the fitting, etc. |
| Luke War, Comment for image # 11362 | 15 Mar 09 19:05 |
| Looking SWEET! |
| John M Oshust, Comment for image # 11362 | 15 Mar 09 18:58 |
| Balsa is forgiving....but I have done this before, much easier than my first attempt on the Mig 2.95! |
| elevatoranj, Comment for image # 11362 | 15 Mar 09 18:47 |
| Looks to be worth ever second spent.. great job, and no pushing panels out of shape when painting. |
| JohnG., Comment for image # 11363 | 15 Mar 09 18:22 |
| Very nicely done. The "O Man" always conquers the big challenges. |
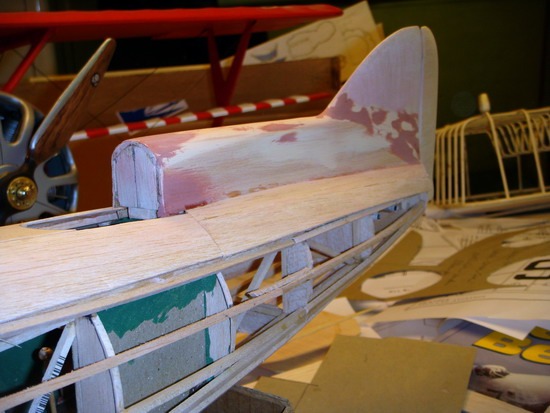
| John M Oshust, Image # 11363 | 15 Mar 09 17:59 |

On to the upper surface wing fillets...always a joy! |
| John M Oshust, Image # 11362 | 15 Mar 09 17:57 |
There is a lot to be said for purchaseing a kit with cut parts 46 plus balsa sheets were made, after 46 plus templates of cardboard, to get the fuse sheeted. |
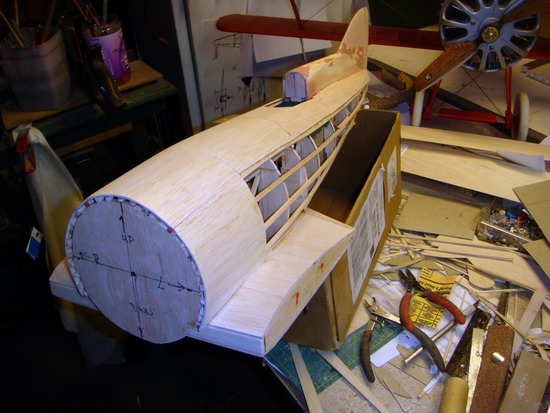
| John M Oshust, Image # 11361 | 15 Mar 09 17:54 |
Took the better part of the week but the "O"ster has a sheeted fuse that has a coat of sealer. |
| John M Oshust, Comment for image # 11327 | 13 Mar 09 20:47 |
| The engine is not done. The foundation for the power plant came with Klaus II. I must make an 11 cylinder radial, but that is down the raod a bit. |
| elevatoranj, Comment for image # 11327 | 13 Mar 09 19:50 |
| U R making super time, 'member the engine is done! |
| John M Oshust, Image # 11327 | 13 Mar 09 18:14 |
A "hot rod" in the formative stages. |
| John M Oshust, Image # 11326 | 13 Mar 09 18:12 |
I did not meet my goal of a sheeted fuse. Fitting the pit and the top side along the fin was all I could muster. Sometimes plans make the work a tad faster, plan as you go a tad slower! |
| Build Thread, Page :
<< 5 6 7 8 9 [ 10 ] 11 12 (230 posts, 20 posts per page, 12 pages in total)
|
[ < Prev ] [ Next > ] |
