| Build Thread, Page :
<< 3 4 5 6 7 [ 8 ] 9 10 11 12 13 >> (851 posts, 20 posts per page, 43 pages in total)
|
[ < Prev ] [ Next > ] |
| Skyediamonds1985, Image # 36865 | 05 Oct 16 00:32 |
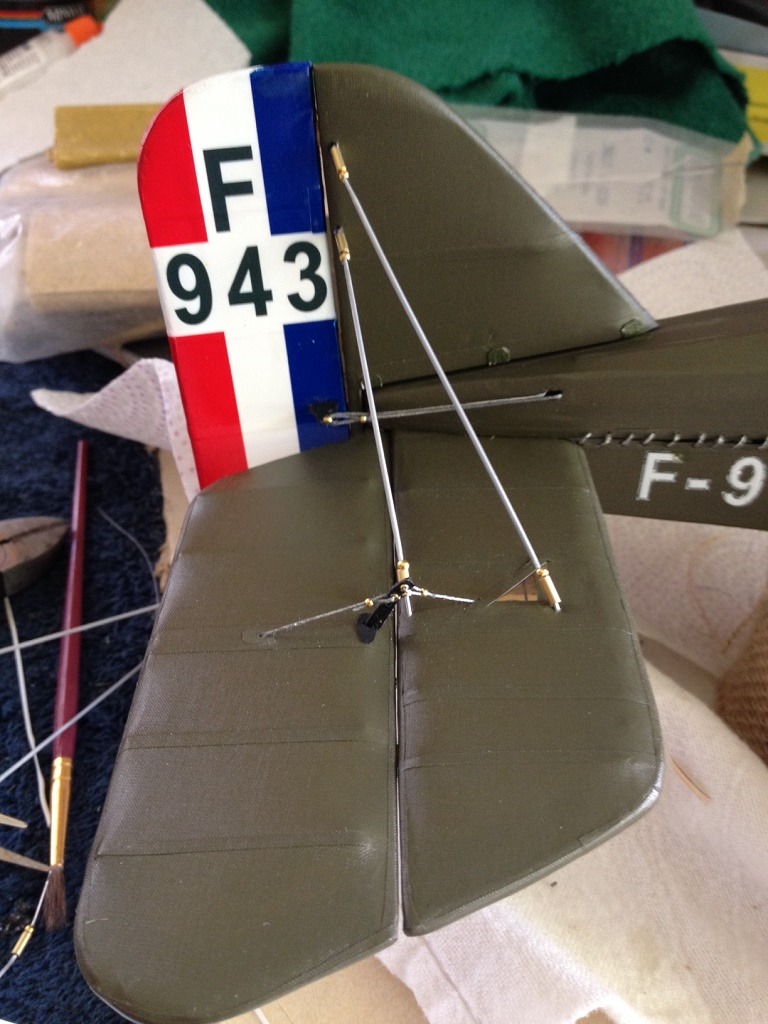
Tail surfaces finished with control horns, cables and rigging. Onward to the ailerons, starting with the bottom wing. |
| Skyediamonds1985, Image # 36864 | 05 Oct 16 00:30 |
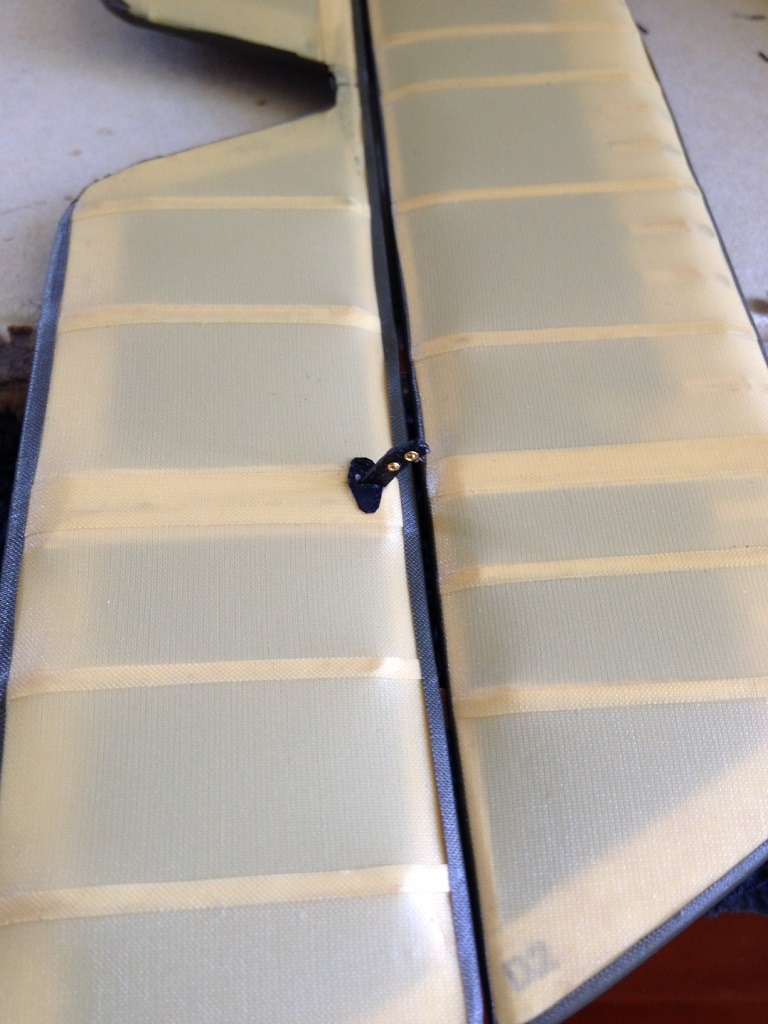
Top side. Notice the double rigging for the rudder. This explains the three cables to each side of the rudder bar. To the more astute observers, I added brass tubing to the underside of the fin to give it some space between the bottom of the vertical fin and the top of the fuselage as on the real aircraft. |
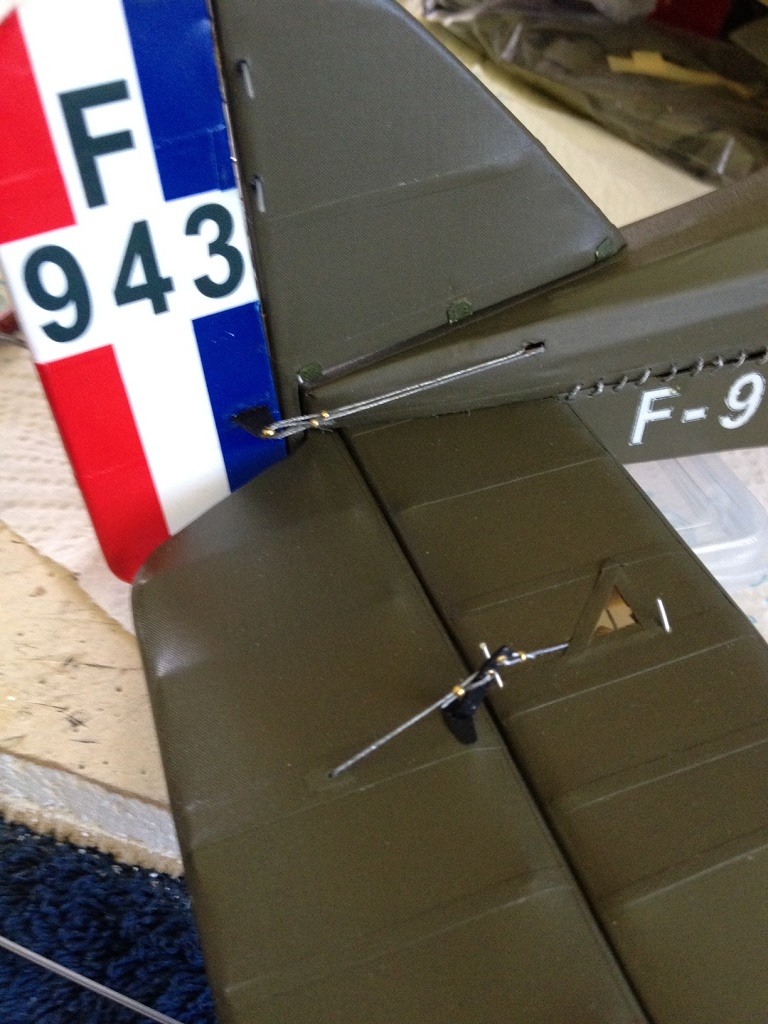
| Skyediamonds1985, Image # 36863 | 05 Oct 16 00:27 |
End result with tail skid and rigging installed. The tail skid had its own control cables. This is part of the reason why I added thee control cables to each side of the rudder bar |
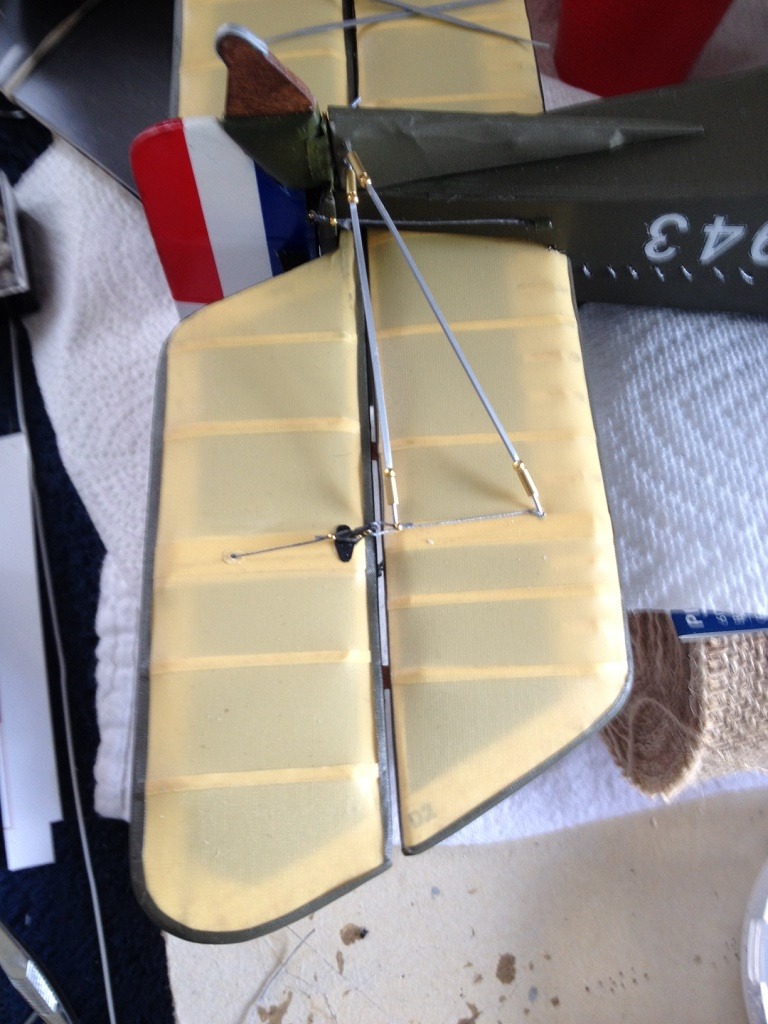
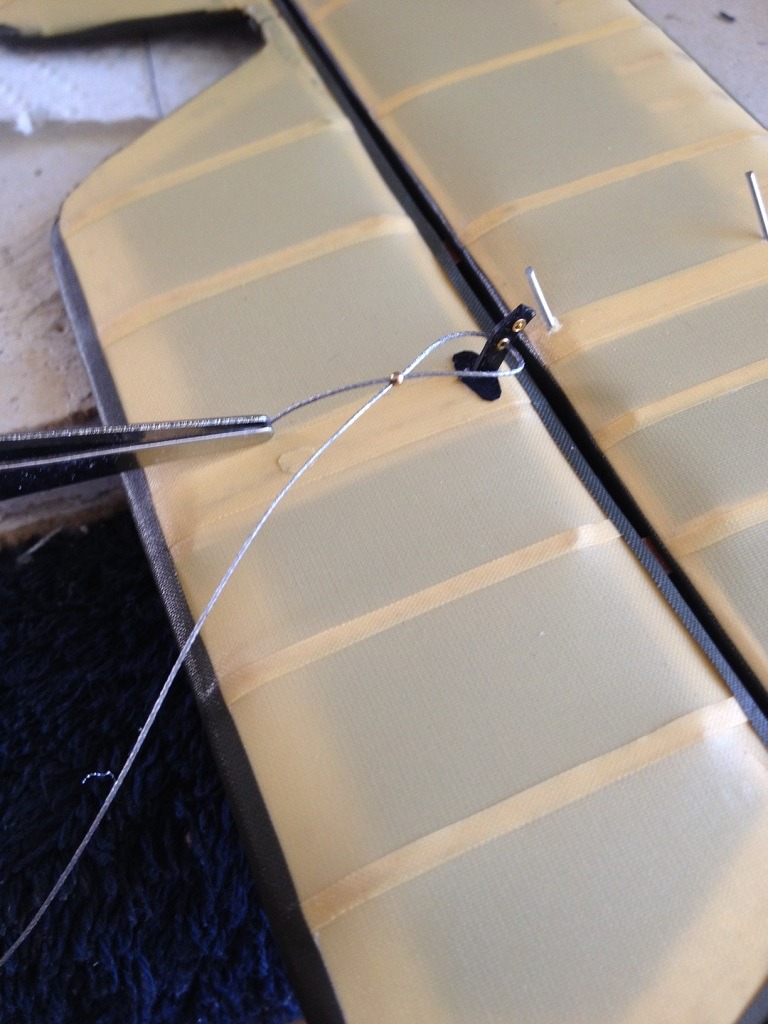
| Skyediamonds1985, Image # 36862 | 05 Oct 16 00:25 |
Starting on the double-looping to the forward portion of the control horn. |
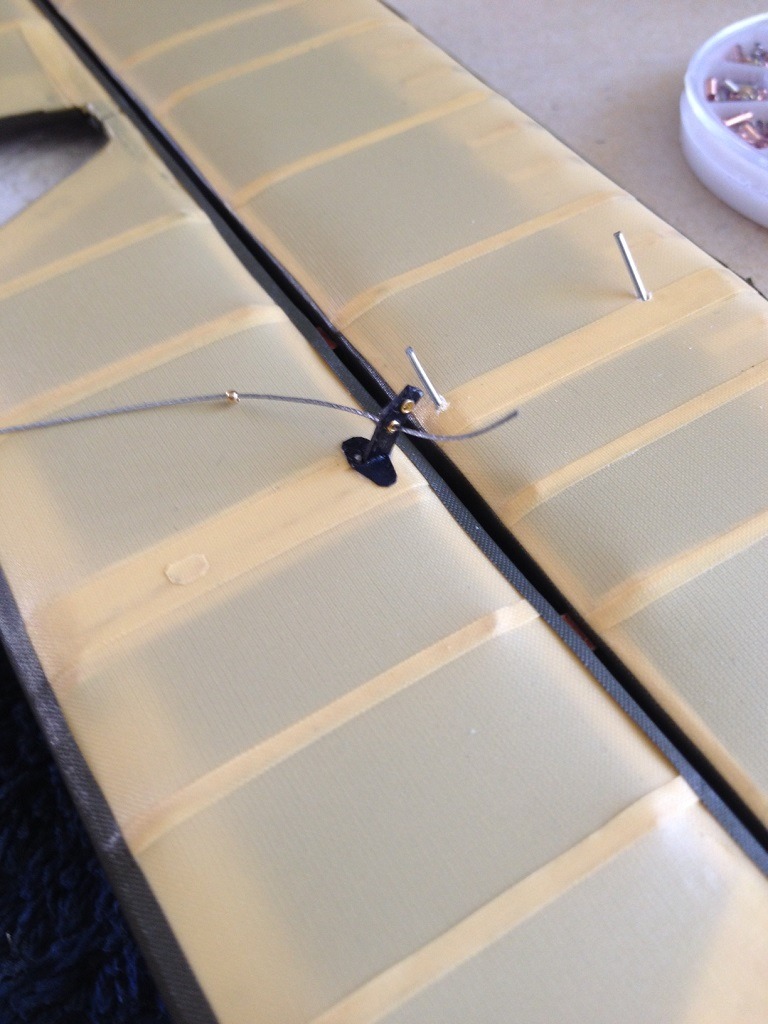
| Skyediamonds1985, Image # 36861 | 05 Oct 16 00:24 |
Added a small patch of Solartex covering and then made a small hole and super-glued the end. |
| Skyediamonds1985, Image # 36860 | 05 Oct 16 00:19 |
|
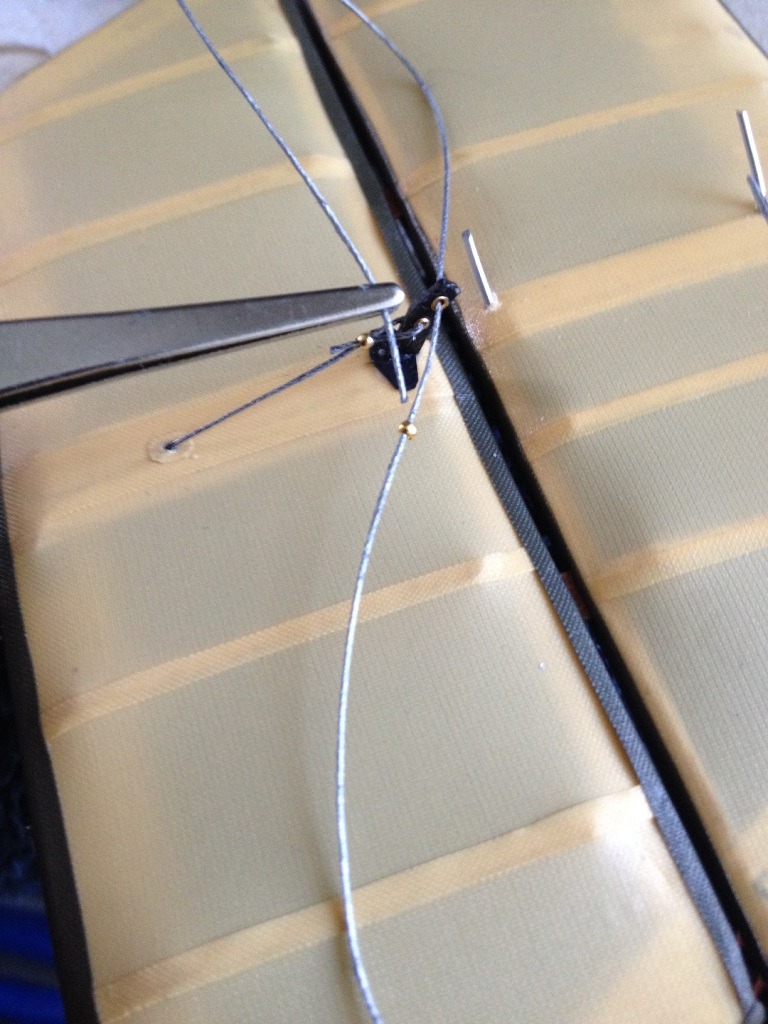
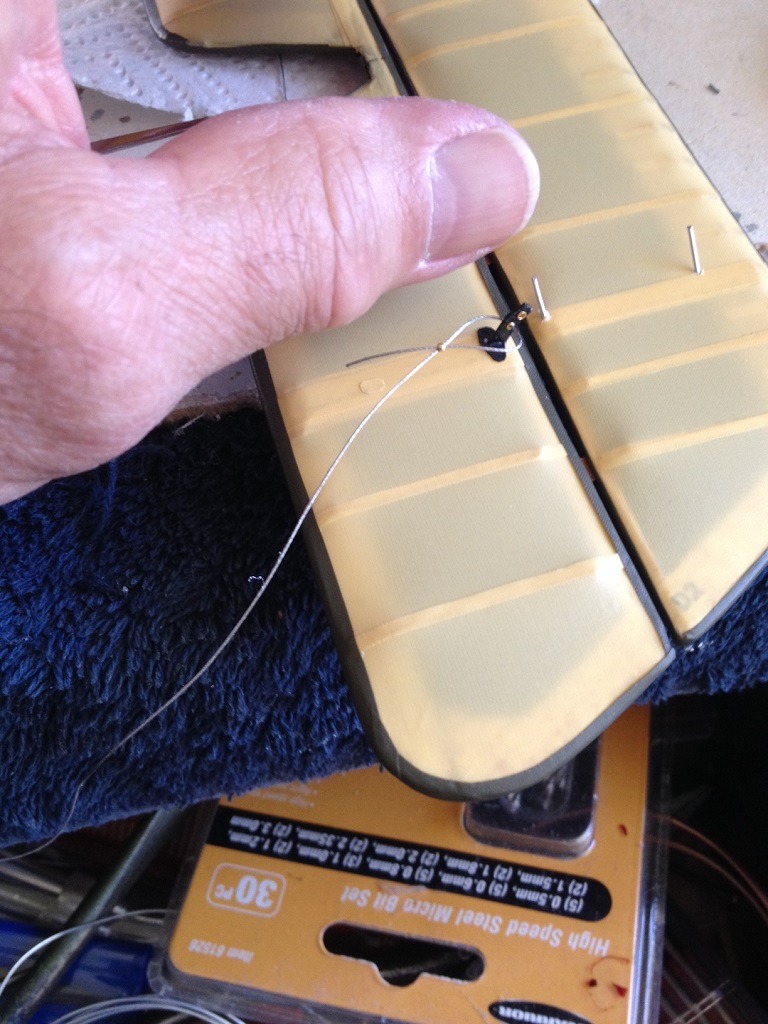
| Skyediamonds1985, Image # 36859 | 05 Oct 16 00:18 |
Thread is double looped back into the bead. That's challenging for the eyes and hands. |
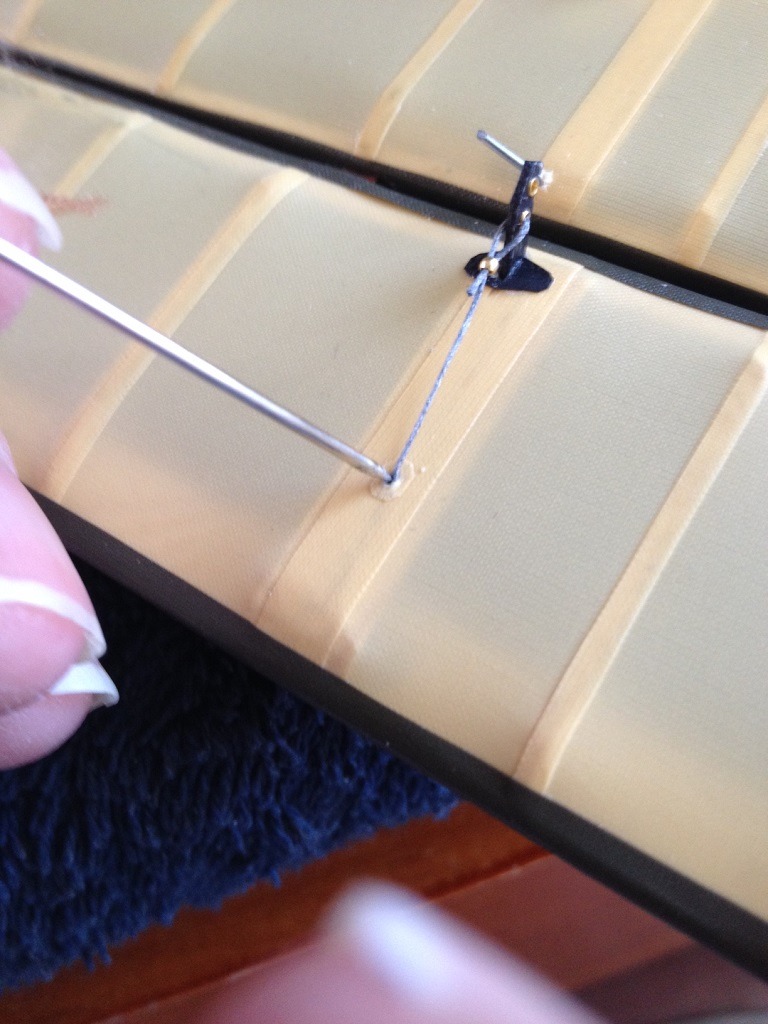
| Skyediamonds1985, Image # 36858 | 05 Oct 16 00:17 |
Added wiring for the rigging yet to come. Threading the control horn. Notice the small bead on the thread. |
| Skyediamonds1985, Comment for image # 36857 | 05 Oct 16 00:15 |
| I should point out that this is the underside of the left elevator/stabilizer. Notice the part number peeking out from under the covering? |
| Skyediamonds1985, Image # 36857 | 05 Oct 16 00:08 |
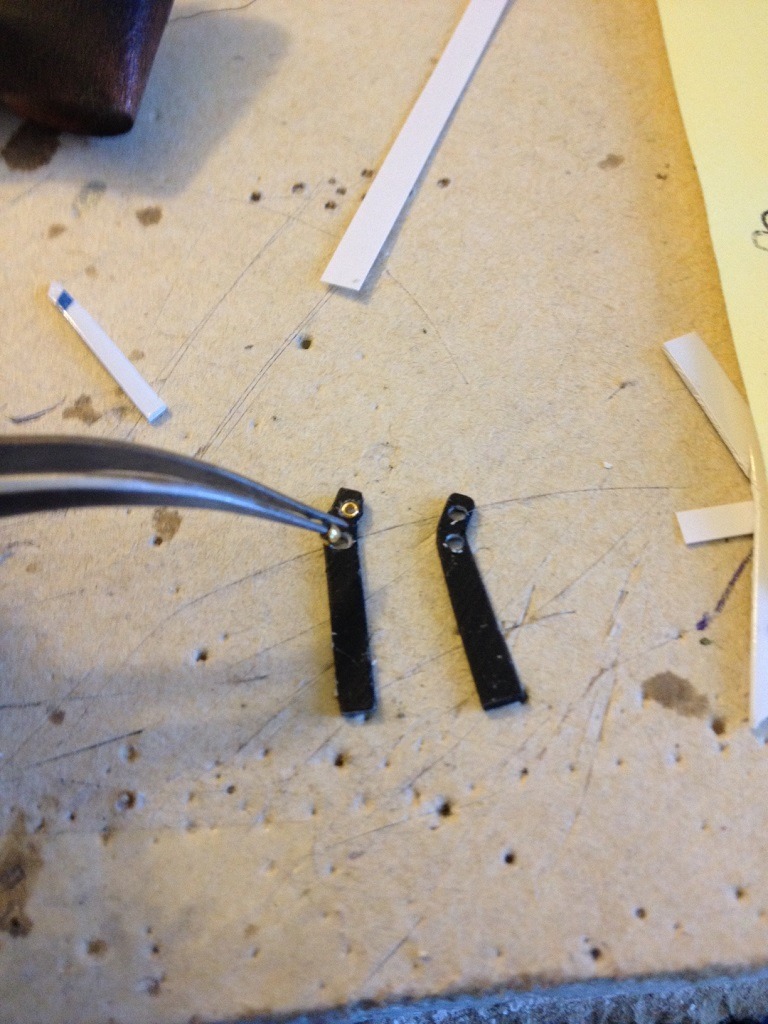
Control horns and base prior to threading the control "cables" and adding rigging |
| Skyediamonds1985, Image # 36856 | 05 Oct 16 00:07 |
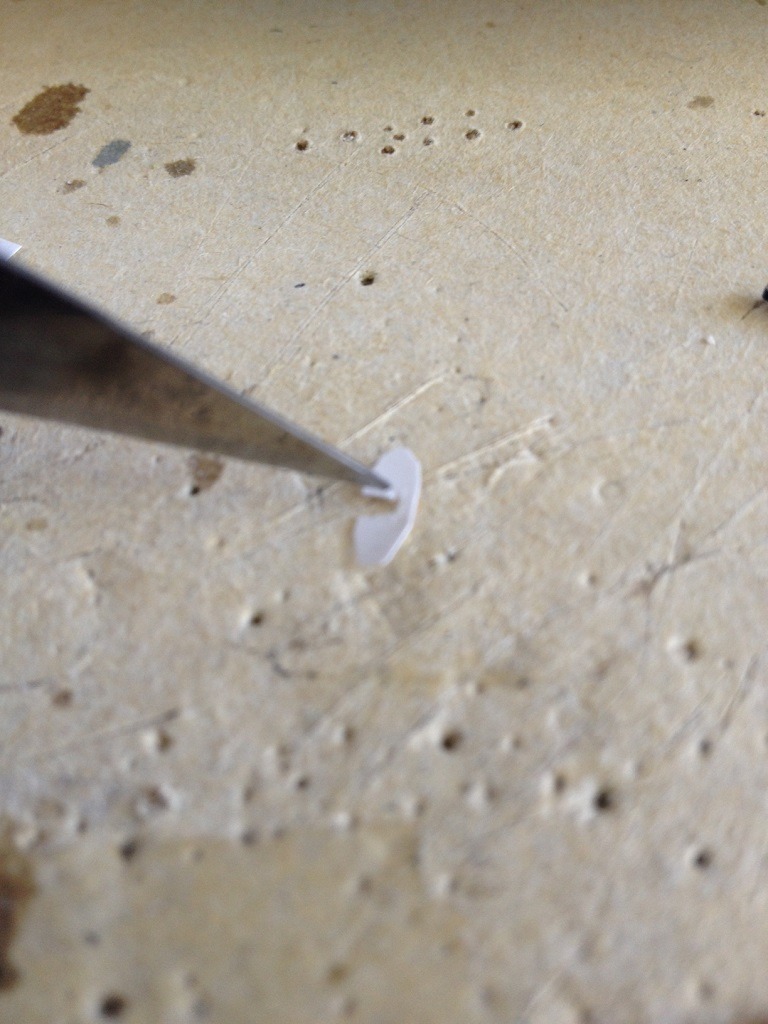
Used glossy paper to build the base for the control horns. |
| Skyediamonds1985, Image # 36855 | 05 Oct 16 00:06 |
|
| Skyediamonds1985, Image # 36854 | 05 Oct 16 00:05 |
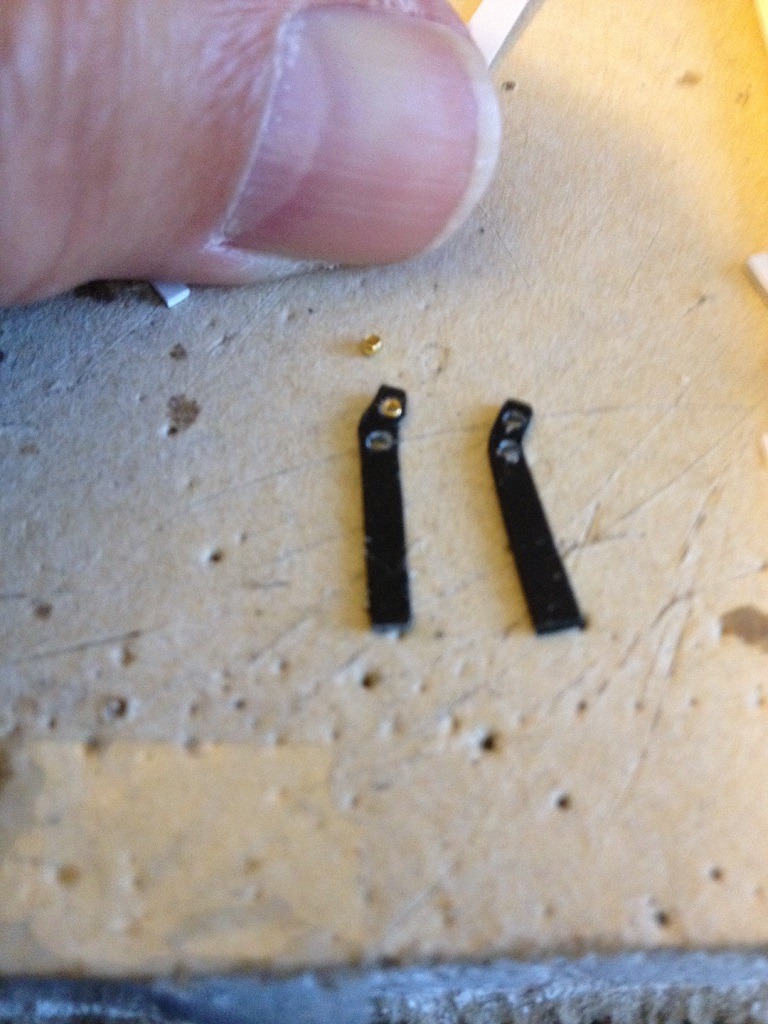
In my last posting, I believe I mentioned I'll be working on the tail feathers. Here, I am fabricating the control horns. I thought I would give it a bit of "bling" by adding eyeball-straining tiny brass colored beads as bushing. I purposely had my thumb in the picture for scale. Notice the itsy bitsy tiny bead. Ouch! |
| biplane guy, Comment for image # 36740 | 16 Sep 16 07:47 |
| My mistake. I was thinking of using it for the gas cap on the N-11. But now I realize that that won't fly. : ) |
| Skyediamonds1985, Comment for image # 36740 | 15 Sep 16 19:26 |
| Biplane, I just oversprayed the exhaust with a solid coat of copper. Then after it was completely dry, I lightly "dusted" over the copper with flat black. It should give off a "burnished" look. Read that in a model magazine and thought I'd give it a try. Thank you. That "gas" cap is for the radiator.... as in coolant. But if you would like one, just let me know... and I'll be happy to send it to you. |
| biplane guy, Comment for image # 36740 | 15 Sep 16 09:05 |
| Great idea for the gas cap, Gary. Can I borrow it for the Nieuport? That exhaust manifold actually looks hot to the touch. Nice touch. |
| Skyediamonds1985, Comment for image # 36740 | 14 Sep 16 13:35 |
| Meku, thank you for the reminder. I puposely left the drain valve off because I'm working on the tail feathers and will be turning this model up on its nose. I didn't want to risk breaking off the valve. Huey, insofar as squashed bugs, and some stains, I'm kind of waiting to see what happens. Mostly likely the buys will be attracted to the radiator and wiring. If this is the case, I could probably set up some sort of electrical grid.... but that smell....:0) |
| Huey V77, Comment for image # 36740 | 14 Sep 16 11:10 |
| Will you include oil stains and squashed bugs? |
| meku, Comment for image # 36740 | 13 Sep 16 05:51 |
| Very realistic in detail!!! Do not forget to drain valve in the radiator :) |
| Skyediamonds1985, Comment for image # 36740 | 12 Sep 16 19:47 |
| Thank you gentlemen, Don C, Creosotewind and jgood. Really means a lot to hear that from you guys. Starting work on the tail. Holding off on the large manifold covers until later, as I know I'll be turning this model upside down while working on the undersides of the tail. |
| Build Thread, Page :
<< 3 4 5 6 7 [ 8 ] 9 10 11 12 13 >> (851 posts, 20 posts per page, 43 pages in total)
|
[ < Prev ] [ Next > ] |
