| Build Thread, Page :
1 2 3 4 [ 5 ] 6 7 8 9 (168 posts, 20 posts per page, 9 pages in total)
|
[ < Prev ] [ Next > ] |
| poppy, Comment for image # 4956 | 06 Nov 07 13:27 |
| Very nice. Great covering job! |
| cdwheatley, Image # 4958 | 06 Nov 07 12:03 |
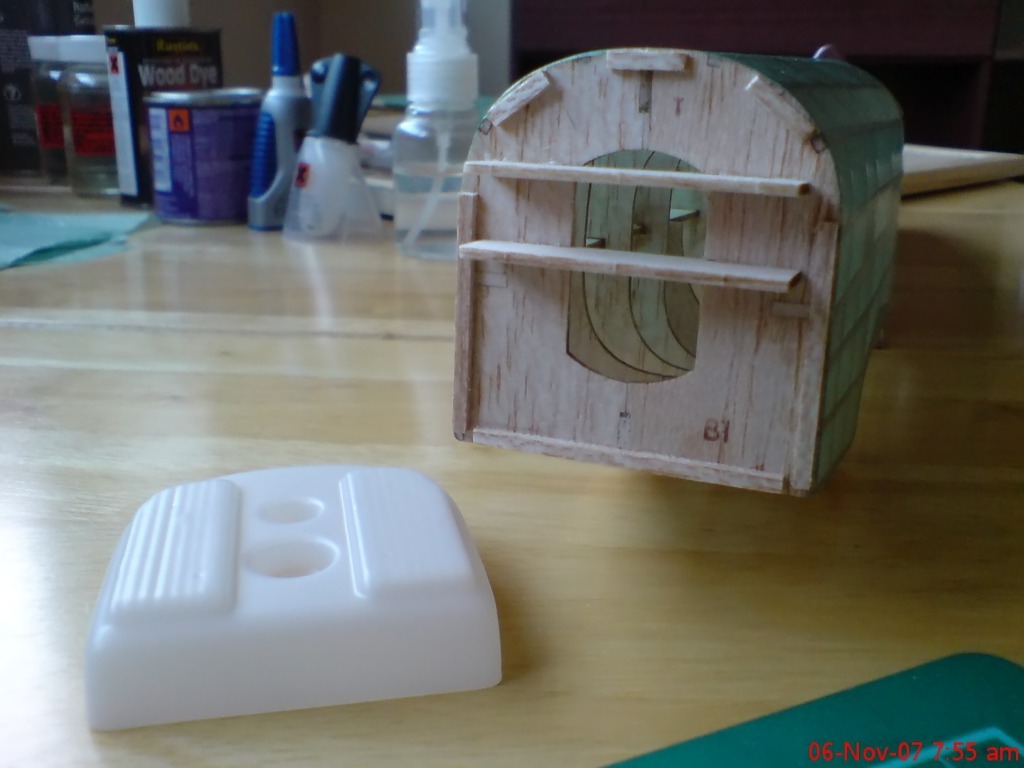
I added 1/16 inch square balsa strips around the edges of the front former B1 so that I can relocate the cowl accurately once it is painted. |
| cdwheatley, Image # 4957 | 06 Nov 07 12:03 |
The underside will be done once the lower wing is in place. |
| cdwheatley, Image # 4956 | 06 Nov 07 12:02 |

I have been busy covering the rest of the fuselage. |
| cdwheatley, Comment for image # 4759 | 26 Oct 07 13:22 |
| I was using this http://cgi.ebay.co.uk/ULTRA-LIGHT-model-filler-balsa-300ml-tub-rc-model-kit_W0QQitemZ6056665595QQihZ017QQcategoryZ34056QQrdZ1QQssPageNameZWD1VQQcmdZViewItem. Contrary to the description, I didn't find it very easy to sand, and it seemed a bit plasticy to me when it set. I also didn't like the bit of 'give' it had either. |
| SteveM, Comment for image # 4759 | 26 Oct 07 12:54 |
| What were you using before? I see poppy uses the Hobbico stuff followed by primer then this micro-fill. Sounds like micro-fill might be just what I need to fill in minor imperfections. |
| cdwheatley, Comment for image # 4759 | 26 Oct 07 08:41 |
| I used a little bit of this for the first time yesterday and was amazed how easy it was to use. Now I realise how rubbish my previous model filler was! I'd never heard of it before I saw the likes of DD and others on here using it to such great effect - thank you for putting me on to it. |
| moostang51, Comment for image # 4754 | 20 Oct 07 13:42 |
| Beautiful job Chris. |
| poppy, Comment for image # 4756 | 20 Oct 07 12:51 |
| Flawless. |
| poppy, Comment for image # 4754 | 20 Oct 07 12:49 |
| Perfect. These look great!! |
| cdwheatley, Comment for image # 4754 | 20 Oct 07 11:57 |
| Yes they are! It took a bit of care to ensure they all adhered to the tissue successfully, with no air bubbles or creases, but it turned out ok. I also trimmed the film from around the edges that would otherwise be visible when they were applied to the model. |
| cdwheatley, Comment for image # 4758 | 20 Oct 07 11:53 |
| I do have a couple of reels of the graphic tape that DD and others here use to great effect but I just couldn't get on with it I'm afraid. After much thought I hit upon this idea and it works great - much easier to use, for me anyway. |
| Barnstormer, Comment for image # 4754 | 20 Oct 07 11:52 |
| WOW! they look really nice, Are those the decals that came with the kit? They look flawless. |
| cdwheatley, Image # 4759 | 20 Oct 07 11:51 |
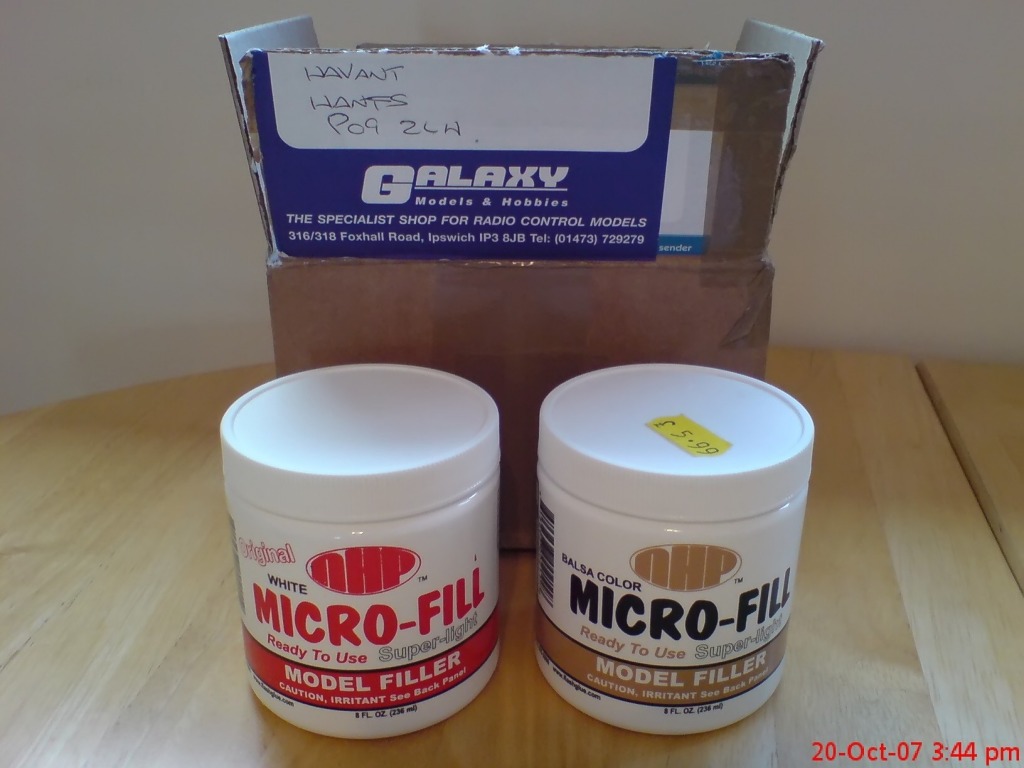
Yay, my Micro-Fill arrived in the post this morning! :-) |
| cdwheatley, Image # 4758 | 20 Oct 07 11:50 |

For those that are curious, this is what I used to make those lines. |
| cdwheatley, Image # 4756 | 20 Oct 07 11:48 |

The tailplane has had some finishing touches added too. |
| cdwheatley, Image # 4755 | 20 Oct 07 11:47 |
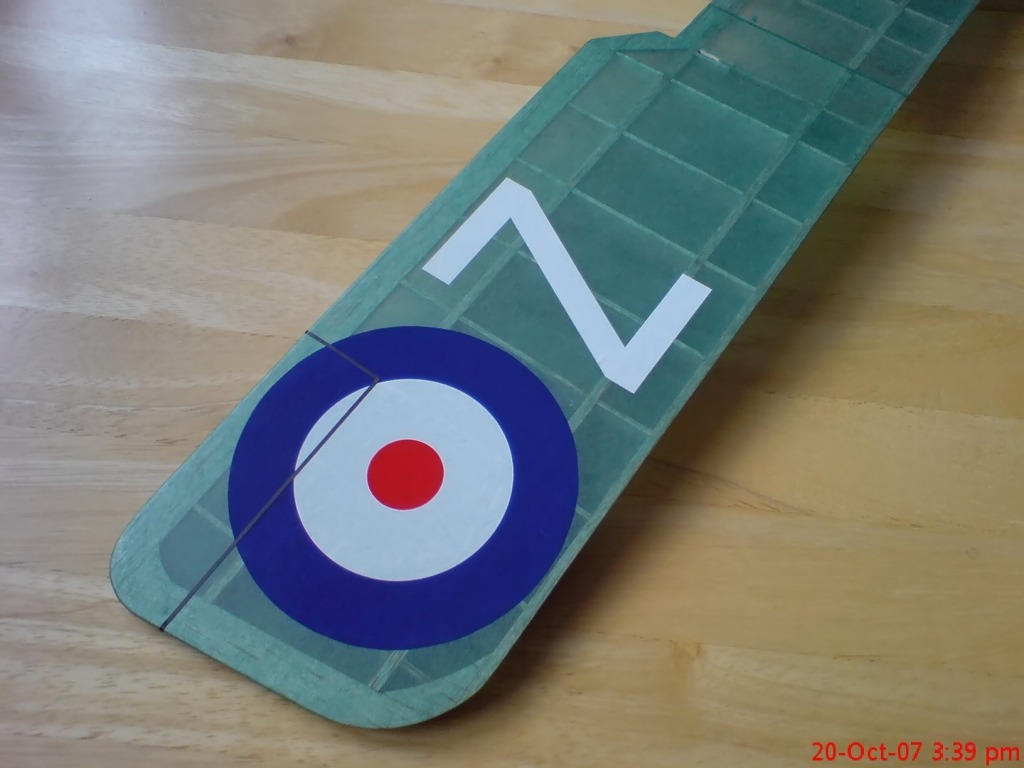
Underside of lower wing, showing one of those HUGE roundels and, for the first time ever on one of my models, separation lines! |
| cdwheatley, Image # 4754 | 20 Oct 07 11:46 |
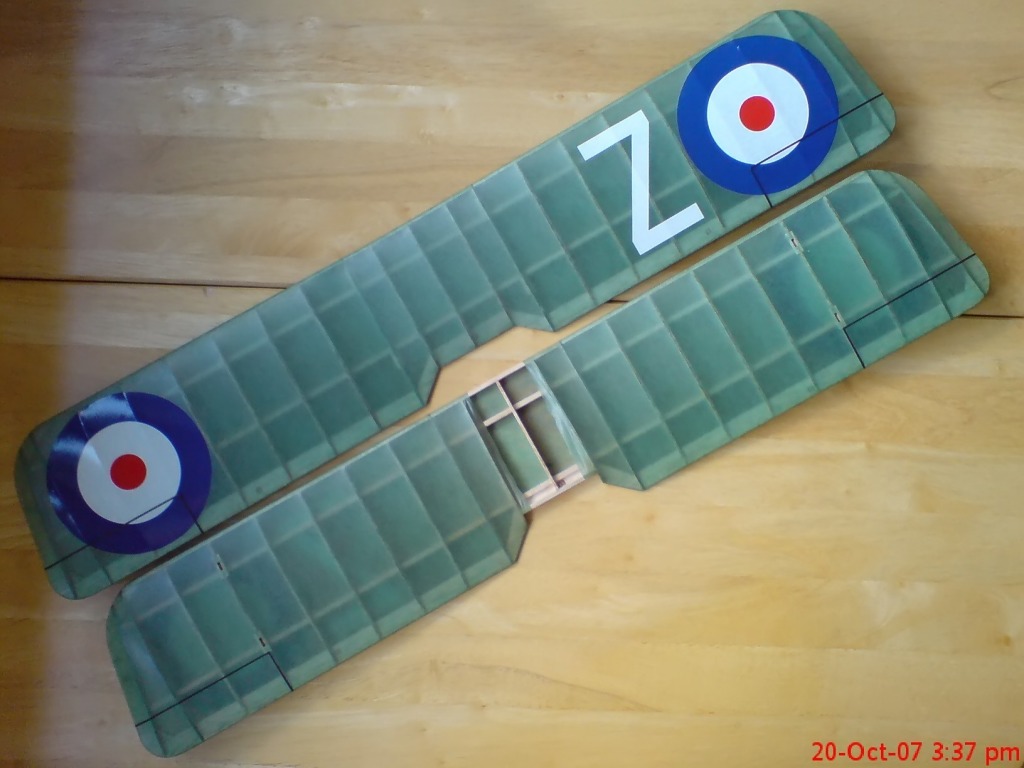
Both wings are now completely finished. |
| poppy, Comment for image # 4581 | 07 Oct 07 10:13 |
| Looks great, Chris. I look forward to seeing the completed model. |
| moostang51, Comment for image # 4582 | 06 Oct 07 19:05 |
| As usual Chris, excellent. Precision plus work. |
| Build Thread, Page :
1 2 3 4 [ 5 ] 6 7 8 9 (168 posts, 20 posts per page, 9 pages in total)
|
[ < Prev ] [ Next > ] |
