| Build Thread, Page :
1 2 3 [ 4 ] 5 6 7 8 9 10 11 >> (348 posts, 20 posts per page, 18 pages in total)
|
[ < Prev ] [ Next > ] |
| biplane guy, Comment for image # 37901 | 05 Feb 17 07:02 |
| Yep, that's me. |
| rgood, Comment for image # 37901 | 04 Feb 17 18:39 |
| Wonderful machine that. Is that you in the pic too "Biplane Guy"? |
| Huey V77, Comment for image # 37901 | 04 Feb 17 08:16 |
| That's a good looking UPF7. Always wanted one but their above my pay grade. I'll stick with my Chief. Thanks for sharing . |
| biplane guy, Comment for image # 37901 | 04 Feb 17 07:56 |
| I thought you might like this one, Huey. I flew in this one from Oak Island, NC, a couple of years ago. |
| biplane guy, Image # 37901 | 04 Feb 17 07:52 |
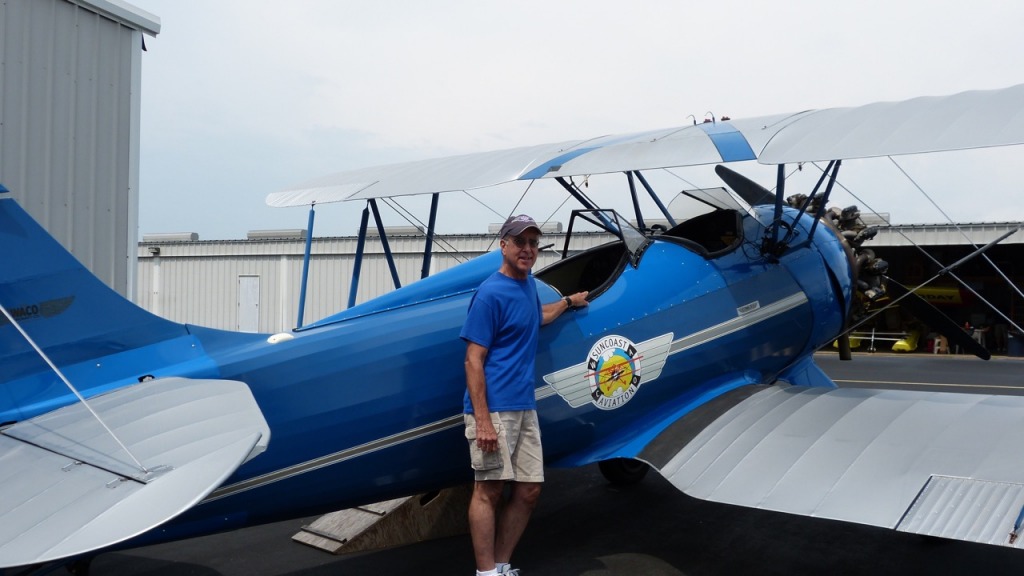
WACO UPF7 |
| rayl, Comment for image # 37787 | 20 Jan 17 22:15 |
| Just wonderful. |
| John M Oshust, Comment for image # 37787 | 20 Jan 17 18:09 |
| Lovely. |
| biplane guy, Comment for image # 37787 | 20 Jan 17 16:40 |
| Since you are probably the most familiar with the Tiger Moth here on the VA I especially value your input. Thank you. |
| rgood, Comment for image # 37787 | 20 Jan 17 15:34 |
| Great job done there BG! Takes me back to 1960! |
| biplane guy, Image # 37787 | 20 Jan 17 15:21 |
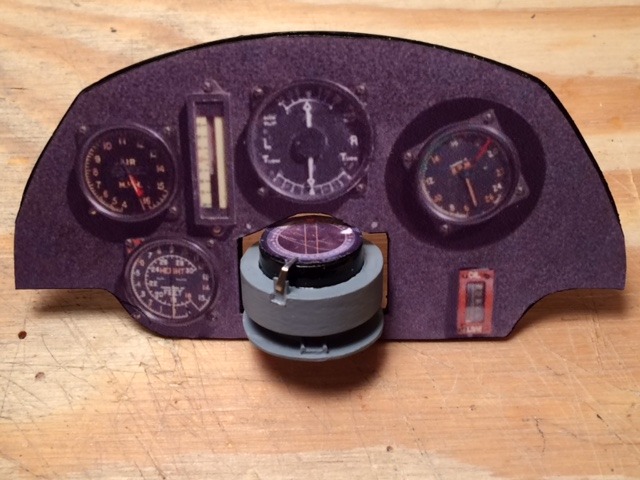
compass prototype |
| biplane guy, Image # 37726 | 05 Jan 17 08:46 |
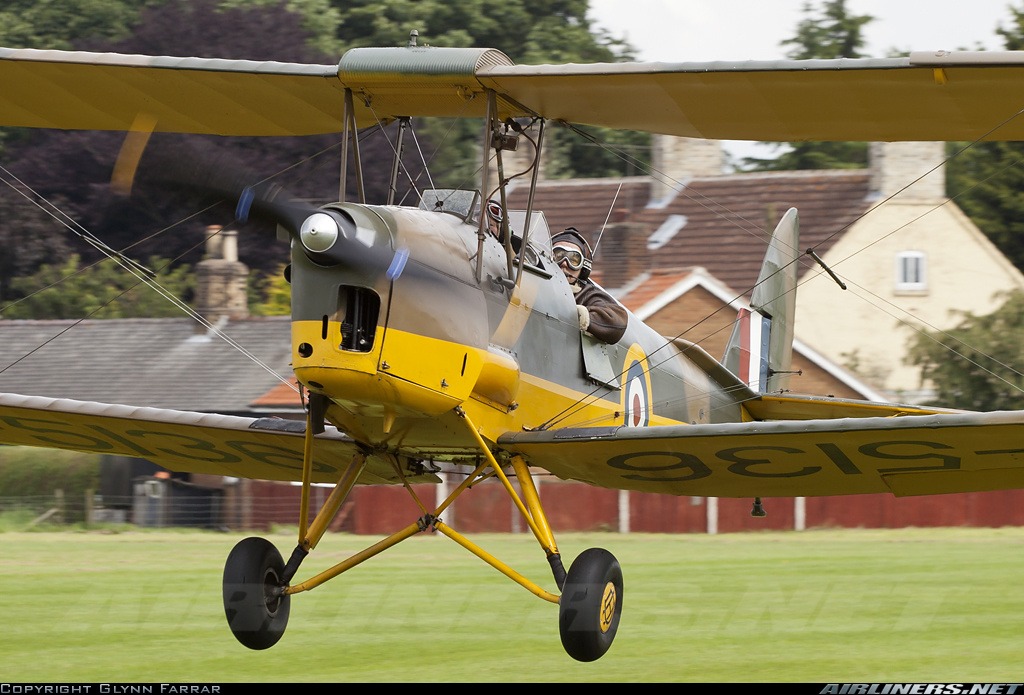
Here's the one I'm modelling |
| LASTWOODSMAN, Comment for image # 37721 | 04 Jan 17 11:13 |
| Thanks gentlemen and RGood - I printed out the pic and labelled it for future reference :-) |
| biplane guy, Comment for image # 37721 | 04 Jan 17 09:17 |
| Thanks fellas, I'll add a photo when it's finished and mounted. |
| rayl, Comment for image # 37721 | 04 Jan 17 07:11 |
| Yesiree, very nice work. Kudos. |
| biplane guy, Comment for image # 37720 | 04 Jan 17 05:44 |
| Hey John, Happy New Year! The frames were cut-out in one piece from a sheet of .020 styrene. The joints between the front and sides were lightly scored with an exacto knife on the front and then bent (until partially broken) to the desired angle. I then filled the cracks with 5 minute epoxy to maintain the shape and add rigidity, wiped them smooth, then allowed the epoxy to set up while checking the angles. I painted them and then cut-out clear pieces of thin plastic from some waste packaging material and glued them in place with Testor's Clear Parts Cement & Window Maker. I used the plywood sheet from which the laser-cut fuselage
formers were removed to trace the bottom curve of the windshields. |
| meku, Comment for image # 37719 | 04 Jan 17 02:07 |
| Beautiful work! |
| meku, Comment for image # 37721 | 04 Jan 17 02:04 |
| This is a very high level of modeling! |
| rgood, Comment for image # 37721 | 03 Jan 17 23:36 |
| OK chaps on the Tiger I was part-owner of the following instruments would apply:- bottom left, altimeter, above left, ASI, on it's right a fore & aft level gauge, center, turn & bank, right tacho, (rev. counter) and below that the oil pressure gauge. All the Tigers that I flew had the same layout. |
| rgood, Comment for image # 37719 | 03 Jan 17 23:13 |
| That is very, very well done! Great. |
| John M Oshust, Comment for image # 37720 | 03 Jan 17 22:05 |
| May I inquire as to how and from what material the wind screens were fabricated? |
| Build Thread, Page :
1 2 3 [ 4 ] 5 6 7 8 9 10 11 >> (348 posts, 20 posts per page, 18 pages in total)
|
[ < Prev ] [ Next > ] |
