| Build Thread, Page :
1 [ 2 ] 3 4 5 6 7 8 (158 posts, 20 posts per page, 8 pages in total)
|
[ < Prev ] [ Next > ] |
| LASTWOODSMAN, Image # 39423 | 02 Oct 17 15:20 |
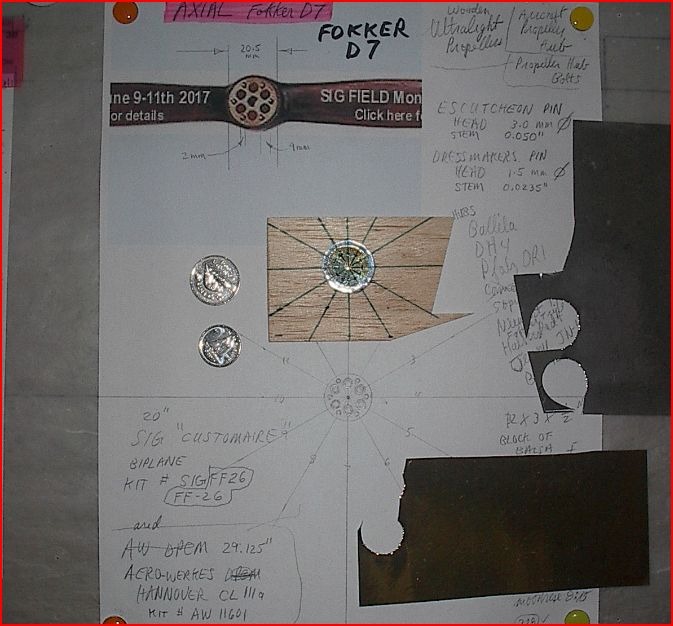
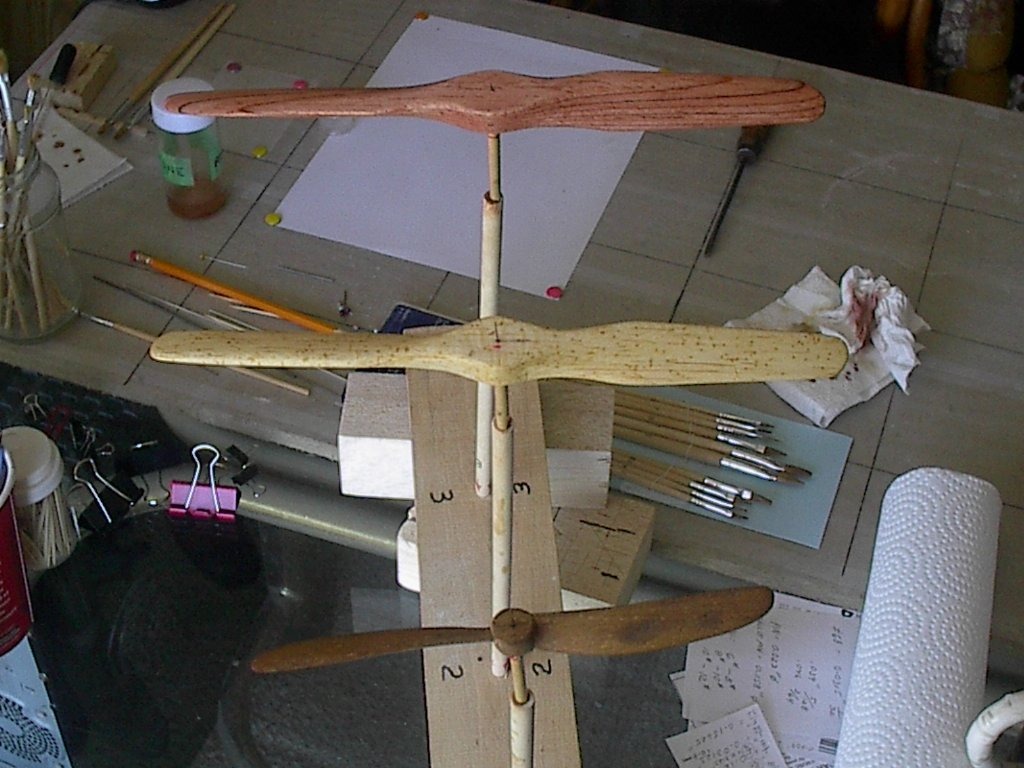
This is for my new laminated 9 1/4" scale "AXIAL" prop I made a while back. I made a separate new removeable prop block, prop shaft, thrust button, and new prop hub assembly for this new prop, so I can interchange the 9 1/2" gray plastic prop and prop block, with the new AXIAL prop and block. I started out with an oversize piece of 1/16' blasa plate sheet for a hub plate, and stuck on a "nickel sized" circle of Chrome 'peel n stick' Trim Sheet on to it (centered with an upside down dress maker's pin), then I stuck a "dime sized" circle of Gold 'peel n stick' Trim Sheet onto the larger Chrome circle, also centering it on the same dress maker's pin. Then I used a green Sharpie permanent marker to mark the 12 location lines on which to locate 2 bolt circles for 6 bolt heads on each circle. |
| LASTWOODSMAN, Image # 38842 | 12 Jun 17 10:47 |
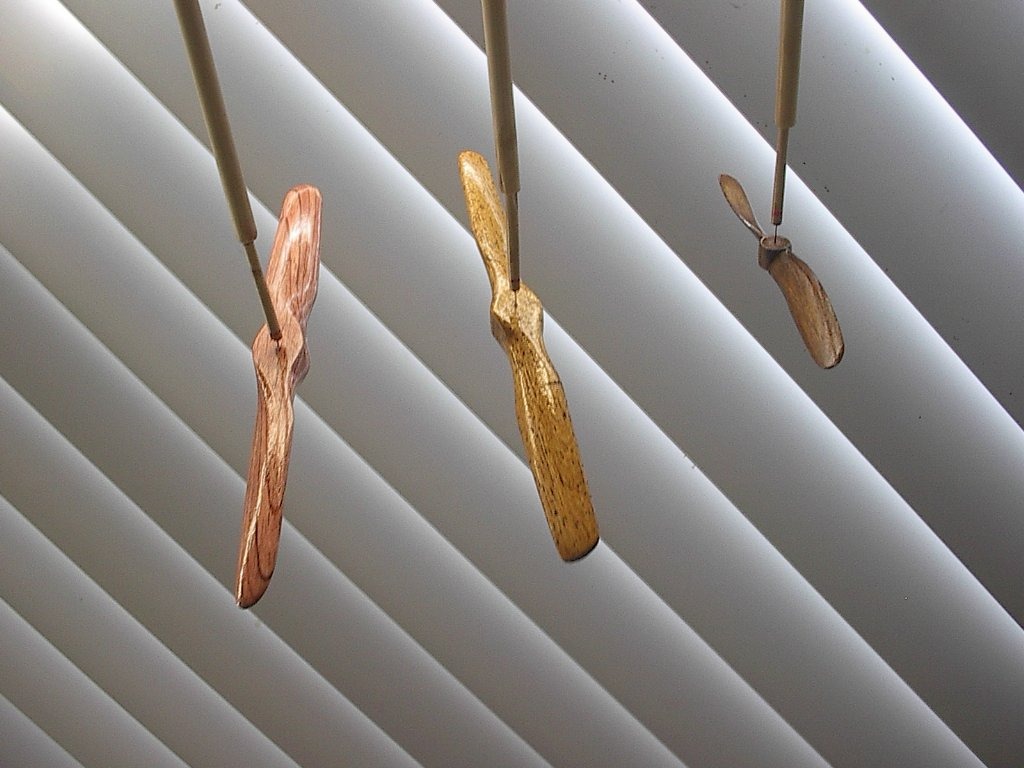
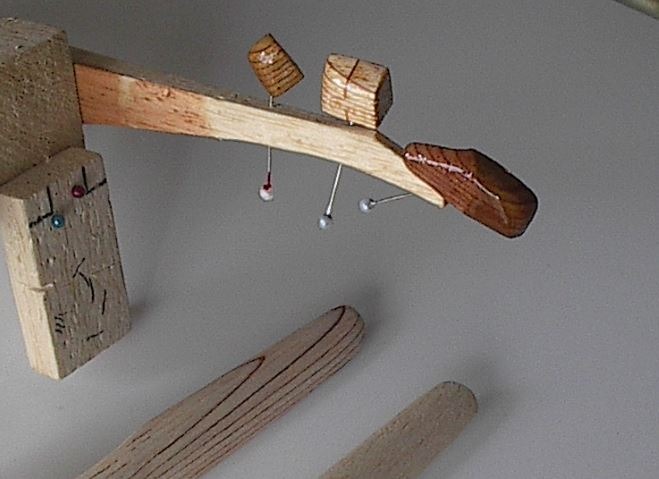
I am letting them thoroughly dry out for a week. A wise man once said, "Lighting is everything." - and so is focus. It is all NOT VERY EASY !! I took a lot of pics to arrive at this underside image, lit from ambient sunlight against vertical blinds. |
| John M Oshust, Comment for image # 38815 | 10 Jun 17 16:57 |
| These came super. Love the one on the left. It is similar to the shape of the air screw on the Baboon. BRAVO, |
| LASTWOODSMAN, Comment for image # 38815 | 09 Jun 17 13:13 |
| Anders, the middle one was a one piece "practice" prop, whose block was sawed off of a large block of balsa 12" X 3" X 1 1/2", that I had been using for blocking up wings and fuselages etc, using round head pins. The wood stain really showed how many pin holes I had in it. |
| Anders, Comment for image # 38815 | 09 Jun 17 12:23 |
| I really like the one on the right, why all the pin marks on the middle one? |
| LASTWOODSMAN, Image # 38815 | 09 Jun 17 10:37 |
After two weeks of patient daily thin coats of rattle can Krylon clear gloss, I have no globs or runs of clear - better quit while I am ahead ... Onwards to prop hub drawings and experiments ... on the practise Axial prop I mixed a little golden oak in with the "natural" stain - I call that prop "WORMWOOD" because of all the round head pin holes all over it ... |
| LASTWOODSMAN, Image # 38717 | 31 May 17 22:01 |
I will just have to call it the "weathered look" - next time I will mix it up 50/50 Golden Oak and Natural stain to get the lighter color I was after. At least the good laminated Axial came out just the right tinge of red, and the practice prop was "Natural" stain. Now for many thin layers of rattle can Krylon Gloss Clear coatings. |
| LASTWOODSMAN, Image # 38716 | 31 May 17 21:58 |
Just stained my 3 props after 2 wks of cleaning my apt! The small one Helice Eclair showed up with black darkened blotches on the blades - I don't know why - and I then made the mistake of brushing on a second layer of stain (golden oak) even though I knew it would darken it way darker (I thought I had overlapped the stain on the first try) and that did not work to remove those blotches!!! |
| LASTWOODSMAN, Comment for image # 38659 | 25 May 17 17:35 |
| Yeah John, anything sells today. I should try that just for fun, and put in an absurdly high asking price, and some kind of quasi-irrelevant name, to see if it legitimizes the purchase in a Buyer's mind. LOL Who knows? How about "Timbits", $538.49 ? |
| heywooood, Comment for image # 38658 | 24 May 17 23:37 |
| that is a really nice cut...
|
| LASTWOODSMAN, Comment for image # 38658 | 24 May 17 18:48 |
| Yeah, John - that little prop puts a grin on me "as happy as a dead pig in the sunshine". |
| John M Oshust, Comment for image # 38659 | 24 May 17 18:01 |
| Your sawdust and pooch hair are necessary evils that must be dealt with periodically. Consider your cleanup a necessary punctuation to secure relaxation and sanity. When the stain and gloss tests are over put a string on the test and market it as art! In today's society there is a potential market for everything and you will be environmentally friendly through recycling 😂 |
| John M Oshust, Comment for image # 38658 | 24 May 17 17:51 |
| The little air screw is the bee's knees! |
| LASTWOODSMAN, Comment for image # 38659 | 24 May 17 13:09 |
| It took me a week to clean my "Woodshop" Apartment and dust off 20 planes. It was FULL of tons of balsa dust - and dog hair everywhere! |
| LASTWOODSMAN, Image # 38659 | 24 May 17 13:03 |
My experiment with different wood stain colors and Krylon Gloss Clear Coatings, on some scrap lamination pieces from the prop block, to see what they look like. LEFT TO RIGHT : 1 - "Golden Oak" 2 - "Natural" 3 - "Mixture" : - 10 parts 'Natural', 1 part 'Cabernet' Red, and 1 part 'Golden Oak' (I like this one the best for my red and black Fokker D7), 4 - "American Walnut". Colors three and four are on the same piece of balsa scrap block laminate. |
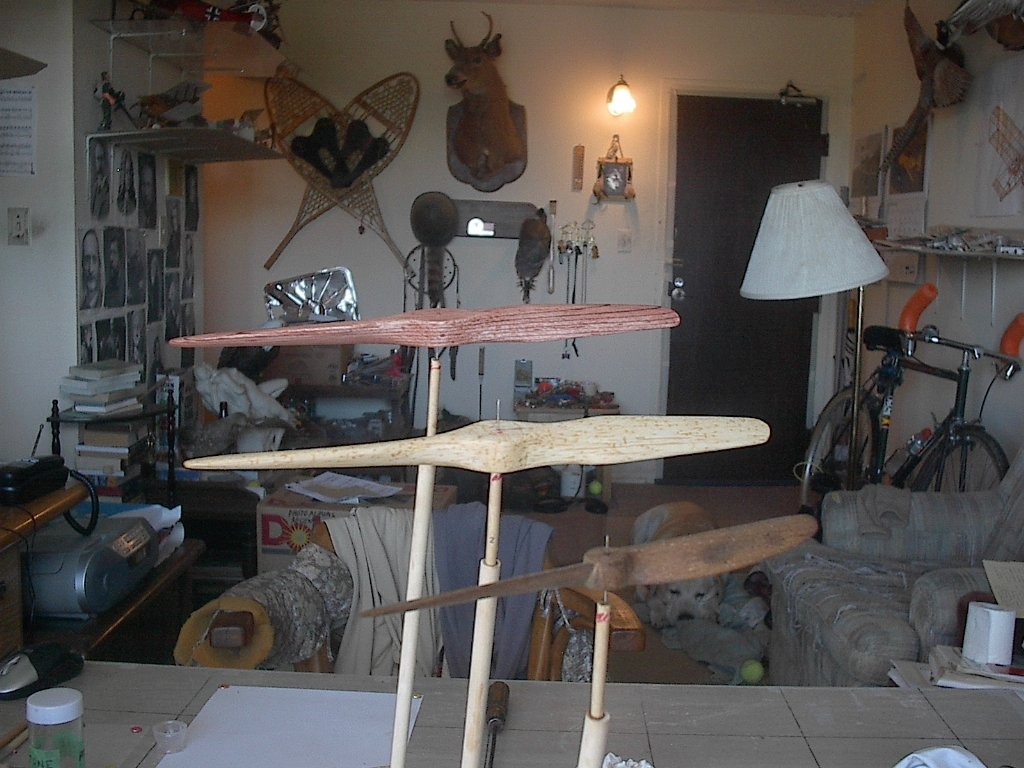
| LASTWOODSMAN, Image # 38658 | 24 May 17 12:51 |
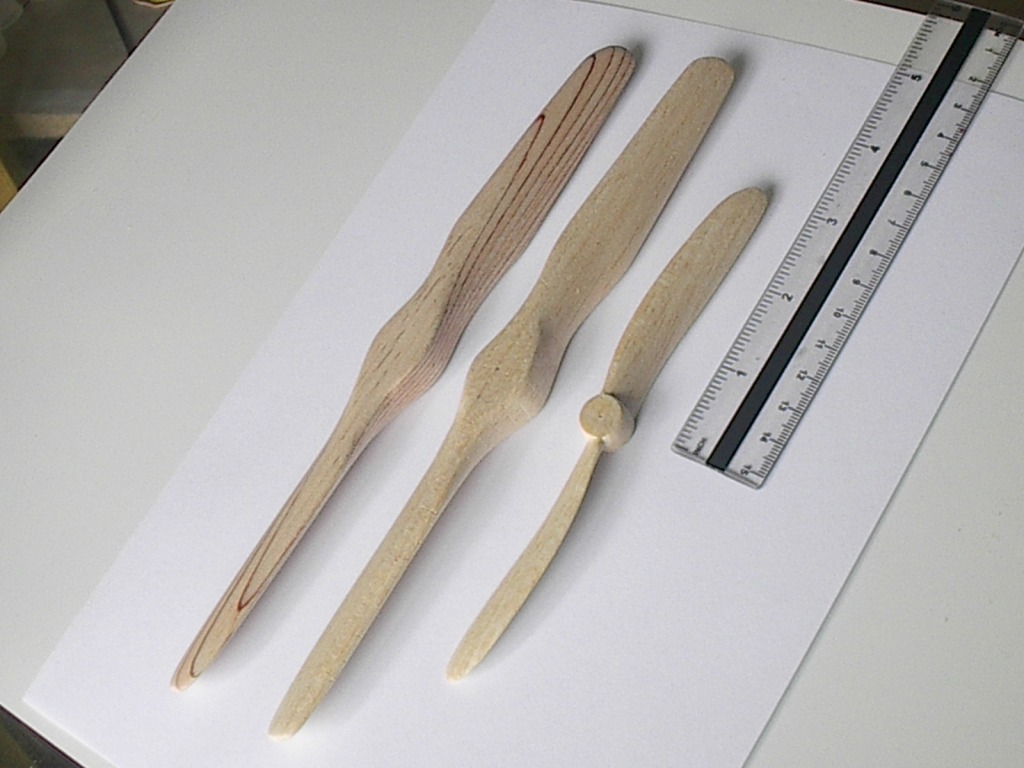
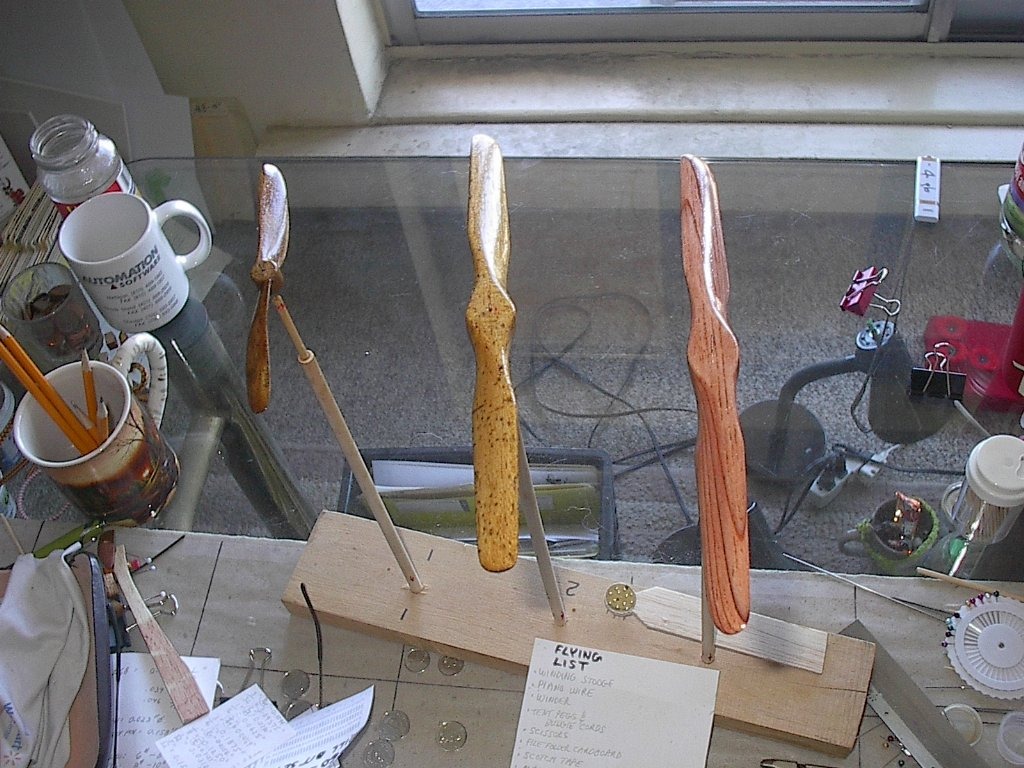
Three props are sanded down to 600 grit. Left to right : 9 1/4" laminated "AXIAL" for the 24" Fokker D7, 9 1/4" one piece "AXIAL" practise prop, 6 1/4" one piece "HELICE ECLAIR" for my 17 1/2" Fokker Eindecker E III. I am half way through building a good jig, to hold and easily remove, all 3 props, as this will take a long time to do it right, with many light thin layers of spray. |
| LASTWOODSMAN, Comment for image # 38577 | 19 May 17 16:18 |
| Real soon John - I had to fix up my smashed up "Cabinaire" and new holes in the "winding stooge" - I have been looking at your nice scale prop hub plates on your WW1 builds - I'm thinking about how to do it ... |
| John M Oshust, Comment for image # 38577 | 19 May 17 16:04 |
| LW. Any aircrew progress? |
| LASTWOODSMAN, Image # 38592 | 16 May 17 21:21 |
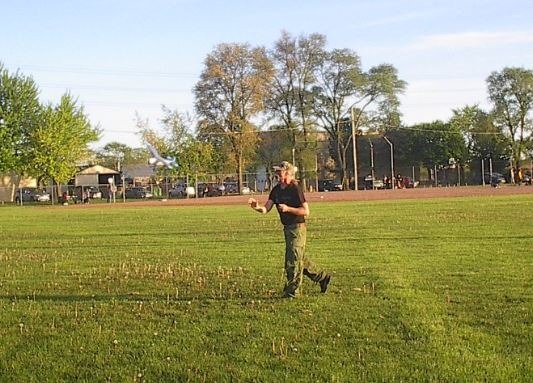
Bad pic - you can barely see it, head high, going left. I let her go with 300 winds and it immediately went into a sharp left turn and steep dive and CRASHED into the soft grass !!! The right stab was twisted from a broken leading edge where I had not put in a gusset. "If at first you don't succeed ..." I am determined to get this figured out and get some good flying pics like Mlriley does. Back to the drawing board and stab repair ... |
| LASTWOODSMAN, Image # 38591 | 16 May 17 21:14 |

Handwinding the rubber with the help of a couple of baseball fan buddies - can you ever do a lot of winds without breaking the rubber when you use a winder ! One 12" loop of 1/8" rubber, stretched and broken in, and lubed - I tested 300 winds = a 25 second power run, 450 winds = a 37 sec power run. |
| Build Thread, Page :
1 [ 2 ] 3 4 5 6 7 8 (158 posts, 20 posts per page, 8 pages in total)
|
[ < Prev ] [ Next > ] |
