| Build Thread, Page :
1 2 3 4 [ 5 ] 6 7 8 9 10 (193 posts, 20 posts per page, 10 pages in total)
|
[ < Prev ] [ Next > ] |
| wingspanner, Comment for image # 11057 | 01 Mar 09 16:08 |
| Absolute bargain. Id love the Dremel. I managed to track down a master airscrew balsa stripper as they are hard to get in the uk. Its excellent! |
| John M Oshust, Image # 11057 | 01 Mar 09 15:35 |

Just returned from a model RR show. Went there looking for model building "Stuff" returned with these a package deal for $70. |
| Xanadu, Comment for image # 11038 | 01 Mar 09 10:28 |
| The quality of your details amaze me to no end........... |
| Barnstormer, Comment for image # 11038 | 01 Mar 09 07:36 |
| An excellent pair of MGs, great work John. |
| John M Oshust, Image # 11040 | 28 Feb 09 19:10 |
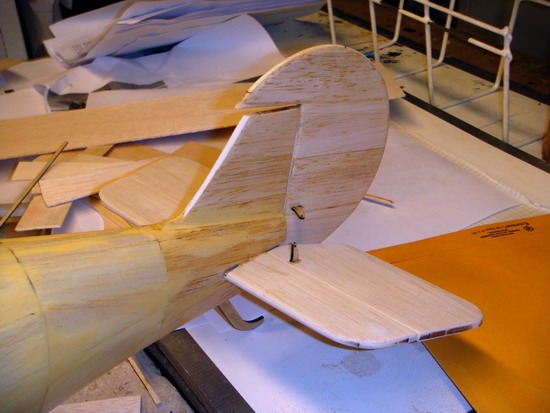
Attaching the hor. stabilizer |
| John M Oshust, Image # 11039 | 28 Feb 09 19:09 |
Klaus has feathers. |
| John M Oshust, Image # 11038 | 28 Feb 09 19:08 |
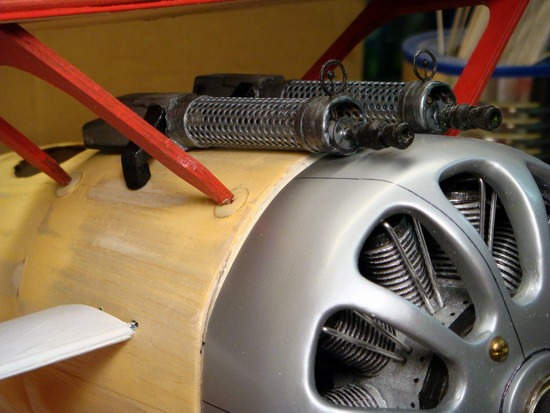
The guns work for me. |
| John M Oshust, Image # 11037 | 28 Feb 09 19:06 |

One of the three refence photos I have for Klaus. |
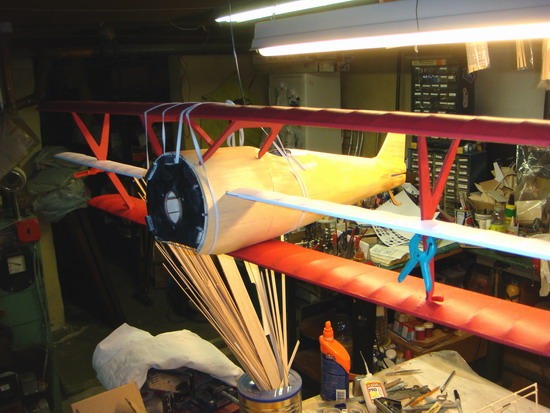
| John M Oshust, Image # 11036 | 28 Feb 09 19:05 |
Everthing is dry fitted. The only major construction left are the fillets. Once done the best part...final finishing. |
| John M Oshust, Comment for image # 11032 | 28 Feb 09 15:16 |
| Tred to edit my typos but no success. If I am VERY quiet and the EVIL wing fillet. |
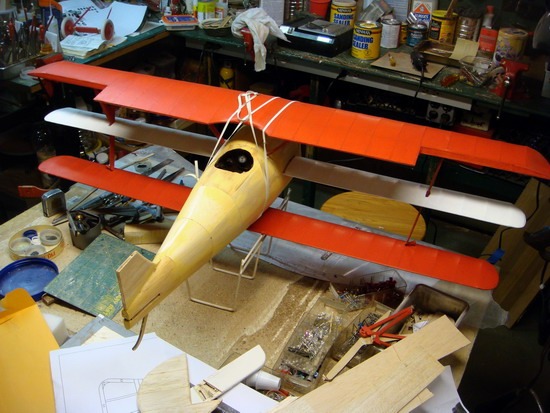
| John M Oshust, Image # 11034 | 28 Feb 09 15:05 |
Klaus II hangs for display. To fit the wings I assembled, disassembled, and sanded the mount nine times until everthing fit into place. |
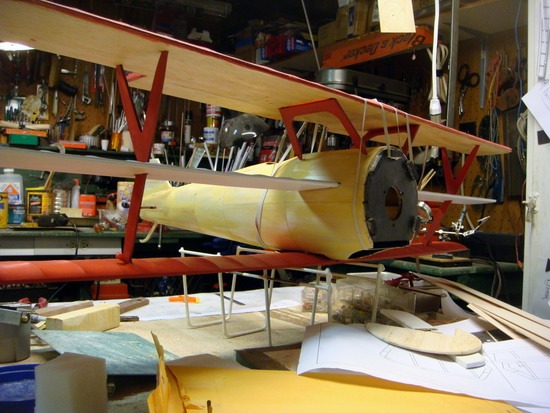
| John M Oshust, Image # 11033 | 28 Feb 09 15:01 |
The wings here are dry fit. When all torsion forces are correct, all wings are "happy!" The fabric covering on the upper surface lays flat with out wrinkling. |
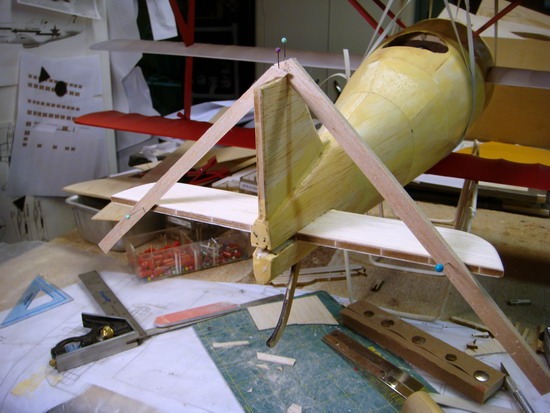
| John M Oshust, Image # 11032 | 28 Feb 09 14:58 |
If I am nery quiet I can hear the epoxy molecules form and harden as they permanently bond the lower wing to the fuse. This time aroung my multiple errors from Klaus I are gone. The fit of the wings falls into place. My measuring stick tells me that they are true. The correct fit makes the eveil wing fillet a much easier task, either for today or tomorrow! |
| wingspanner, Comment for image # 11008 | 28 Feb 09 14:21 |
| Looks class, If the rest of the plane looks anything like the cowl you'll have a winner on your hands. |
| John M Oshust, Image # 11031 | 28 Feb 09 13:09 |

A poppy like smooth fuse. It is going to get the lower wing permanently mounted today....I hope! |
| John M Oshust, Comment for image # 11008 | 27 Feb 09 20:52 |
| Barnstormer. Thanks "Lettuce" hope that my success with Klaus II continues. I still have to deal with the evil lower wing fillet. I must remember to wear my hat when fabricating it. Best wishes for your Jug....after the Corsair one of my favorites. Which version? |
| Barnstormer, Comment for image # 11008 | 27 Feb 09 20:39 |
| Engine cowl and prop are just #@#%&^* spectacular. John I think this one will be hard to separate from a REAL one in the final photograph. Amazing work.
|
| John M Oshust, Comment for image # 11008 | 27 Feb 09 16:21 |
| Thanks James. As the learned DD stated, building the second one is a bit easier. The cowl is a left over from K1. I will make another cowl and engine. Klaus II will be able to change cowls to accomodate different flight conditions. |
| John M Oshust, Comment for image # 11008 | 27 Feb 09 16:15 |
| Minwax wood sanding sealer. It is like a varnish. |
| pfinn, Comment for image # 11008 | 27 Feb 09 10:37 |
| What did you prime you covering with? |
| Build Thread, Page :
1 2 3 4 [ 5 ] 6 7 8 9 10 (193 posts, 20 posts per page, 10 pages in total)
|
[ < Prev ] [ Next > ] |
