| Build Thread, Page :
1 2 [ 3 ] 4 5 6 7 8 9 10 11 (223 posts, 20 posts per page, 12 pages in total)
|
[ < Prev ] [ Next > ] |
| Creosotewind, Comment for image # 20261 | 26 Nov 10 15:01 |
| Thanks for the suggestion. I will try it out. |
| pfinn, Image # 20261 | 24 Nov 10 22:55 |
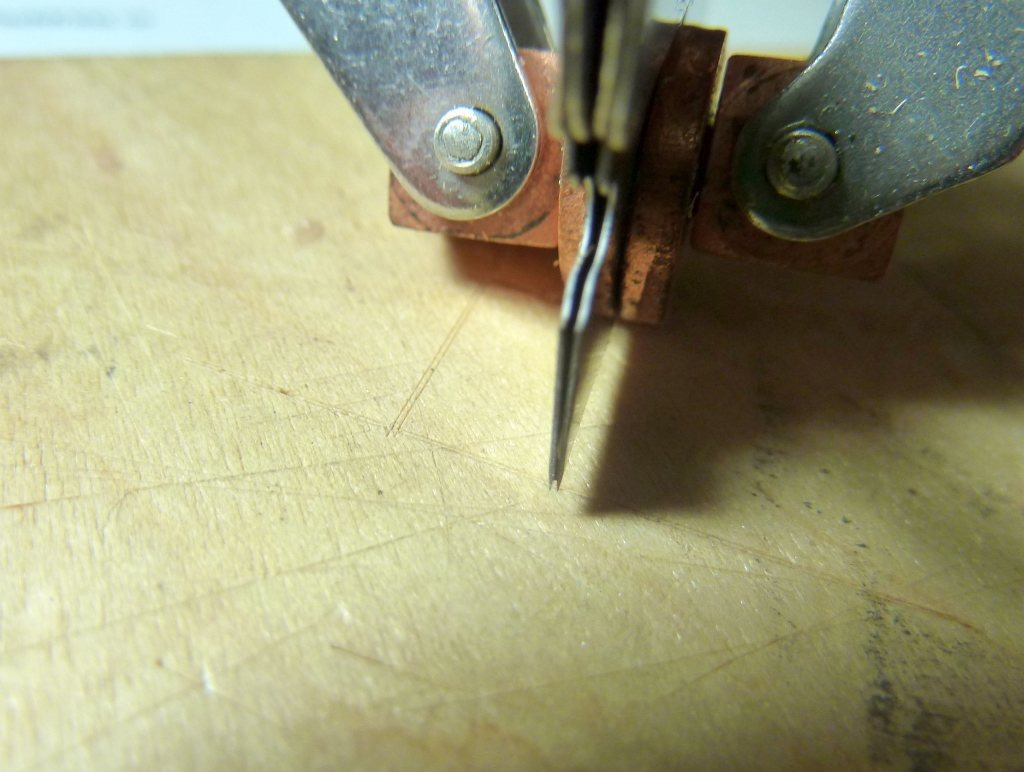
Creosotewind, one could clamp (or glue) two single edge razors together and use to score (cut) the panel lines. Dig out the middle. This was in aircraft birch ply. Net groove width: .010" ; the width of the blade. Space it for wider lines. |
| pfinn, Image # 20168 | 19 Nov 10 18:21 |
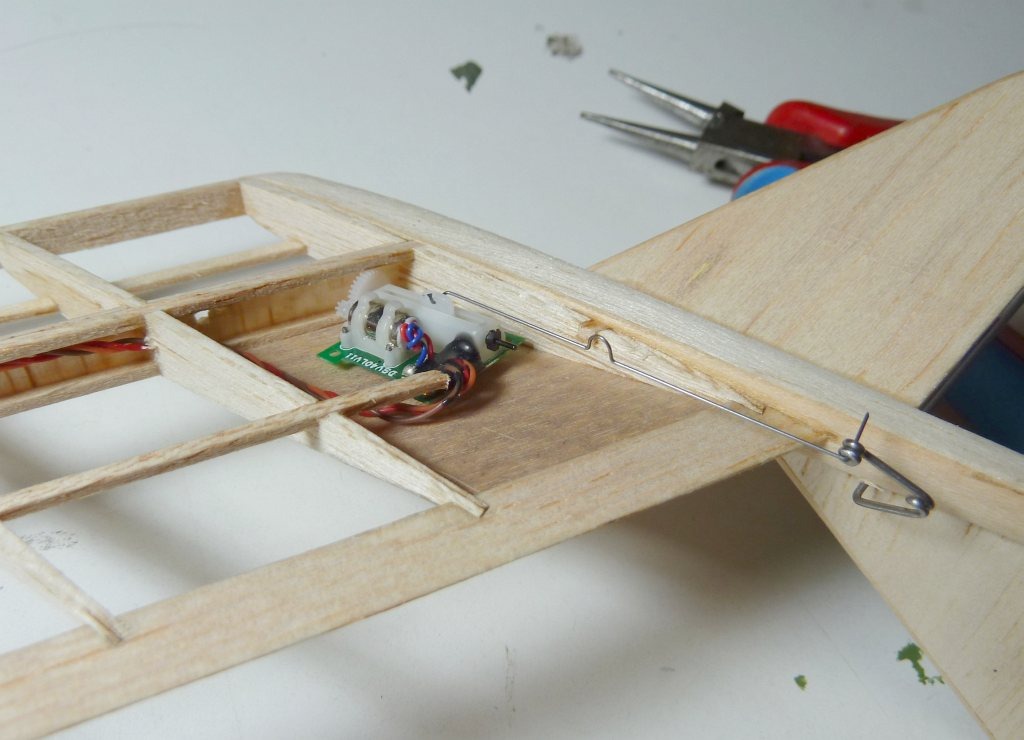
Something like this. I flush mounted some 1/64" ply to the top surface as a base to mount stuff to. |
| pfinn, Image # 20167 | 19 Nov 10 18:17 |
Put the "Dog Leg" into it for adjustability. Flying wings typically don't need very much control surface deflection. To reduce control throw initially I will be able to open up the angle of the Dog. I made the loop to ensure I don't work harden and snap the wire when adjusting. Plus if you guys have'nt guessed yet, I kinda like bending wire. ;o) |
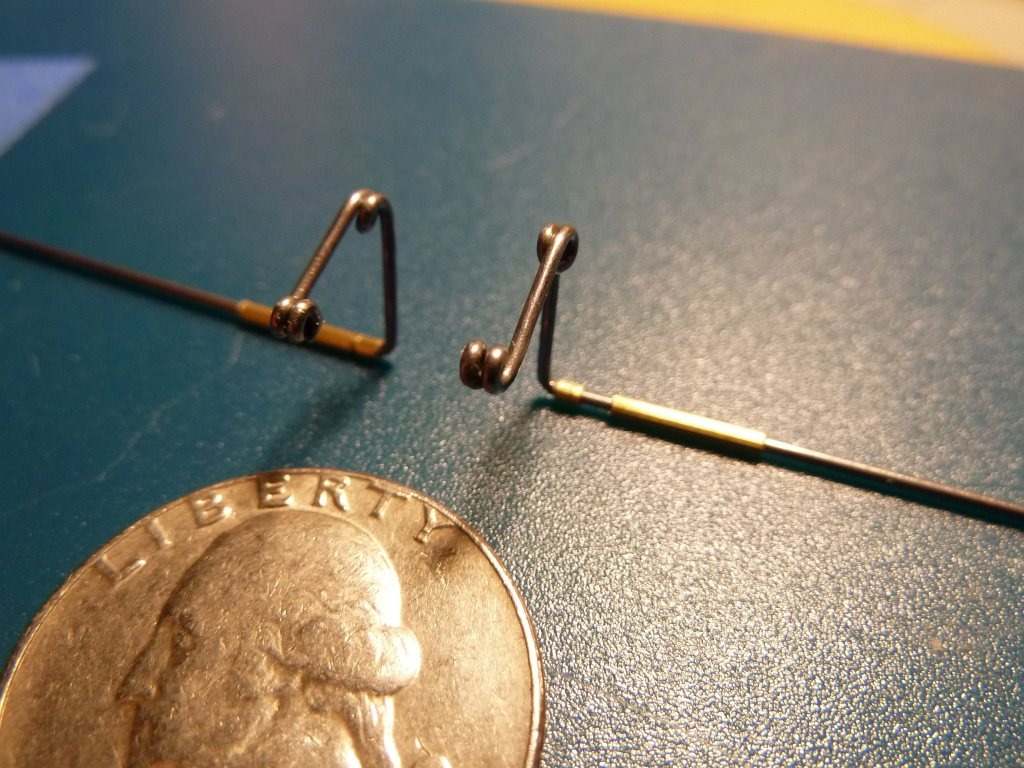
| pfinn, Image # 20164 | 19 Nov 10 18:08 |

Since there are so many funky angles, I'm bending some torque rod/control horn linkages. Pushrod is .015 Dia.. Torque rod is .030 Dia. |
| pfinn, Comment for image # 20066 | 14 Nov 10 20:28 |
| Thanks Jerry. It's a great kit.The radio install is next which should'nt be too bad. I'm a little at a loss, or indicisive about the color scheme. Apperantly these were to be "Nacht Jaeger" (night fighters/hunters). I've found some reference on late (as in '44) night camo. Black bottom, gray/violet top base with a tight white-blue squiggle overlay. The kit's box art is close. Since this aircraft really wasn't produced, I may just go day camo. I think the aircraft will look more attractive. I don't know yet. As for the calculator, I was hoping you would tell me how to use it! |
| jerry campbell, Comment for image # 20066 | 14 Nov 10 17:35 |
| You are really doing a great job on this cockpit. I've had this kit for some time and have been tempted to build it, this is inspiring. I found the calculator, but as yet I've not figured how to use it. |
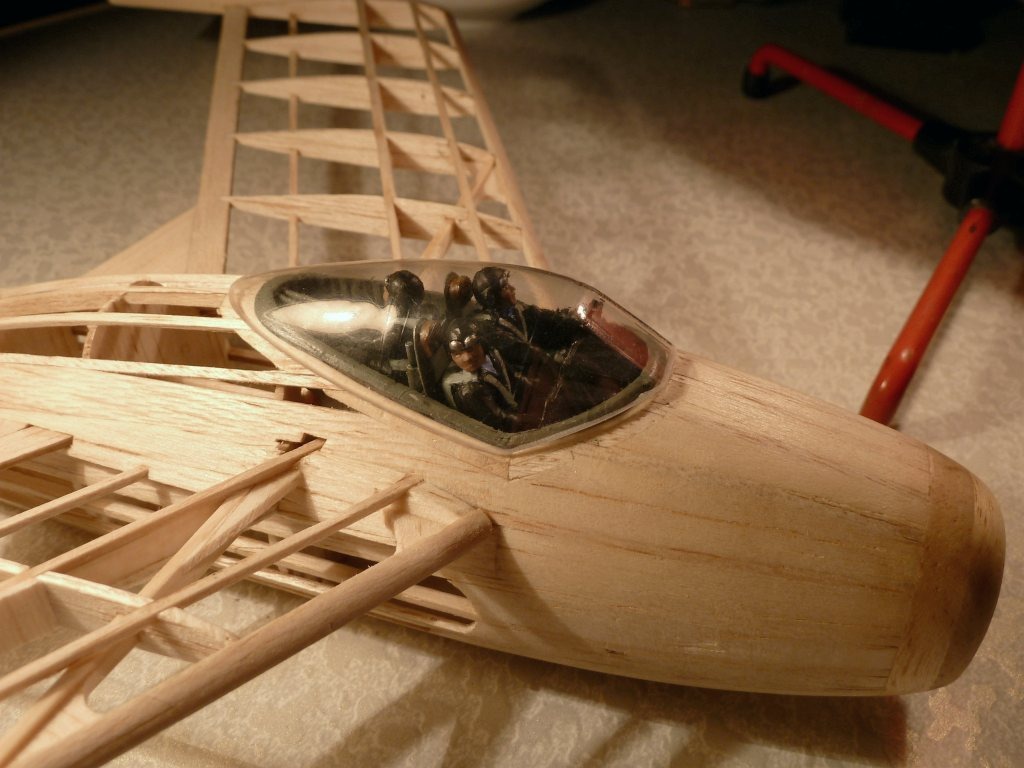
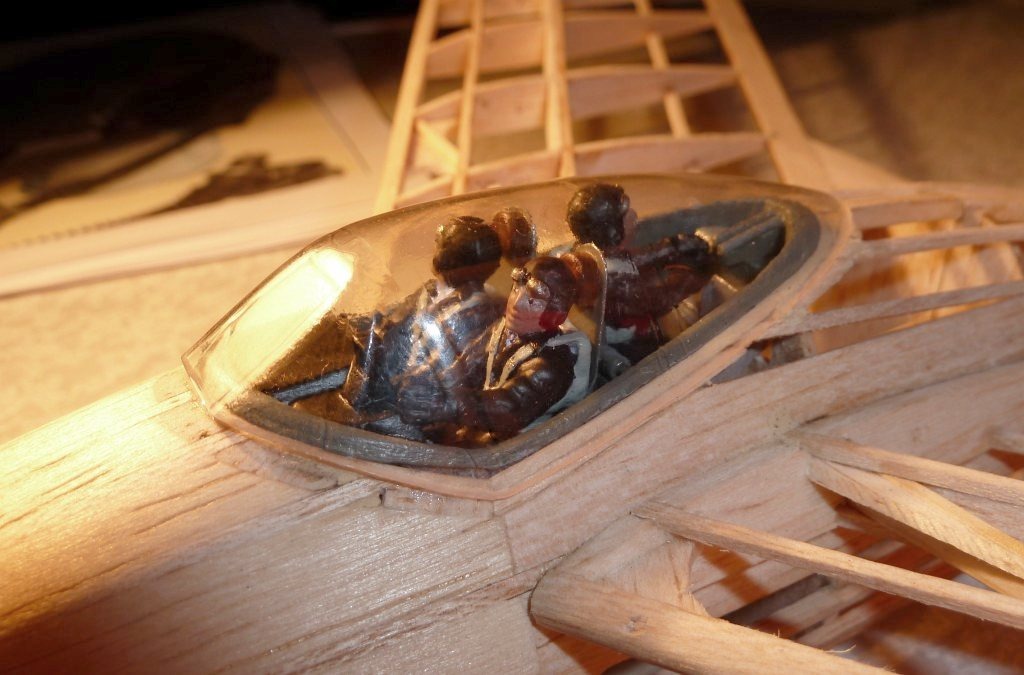
| pfinn, Image # 20066 | 14 Nov 10 11:51 |

Although further away, this shot is more indicative of the true color. |
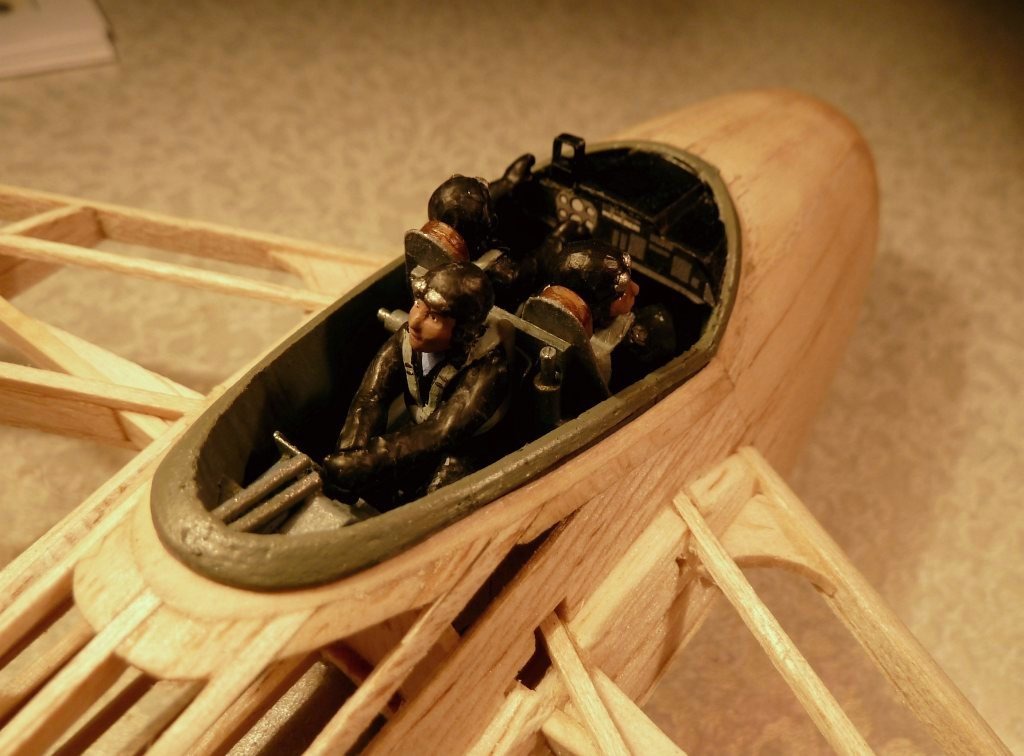
| pfinn, Image # 20065 | 14 Nov 10 11:49 |
I do believe that for this small of a scale, investment in some good quality brushes is a must. I didn't and paid for it in grief. Paint consistancy is critical (this is acrylic). Small batches of paint dry quickly. For example: on the chutes and straps. By the time I was to the third guy (5 min.) the paint had thickened and skinned around the edges already on the palette. Gloppy paint is not good. |
| pfinn, Image # 20064 | 14 Nov 10 11:39 |
With the "Detail Filter" on. Pilot will be going to the eye doctor today. |
| pfinn, Image # 20063 | 14 Nov 10 11:37 |
|
| Creosotewind, Comment for image # 20010 | 13 Nov 10 09:18 |
| Real nice work. The figures are highly animated and will greatly add to the model. Great job! |
| pfinn, Image # 20016 | 12 Nov 10 20:53 |
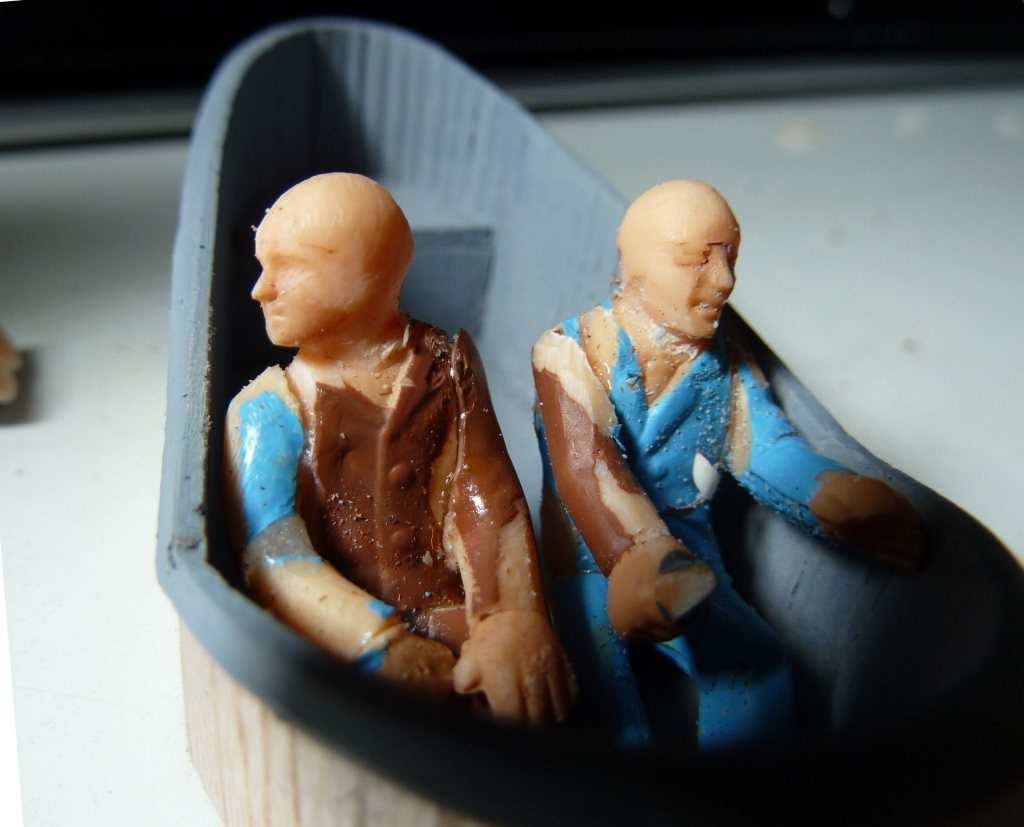
Here they are after surgery. Did some work on the faces to rid them of the "Mr. Bill" look. Look, they must be the same blood type. ;o) |
| pfinn, Comment for image # 19853 | 12 Nov 10 20:49 |
| Jerry. These were "O" scale railroad workers to begin with. Not too sure what scale they are now. But, it just so happens that I recently found a "Scale Calculator" online a couple days ago. You can download it for free from here: http://www.clubhyper.com/reference/calculatorfc_1.htm |
| jerry campbell, Comment for image # 20010 | 12 Nov 10 19:22 |
| What scale are the figures? |
| jerry campbell, Comment for image # 20010 | 12 Nov 10 19:21 |
| Great looking cockpit, looking forward to see it finished. |
| David Duckett, Comment for image # 20010 | 12 Nov 10 14:08 |
| Thanks for posting this so I can make it large enough to see. Amazing work. |
| pfinn, Image # 20010 | 12 Nov 10 14:04 |
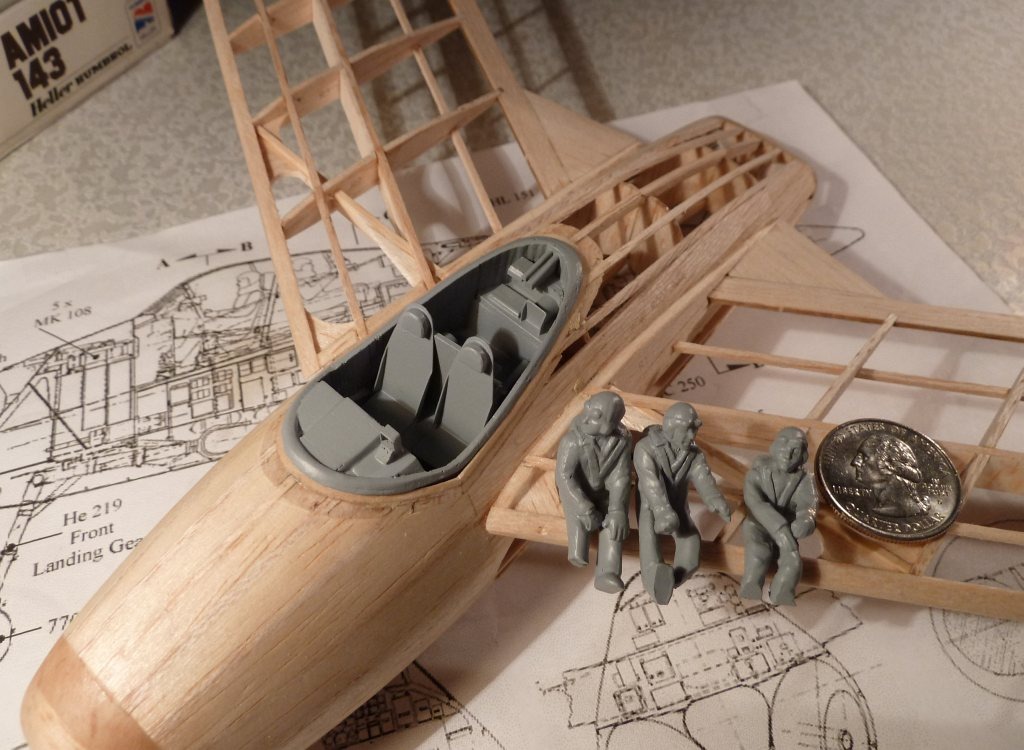
A Quarter for scale. |
| pfinn, Image # 20006 | 12 Nov 10 11:48 |
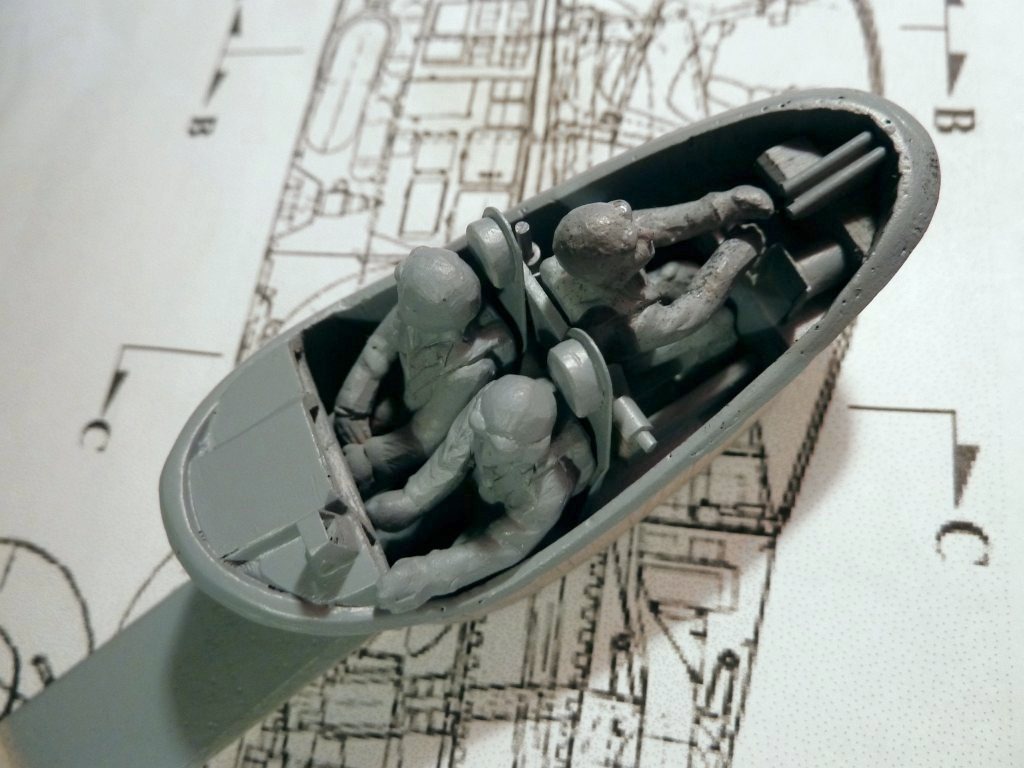
Nod gets another coat of primer, some serious "Micro Sanding", then some paint. |
| pfinn, Image # 20005 | 12 Nov 10 11:45 |

Brick-a-Brack installed. |
| Build Thread, Page :
1 2 [ 3 ] 4 5 6 7 8 9 10 11 (223 posts, 20 posts per page, 12 pages in total)
|
[ < Prev ] [ Next > ] |
