| Build Thread, Page :
1 2 3 4 [ 5 ] 6 7 8 9 10 11 (223 posts, 20 posts per page, 12 pages in total)
|
[ < Prev ] [ Next > ] |
| pfinn, Comment for image # 13404 | 03 Dec 09 21:19 |
| Well, as a matter of fact I do! E mail me at finn_proto@yahoo.com and I'll mail em' to ya. |
| csmorkt, Comment for image # 13404 | 03 Dec 09 16:10 |
| Hey thanks for posting this build article on the Bv 215. I just got this kit and this is going to be very helpful. You have quite extraordinary talent my friend....WOW! If you have any of those turbine blades left lying around I could sure use them. |
| FLYBOYZ, Comment for image # 13982 | 02 Dec 09 22:11 |
| That really cool! |
| frwyflyer, Comment for image # 13982 | 02 Dec 09 20:45 |
| Yes, please take it from the beginning. Please show us how the mold material appears before becoming the "cube" shown. Also show the source and cost of this mold material. |
| pfinn, Comment for image # 13982 | 02 Dec 09 20:29 |
| Should I start from before this? This was one I did berfore. |
| John M Oshust, Comment for image # 14986 | 15 Nov 09 22:34 |
| "Tanks" I am a long way from a prop. I need 1/12 scale |
| pfinn, Image # 14987 | 15 Nov 09 22:17 |
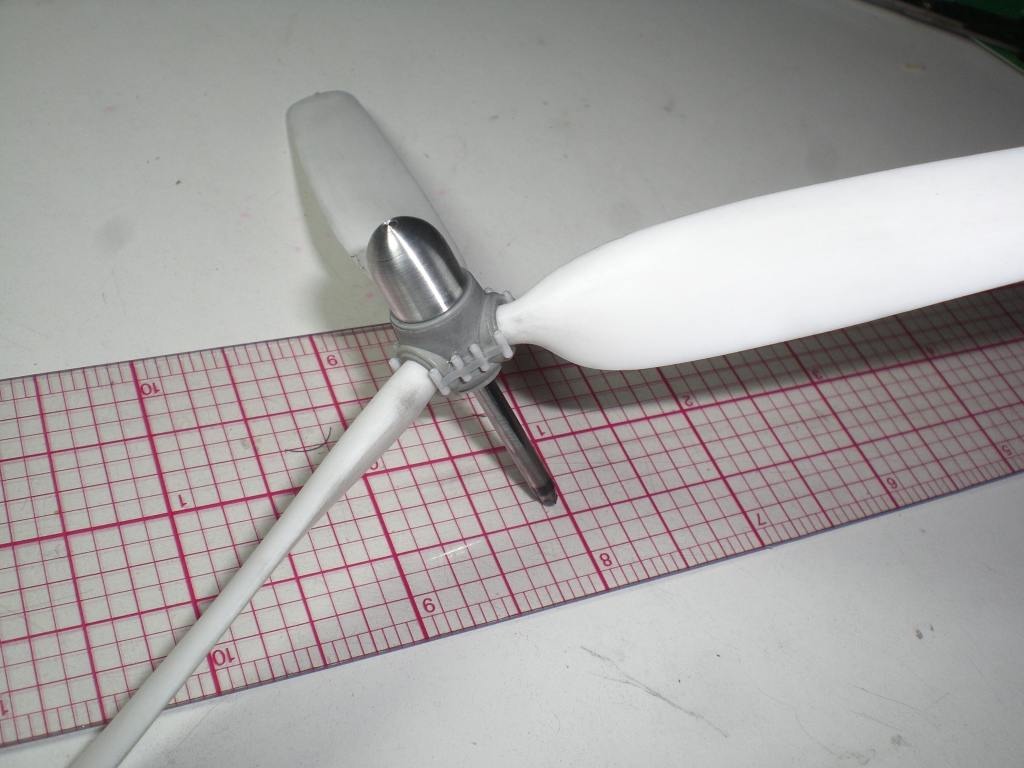
Hamton Standard Hydramatic. These are the "S" telescoped, square cutoff.http://www.enginehistory.org/Propellers/HamStd/hamstd.htm |
| pfinn, Image # 14986 | 15 Nov 09 22:12 |
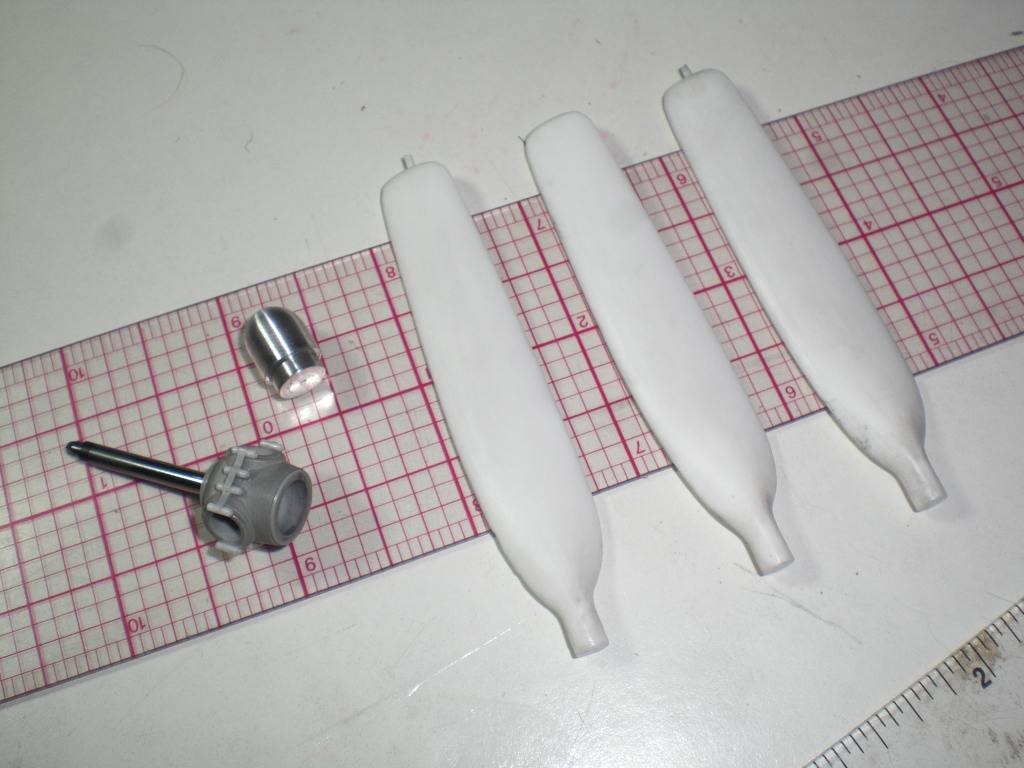
Hey John O, these are the "Fatties" I dd for the Tigercat. I'll be making blades for all the hubs I'm doing. These are 1/24 scale. I could bump up the blades for your size hubs if you like. I contacted DD and he said he was fine with it. But if you'd like some David Duckett originals, I Totally understand that too. Phil |
| pfinn, Image # 14884 | 11 Nov 09 22:28 |

Lake Casitas,Pacific Ocean, Channel Islands. |
| pfinn, Comment for image # 14786 | 09 Nov 09 15:24 |
| Hello Frwyflyer. As for number of parts per mold, I guess I'll find that out with these. As for Degassing, I would, if my vac bell jar didn't get cracked the last time I moved (an implosion would not be a good thing!). But as it turns out, putting the mold in a pressure vessel during cure seems to negate that step anyway. That's also why I choose the 24 hr. cure as opposed to the faster cure.Phil |
| frwyflyer, Comment for image # 14786 | 09 Nov 09 13:39 |
| Hey Phil, How many parts can you get with the platinum product before needing to remake the molds? How do you keep the bubbles out? Are you de-aerateng the material before pouring? OR putting the molds under pressure while they cure? |
| pfinn, Comment for image # 14786 | 09 Nov 09 01:41 |
| Thanks all! Scigs30, I use the BJB TC 5050 Platinum based clear silicon. This has a shore A hardness of 50 and can take temps of up to 850 deg. F (454 C). Fairly hard. It suits these types of parts well. If you have at least 1/2 " of material surrounding your part, you can get away without a rigid outer mold shell when casting parts(although I still use an 1/8" acrylic or polycarbonate plates just smaller for support on a couple of these, trial and error I guess). I get mine at
http://www.burmanfoam.com/
because I can drive there and pick up a quart or gal. and other stuff (you're looking at about 1.5 to 2 quarts of silicon in these eight molds).
And this is BJB http://www.bjbenterprises.com/ were you can order direct.
I like the 5050 because of the 24hr cure as opposed to the 5060 with an 8 hr. cure.
Hope this helps. You can contact me if you have more questions. I tend to run on...obviously.;o). |
| jgood, Comment for image # 14786 | 08 Nov 09 19:17 |
| Amazing. |
| scigs30, Comment for image # 14786 | 08 Nov 09 17:49 |
| What do you use for the clear molds? Do you have a link? I need to make some molds for OOP Guillows kits. Thanks |
| poppy, Comment for image # 14786 | 08 Nov 09 17:24 |
| Craftsmanship at its best. |
| David Duckett, Comment for image # 14786 | 07 Nov 09 18:41 |
| As the proud owner of the first set of wheels and nose gear assembly, I can absolutely guarantee that having these in your hands will cause the condition known as "wet". Beautiful, beautiful work!! |
| stirling, Comment for image # 14786 | 07 Nov 09 18:32 |
| Very humbling!! Quite simply amazing. |
| JohnG., Comment for image # 14786 | 07 Nov 09 18:12 |
| Thank you Phil. These are so far out I am almost giddy with pleasure..."You Da Man". All "Youse Guys" who would like work done...be sure to get in touch with Phil...you won't be sorry. |
| Roring40, Comment for image # 14786 | 07 Nov 09 18:09 |
| Absolutely stunning ! |
| pfinn, Image # 14786 | 07 Nov 09 18:05 |
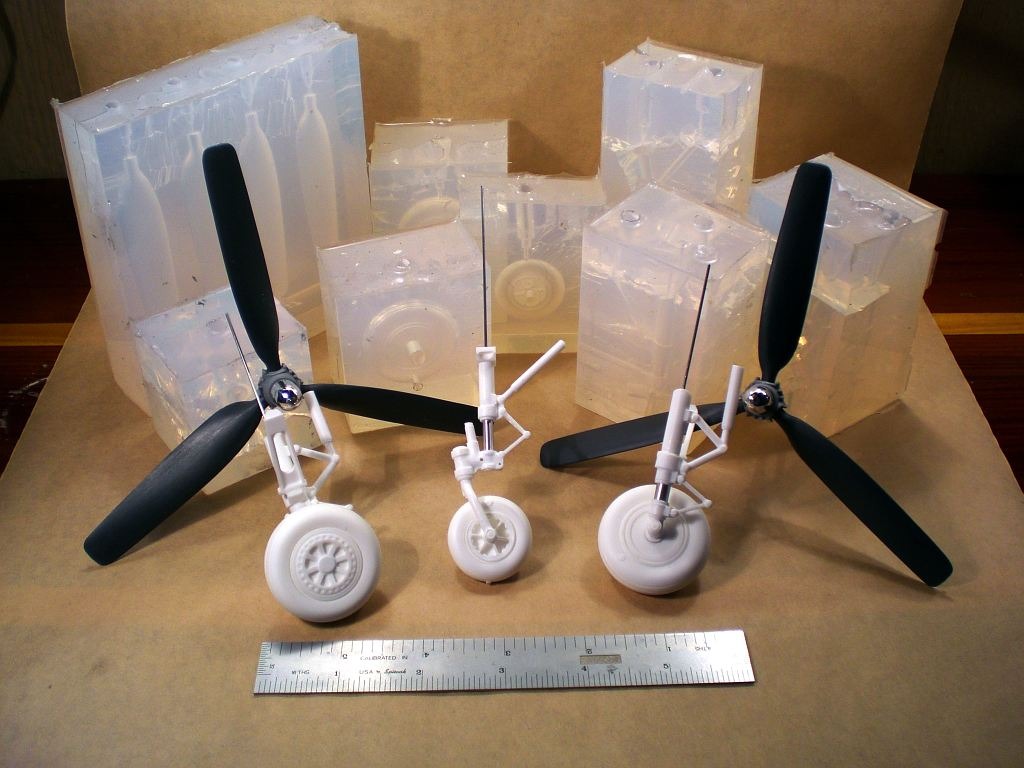
Well, JohnG, beat you to it! These are in the hands of JohnG. Eight molds for this particular set plus the turned aluminum spinner parts. Took a little while with three hours here and there and a couple of good work days, but they're finished. The .045 dia. wire and aluminum shafts are inmolded as well as the wheel bearings that slip/press into the wheels. I used some pigment in the prop blades and hubs but as the resin cures white, the blades are not quite black, but are a good base for a black paintjob. |
| Build Thread, Page :
1 2 3 4 [ 5 ] 6 7 8 9 10 11 (223 posts, 20 posts per page, 12 pages in total)
|
[ < Prev ] [ Next > ] |
