| Build Thread, Page :
<< 2 3 4 5 6 [ 7 ] 8 9 10 11 (200 posts, 20 posts per page, 11 pages in total)
|
[ < Prev ] [ Next > ] |
| Creosotewind, Image # 9048 | 08 Aug 08 10:24 |
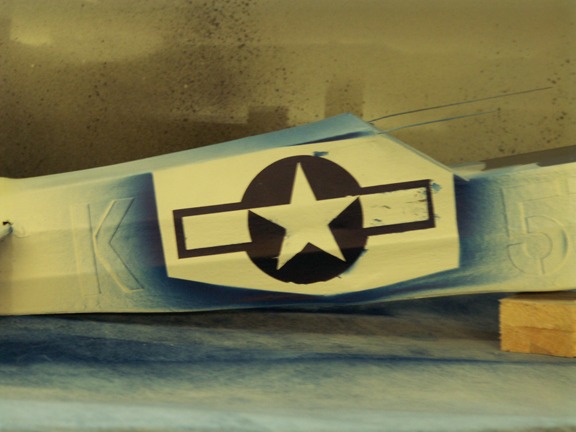
Painting the markings. |
| Creosotewind, Image # 9047 | 08 Aug 08 10:23 |
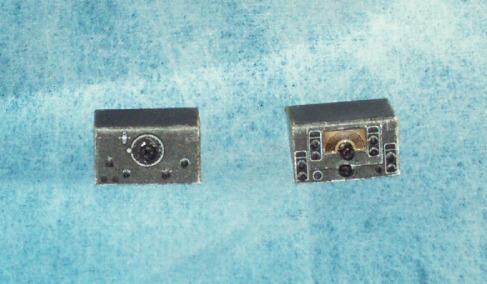
Not radio controlled, but it does have radios. |
| Creosotewind, Image # 9046 | 08 Aug 08 10:22 |
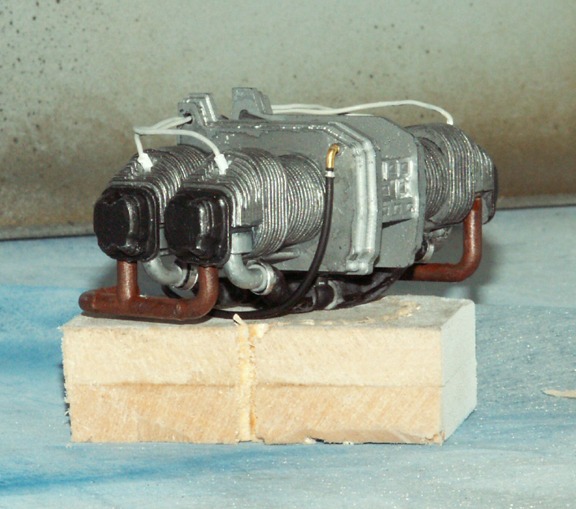
Other Side, wiring and tubes added. |
| Creosotewind, Image # 9045 | 08 Aug 08 10:21 |
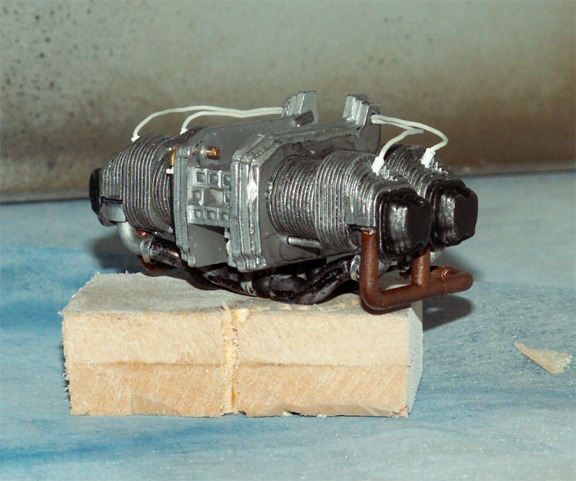
Piper motor Painted |
| Jedi, Comment for image # 8959 | 22 Jul 08 18:34 |
| Very nice detail!!! |
| RodN, Comment for image # 8959 | 22 Jul 08 17:49 |
| This is a beauty, I cannot believe the detail you have gone to here, a real pleasure to look at. |
| Creosotewind, Comment for image # 8950 | 22 Jul 08 09:56 |
| Moostang, thanks. That is my plan for painting, round 2. |
| poppy, Comment for image # 8959 | 22 Jul 08 05:34 |
| Looks like the real McCoy! |
| moostang51, Comment for image # 8959 | 21 Jul 08 17:55 |
| WOW!!! |
| moostang51, Comment for image # 8956 | 21 Jul 08 17:52 |
| My son is only nine so anytime I raided his stash it would cost me another lego design kit. Of course, I would pick it out so that a future Guillow build would benefit. |
| moostang51, Comment for image # 8950 | 21 Jul 08 17:49 |
| Try airbrushing the same olive drab first inside the masked off areas. This will be the color that bleeds and actually will seal the edges. Then go to white. I usually had great results doing this. |
| John M Oshust, Comment for image # 8956 | 21 Jul 08 17:27 |
| I steal my son's Lego parts all the time ...good thinking! |
| John M Oshust, Comment for image # 8959 | 21 Jul 08 17:24 |
| Bravo...nice job! |
| wingspanner, Comment for image # 8959 | 21 Jul 08 17:07 |
| Looks superb, theres a lot of thought gone into this and it shows. Well Done |
| SteveM, Comment for image # 8959 | 21 Jul 08 15:07 |
| I've never seen an engine built like that before! You just took it to a whole new level for me. I look forward to your next set of photos. |
| David Duckett, Comment for image # 8959 | 21 Jul 08 15:02 |
| Damn! |
| Creosotewind, Comment for image # 8957 | 21 Jul 08 14:50 |
| When I assembled the exhaust system, I deliberately let each piece melt into the next with the liquid cement. This left a reasonable facsimile of weld seams, just like a full size Continental engine. |
| Creosotewind, Comment for image # 8959 | 21 Jul 08 14:47 |
| I still need to add color and some wiring, but I'm quite pleased with the look so far. |
| Creosotewind, Comment for image # 8958 | 21 Jul 08 14:46 |
| Plane was stripped, patched, primed and now prepped for new graphics. I will lay down the image colors and then add the stencil. Olive drab will then be the last coat. A trick I didn't use previously, but will do this time is, once the stencil is set in place, spray that color over the stencil. It helps to seal the edges and prevents underspray. Then spray with the top coat, in this case olive drab. Stay tuned. |
| Creosotewind, Comment for image # 8957 | 21 Jul 08 14:43 |
| You can compare the kit, wood cylinder with the new engine. Like I wrote, most of the engine block will be hidden so I concentrated on the cylinders and manifolds. There should be two rocker arms, but I didn't have enough room so I just used one under each cylinder. It is enough to add complexity to the overall look. |
| Build Thread, Page :
<< 2 3 4 5 6 [ 7 ] 8 9 10 11 (200 posts, 20 posts per page, 11 pages in total)
|
[ < Prev ] [ Next > ] |
