| Build Thread, Page :
<< 17 18 19 20 21 [ 22 ] 23 24 25 26 27 >> (851 posts, 20 posts per page, 43 pages in total)
|
[ < Prev ] [ Next > ] |
| John M Oshust, Comment for image # 35979 | 01 May 16 20:37 |
| I am liking the texture on the solartex. I am not seeing the stitching, but then again my eyes are bad! |
| Skyediamonds1985, Image # 35980 | 01 May 16 20:36 |

Thought you might find this interesting about nothing the surface tapes, as well as their width. Ciao for now. |
| Skyediamonds1985, Image # 35979 | 01 May 16 20:33 |
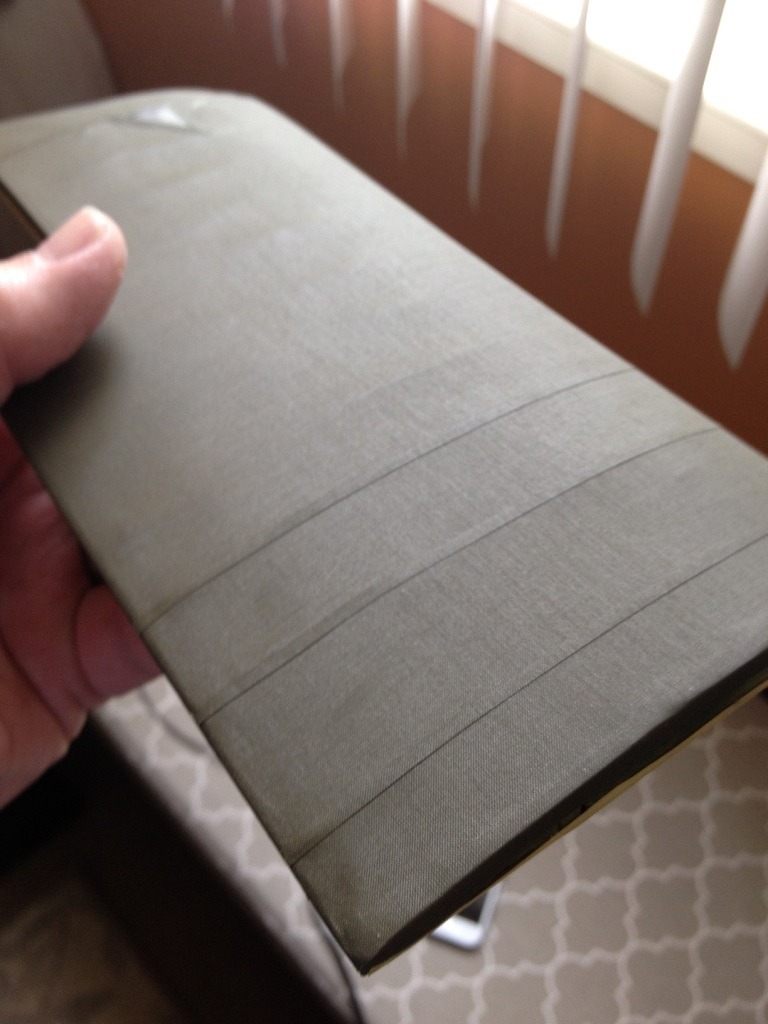
Wing covered with heat-shrink Solartex. I also added surface tape. As mentioned in my previous posting, at 1,248 stitches and each one 1/16" across,, decided to keep my sanity at this point. At the wingtip, is the inspection window. Will post a close up later. |
| Skyediamonds1985, Image # 35978 | 01 May 16 20:29 |
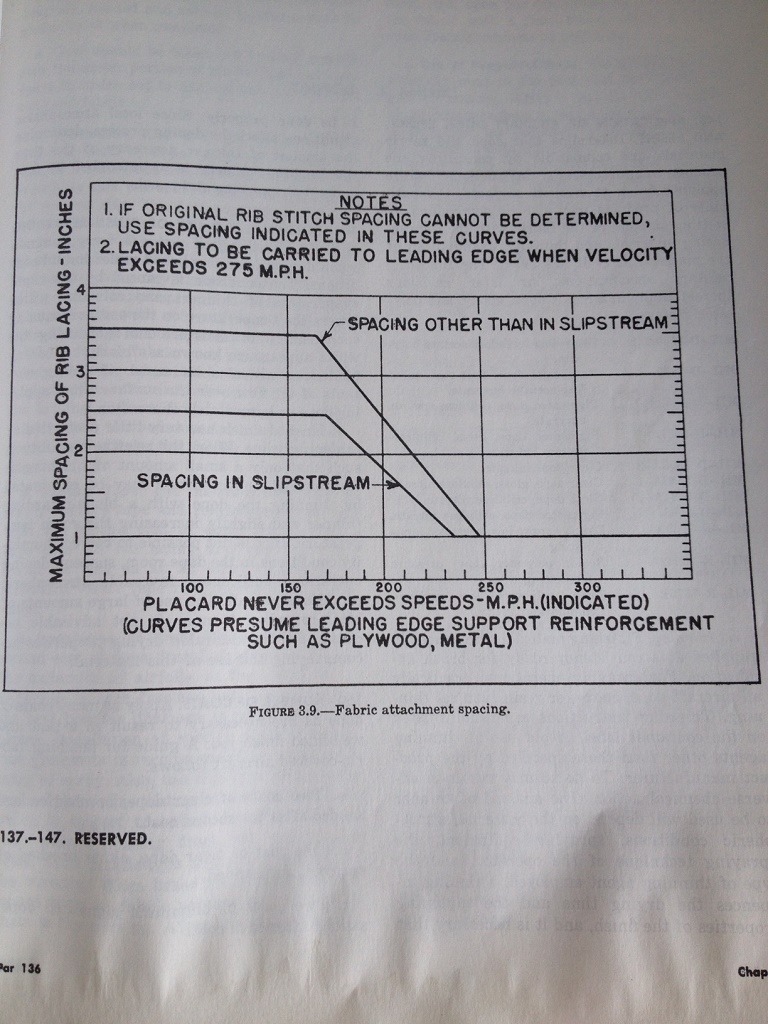
The speed of the aircraft determines the distance between stitches. On the S.E. 5 for example, this works out to 2.5 inches apart. With 52 ribs for both top and bottom wings (not including the false ribs along the leading edge) that works out to 1,248 stitches...... At this scale, each stitch works out to be 1/16" across. |
| Skyediamonds1985, Image # 35977 | 01 May 16 20:19 |
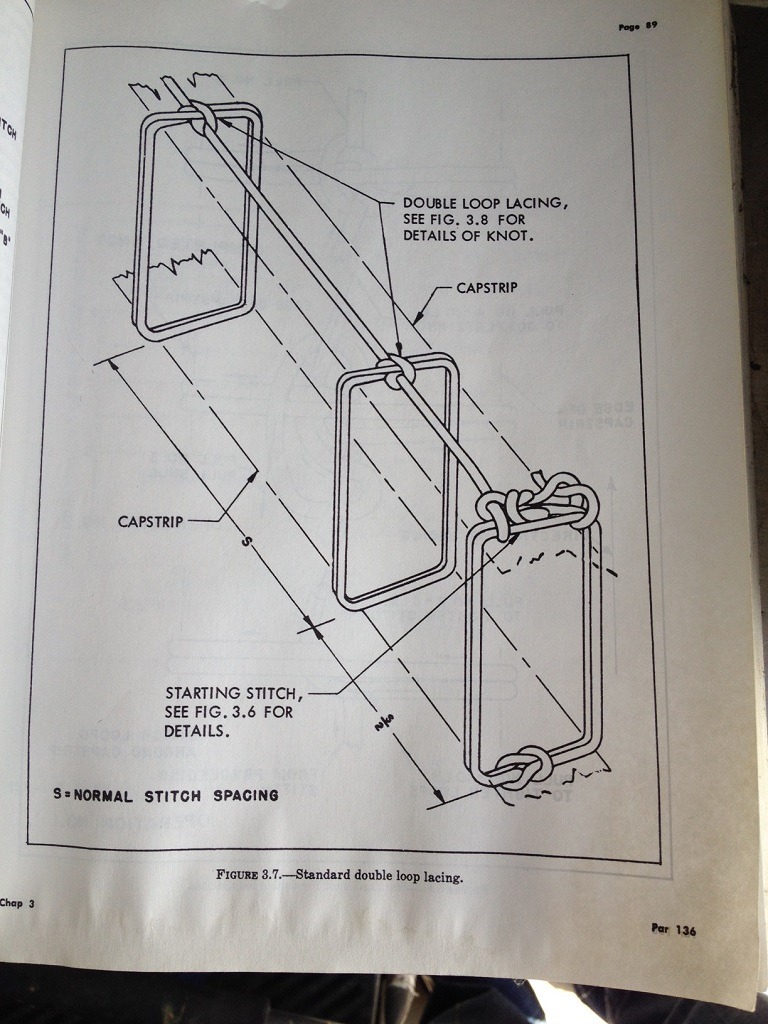
Rib stitching. |
| Skyediamonds1985, Image # 35976 | 01 May 16 20:19 |
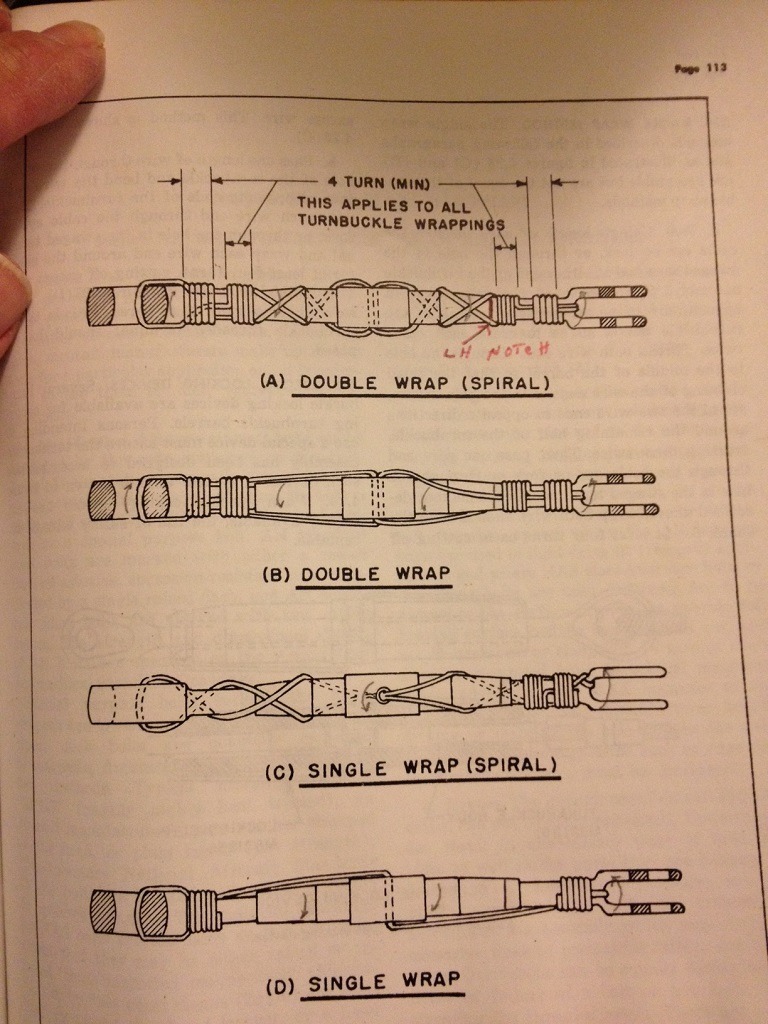
This is from the published FAA repair manual part 43.13 on turnbuckles. |
| Xanadu, Comment for image # 35936 | 27 Apr 16 06:31 |
| Lot of work for sure on those stiches. |
| BriandKilby, Comment for image # 35943 | 26 Apr 16 15:52 |
| ok, we'll do that! |
| Skyediamonds1985, Comment for image # 35943 | 26 Apr 16 14:58 |
| Creo, thank you. Haven't seen you in awhile. Good to know you're still around. Just fyi, finally finished what I can for the fuselage before proceeding to the wings. There are still a few details left to install (gun sights for example) but don't want to risk knocking 'em off during the rest of the build. |
| Skyediamonds1985, Comment for image # 35943 | 26 Apr 16 14:55 |
| Brian, your brother here? That is indeed, a small world. Should you come here for the air races or anything else, we'll have to get together and definitely share a few model stories. |
| Creosotewind, Comment for image # 35943 | 26 Apr 16 13:34 |
| Looking very nice. |
| BriandKilby, Comment for image # 35943 | 26 Apr 16 06:46 |
| sky, you live in reno? my brother lives in reno. small world! |
| Skyediamonds1985, Image # 35943 | 25 Apr 16 21:32 |
However, with the two strips acting as safety margins, I hand-painted the tubular strip of plastic glued in between. The results make for pretty convincing hinges. |
| Skyediamonds1985, Image # 35942 | 25 Apr 16 21:30 |
The glossy strips of paper with the rivet decals were painted first, before glued onto the model. This is to control exactly what I'd like on the finished results. I could take a chance and hand-paint the strips, but I didn't want to risk it. Especially at my age of retirement. |
| Skyediamonds1985, Image # 35941 | 25 Apr 16 21:26 |

Then I cut lengths of full round plastic strips to match the length of the glossy paper strips. As you can see, Evergreen Plastics can make them very small and thin. They also do this with half-round strips too. Those will be used as rigging between the wings. |
| Skyediamonds1985, Image # 35940 | 25 Apr 16 21:24 |

To fabricate what appears to be hinges to hold the machine gun covers in place, I cut thin strips of glossy paper and used MicrtoMark's rivet decals. |
| Skyediamonds1985, Image # 35939 | 25 Apr 16 21:19 |
|
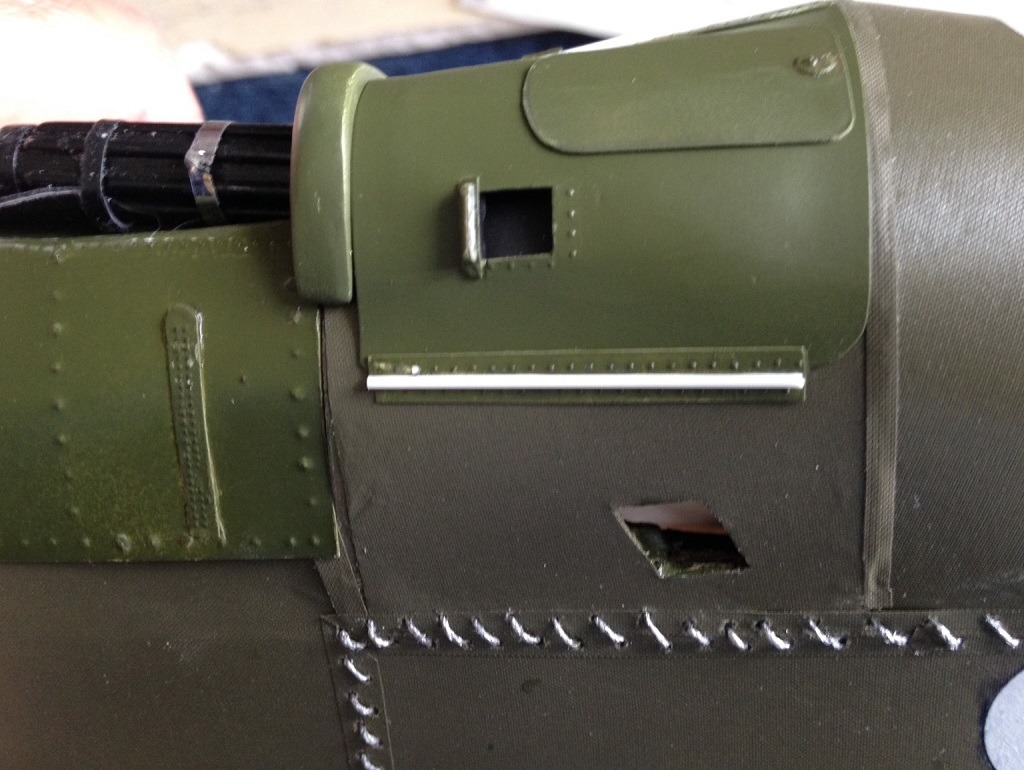
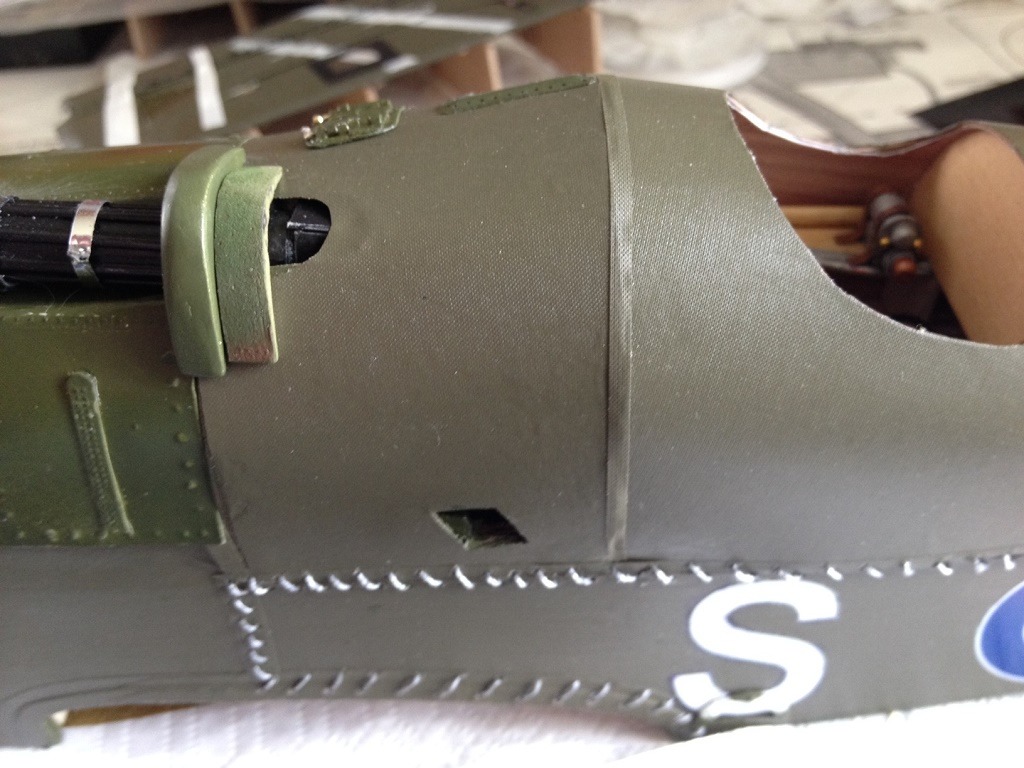
| Skyediamonds1985, Image # 35938 | 25 Apr 16 21:17 |
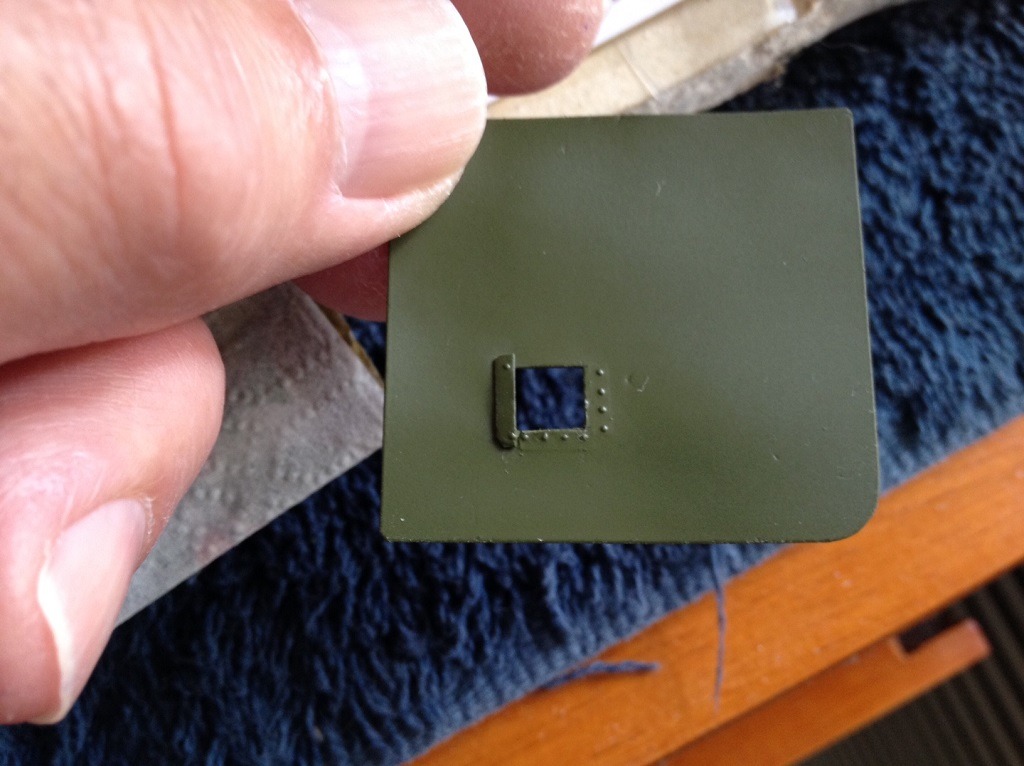
After careful cutting and trimming (and trimming), I cut out the hole and used MicroMark's rivet decals to simulate the opening for the ejected shells. Then painted glossy olive drab for that "factory fresh" look |
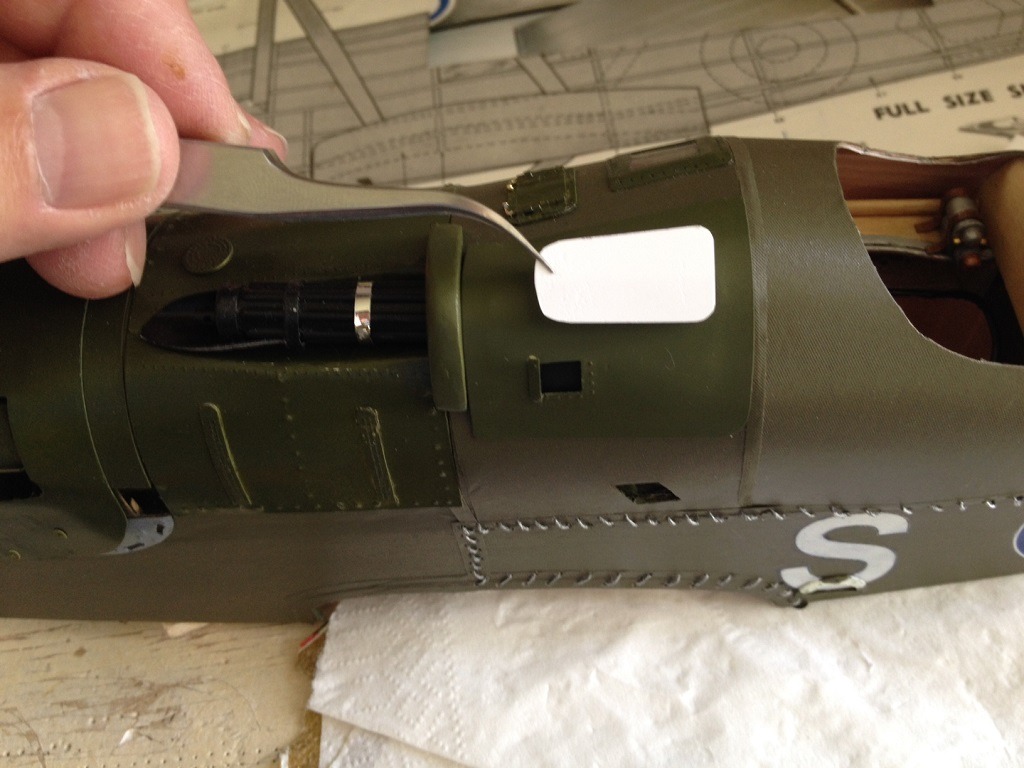
| Skyediamonds1985, Image # 35937 | 25 Apr 16 21:14 |

Like previous covers, I'm using medium thick glossy paper. The glossy surface is smooth and does not exhibit any signs of fibers normally seen on paper. I can use either glossy paint, or flat to suit my tastes. |
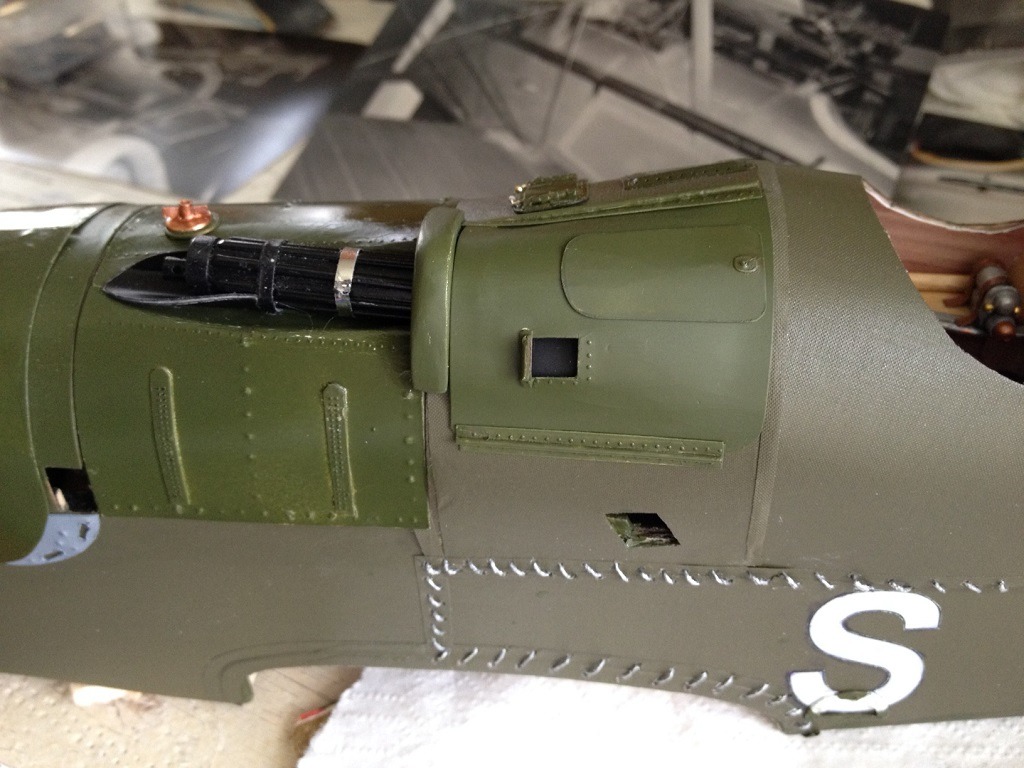
| Skyediamonds1985, Image # 35936 | 25 Apr 16 20:55 |
Added a second means of support for the cover. I decided to simply attach the rear portion of the covering directly to the fuselage at the joint. Just like the real aircraft. |
| Build Thread, Page :
<< 17 18 19 20 21 [ 22 ] 23 24 25 26 27 >> (851 posts, 20 posts per page, 43 pages in total)
|
[ < Prev ] [ Next > ] |
